HIGHLIGHTS:
SUN & MOON RIG
A lot of innovative work this month! I finished creating the astronomical part of the “Sky Rig” for the timelapse sequences in “Lunatics!” S1E01-SR-2. This is meant to be an impressive simulated timelapse effect shot of the Soyuz rocket being erected on the launchpad (actually two of them, with a real-time shot between and others around it).
This included not only a controller to position the Sun and Moon in the sky, but also atmospheric effects to simulate the reddening in the sunrise and sunset, and the movement of shadows during the day (tricky, because of some limitations of Blender Internal’s shadow-rendering).
The Moon is a bit of a cheat: after my attempt at creating a low-poly modeled Moon, which hit some kind of rendering bug problem (apparently because of the distances or angles involved — looks like some kind of rounding-error issue to me), I decided it wasn’t worth the trouble to animate the Moon phase, and just put in a billboard of the Moon at the right phase. Which is perfectly fine for my scene, it just makes it less universal. I also did not bother getting the Moon’s declination right, it just follows the equator (which is not even approximately correct — unlike most true moons, our Moon orbits in the Ecliptic, not around its primary’s equator).
But, it’s definitely close enough for what I needed in the show.
TOPICAL SUMMARY ON SUNLIGHT RIG
After completing that work, I cut together a “topical summary” from my worklogs, using all of the work on the Sunlight System / Sky Rig, from January to this month. I only included the actual authoring work (Blender, Inkscape, Gimp), skipping over the research and training I had to do to learn how to do it. I presented it at 60X, with intertitles and music. It’s not bad — I put it up as an exclusive “Premium” Patron video. I plan to eventually do a screencast tutorial on how to use the rig.
From this video, I estimate I spent 26-28 hours of actual production, which isn’t really that long. That should probably be seen as an estimate of what it would take to do a similar development project. On the other hand, it took over six months to complete the work, due to all the other things I was doing in that time, and the research and thought that went into it.
These estimates I can make based on this worklog edit are the real business value of making this “topical summary”, and I think this is a pretty good way to do it. I think I should make more of them, to address the different sorts of work I did over that time. The musical “speed modeling” video is really just a fun side benefit. I do kind of like it, though, although I don’t know how much it will mean to other people.
BILLBOARD EXTRAS COMPOSITING
I also solved a problem that was bugging me about how to composite “Billboard Extras” correctly, so that the Freestyle lines are rendered correctly. This requires rendering a layer with only the billboards, to generate correct billboard alpha data that can be mixed with a material key alpha to generate correct masks for the billboards. It won’t help with the Touring Baikonur sequence (unless I re-rendered them), but it will be a big help with the animated billboards in the Soyuz Rollout timelapse sequences.
PAD CREW EXTRAS
The PadCrew Extras file that Keneisha left me with was incomplete, and the characters weren’t rigged. So I had to do a lot of work on that file, which was hard, but also a great learning opportunity. I now know a lot more about Rigify rigs and skinning. I was pleasantly surprised to see that the automatic skinning did an entirely adequate job for these extras characters (I imagine principle characters need a lot tweaking in weight paint mode).
I did discover that I get much better results if I separate the clothing meshes into separate objects prior to skinning, and then rejoin them after. This eliminated the need to do any weight paint cleanup.
SCALING RIGIFY RIGS
Also, this month I learned about the very important issues around how to scale a Rigify rig and the animations associated with it. This is a really tedious and complicated problem, which will be critical to fixing the animation in the Train sequence (S1E01-TR) that I’ve been worried about for a long time, without having to redo the animation that Keneisha put into that scene (which was a LOT of work). That’s because the scene was constructed at the wrong scale as well as at a different scale than the characters. When the scales were corrected, the animation went all to hell (and then Keneisha corrected some of it, which may have left things in more of a mess, when I try to fix the animation scale later).
This is going to be a real problem to untangle, and I need to understand how it all works to fix it. So it was really good to have a simpler problem to learn on.
NLA EDITOR TRAINING
This also gave me a chance to learn more about NLA Editor, and the way it interacts with the Dope Sheet/Action Editor and the Graph Editor, which has always confused me. But I think I’m getting it now — and of course, this will be critical not only for the Train sequence, but also for fixing the Suiting Up sequence later. I finally feel like I’m getting a handle on how the animation works, which is something I had simply not embraced before.
BILLBOARD EXTRAS RENDERING
I also created scripts to render, rename, and group Billboard Extras poses into animation loops that will make animating the “timelapse effect” movements much easier — essentially just like regular object animation, since the loops will handle the textures, rather than me having to change them from frame to frame (which would have been really tedious).
STARTED CLOUD CONTROLLER
Ended the month by starting work on the Cloud Deck animation controller.
Of course, I’m very much aware of just how slow all this is going, even if I am making progress. It’s simply a lot of working, and the learning curve is still an issue.
Jul 5, 2020 at 4:00 PM
Getting Better – Sunrise
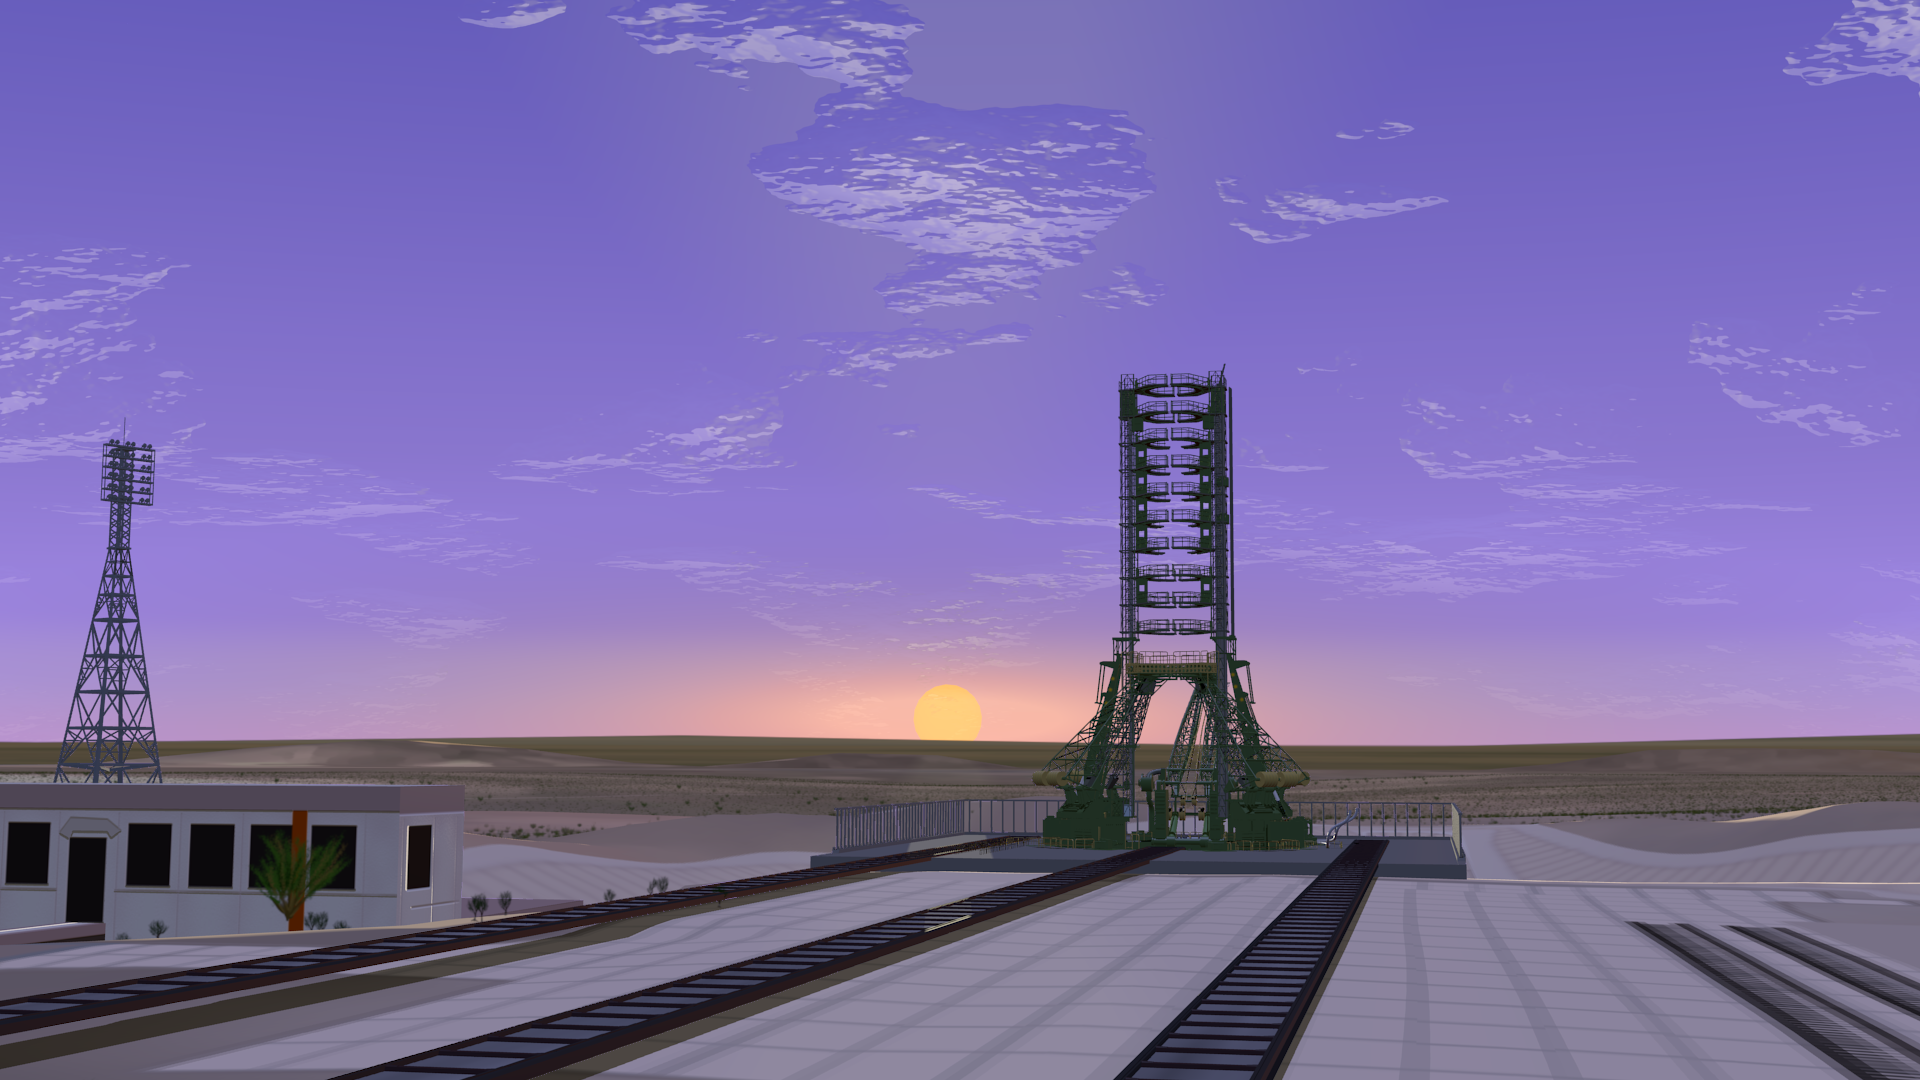
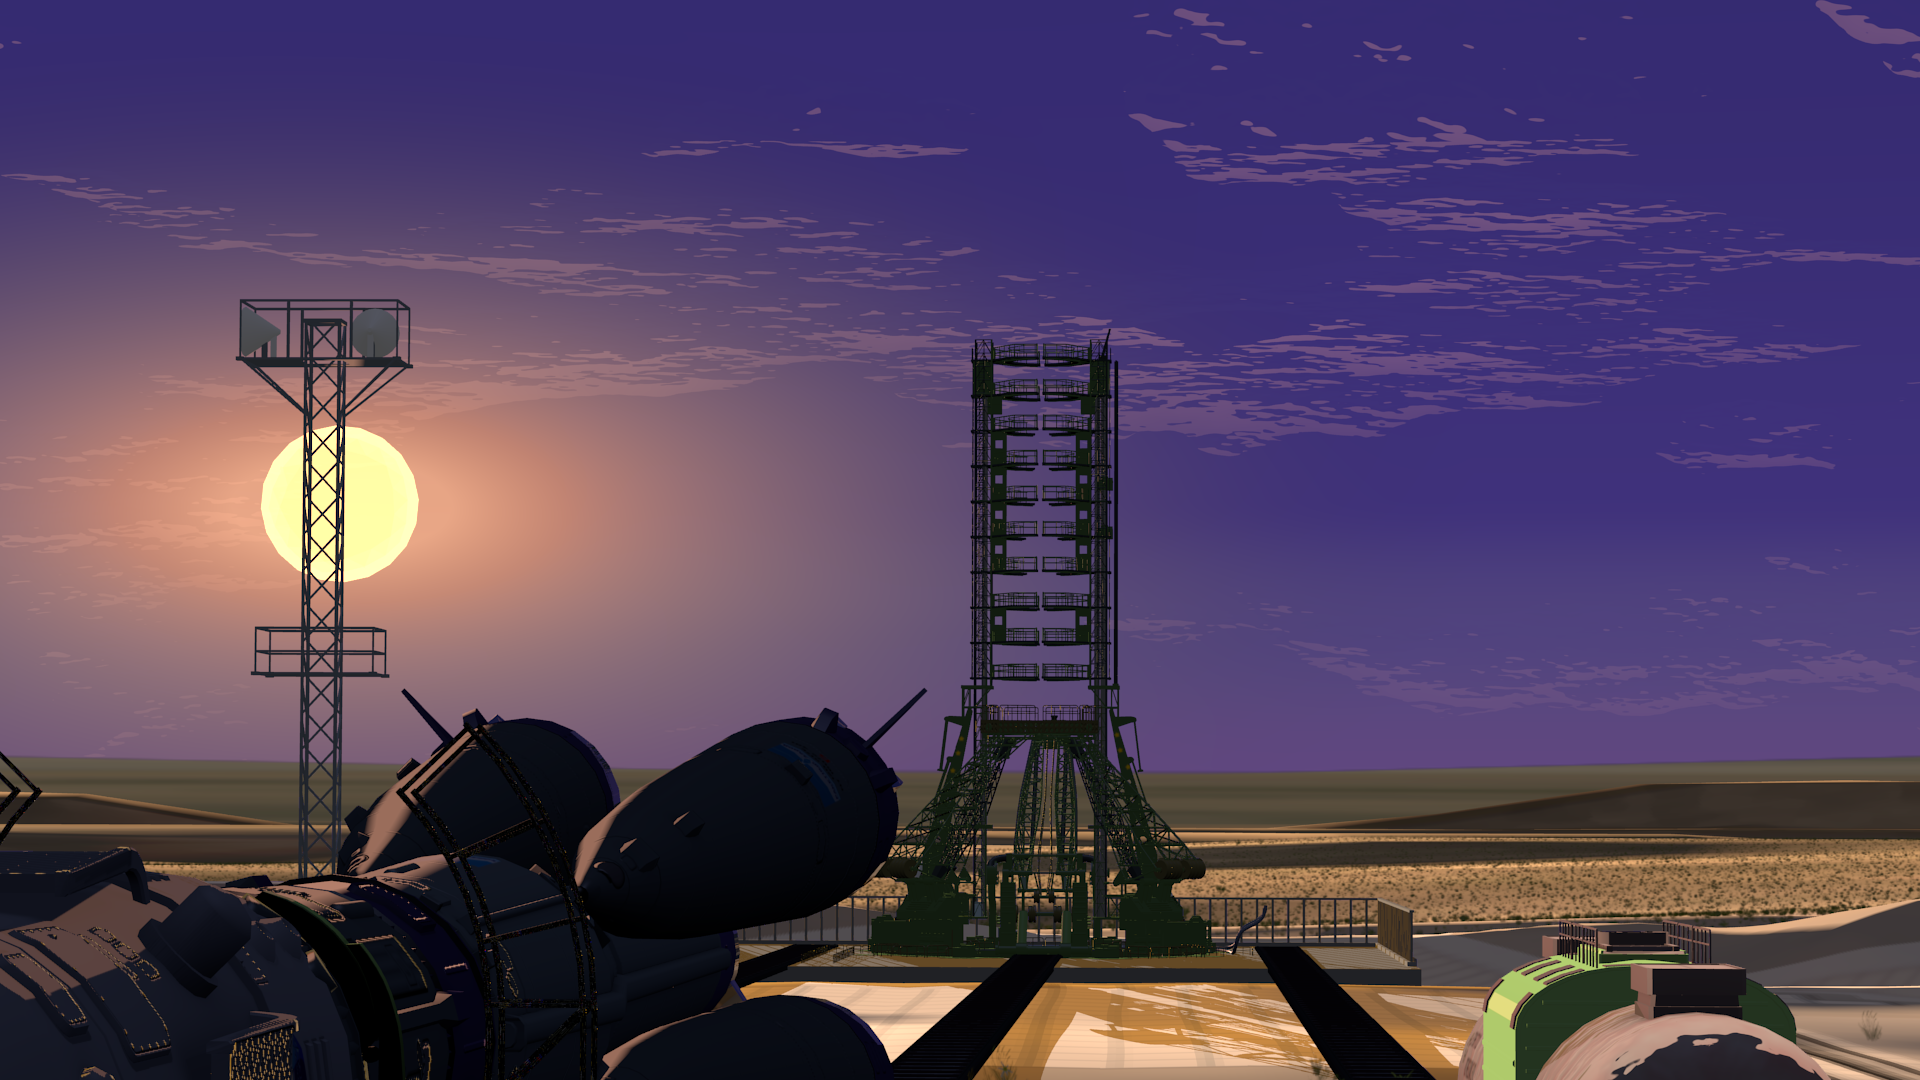
This is a really challenging problem in rigging, constraints, drivers, lighting, materials, and textures. I have spent quite awhile on this, but I’m getting there.
Most recent changes include adding the “Sunrise Glow” object around the Sun (that creates the wide glow effect on the horizon, which morphs into a halo around the Sun as it rises), and fixing the “Cloud Deck” layer, which will have an animated texture in the final shot (the clouds are a procedurally-generated texture, and will both shift and evolve as part of the “timelapse” effect).
The “Sunrise Glow” has to be rigged using constraints to get it to not only follow the Sun, but also remain aligned to the horizon as the Sun is animated. The angles are dependent on latitude, which is part of the sky lighting system rig.
I hope to create a nice sky rig to release on BlendSwap after I’m done with this — it seems like a good candidate for reuse and learning.
There are still things I’m not happy with. The Sun is a little dimmer than it should be, and the cloud color should really be pinkish, particularly on the side facing the Sun. Also, the structure should already be casting a shadow at this point, and it’s not there yet.
It turns out that Blender’s lamps don’t cast shadows at extremely low angles. So I probably will have to cheat the shadow to get the long shadows at sunrise.
I’ve gone through a lot of false-starts on this project, but I think I’m finally on the right track here.
Jul 8, 2020 at 4:00 PM
Sunrise – Sunset, Moonrise – Moonset
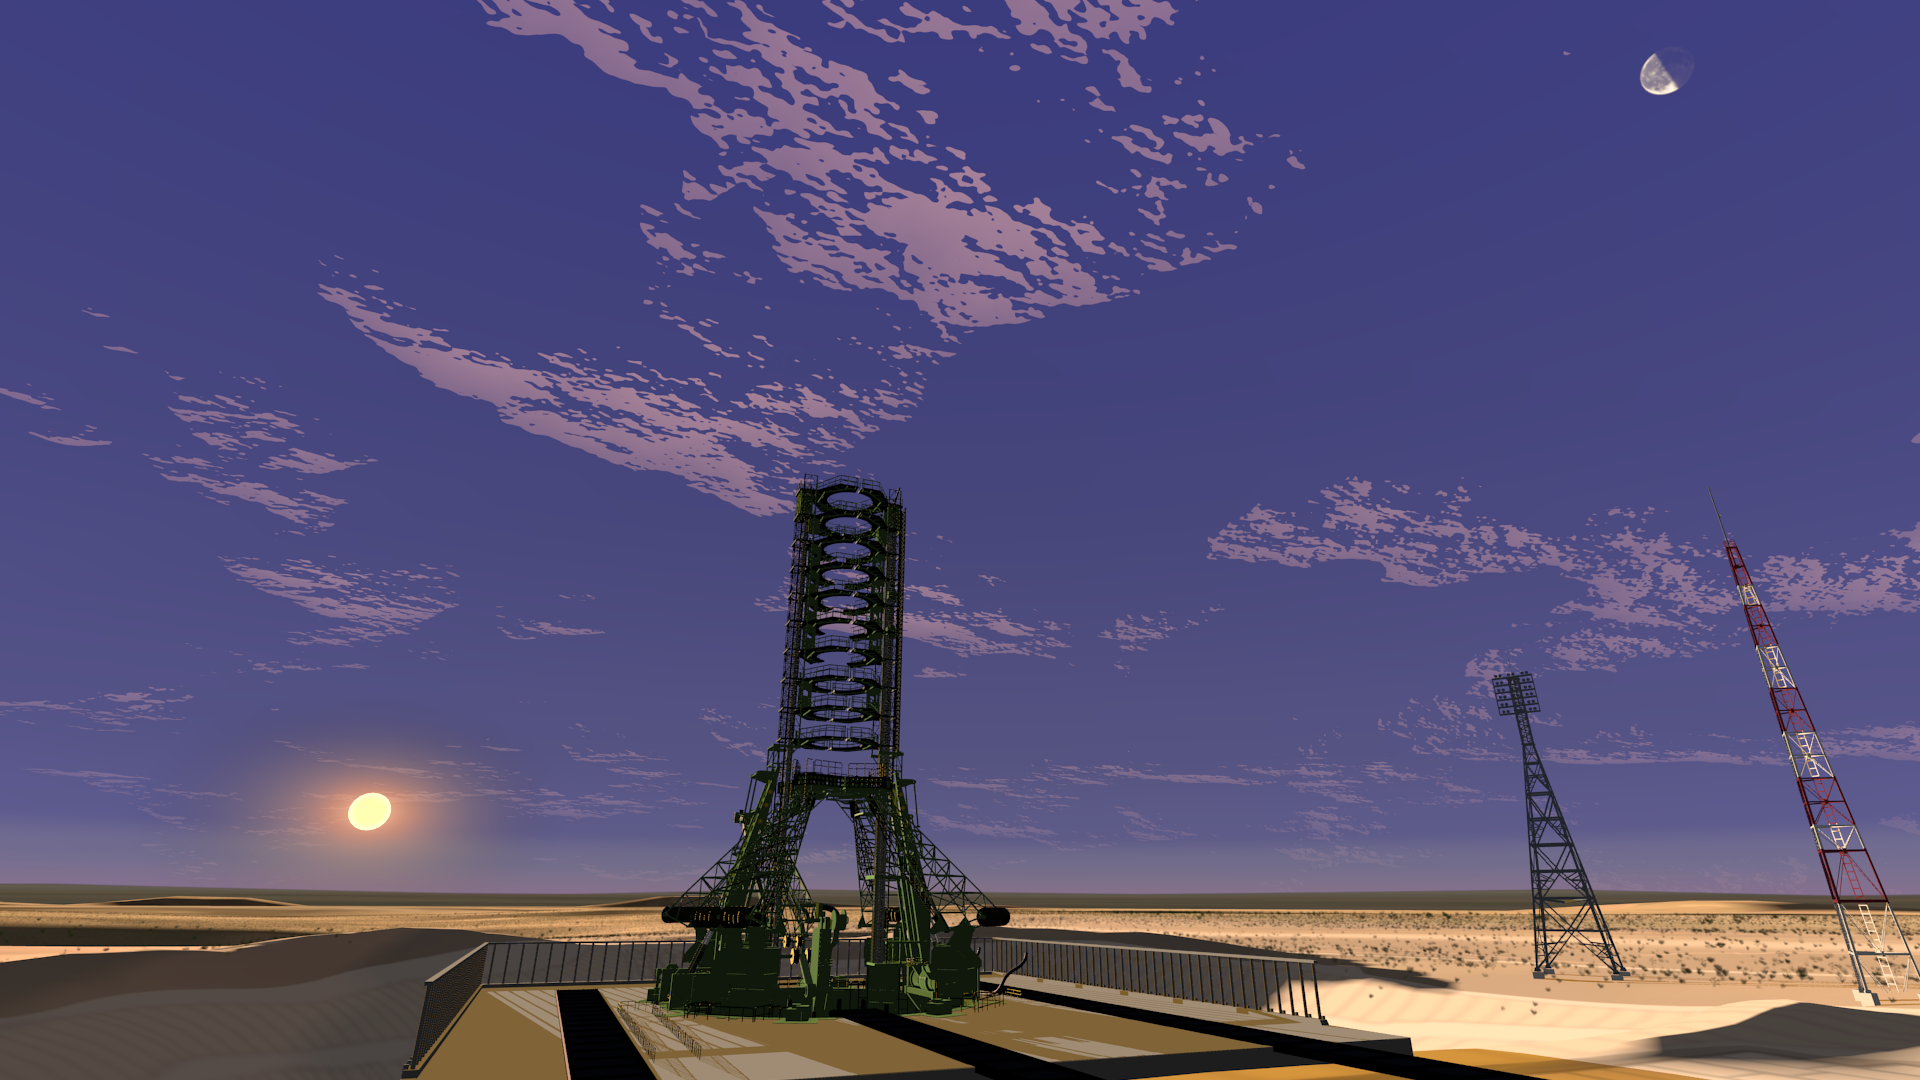
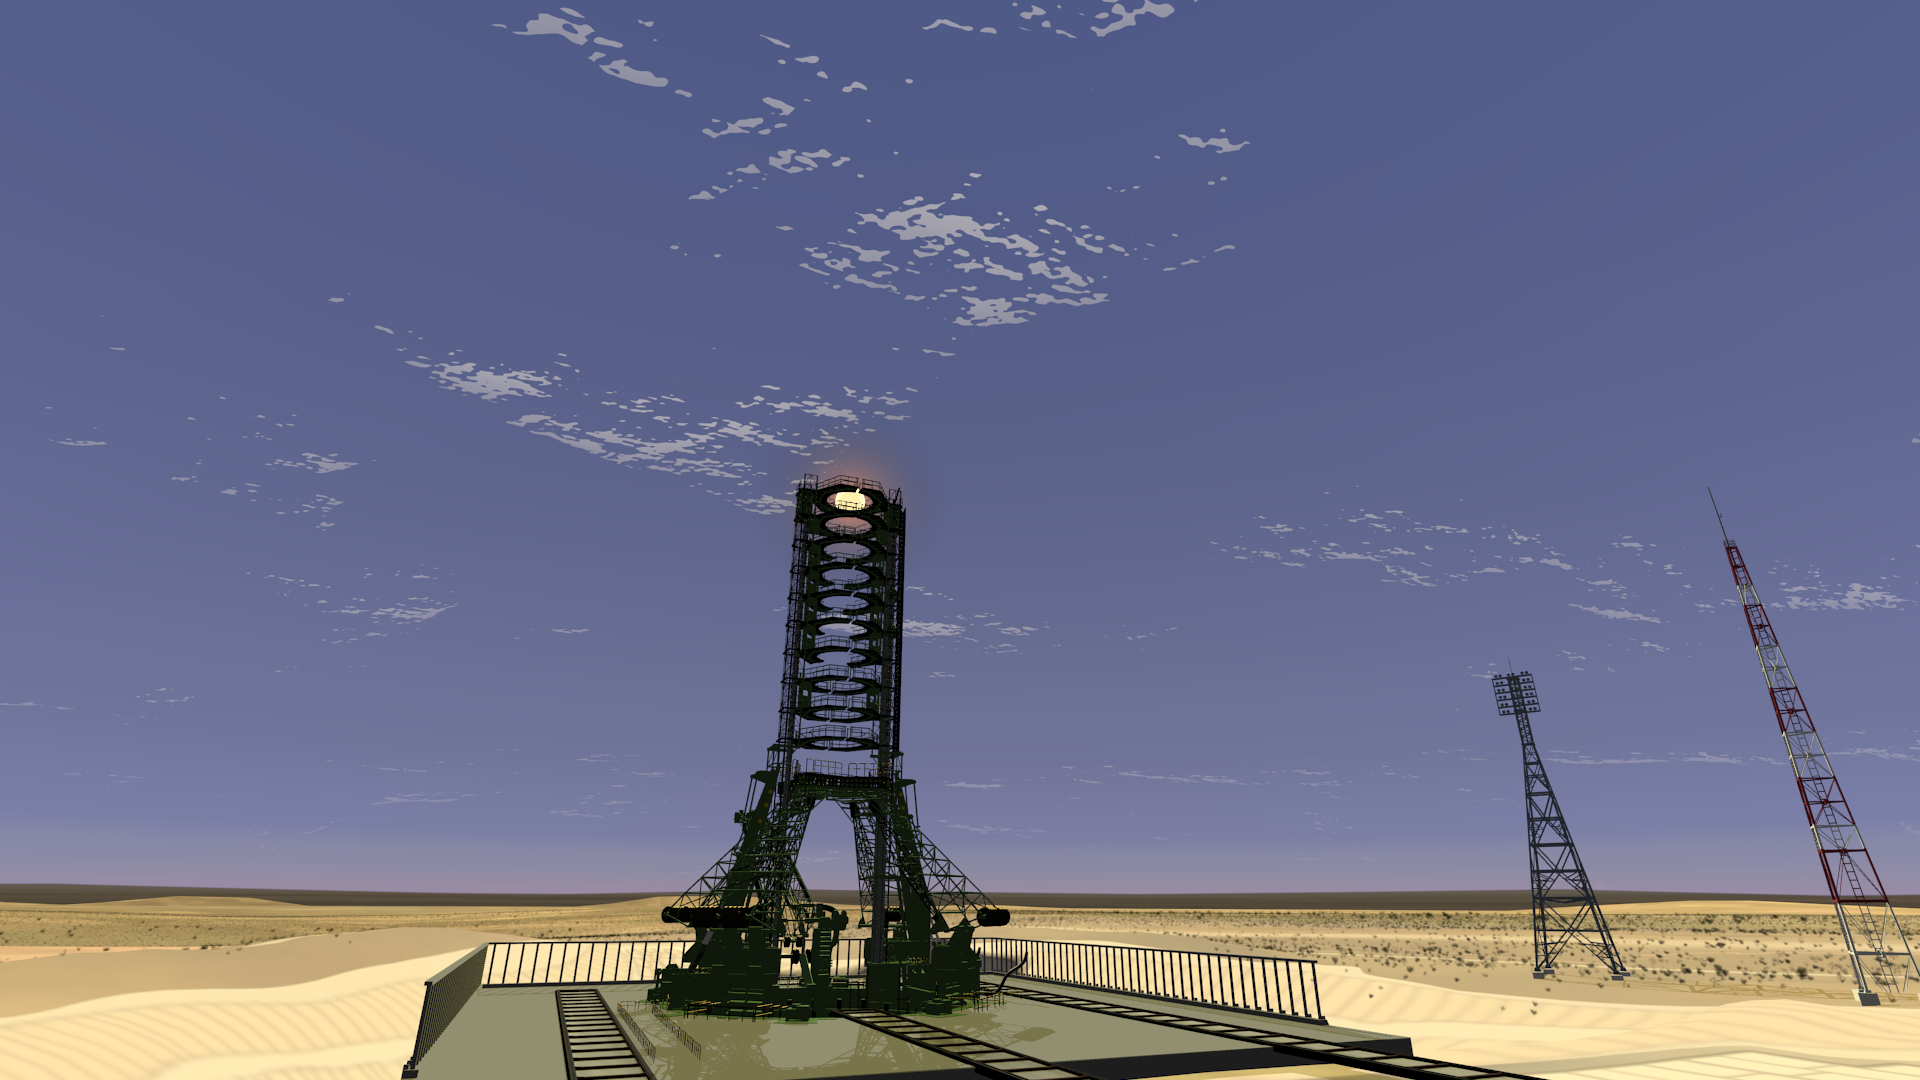

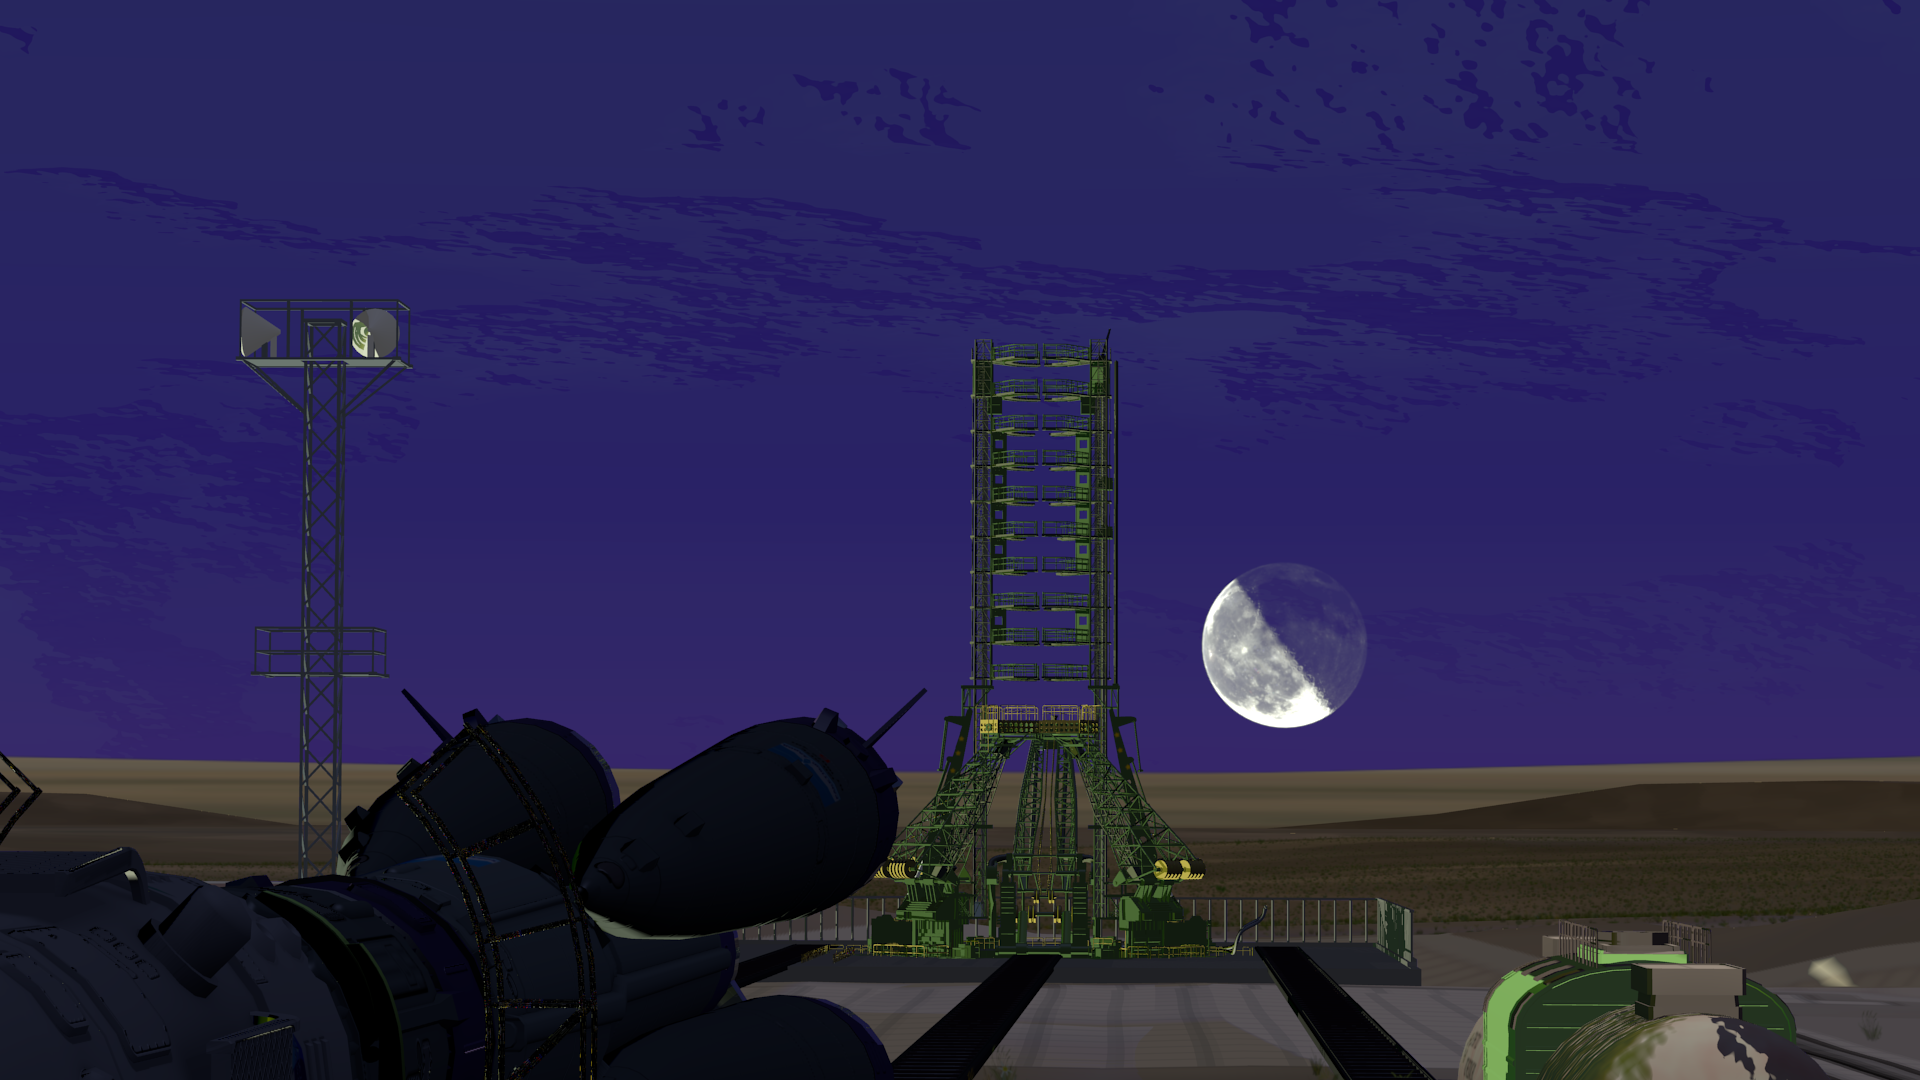
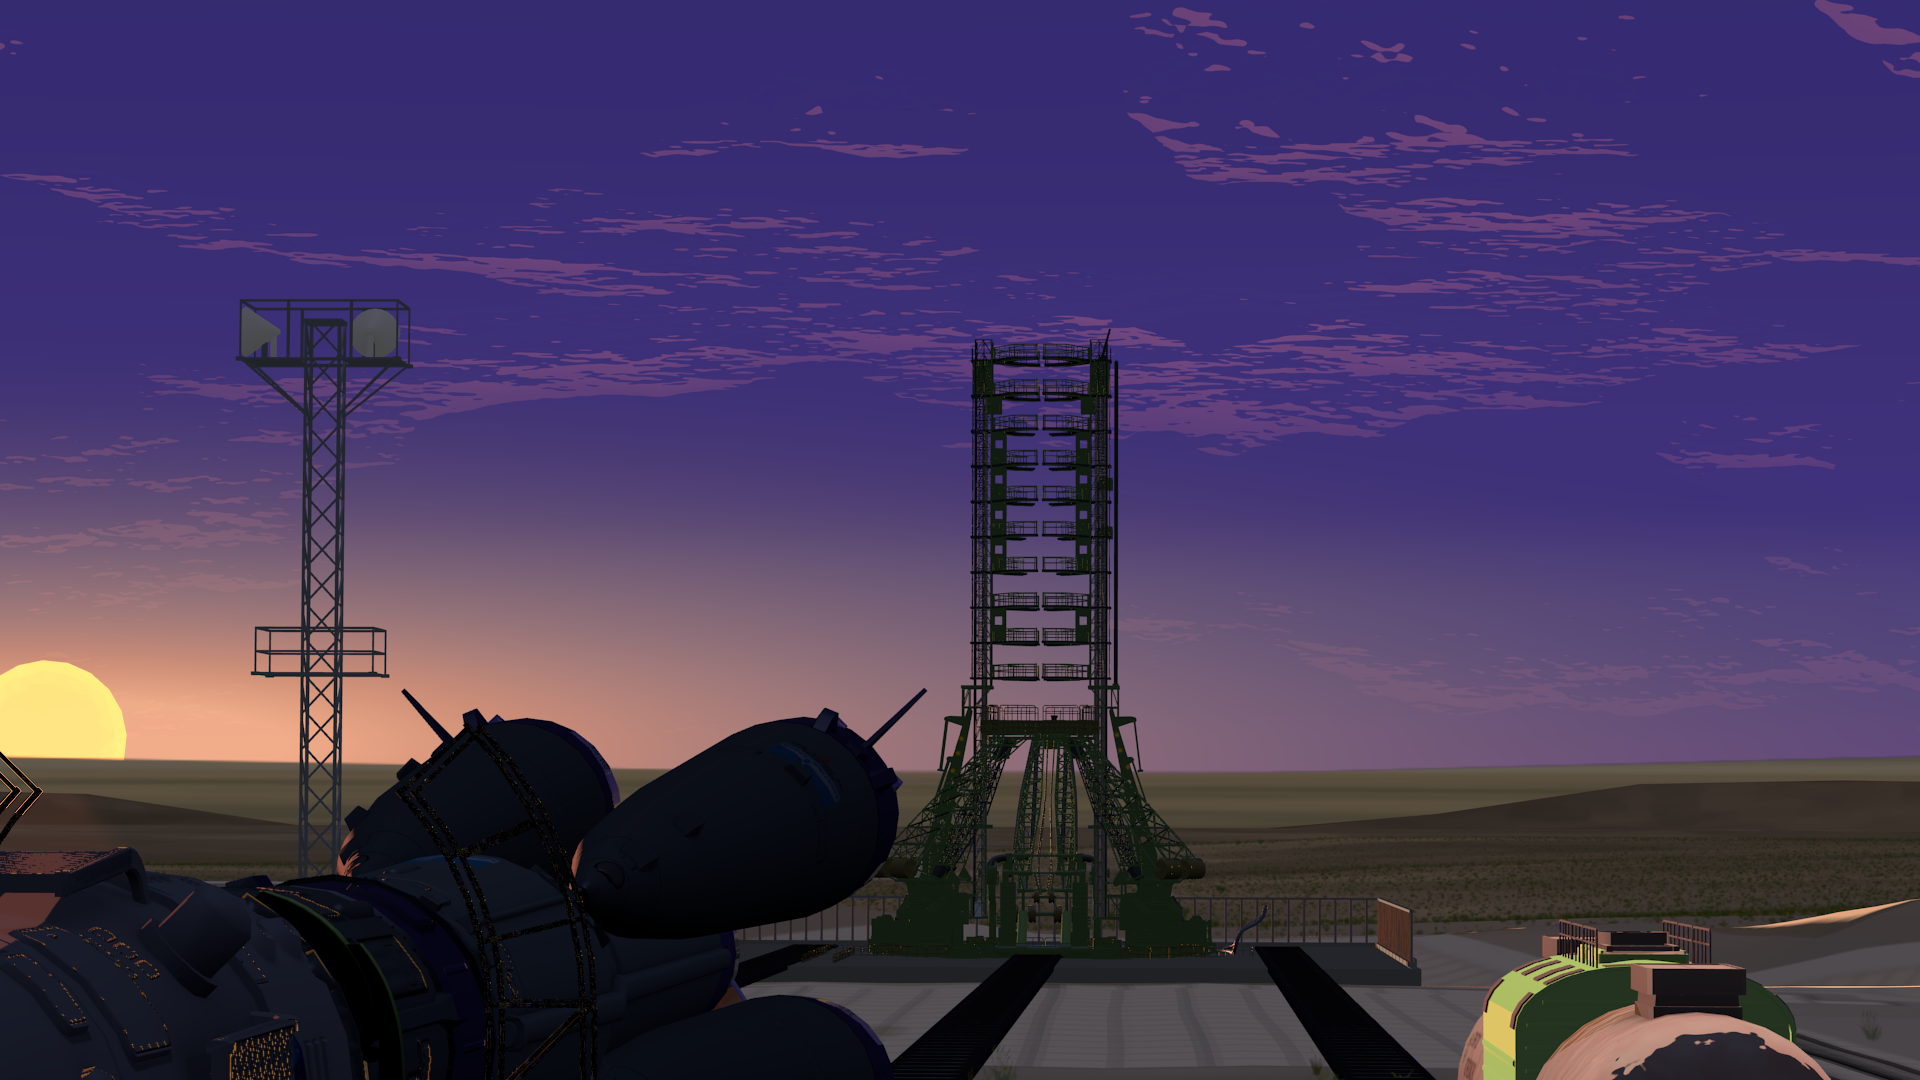

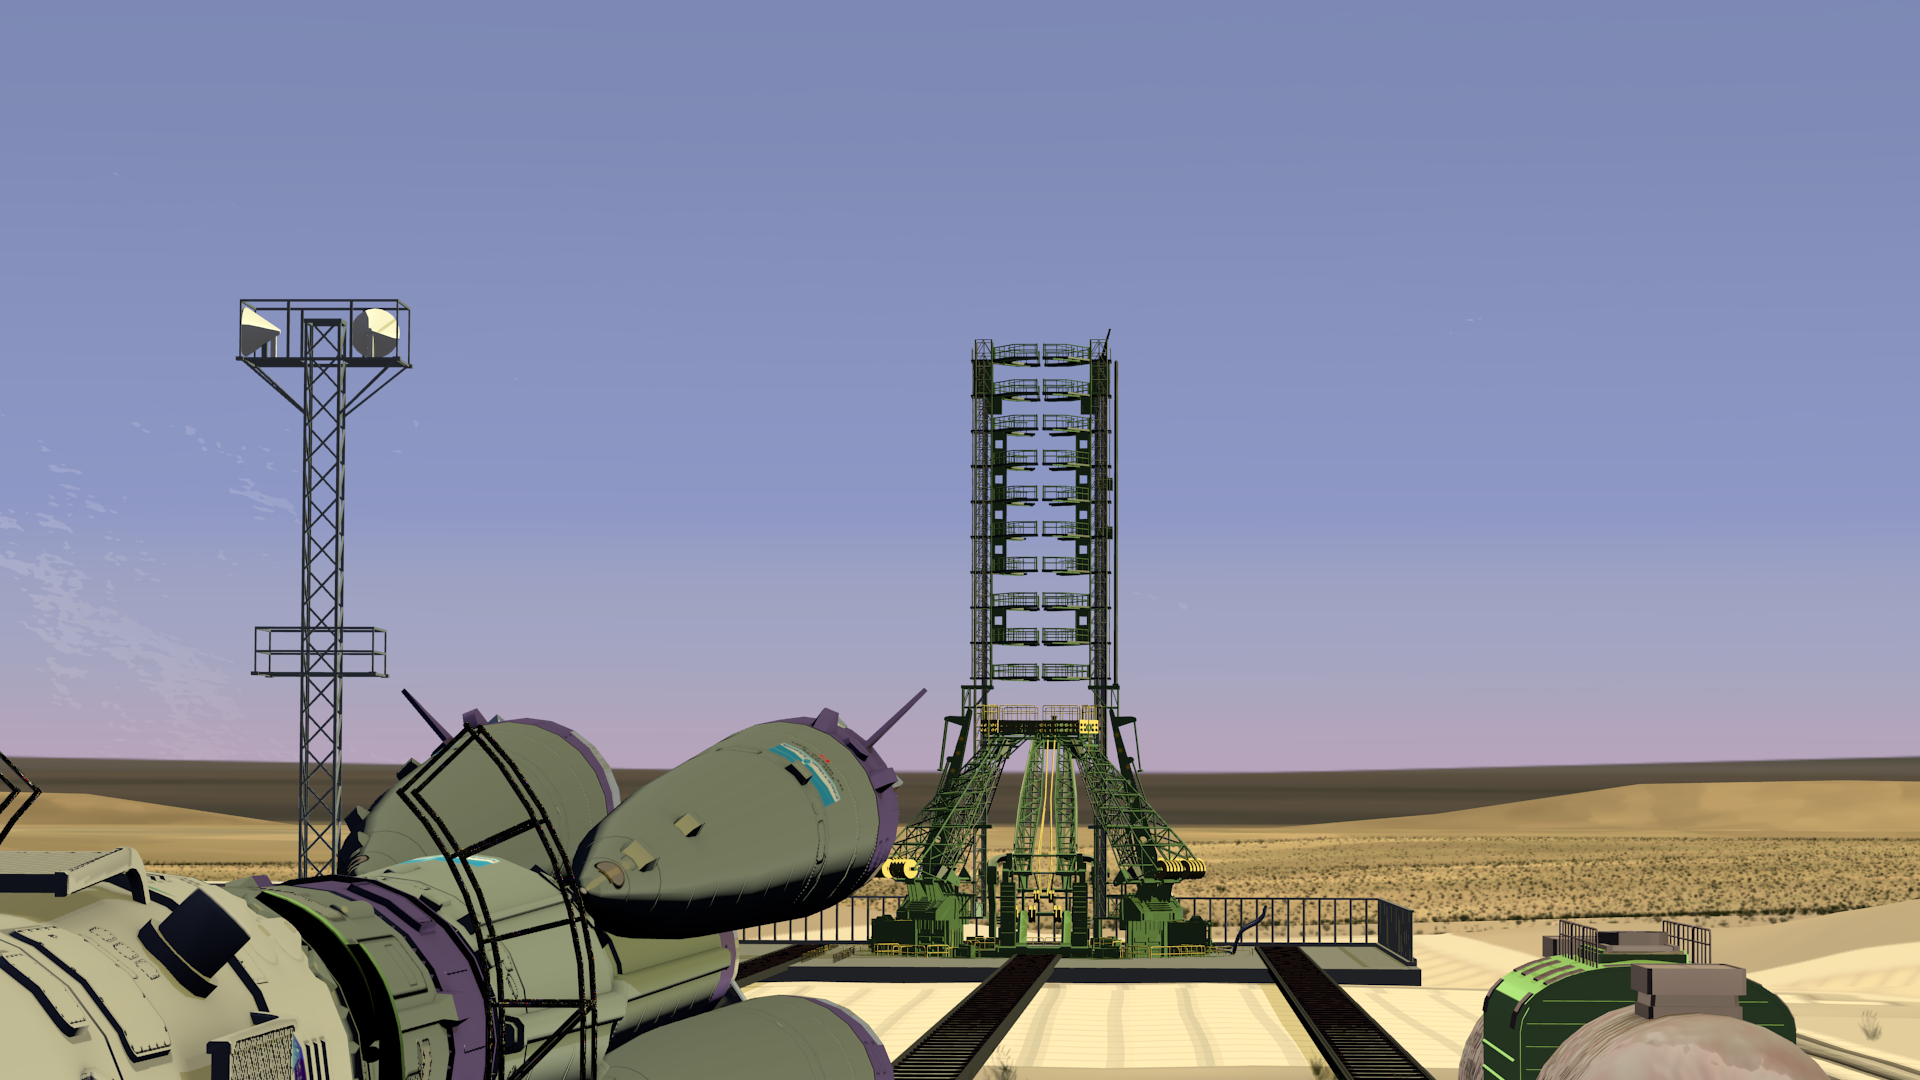
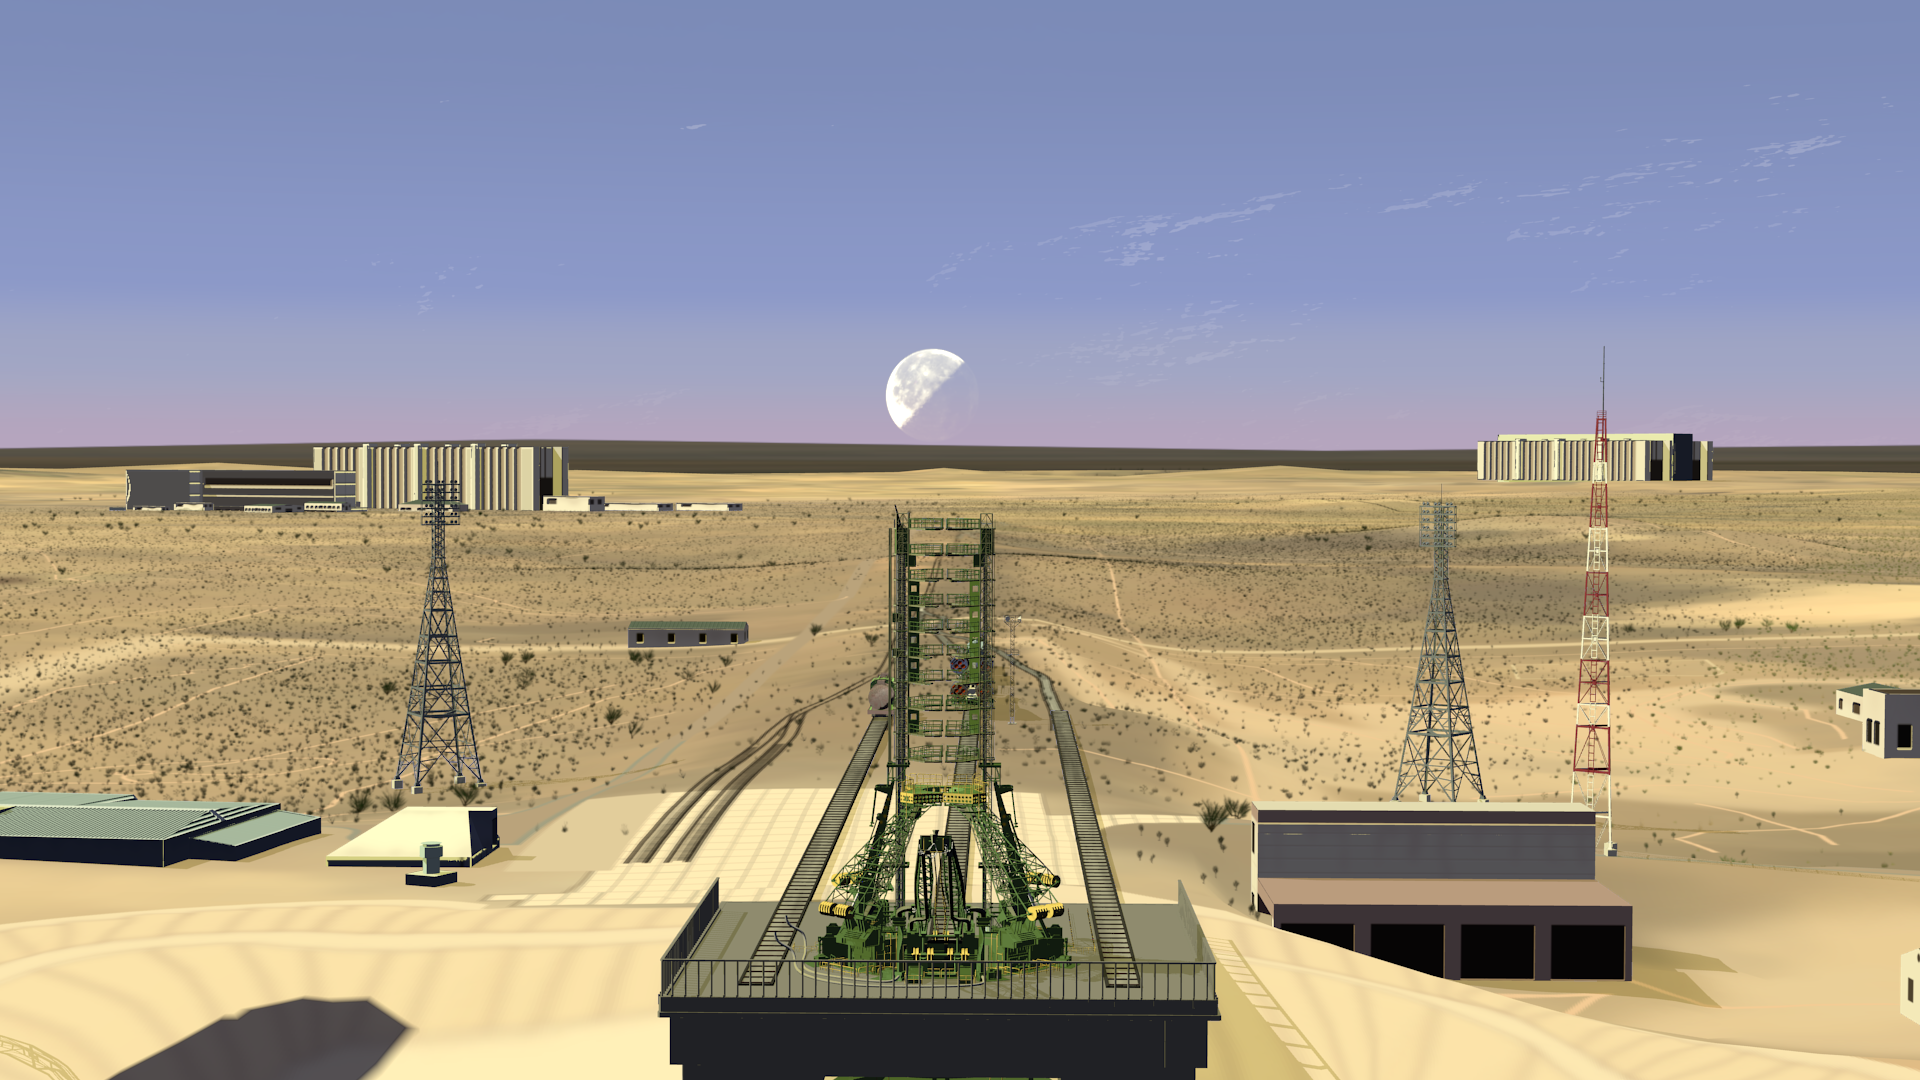
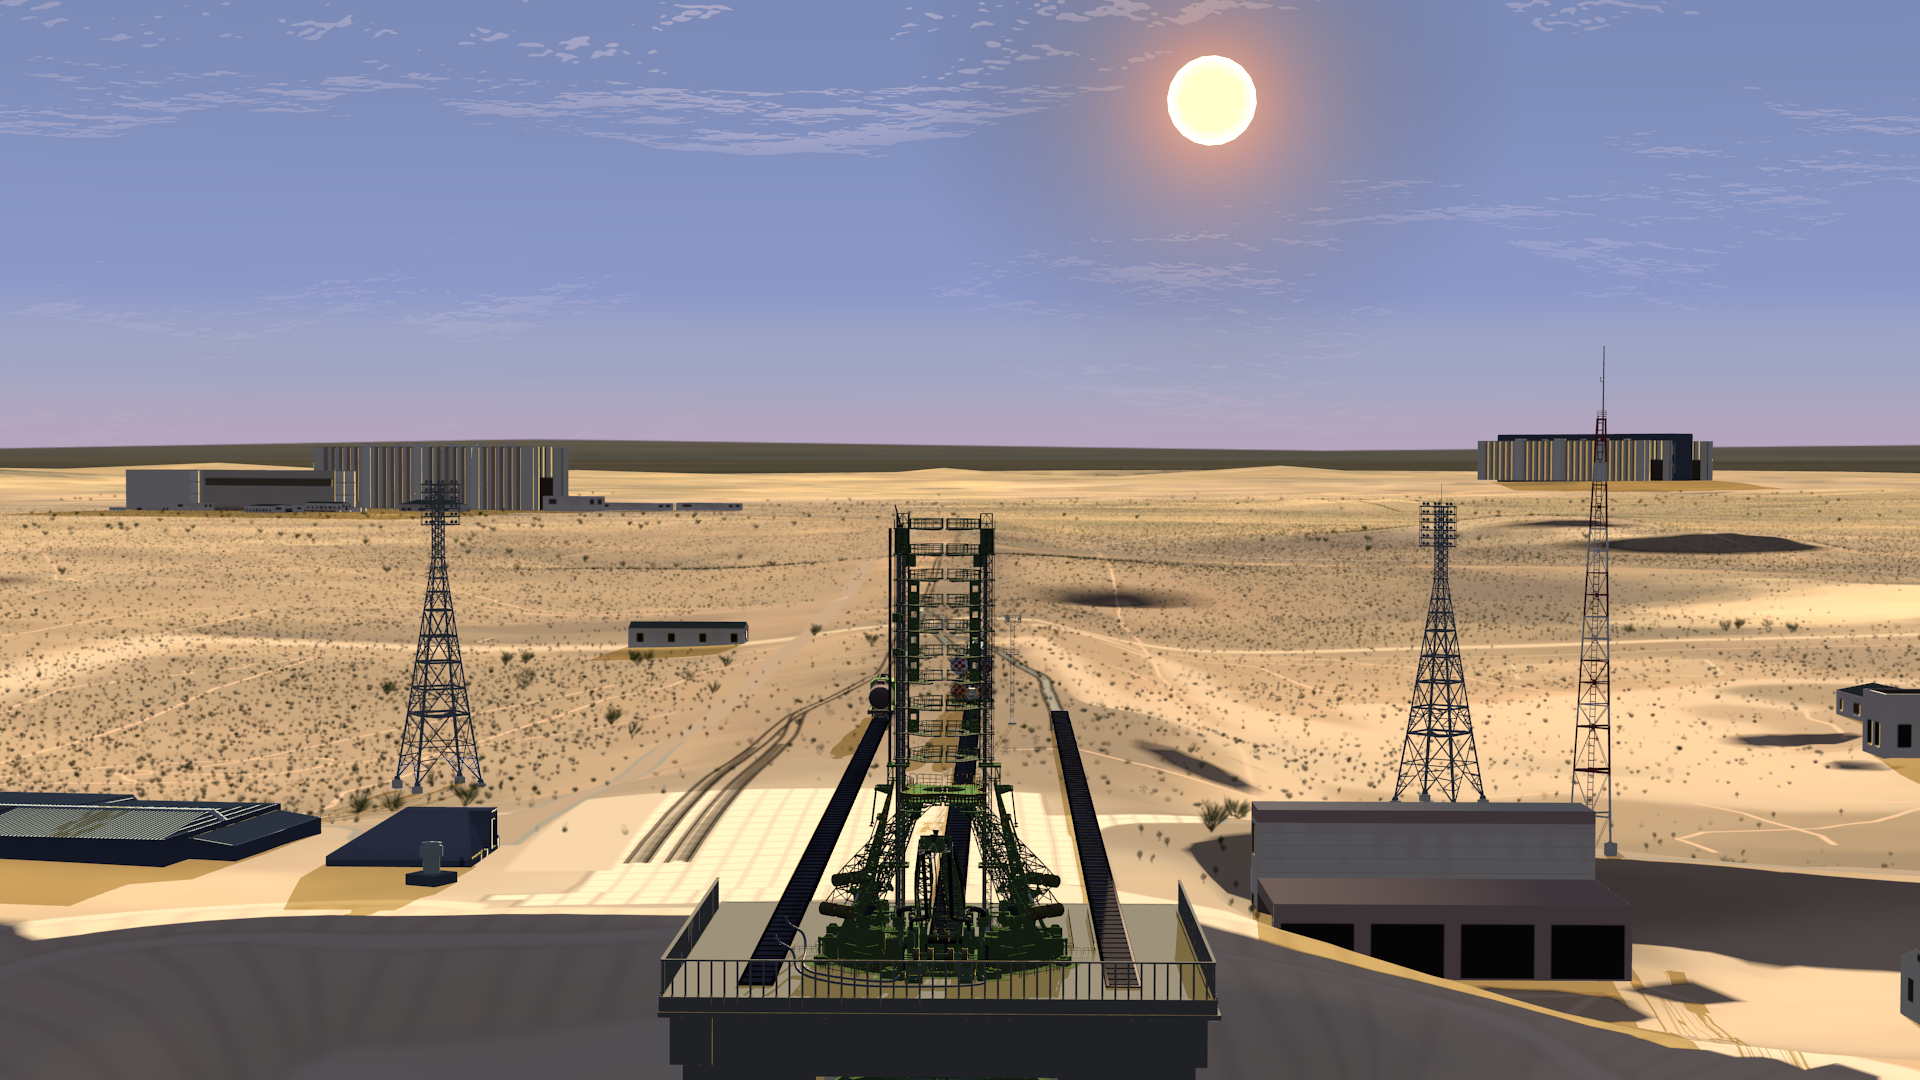
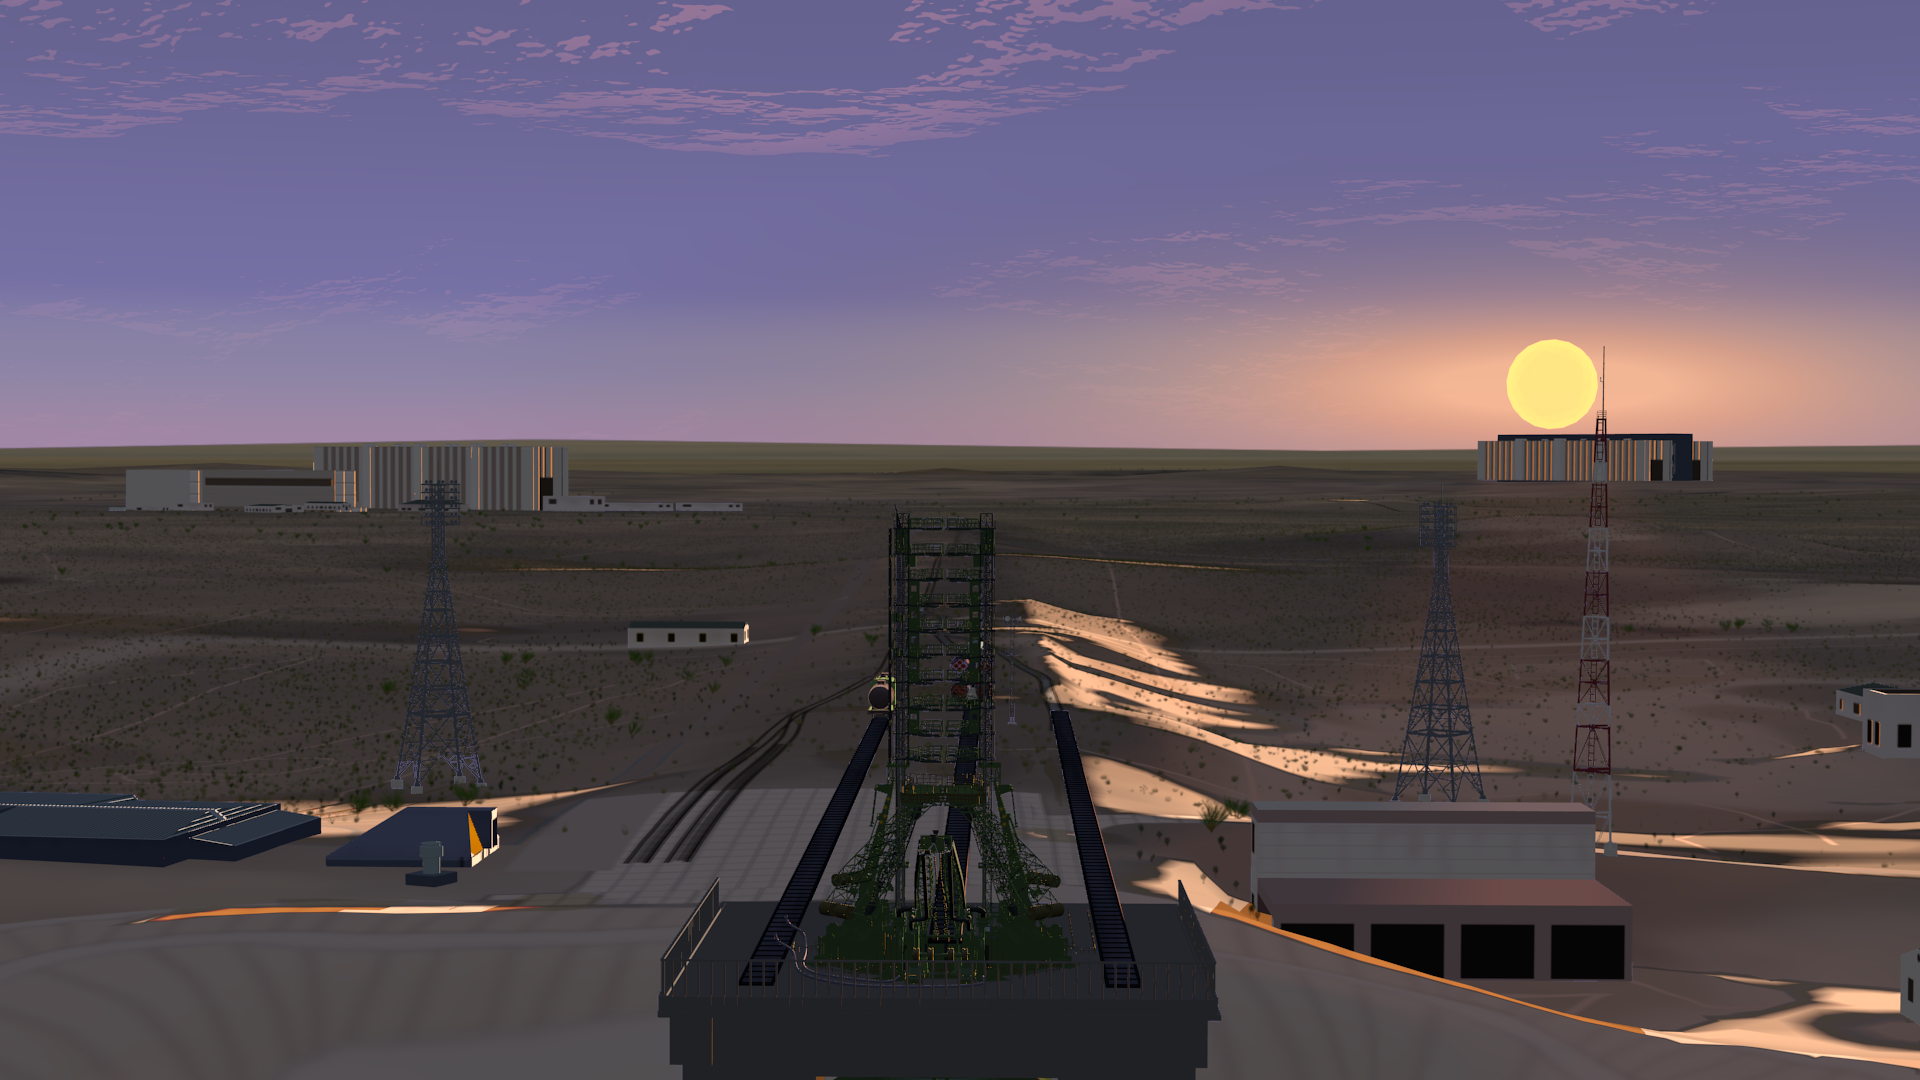
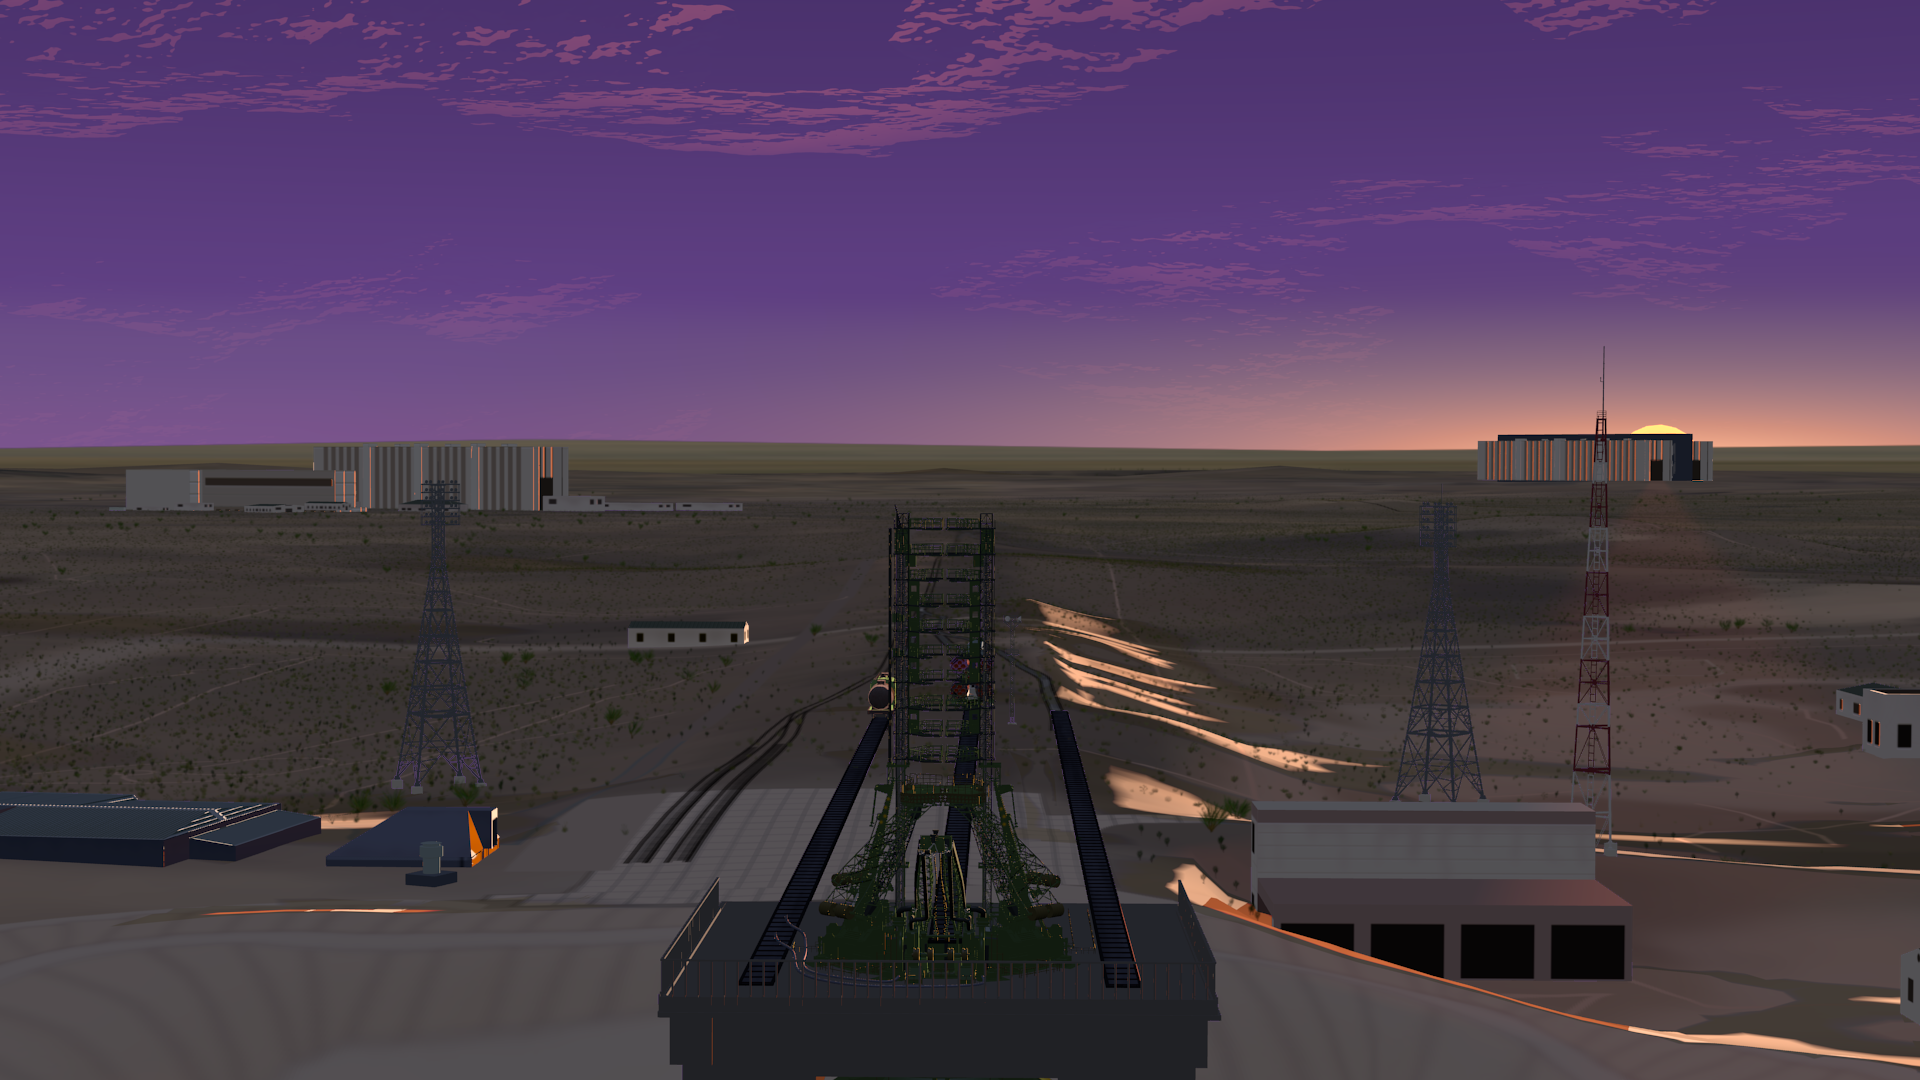
I think I’m through with the sky rigging for the “timelapse” sequence. With it, I’ve experimented with some different angles and times of day. Not all of these will appear in the sequence, but I wanted to see what they would look like.
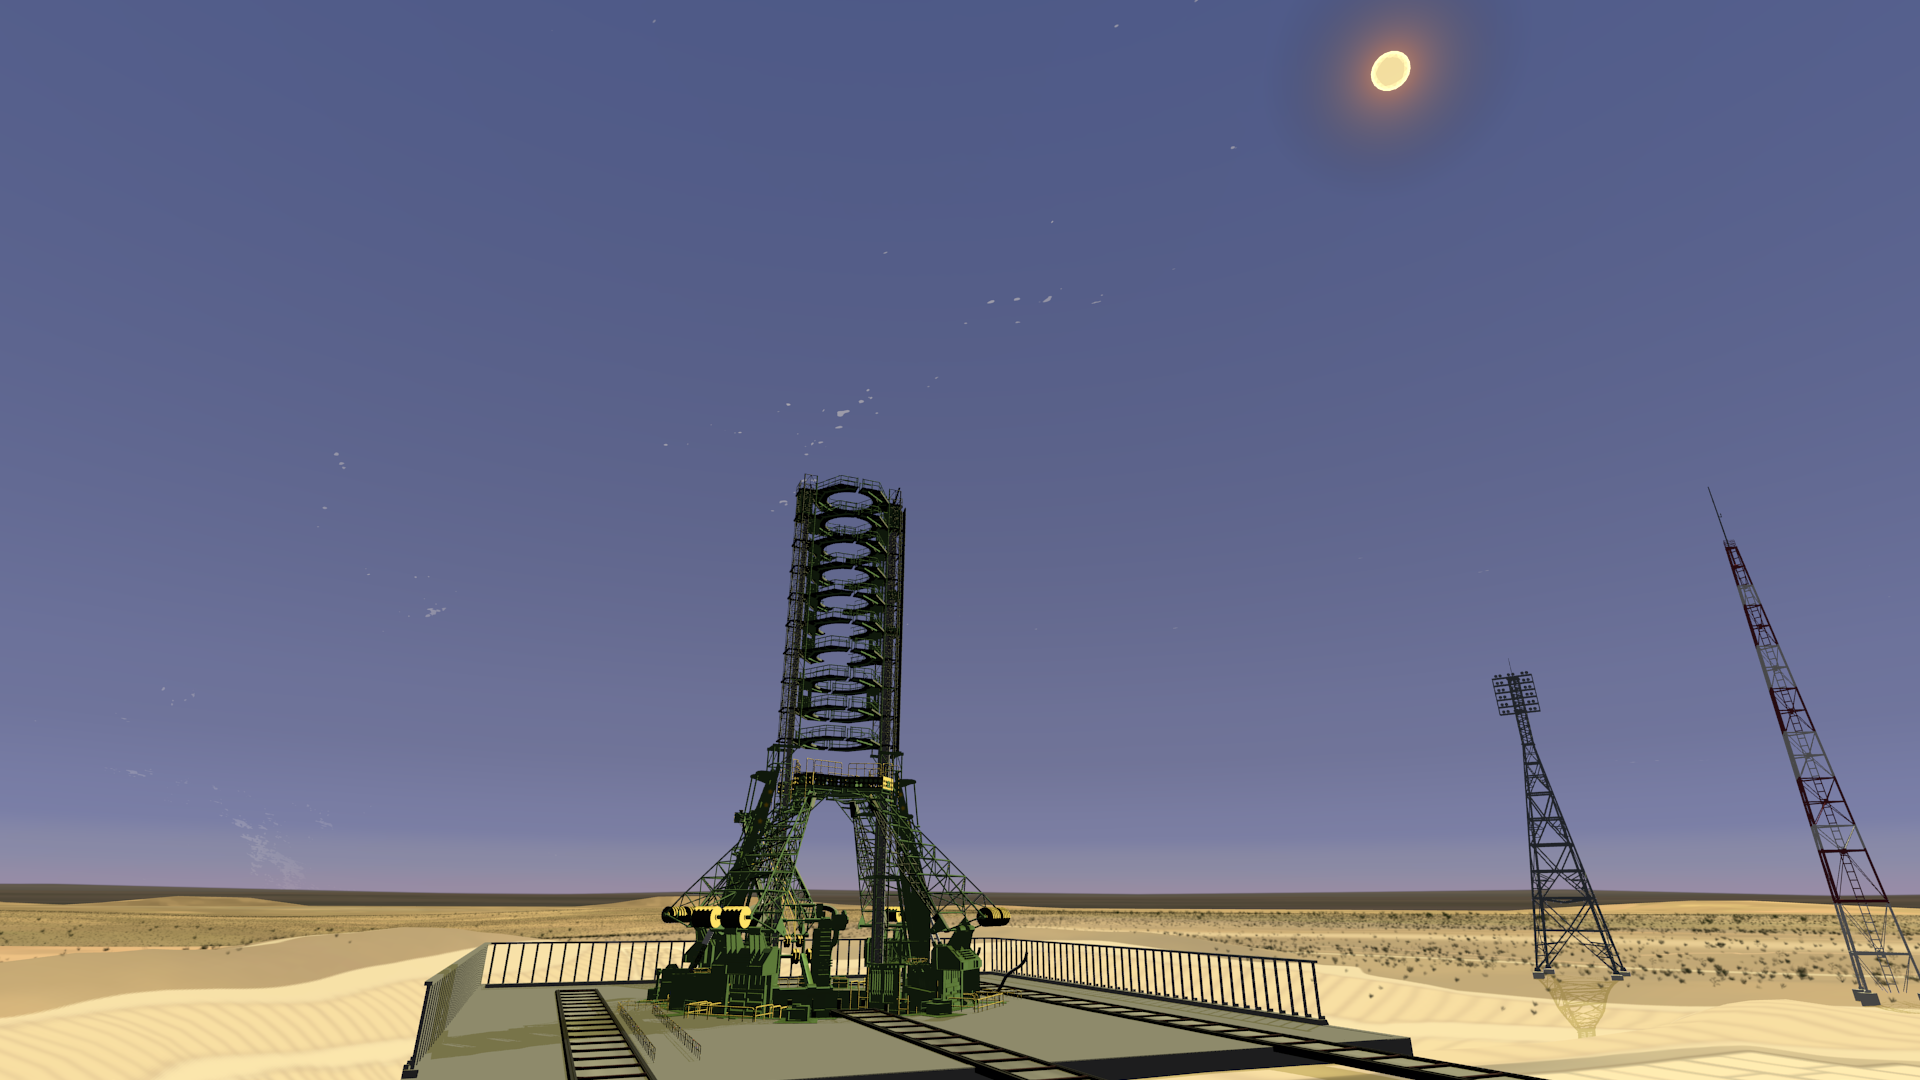
The nighttime shots don’t hold up quite as well, mainly because some of the toon materials have “emission” lighting to give them a flatter shading, and it starts to show up weirdly in low light.
The moon on April 4, 2040, which is when these shots are set, is almost exactly at “third quarter” (a waning half-illuminated Moon). So it’s hard to get any shots with both Sun and Moon in them (I did it for one of the shots above by using a very wide angle lens and also cheating the Moon’s position a little).
You’ll notice the Moon doesn’t quite follow the same track as the Sun, which is realistic, although I haven’t made an effort to figure out exactly what this alignment will be in April of 2040. The Moon’s orbit is pretty complicated, as it is very loosely bound to the Earth and has a number of periodic variations. But it’s a pretty minor detail for this sequence.
The position of the Sun and Moon and the East-West alignment of the launch complex, makes for some dramatic shot possibilities, which I’m pretty happy with. I’ll probably take that into account when coming up with the final angles for the sequence.
Jul 9, 2020 at 4:01 PM
Billboard Extras + Freestyle: The Right Way
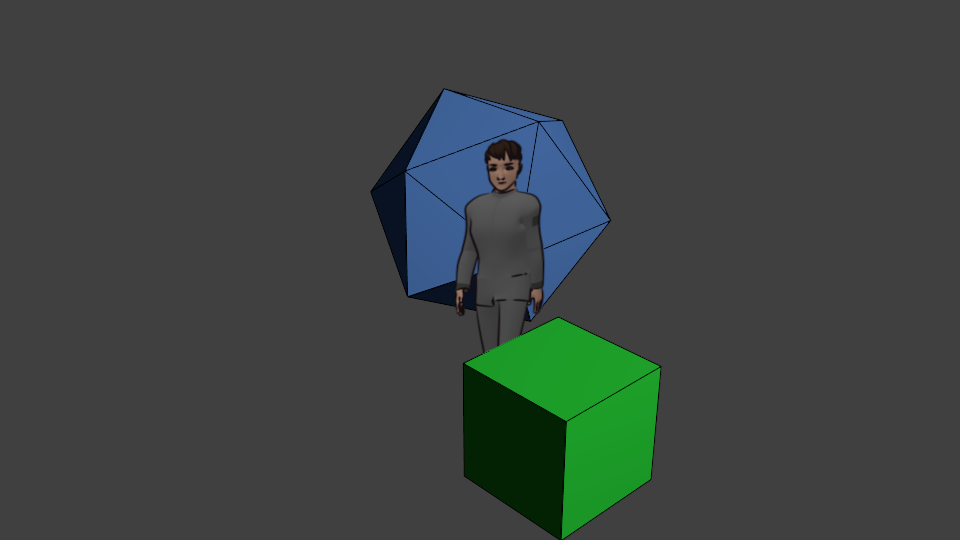
I finally figured out the right way to handle Freestyle line-masking with billboard extras.
“Billboard extras” are pre-rendered, posed extras figures I can put in the background of shots for crowd scenes, without the overhead of including the whole character model in my Blender file.
I include Freestyle lines in these pre-renders, so they don’t need to be outlined by Freestyle, and indeed, I want to explicitly exclude them from the process. I do that partly by not including them in the “Ink” render pass, but only in the “Color” pass.
But this leaves the problem of removing the Freestyle “ink” lines that would appear behind the characters. I also don’t want to suppress lines for objects in front of the billboards, nor for the transparent parts of the billboards.
Earlier, I did this by including the billboards in the “Ink” pass, but marking them to be ignored by Freestyle. This gave reasonable results in the “Touring Baikonur” sequence, but if you look closely, you can see that lines are suppressed near the characters (because the whole billboard blocks the lines, since Freestyle doesn’t support transparency).
For the timelapse sequence, I wanted to use lots of extras, and I wanted to improve on this line masking.
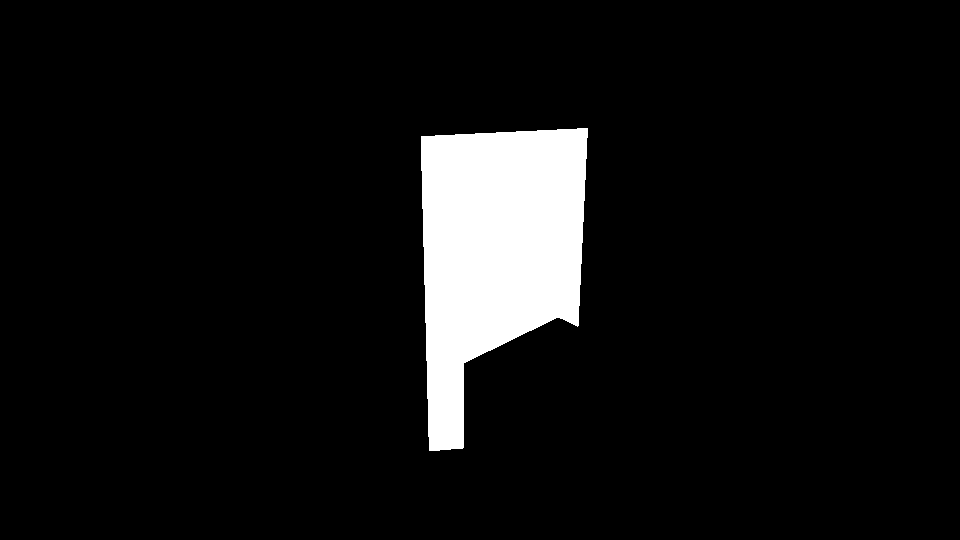
What I did was to add a “Material Index” to the billboard materials, so I can create a mask showing the visible parts of the billboards:
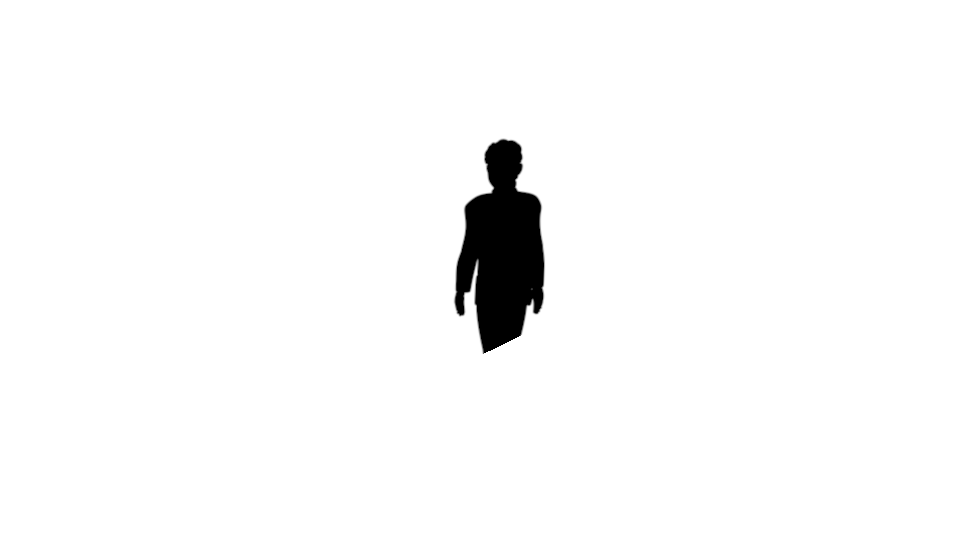
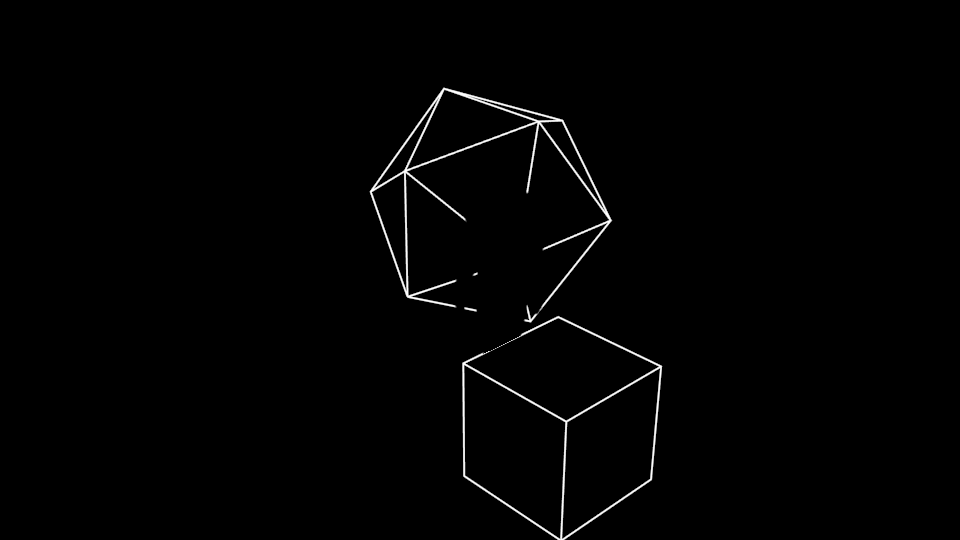
I then add a “BB Alpha” render to mask only the areas within the actual drawn figures:

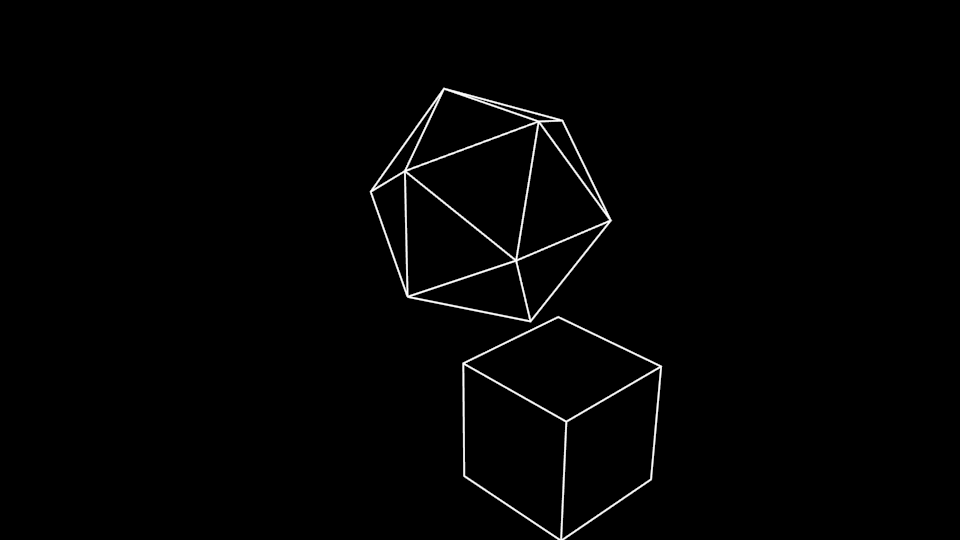
I can then combine and invert these to get a mask of places I want Freestyle to be able to draw:
Which is then combined with the alpha channel from the Freestyle “Ink” pass:
To give the masked Freestyle result:
Which I then use to apply the Freestyle “Ink” layer over the “Color” layer to get my final composite:
Simple! And fast.
I honestly expected to spend a lot more time tinkering with this to get it to work, but in fact I got it almost immediately. Spent only a half-hour setting this demo up.
The compositing node map looks like this:
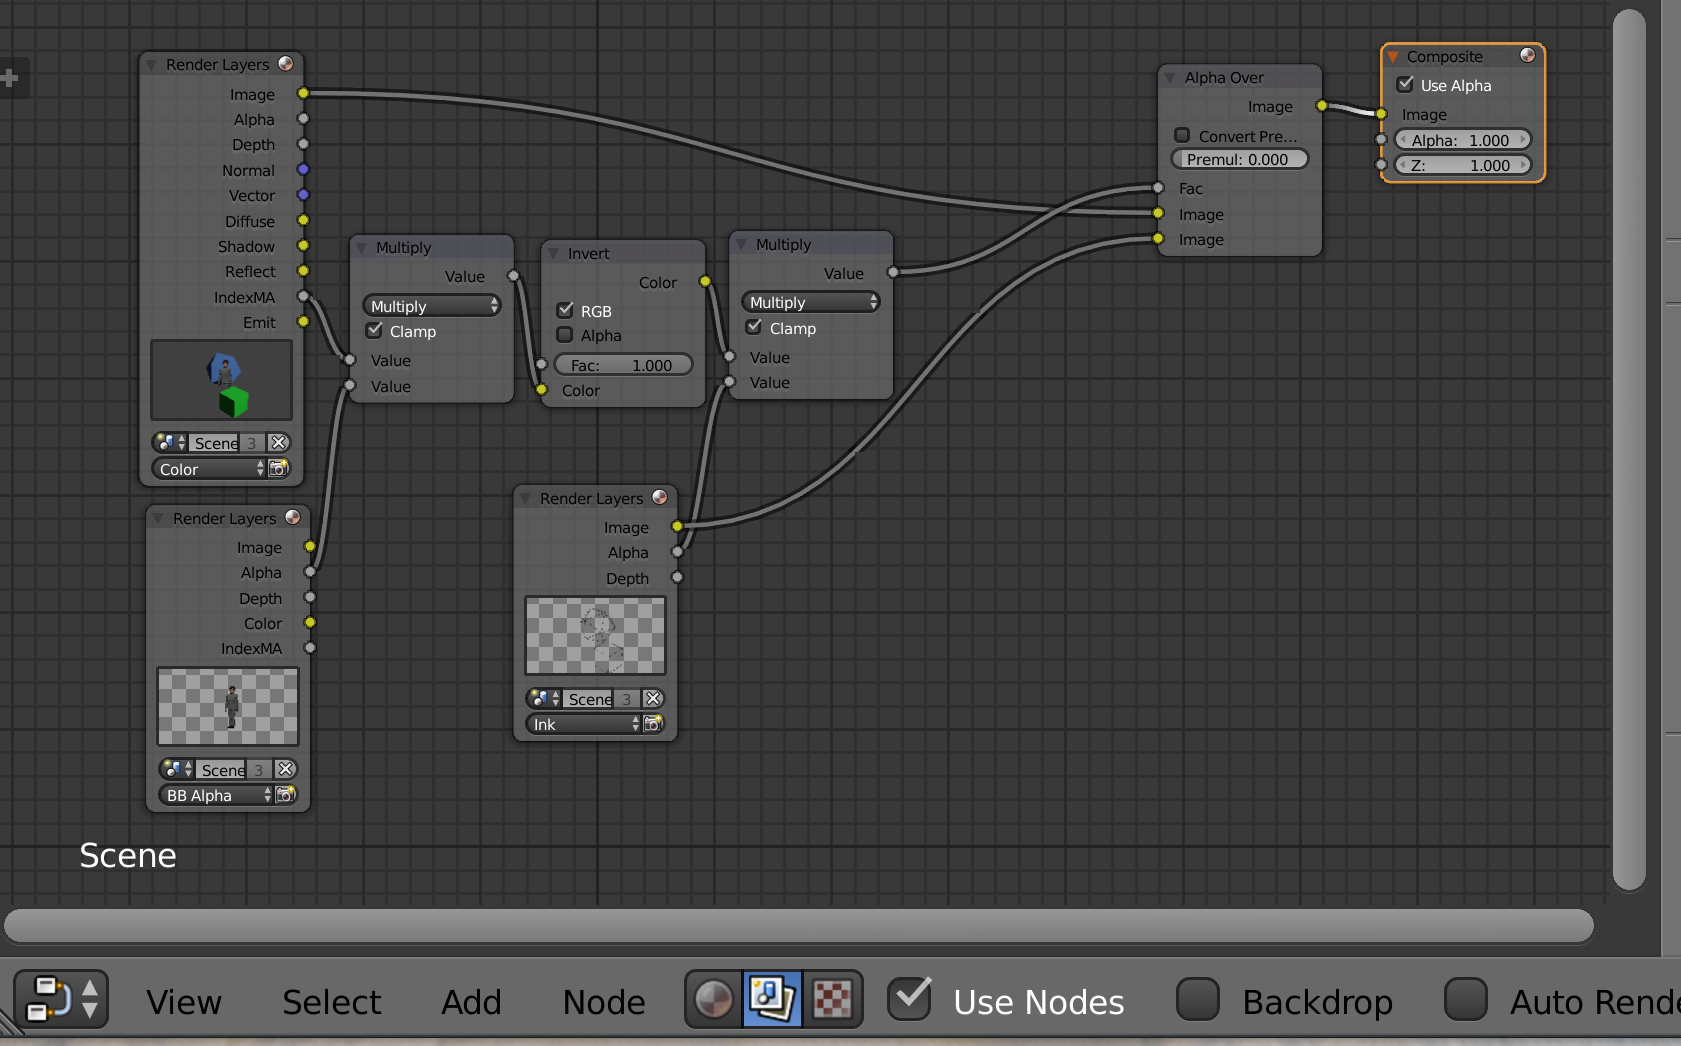
In my actual production shot file, I’ll actually render the passes to EXR files, and then include these nodes in the compositing file that will assemble them into final animation from the EXRs.
Jul 24, 2020 at 6:01 PM
Work Summary: Sky Rig Development
It took me about 27 hours spread over six months in 2020 to complete the “Sky Rig” (and model) that I developed for the “timelapse” sequences in our pilot. It isn’t perfect: it’s much more convincing for day than for night, and the Moon is only presented in one phase. Both could be fixed, but aren’t needed for the sequence in the show, so I didn’t try.
Since this uses an armature to set the position and motion of the Sun and Moon, it can be used to animate the sky as it would change over the course of a day. The clouds can be animated by moving the X and Y offset (to adjust their position) and the Z offset to simulate the clouds evolving as they condense and evaporate.
I created this video partly by clipping out the work on this particular topic from my daily worklogs and then speeding it up to 60X, so that each second represents a minute and each minute and hour — so it is a timelapse as well. One goal is to estimate how much work this project represents, because it’s otherwise hard to tell, due to all the the other work that was interleaved with it during that same period.
Another is that it’s kind of pleasant to watch, especially with the music, which is the album “Turn” (Jamendo #88639) by Kressof (CC By 3.0). One of the tracks is also on the “Conception to Completion” video for FilmFreedom. The effect is a bit like a speedpaint, but mind you, this contains my puttering around and false starts as I experimented with the design. I decided not to include all the web searches for help and video tutorials I watched along the way to figure out how to do it, nor posting intermediate results here on Patreon (which you’ve probably seen already).
This is not a way to learn how to create or use this rig. I plan to record a screencast explaining how to use it in a scene.
Jul 27, 2020 at 4:00 PM
Pad Crew Billboards

The remaining major element of the “timelapse” shots is the collection of pad crew character billboards, which will be animated moving around during the shot.
For this, I need to have rendered billboards of the characters, and for a bit of extra effect, I decided to render them “go-motion” style, with some blurred movement. So for these billboards, I arranged for both the camera and character to be moving, with motion-blur turned on in Blender.
For this, I adapted the Pad Crew models created by Keneisha Perry into 12 separate variations of Pad Crew extras, then rigged them using our Rigify-based character rig and automatic skinning (which works fine for these characters).
Then I defined five poses and copied our walk cycle animation to the characters to make an addition 12 walking poses. In addition, the camera is set up to take 8 directional images (front, front-left, left, back-left, back, back-right, right, and front-right). I set these up in the Non-LInear Animation (NLA) Editor in Blender, which makes it (somewhat) easy to match animations for all 12 characters.
Then I wrote a short Python script to render all of these as “animation” in Blender (even though the goal is actually billboard still frames), and then to rename them from the frame numbers to mnemonic names for the different angles and poses.
This will give us a total of 12 x 17 x 8 = 1632 billboards to choose from.
Assuming I have about 30 characters in shot on average, and animate the characters “on 5s at 30fps” or “6 fps”, then a 30 second shot will require me to move or select billboards about 30 x 6 x 30 = 5400 times.
Which is a lot of labor, but not impossible, especially since the steps will only take a few seconds each. I also may be able to cheat and not really need to animated 30 characters in each step.
I’ll also be adding a 3D posed driver for the “Transporter-Erector” vehicle, and a few 3D animated walking characters for the normal-time animation shots in the sequence, using the same PadCrew-extras models.
You might notice that, in addition to the blurring, the Freestyle lines are thicker on these — that’s because they’ll be rendered as only a small part of the shot, so the line size will be closer to matching the rest of the shot.
Jul 29, 2020 at 4:00 PM
Set Fix: Railroad Embankments
During all of the work on lighting, one of my recurring frustrations has been the mismatch between the railroad tracks and the landscape. This is not so noticeable in soft lighting, but when the shadow casters for the sun lighting are added, the tracks clearly cast shadows which reveal that they are floating well above the ground over a lot of their length, breaking the illusion.
Also, for simplicity of rigging, the tracks near the pad, which are part of the LaunchPad mech are perfectly straight, and these have to be adapted to the curved tracks we see in the distance, which are simply drawn onto the landscape texture.
So what I finally settled on as a fix was to model some intermediate elements which are more forgiving — I added railroad embankments for the tracks (which is actually how this problem is solved in real life after all), and then also curved model track elements which allow for the transition from the straight mech tracks to the drawn-on texture tracks in the distance.
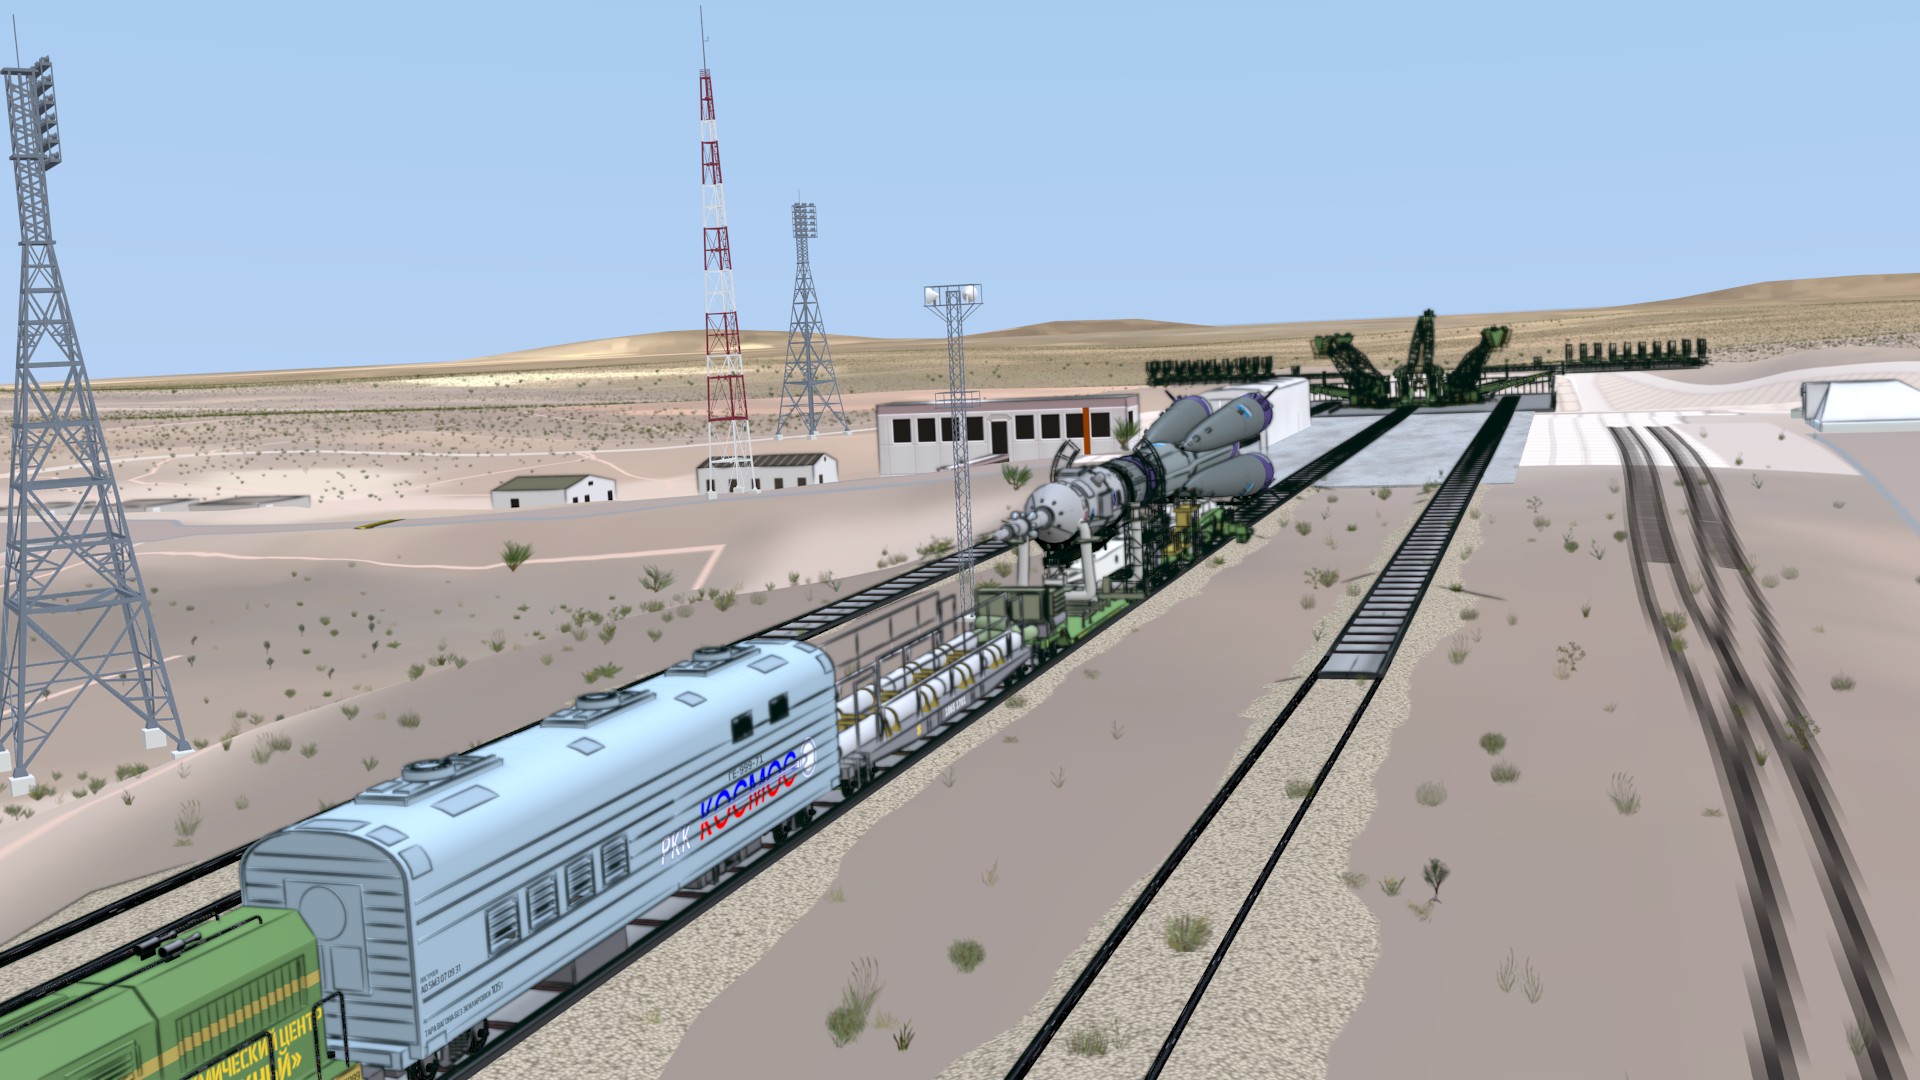
Here’s a view closer to what we might see in the actual shot:

Here’s a close-up detail of the track transitions:
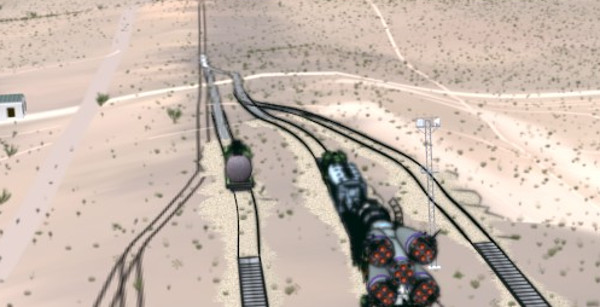
The track on the far left only exists as a texture element, the other three show the transition from the mech-model tracks to curve-extrusion tracks, to texture tracks in the distance.
I do see one problem in this test I will probably fix — the embankment on the left is covering over the texture-only track slightly (this is not visible in the Blender viewport, because the texture isn’t normally rendered, so there’s a fair amount of trail-and-error matching them.
Of course the curve-extrusion tracks don’t have railroad ties. I may have to figure out a way to create the impression of those. Maybe model them, or just add a textured curve element along with the tracks, using a different extrusion shape.
These are all lit with the test lighting in the LaunchPad set file, so they don’t look quite as snazzy as the shot files, which use the sky lighting rig I created.
I also see that I’ve lost some of the buildings around the launch pad in this set. I need to find them again. They are, I think, in one of the LaunchPad-Bkg files I created earlier.
Jul 31, 2020 at 4:01 PM
“Gopher Cam”
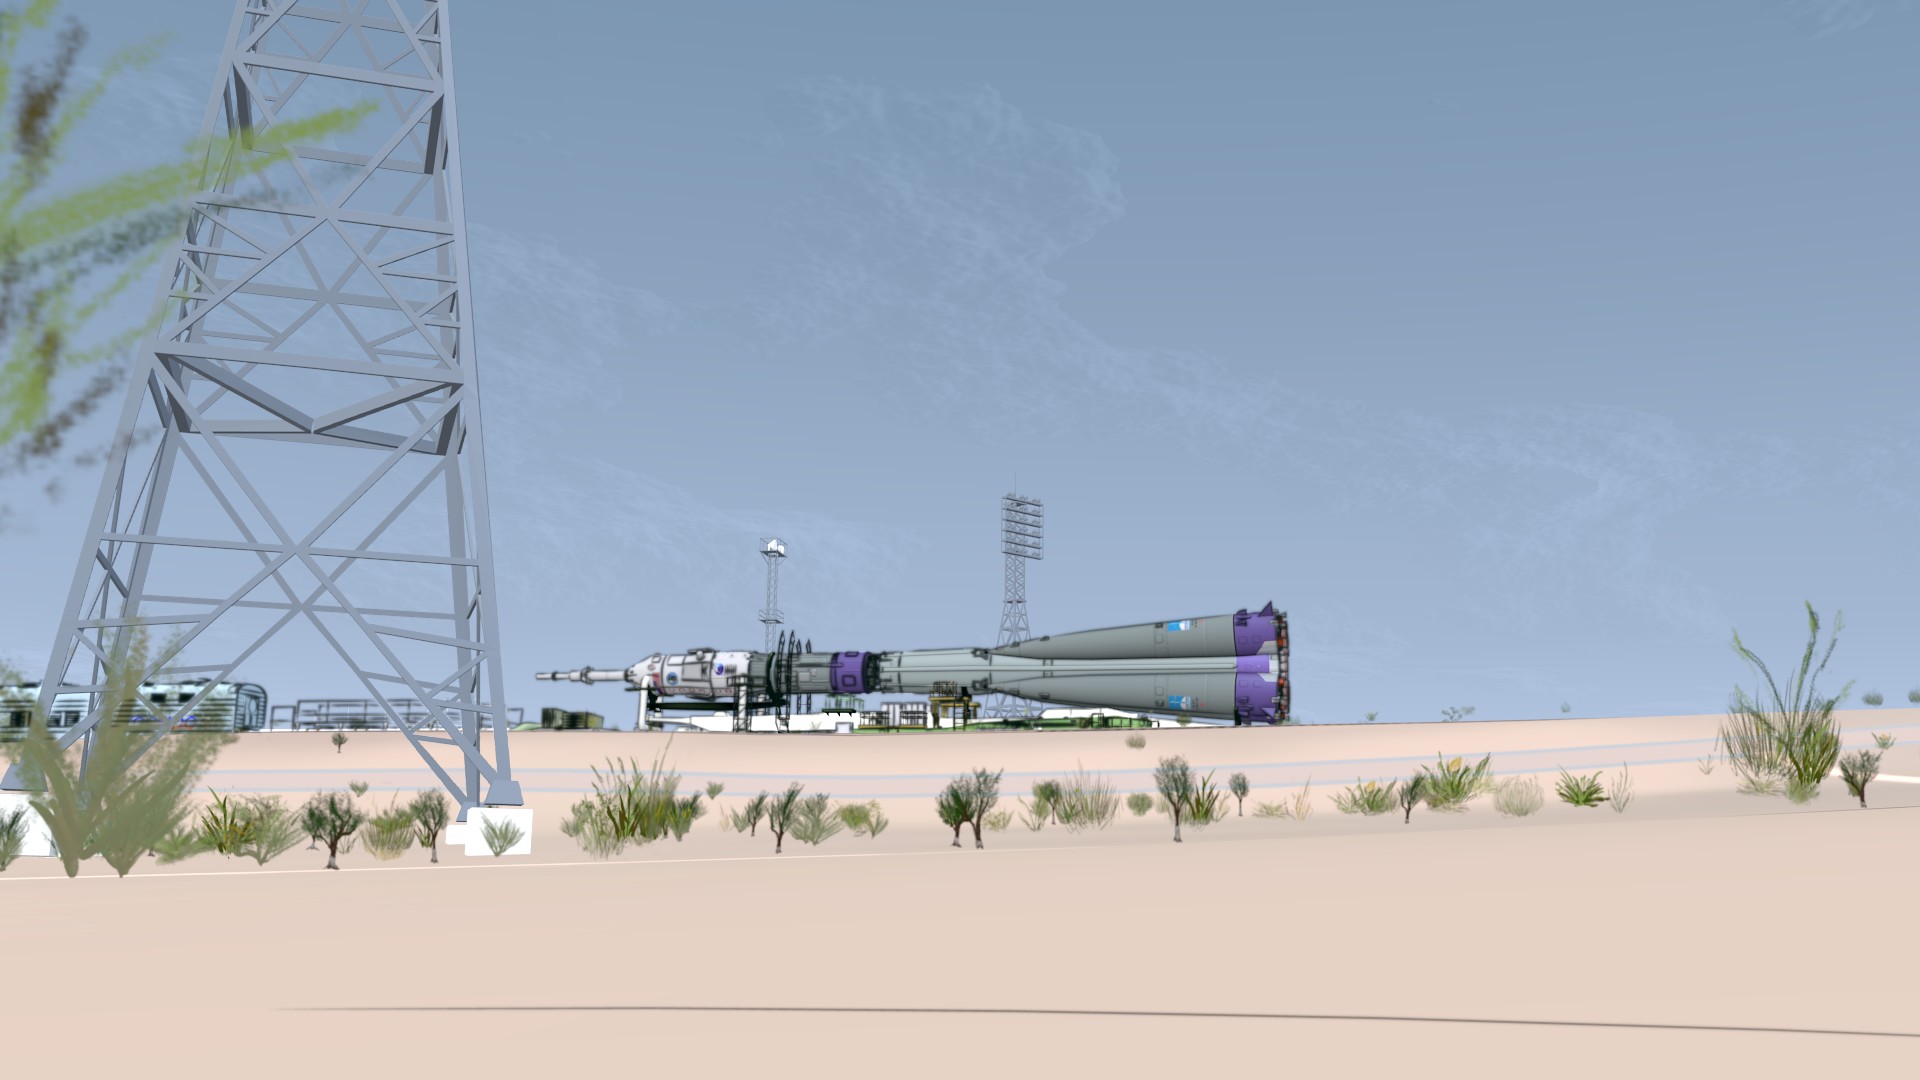
I also took a moment to figure out where to put the camera for the background element in the “gopher” shot (with a foreground gopher watching the rocket being rolled out).
During early pre-production we had seen some fun shots taken during real Soyuz rollouts, where a gopher happened to be near one of the cameras, and we thought it would make for a light-hearted addition to the sequence. I did several mock-ups of that shot, and we do have an animated gopher character to put in the foreground of this shot:
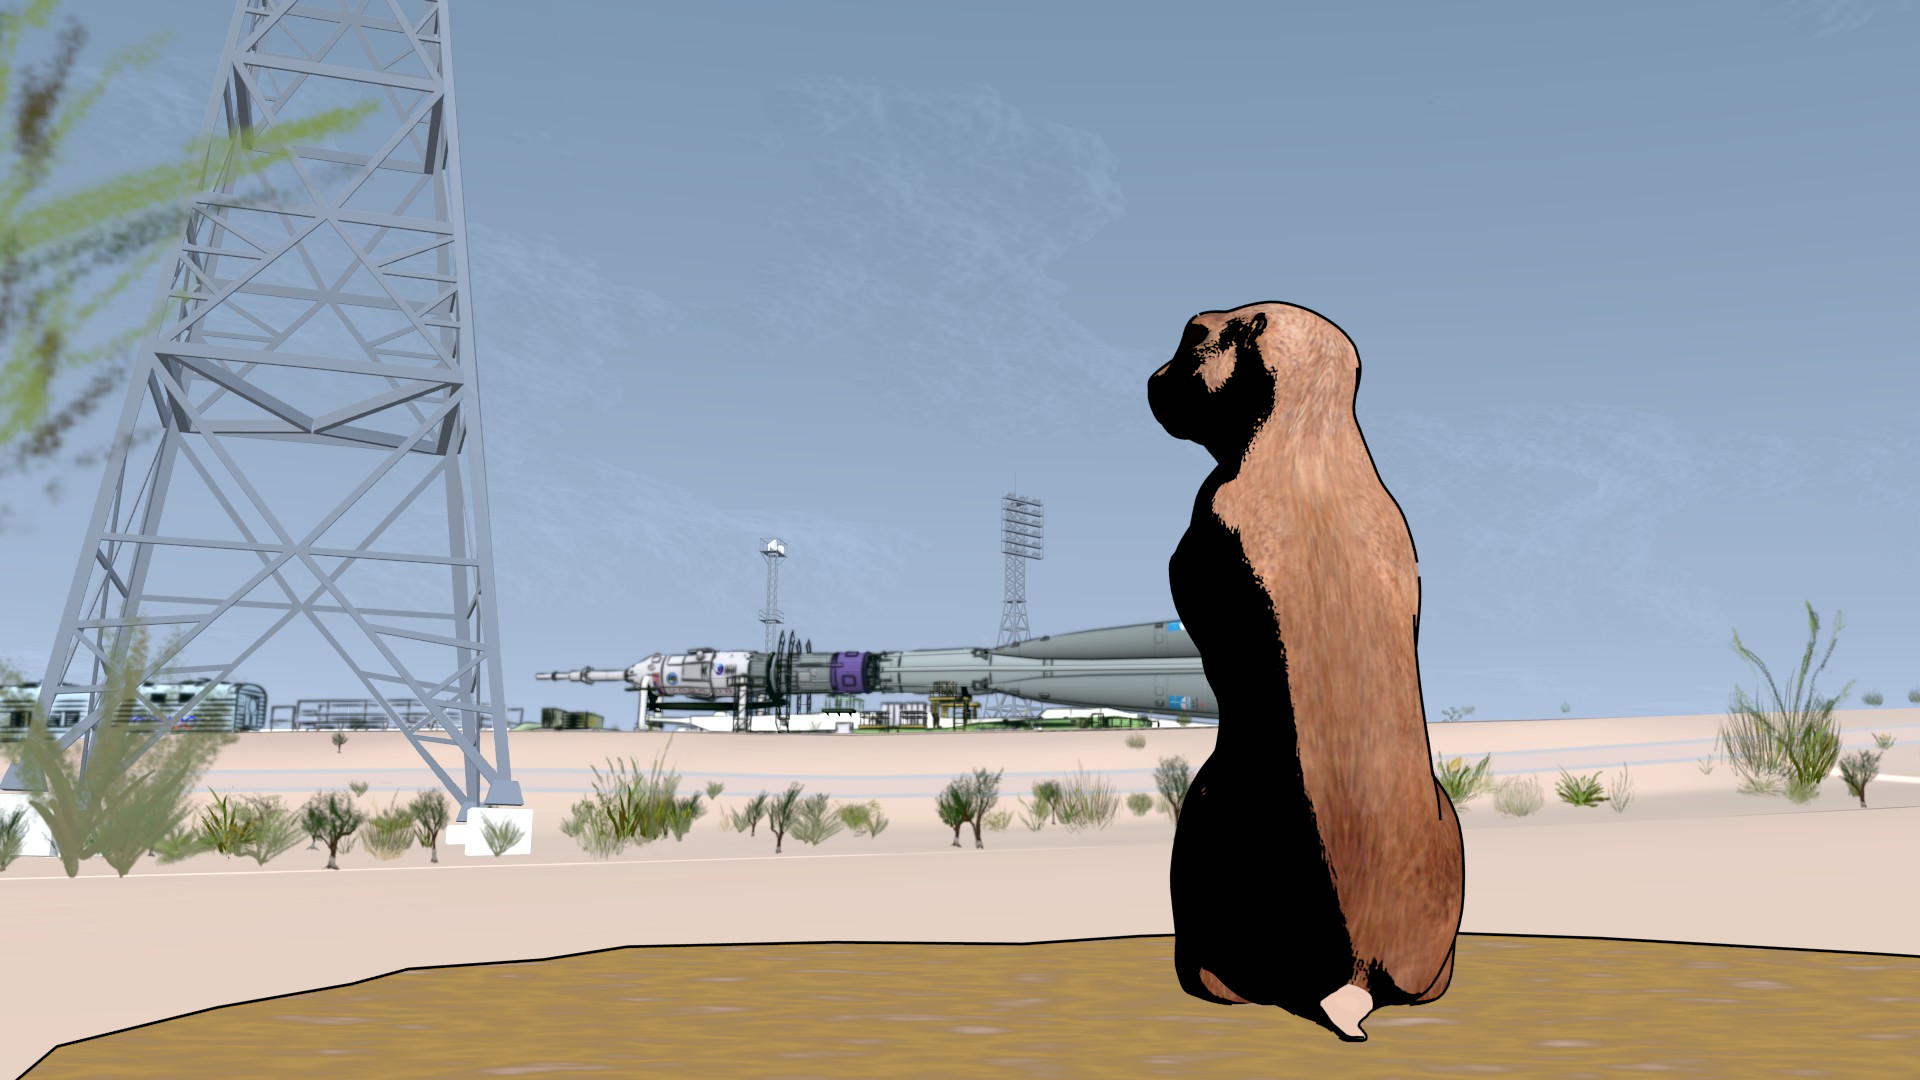
(Although this is still just a mock-up, because I haven’t finished with the Gopher shot element and the lighting hasn’t be worked out, and so on).