In our pilot episode, we have a montage in which Georgiana and Hiromi go through some of the traditions of a Russian space launch from Baikonur. One of these is signing the door of the room they stayed in at the “Cosmonaut Hotel” in Baikonur. By now, these doors have a lot of signatures on them, but space travelers still sign them. We felt certain that if you were taking a second-grader into space, you’d definitely do all this stuff.
This requires animating the writing appearing under the pen as Georgiana writes her name. There are probably many ways to do this, but I decided to do it using Blender’s “Dynamic Paint” simulation tool to reveal an already-prepared signature drawing that I made with ink and scanned in some months ago. This is the first time I’ve ever attempted to use this tool, so it was definitely a challenge.
Creating the Pen Path
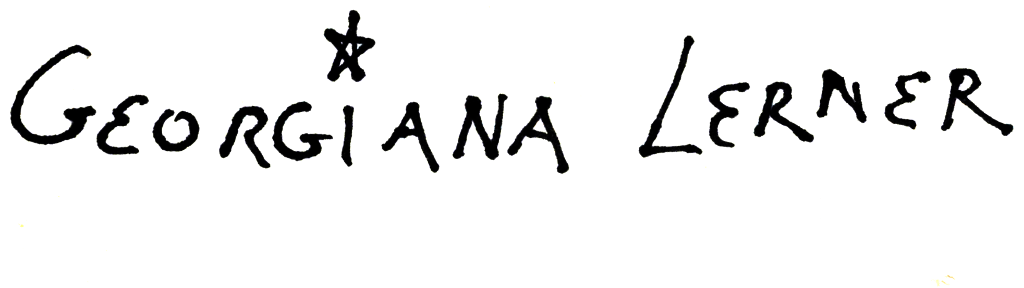
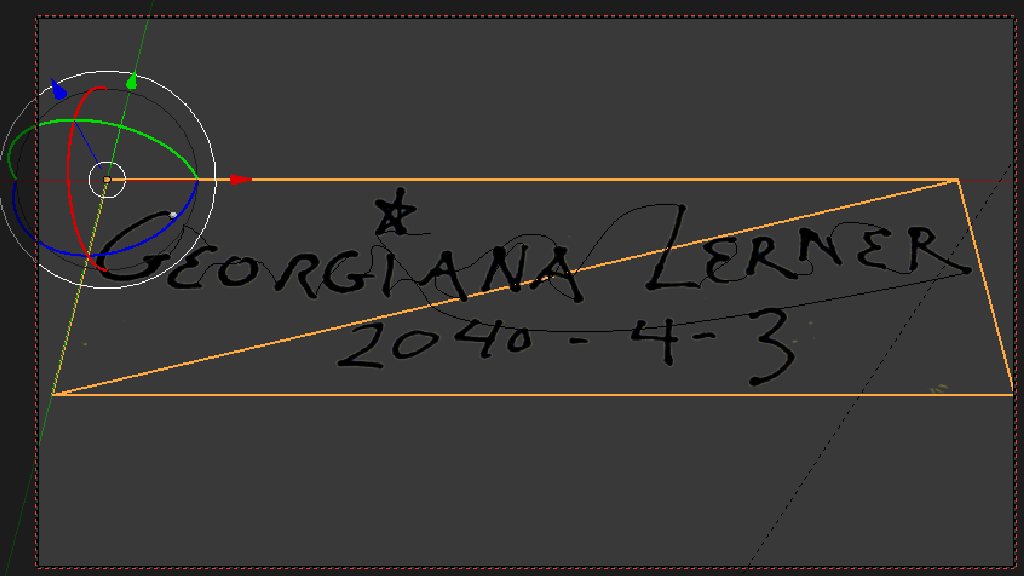
First of all, here’s the original signature image I created. I decided that Georgiana probably prints her name rather than using cursive, and she’s still working on her letter forms. She does have uncommonly-good hand-eye coordination, though, for a seven-year-old. We show her writing and drawing quite a bit in the episode:
The first step we need is to draw the path the tip of the pen will actually follow while writing this signature. To do this, I started by importing the signature and tracing it with the bezier curve tool in Inkscape.
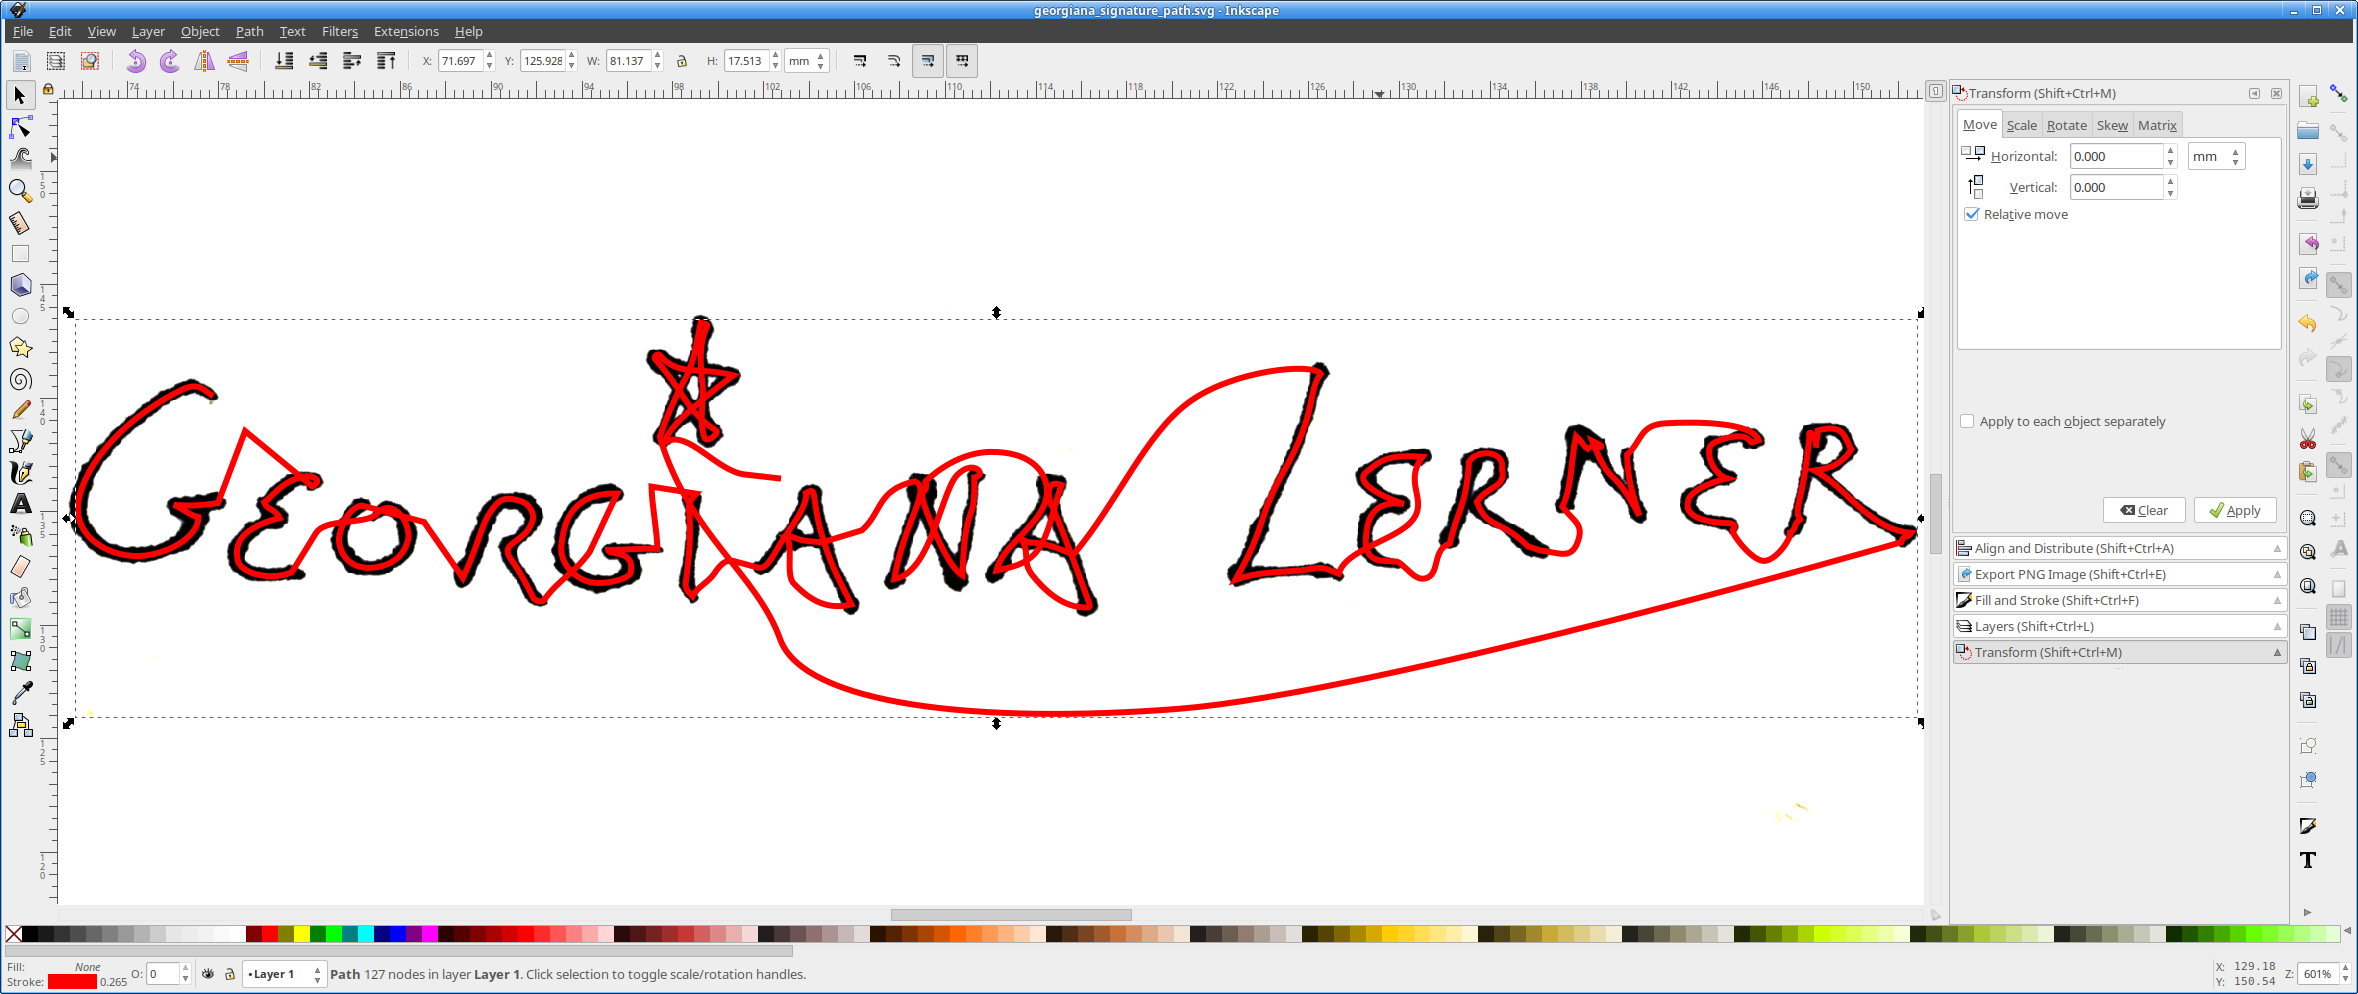
Remember, this is not an attempt to redraw the signature. What I am drawing is the path I expect the tip of the pen to follow as the word is written. Between the letters, I’ve provided some control points for later use, but not worried too much about those paths — I’ll be editing them further in Blender, as we’ll see below. Of course, this is all one bezier path, since the pen doesn’t ceased to exist (or move) between letters. In a few cases (where the ink is blobbed a bit), I have added hesitations or circular motions of the pen to account for the extra ink.
I also drew a box around the image object in Inkscape, as well as snapping the page size to match it.
Now I need to export this as a PLAIN SVG file from Inkscape (select the format from the drop-down menu in the low right of the dialog). In my experience, Blender’s SVG importer does not do very well with Inkscape SVG files, so plain is safer:
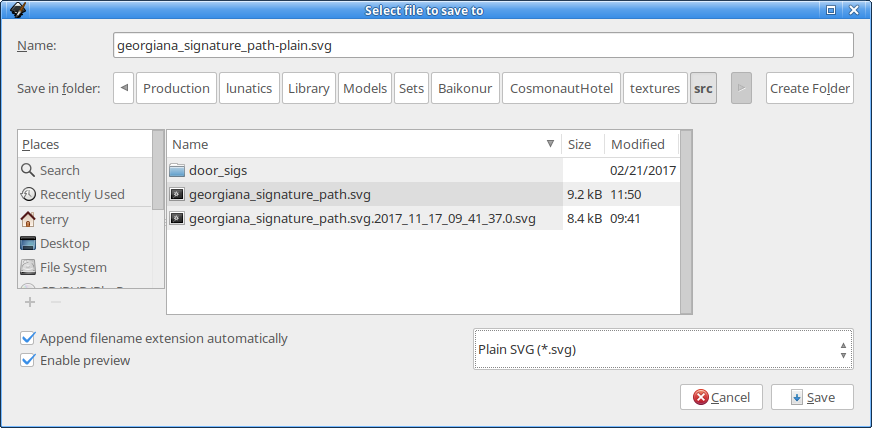
I also saved the file in Inkscape’s customized SVG format, which preserves more embedded metadata. I usually indicate in the filename when a file is plain SVG, even though it’s technically the same file format.
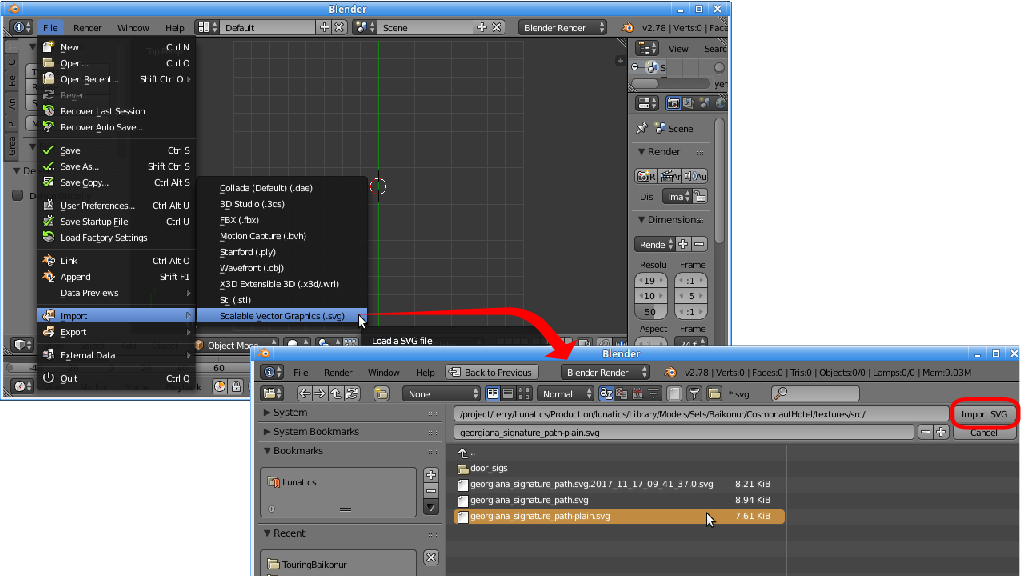
Now I need to import both the original scanned signature and the pen path into Blender:
Since I also included a frame around the image, this import brings that into Blender as a curve object as well. I converted that to a mesh and gave it material and texture — this will be our canvas object:
You can also see the pen path curve in this image. After import, I renamed this curve object to “Signature-Path”. The frame I will use as canvas I called “Signature-Frame”.
Up to this point, the bezier path is 2D (in the plane of the canvas). The next step is to edit the curve to pull the transitions from letter to letter out of the plane, because of course, the tip of the pen is raised off of the surface during these parts of the motion. So I carefully edited the nodes to achieve this. I found this step hard, because it is very difficult to see the true 3D position of the bezier nodes. I had to move the point of view frequently to keep track of this:

Creating the Brush Object
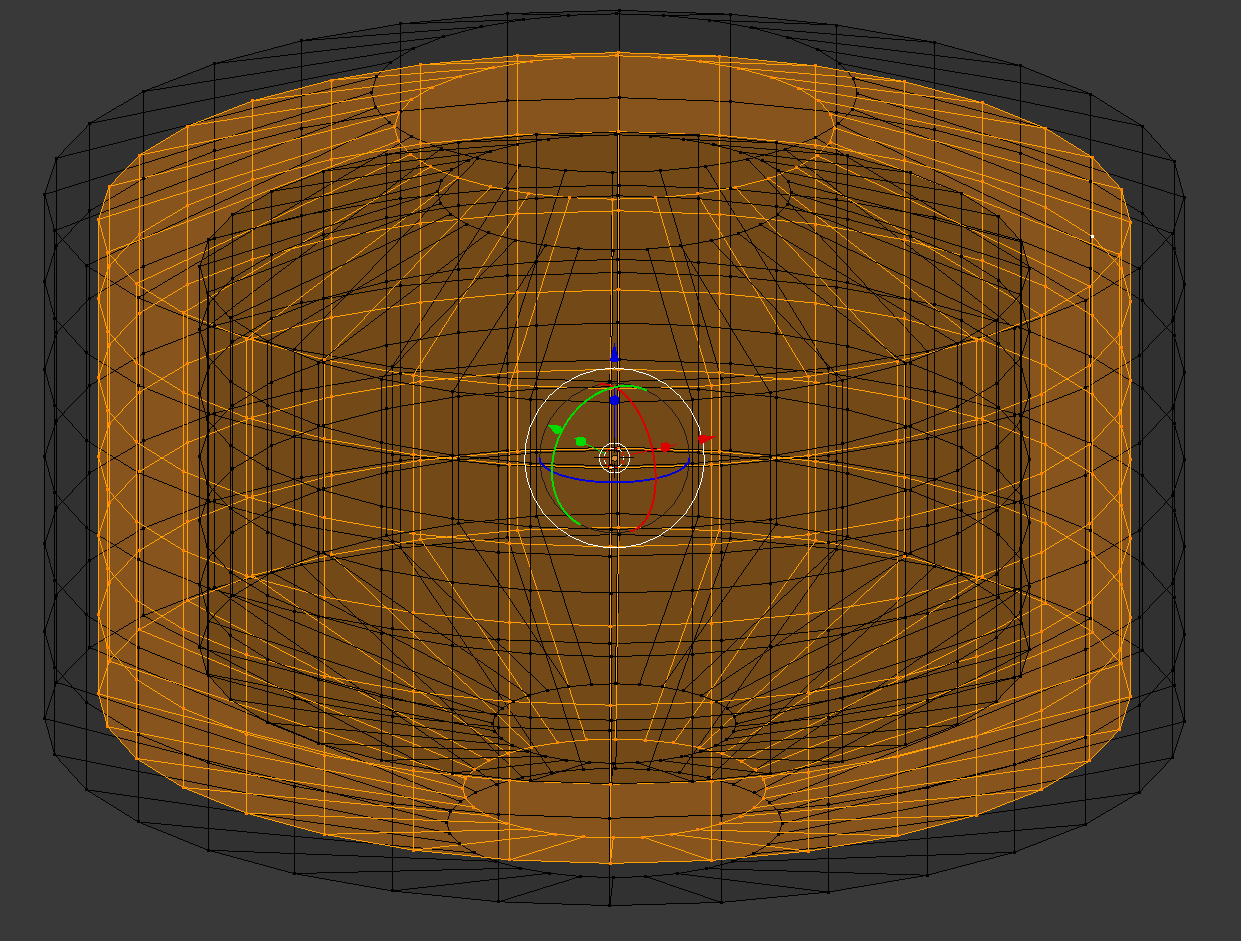
Initially, I just used a small icosphere mesh for the brush. However, I had a great deal of trouble getting good results from the brush, and wound up creating a cylinder, and then a modified “puck” shape. This had nothing to do with aesthetic concerns for the shape on the page (I just wanted a roughly circular intersection). But I encountered a lot of strange, possibly buggy behavior in how different shapes affected the result. Despite using “mesh volume” for the brush, for example, only the shell of the mesh would act when I was using the initial icosphere. This was extremely confusing, and I still don’t know what is going on with it. I eventually even added nested copies of the mesh to make more vertices inside the object to help produce a usable brush pattern on the canvas. I am not sure if this made any difference at all — it really should not have, based on the documentation, but I made several tests that showed that the actual behavior was definitely not as documented. This was definitely my biggest disappointment with Blender during this process. Either something very subtle is going on, or there are serious bugs in the way Blender computes intersections for dynamic paint.
It is possible that, since I’m now using the “new depsgraph” feature in Blender by default, these might be bugs related to that system — the failure to update locations from the path seems like it might be. But this would take further experimentation to determine.
The other thing I did was to use the “mesh volume + proximity” option, and then shrink the mesh somewhat so that the proximity (around “0.08”) did not make the brush too large. I have not been able to find any documentation that specifies what units the “proximity” and “object distance” options are meant to be in — it doesn’t appear to be the current Blender units. But after much experimentation, 0.08 seemed to be good for my case.
Animating the Brush
Now I want to get the brush object to follow the curve I have created. For this I use the “follow curve” constraint, and select the curve that I imported above. I don’t need to use any of the options on the panel, because I don’t need the brush to rotate as it moves. The brush will trace through the letters painting a rough (slightly oversized) letter patterns with dynamic paint. Where the curve goes up out of the page, the brush should not mark.
To get the brush to move, I need to animate the curve from the curve panel:
- Set the animation range (render panel) to start at frame 1 and go to frame 600 (20 seconds at 30fps). Bear in mind that if this is too fast or slow, I can always edit the dope sheet later.
- Create a timeline window for animation work.
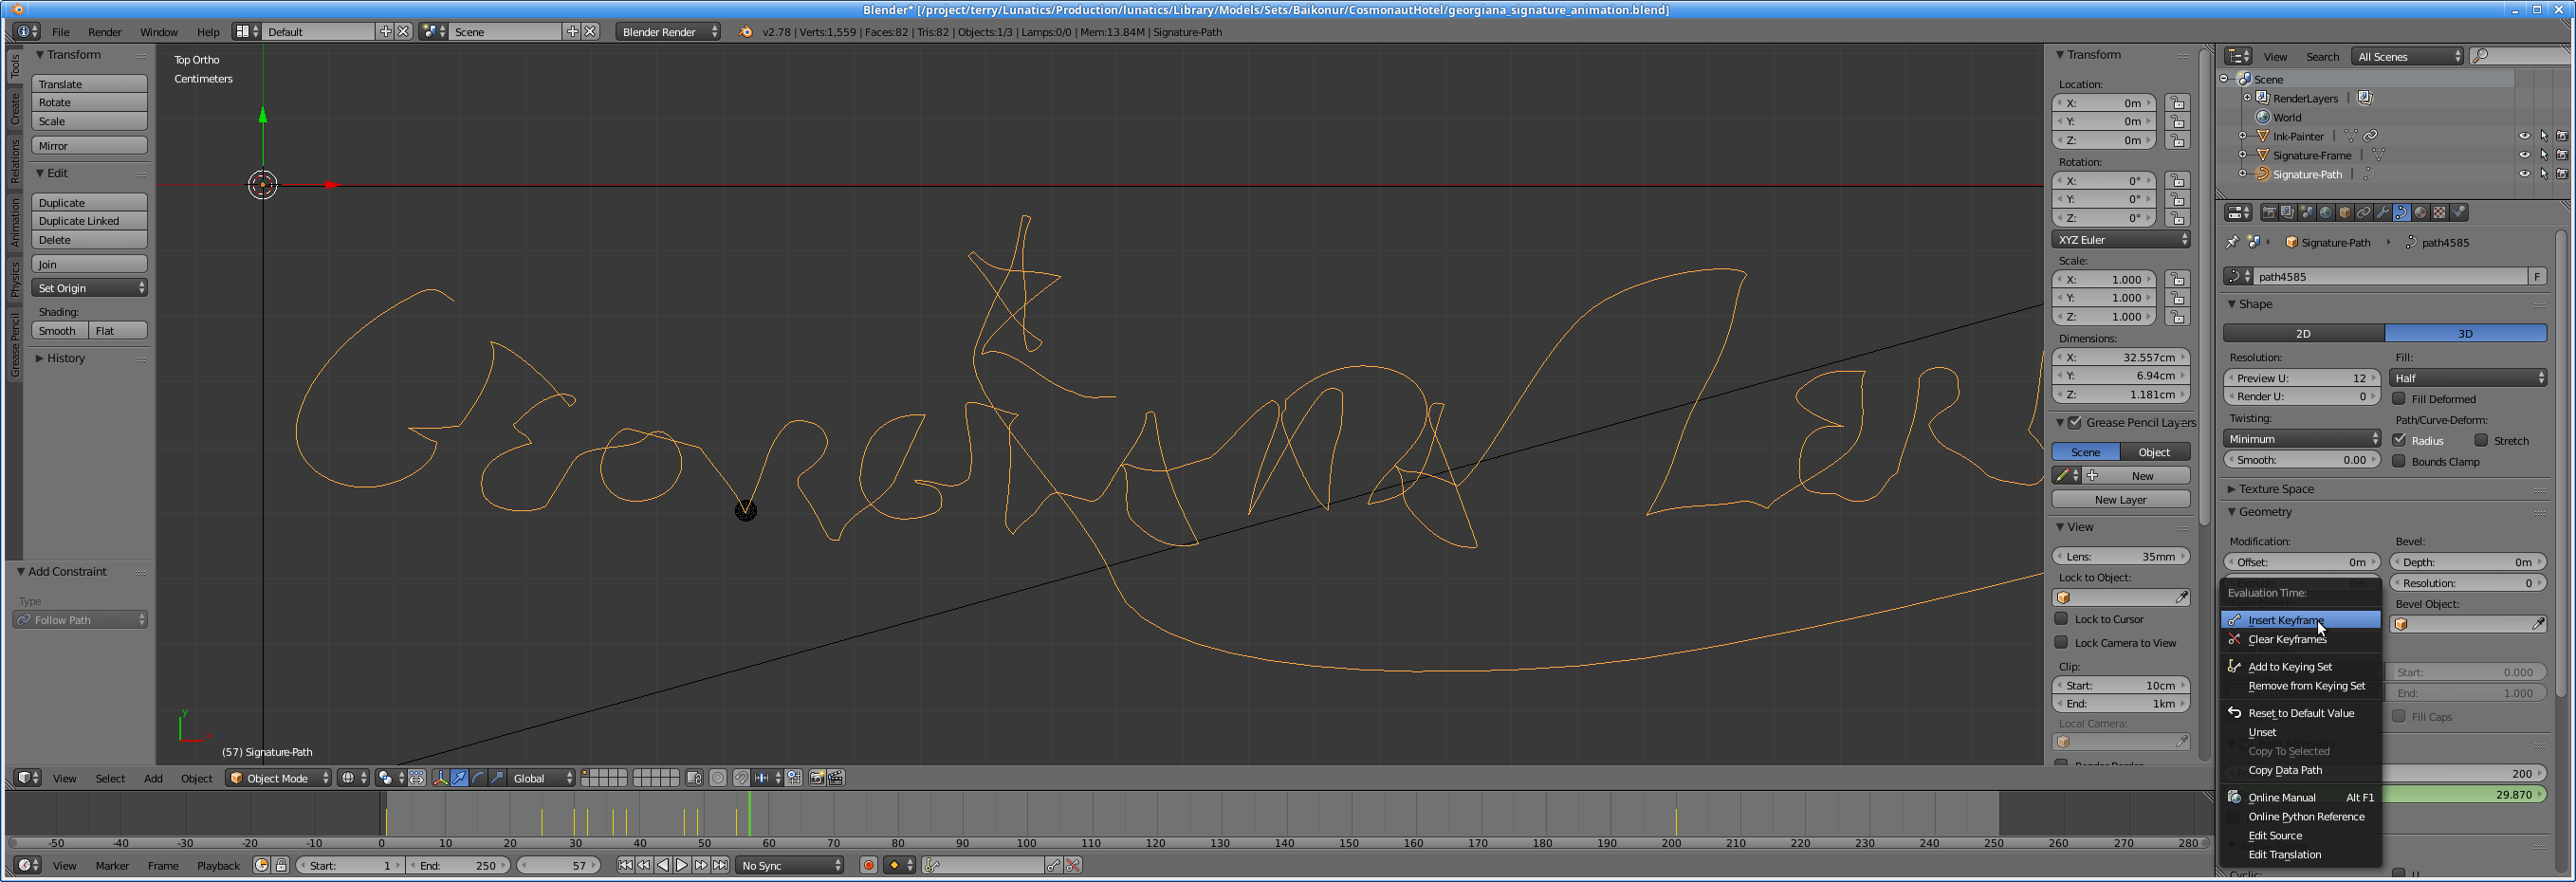
- Select the animation path “Signature-Path” and the curve panel in the properties window.
- Set the path to have 600 frames (setting a path animation to the same number of frames as the animation is a useful rule of thumb, though not required).
- Move to frame 1 (timeline) and set a key frame for the curve evaluation of 0.0, then move to frame 600 and set a key frame for 600.0.
We now have the simplest possible animation for the brush. If you play it back, you can watch the brush object trace out the letters. If you map the original signature texture onto the frame and you are in Blender’s “Materials” view mode, you can directly watch the brush object tracing along the letters in the texture.
The animation is very primitive and mechanical, though — not at all like the motion of someone writing. For one thing, a person spends more time writing the actual strokes, but very little time lifting and moving the pen to the next stroke. They also tend to slow down or pause at the ends of strokes and in more intricate turns in the lettering.
To fix this, I needed to estimate how long each piece of curve would be traversed. I decided that Georgiana would take longer drawing each stroke, while the pen would jump quickly along the arcs where the pen comes off of the page. Some of the larger also letters take longer. In the end, I wound up with key frames at least at the beginning and end of each letter, with a few extra ones in the middle of letters.
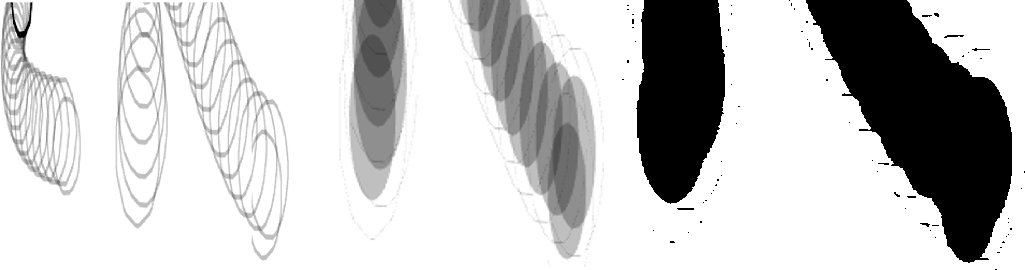
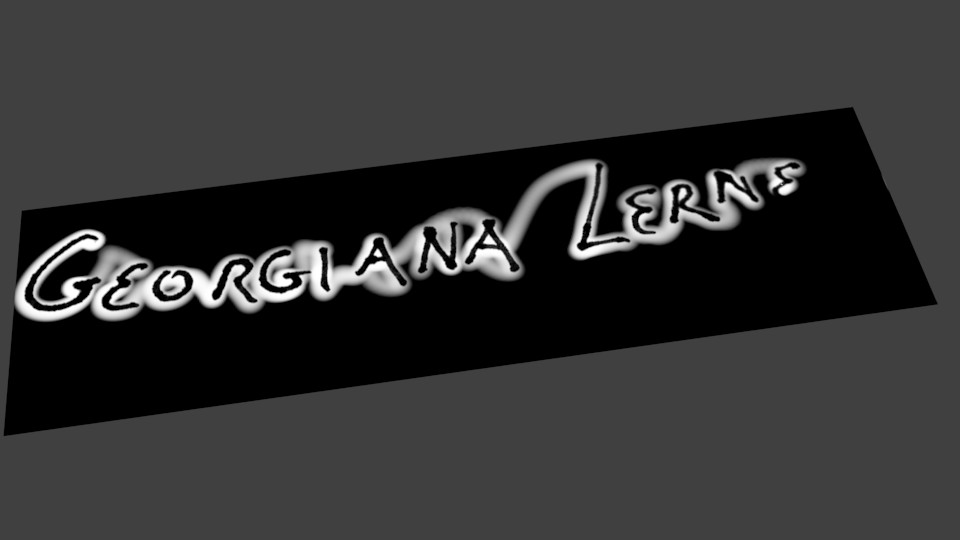
Initial tests with this rig worked okay, but I found that my brush wasn’t leaving the surface fast enough, so I’d get a lot of streaking between letters. You can see in this image, one of my early tests. The white mark is the dynamic paint, while the textured signature is in black:
I didn’t want to change the path, because it’s also going to be used to direct the motion of the pen. So instead I animated the brush object itself, lifting it up off of the page between letters:

I’ve also animated the size of the brush — I’ll explain that further down.
Setting Up Dynamic Paint
Now that we have an animated object to act as the brush and a canvas object that we want to use the dynamic paint simulation on, we need to set them up in Blender. First, select the brush object (actually called “Ink-Painter” in my file), then click on the “Physics” panel in the properties menu. Select “Dynamic Paint”, then “Brush”. Due to some apparent bugs with using the “mesh volume” approach, I found it worked better to use “mesh volume + proximity” for my brush. I set the proximity to “0.080” and made the mesh a little bit smaller so that the proximity value wouldn’t make the paint area too large. I used “absolute alpha” which means that the paint will go to full depth immediately, rather than showing layers of paint with partial transparency (although it is possible to fix the alpha in the compositing phase below). Here’s my brush settings:
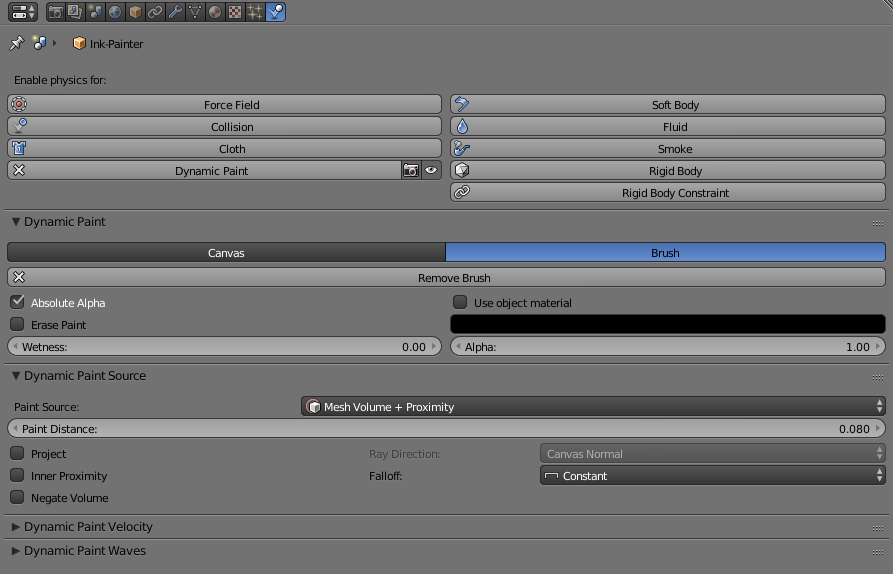
Choosing “Absolute Alpha” helps to get a hard paint effect rather than successful gradual steps. The “Mesh Volume + Proximity” mode was the best I found after many different tests. I initially tried to use the “Object Distance” mode, but this did not work at all — it appeared that the brush didn’t move at all and just sat at the origin. This might be because it was using local coordinates instead of global (since most of the brush’s motion was set by following the Signature-Path object, the brush didn’t move much in its own local reference frame). Just using “Mesh Volume” seemed to be buggy, since for shapes, it would only detect the outer shell of the mesh instead of the entire volume. Too large a proximity would make the brush too large, though. So I compensated by shrinking the brush object and setting the “Paint Distance” value appropriately (even though I never figured what units it’s supposed to be in).
Next, I select the “Signature-Frame” object, and set it up as the Dynamic Paint canvas. Note these are my setting for the final render — I suggest using a lower resolution (256 or 512) for testing:

The “Image Sequence” mode works by outputting the dynamic paint effect to a series of images which can then be used as a material texture. Once this is set up, clicking on “Bake Image Sequence” under the “Dynamic Paint Output” tab will generate the image files. We could theoretically use this result directly — here’s what that would look like:
Using the Dynamic Paint Mask to Reveal the Texture
But what I actually did is to use this video texture as a mask to reveal the already-prepared drawing. This allows us to get the fine style of the writing as originally drawn, while getting the match to animation from the dynamic paint effect. For this, I use the dynamic paint texture as a node in combination with the image texture, both driven from the same UV map. Here’s my basic node system:
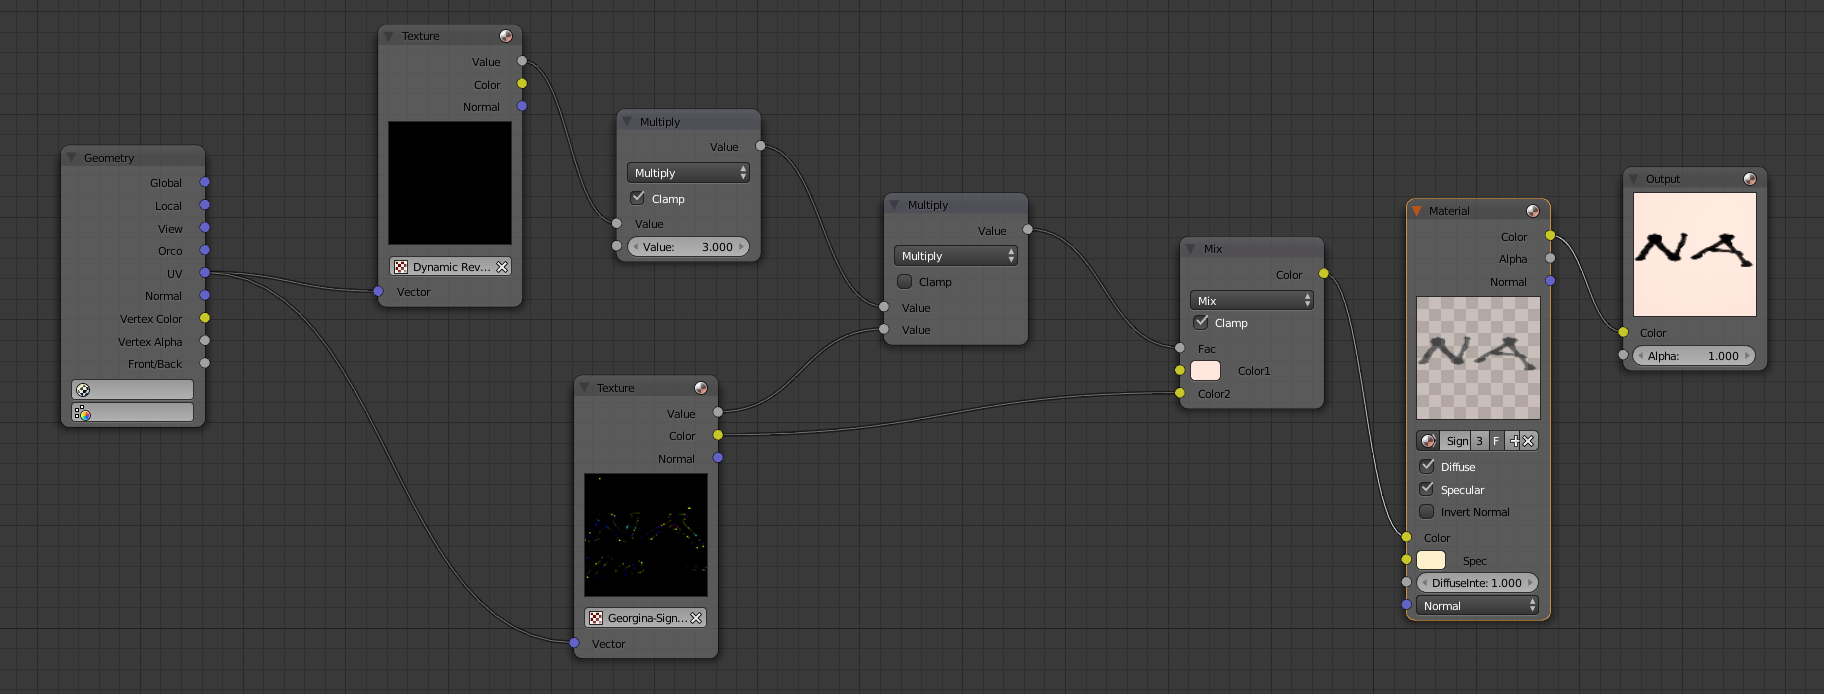
The basic idea here is that we use the alpha channel from the dynamic paint texture to control the texture input from the pre-drawn texture. I’ve added an additional multiplication stage on the alpha output from the dynamic paint, which increases the “hardness” of the alpha. Then the alpha from the pre-drawn texture is also multiplied in. And finally, the color from the pre-drawn texture is applied, moderated by this alpha effect. This is then used as color input for the material.
Here’s an early attempt based on this system which used a fixed-sized brush:
This reveals a bit of a problem which can blow the illusion with the reveal technique, particularly with the pentagram star used over the “i”:

What’s happening is that the dynamic brush is wider than the line, and where it crosses a line that is meant to be drawn later, that line is revealed, even though it shouldn’t have been drawn yet. The trick is to make sure the dynamic brush isn’t too wide, particular where one pen stroke is crossing another. This is the reason why I also carefully animated the brush size to keep the dynamic paint close to the pre-drawn stroke width, as shown in the earlier GIF.
Adding an Animated Pen
The next step is to add a pen and animate it to follow the writing. For this test I just modeled a very simple stand-in pen object. I then added an armature with a single bone and parented the pen model to that bone (I’m not really sure if the armature is gaining me much over controlling the pen object directly, but I expect the armature approach will be useful in the final shot, so I’m using it now):
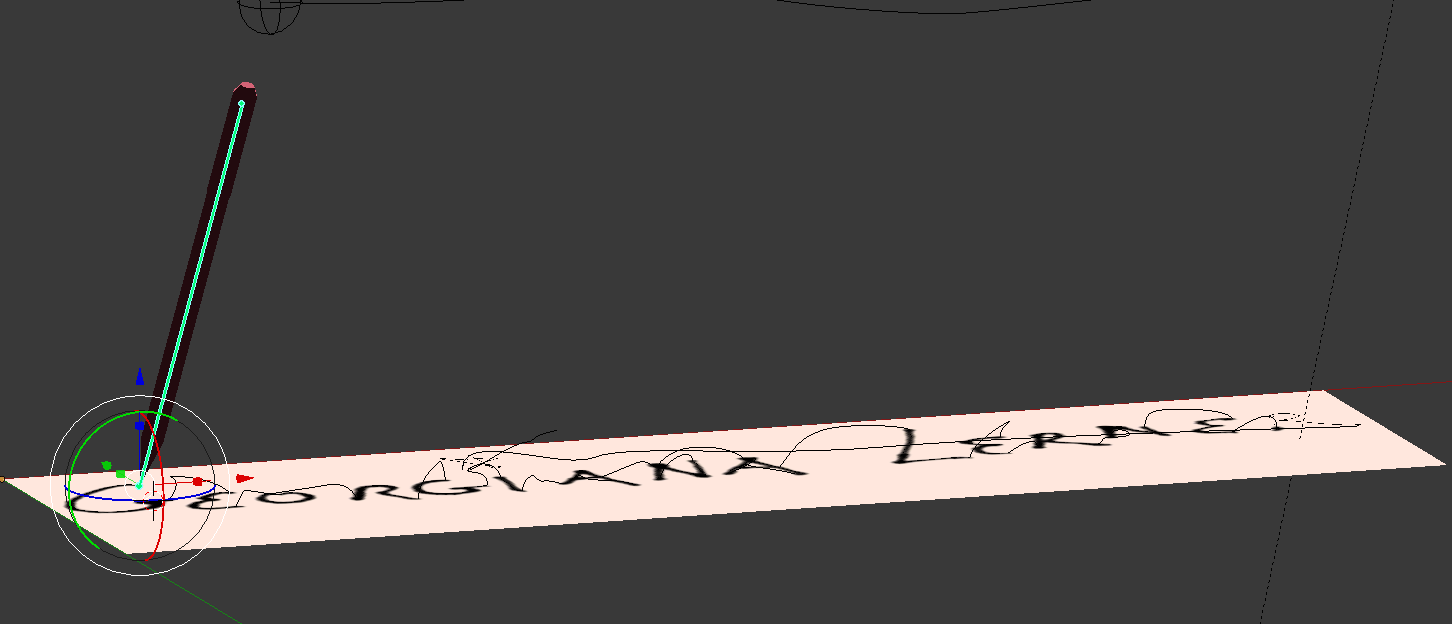
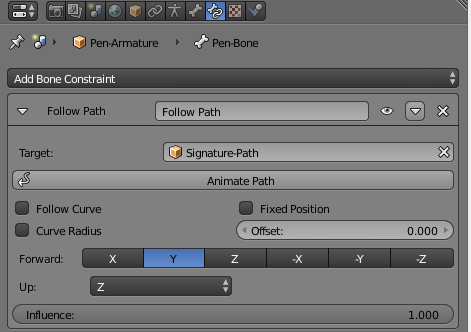
Now the first part is easy: I just want the tip of the pen to follow the “Signature-Path” object. That I do with a “Follow Path” bone constraint:
This would produce an animation that might be acceptable for some purposes. But I want the pen to move a little bit more naturally (especially since I also plan to add a hand holding it later). When you write with a pen, you don’t usually write with your whole arm, nor do you hold the pen perfectly straight relative to the paper. Instead you mostly control the pen with your wrist, so that the top of the pen follows a much smoother path than the tip in contact with the surface. To get this effect, I created a second curve/path object in Blender (directly this time), approximating a smoothed out version of the pen’s motion. I then set up an empty object to follow this path, and of course, animated keyframes for it, so that it would be in about the right position relative to where the pen tip is writing:

And finally, we have one more bone constraint, to make the top of the pen point towards the target empty:
So now the pen tip follows the “Signature-Path” curve, while the top of the pen tracks the “Pen-Top-Target” which is following the “Pen-Top-Path” curve. And that takes us to the finished animation:
Later, I plan to add Georgiana Lerner, holding the pen. I have not figured that part out yet, but I’m hoping I can use this rig to control the IK controller for her hand.
