
HIGHLIGHTS:
CLOUD CONTROLLER CREATED
This month, I added the Cloud Controller rig and the Horizon Rig and their respective geometries to my sky rig, completing it for use with the Baikonur Cosmodrome exteriors (and also other Baikonur exteriors).
LAUNCHPAD MECH UPGRADED
I also re-rigged the Launchpad mech to allow for some additional animation I discovered I needed: I can now move the locomotive to push the Tanker car into place, and I can hide either or both trains by pushing them under the landscape, to do shots that shouldn’t include them.
I also corrected some modeling errors on the Transporter-Erector model, made changes to the buildings around the pad, and I solved the “floating track syndrome” by adding railroad embankments and a curve-based track extension to go from the straight mesh-modeled tracks to merge with the drawn tracks on the terrain texture.
LUNATICS S1E01-SR “Soyuz Rollout”
I setup most of the animation for the S1E01-SR “Soyuz Rollout” sequence, including the timelapse and realtime sections, although I have not yet added the billboard extras (and there’s a problem with the billboard plants, when they are silhouetted against the sky or distant background.
I did live screencasting with commentary for most of this, which I hope to cut together for the “Film Making For Lunatics” (FMFL) tutorial/case-study project.
PACKAGED ABX FOR INSTALLATION
Fixed the installation process on Anansi Blender Extensions (ABX), our studio tool. This helped a lot in setting up shot files for S1E01-SR.
LIB-RAY FUNCTIONAL TESTS WRITTEN
I got the code for the Lib-Ray Player partially imported into Eclipse earlier, and this month, I wrote out a “functional test” to get my code to pass in order to consider the development project successful.
Aug 4, 2020 at 4:00 PM
Cloud Animation Tests
For the timelapse sequences, I’m creating a procedural animated cloud effect, and I’m setting up a “cloud controller” using an armature control panel with drivers, similar to the sunlight rig and the launchpad control panel.
But to do this, I needed to check that the texture is still working correctly and also get the right range for the control parameters.
It’s hard to see this with still renders, so I had to create these test animations.
The video shows the texture settings and animation process. What we’re actually looking at here is the “Cloud Deck” object, which is a dome shape, with a transparent cloud texture mapped onto it, which both appears as white clouds in the sky and casts shadows onto the ground below (the “ground” is simply a disk mesh in this test model).
Aug 10, 2020 at 4:00 PM
Combined Sky System

Quick overview render with labels, for the “Combined Sky System” file. This is a Blender background set to provide the sky, horizon, and clouds for outdoor shots.
For this, a patch of the Earth’s surface is modeled as a disk, with a sky dome over it to provide the clouds and ring of backdrop horizon. Controls are provided for the Sun and Moon position from the “Hour Angle” (or time of day). The latitude and north direction are set by adjusting the pose of the Sunlight Controller. When the Sun is close to the horizon, constraints set in to provide the broadening and reddening of the Sun’s glow in the atmosphere.
The Cloud Rig allows the clouds to move as well as evolve during the day, and they also have color and brightness controls to get those early morning pink clouds and bright white daytime clouds, as well as dark clouds at night. The clouds themselves are a simple application of Blender’s built-in “Cloud” texture — not fancy or rigorously accurate, but they do give a petty good impression of cloud shape and movement.
I did have to drop the bump-map effects for the clouds, since the bump-mapping feature doesn’t fully support the procedural cloud texture. In particular, it chokes on the “Z Offset”, which we use for control the “evolution” of the clouds — it only works if the Z Offset is set to zero, and the results can be pretty bizarre, as it also locks the position for any other effects in that texture slot.
The horizon, as a backdrop is a special case, and its brightness and color needs to be animated separately, so the Horizon Rig provides simple sliders to do that animation.

The only direct animation that will be required are the World Sky zenith and horizon colors.
Obviously, there are several non-physical tricks being used here — the “Sunlight Glow” object is behind the Sun, even though it technically models the atmosphere’s effect on the sunlight. But this way, the glow doesn’t distort the Sun’s color. (Also, despite certain Internet conspiracy theories, it turns out that the Earth is not flat, nor is it only 60km across).
The Sun is located 55 km from the center of the set, which means the Sun has to be 480m across to subtend one-half degree, matching the angular size of the Sun in the Earth’s sky.
The horizon ring is some 30 km in radius, and the usable set region is probably about 5 km, which can be filled with the outer set structures, and then the local set where the camera might actually be moved around is a few hundred meters across — which is about the size of the “Launchpad-Ext” set that this will be used around first.
However, there’s nothing keeping me from using this system in other shots later. I definitely will be using it to provide backgrounds for the “Train” sequence at the beginning of this episode, and it will probably even provide the sky for the shot in New York City at the beginning of episode 4, and any other Earth surface exteriors we have later on (the only tweak needed will be to provide a different skyline graphic for the wrap-around backdrop).
The file has a simple “monolith” test set for development use:
I’ll be doing a few more tests, and then I should be able to proceed with animating.
This will probably be a useful “spin off” file, as I’m sure lots of people could use a model for exterior backgrounds like this. So I’m hoping to get this one to a good publication quality and put it up on BlendSwap.
Aug 12, 2020 at 4:01 PM
Final Set Review: Launchpad Exterior
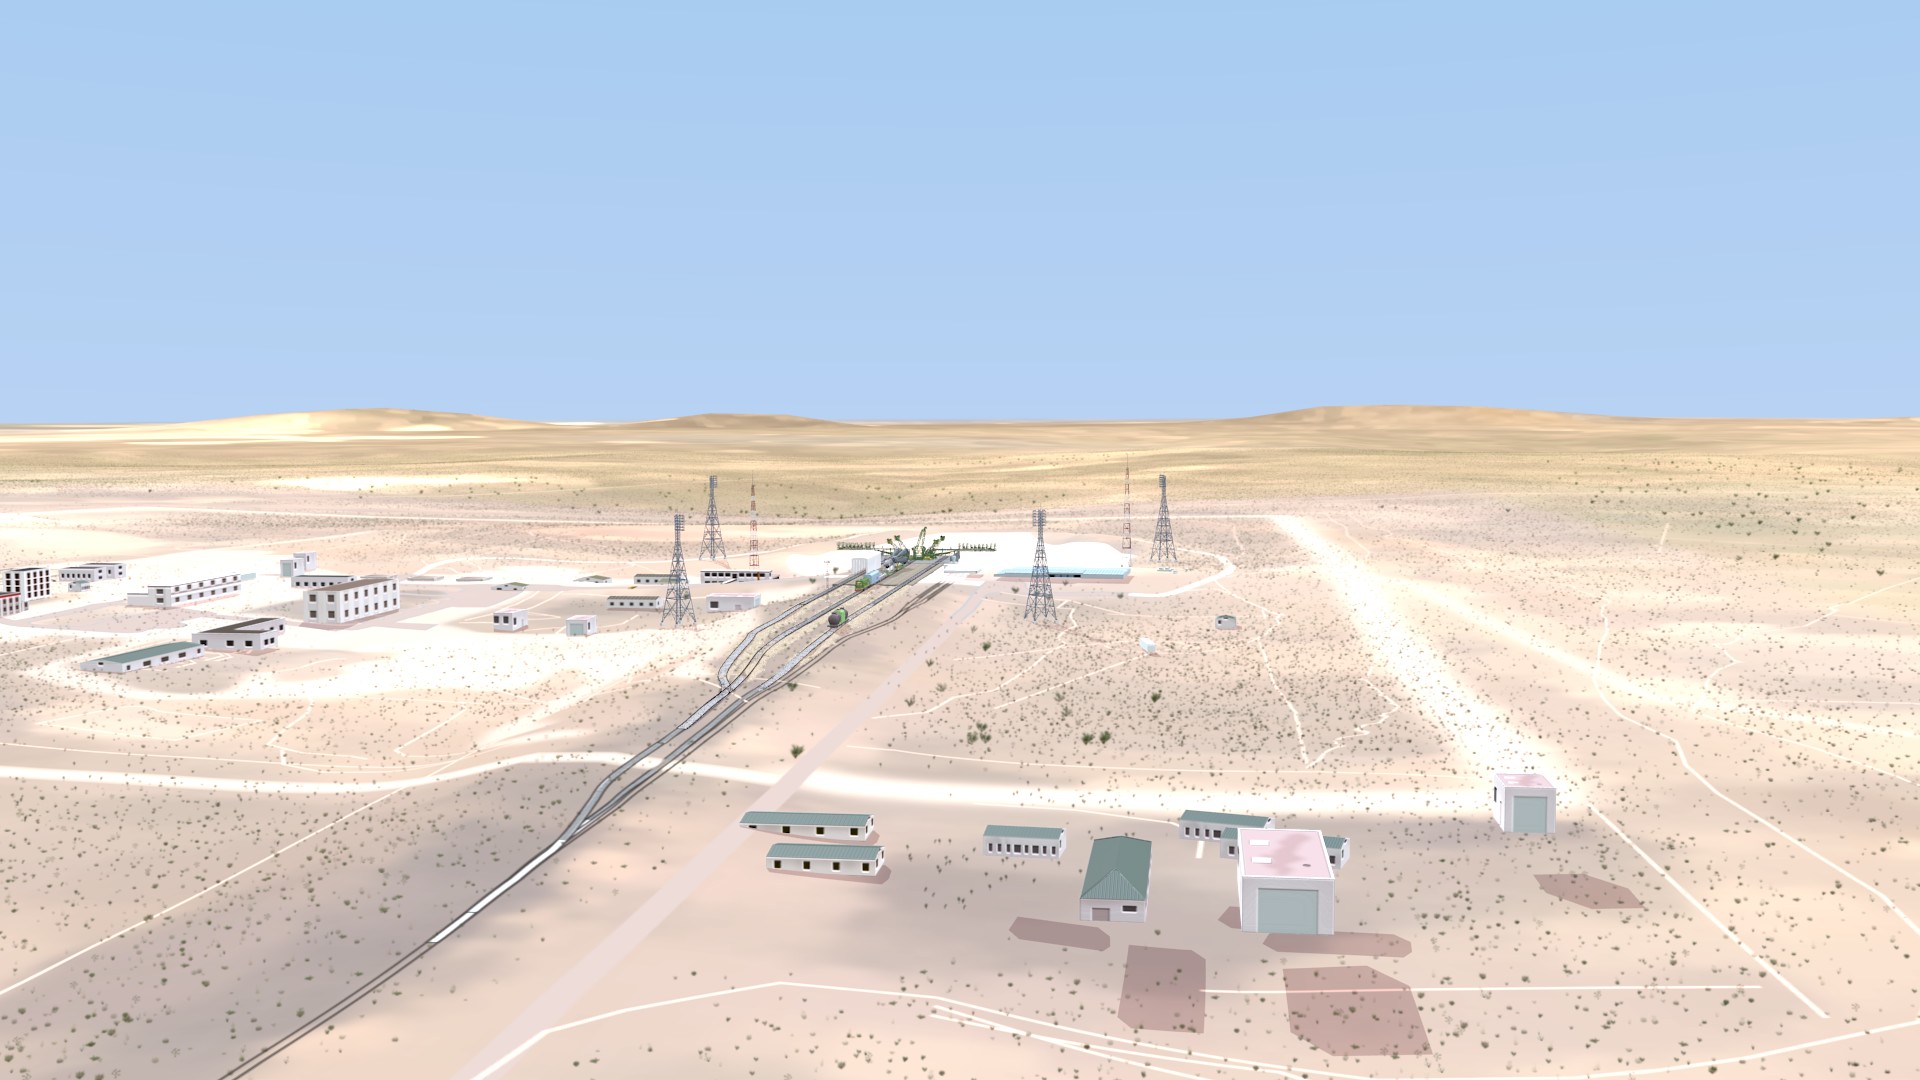
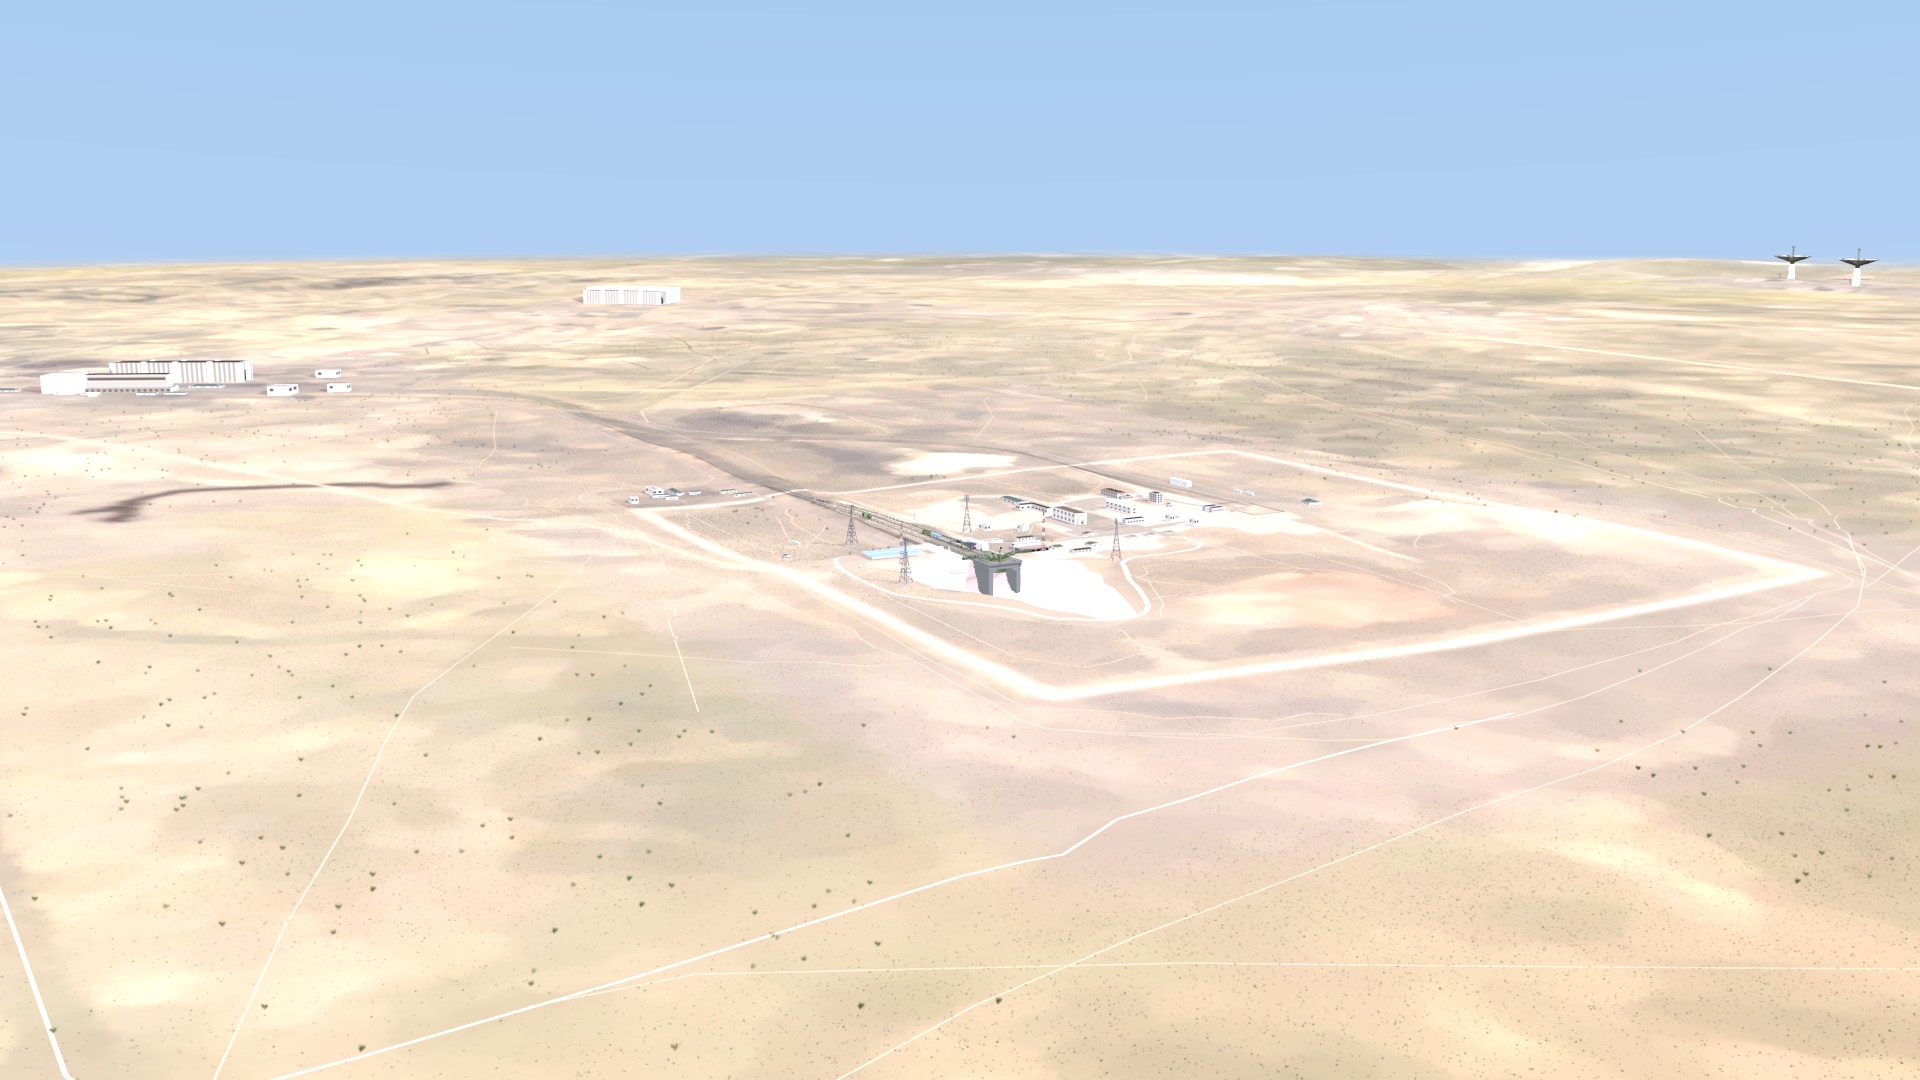
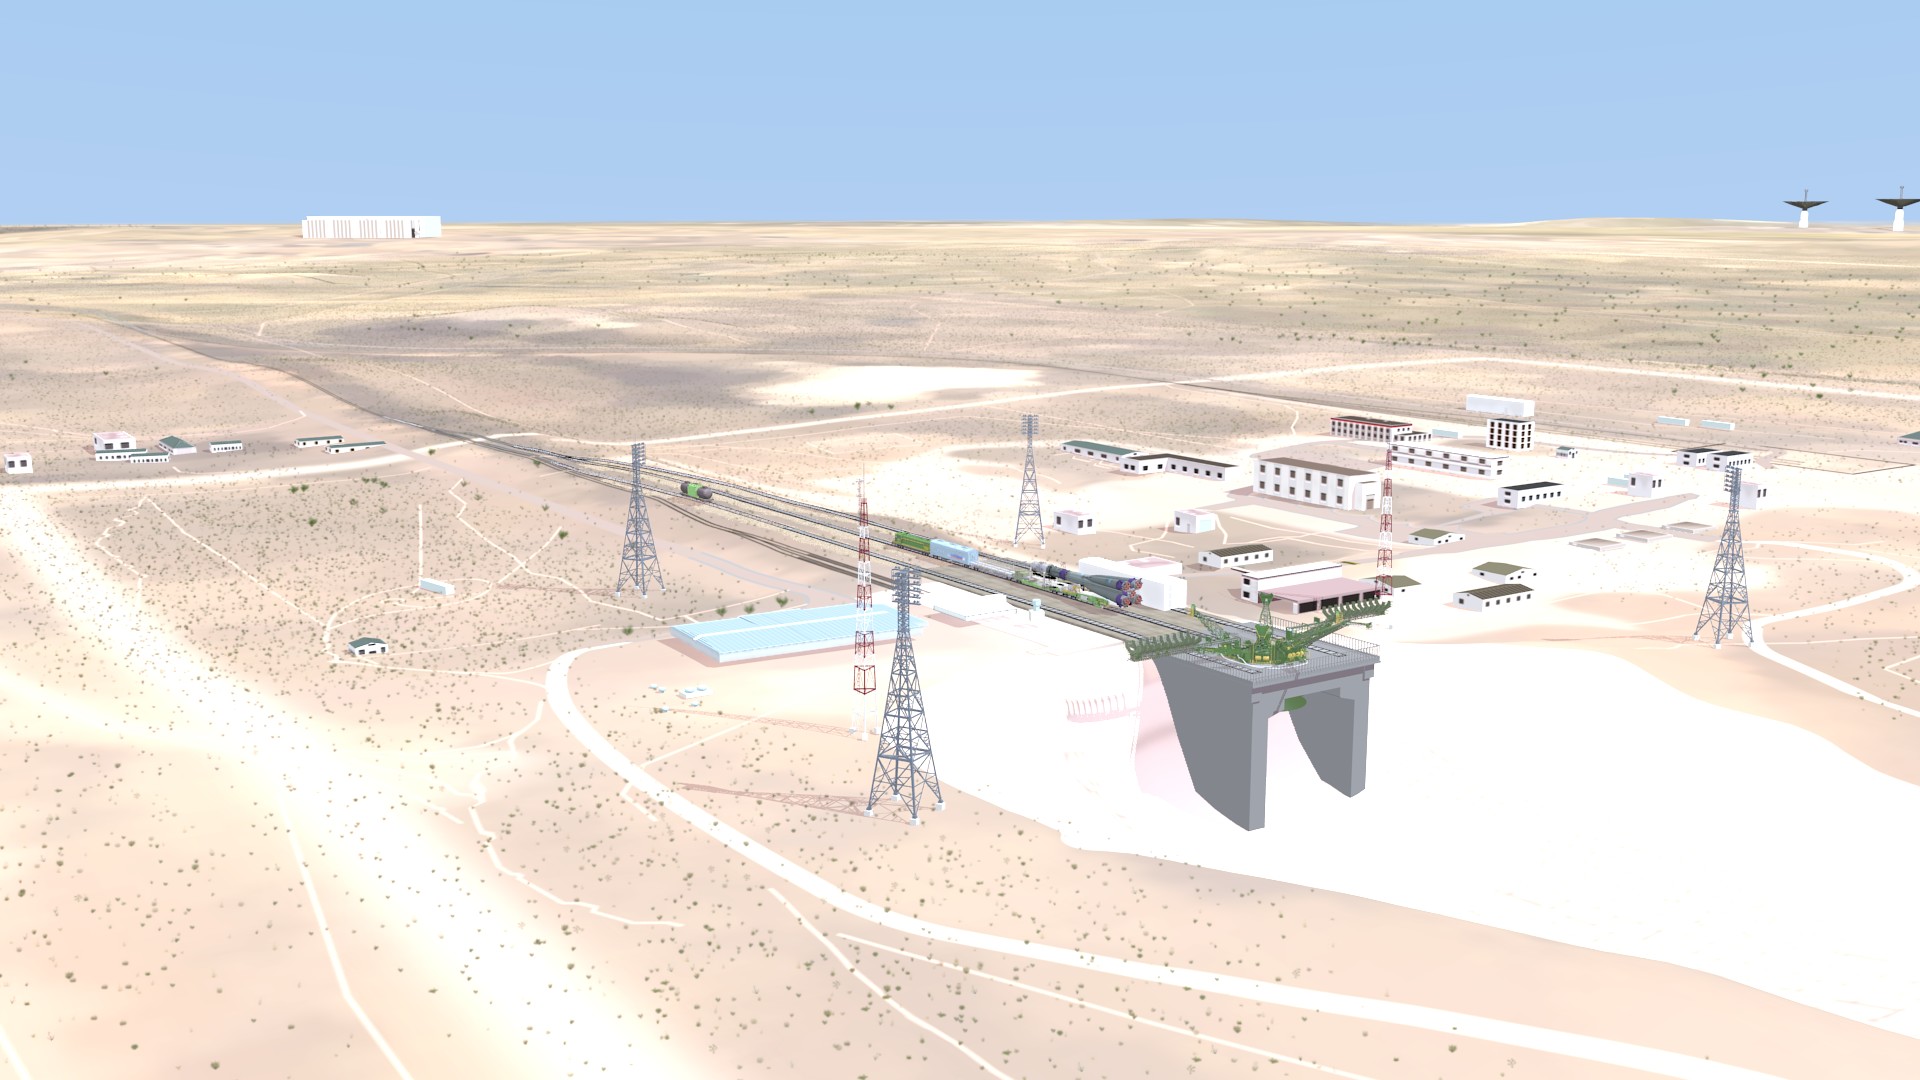
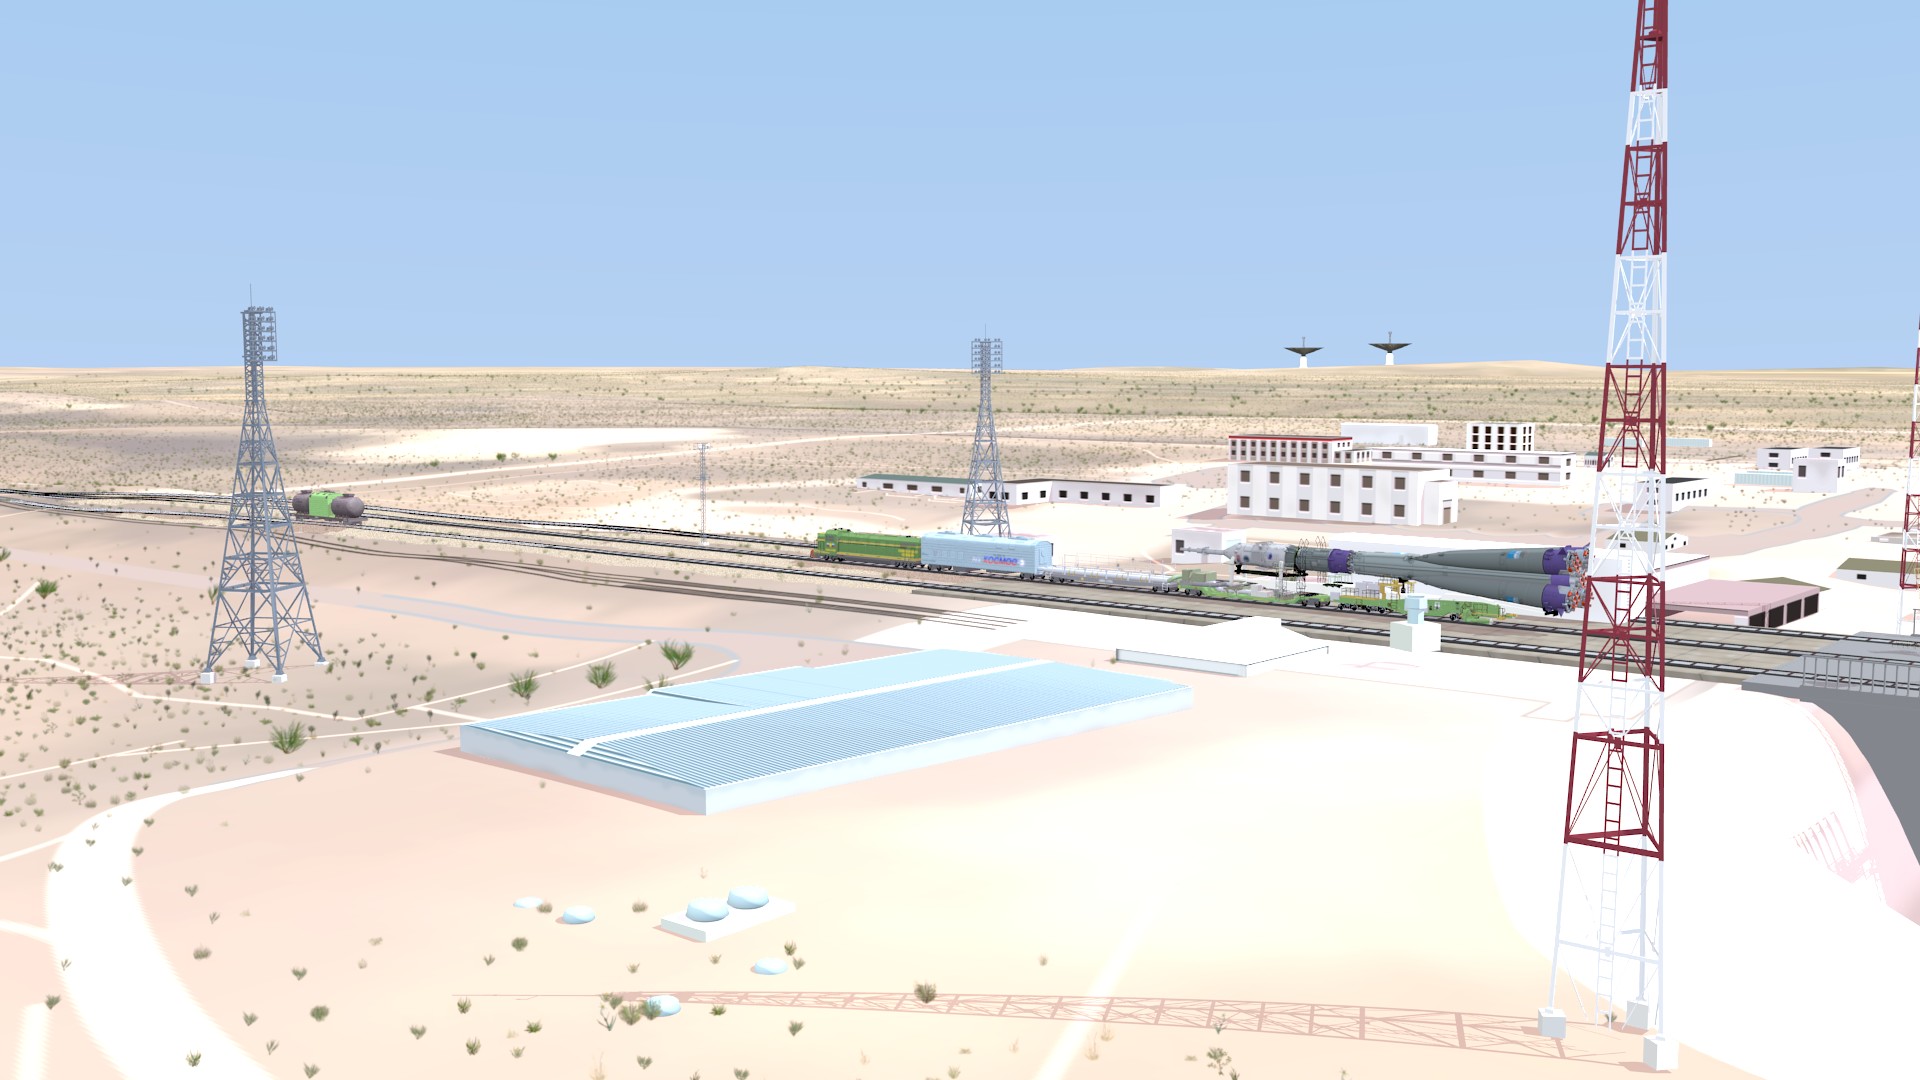
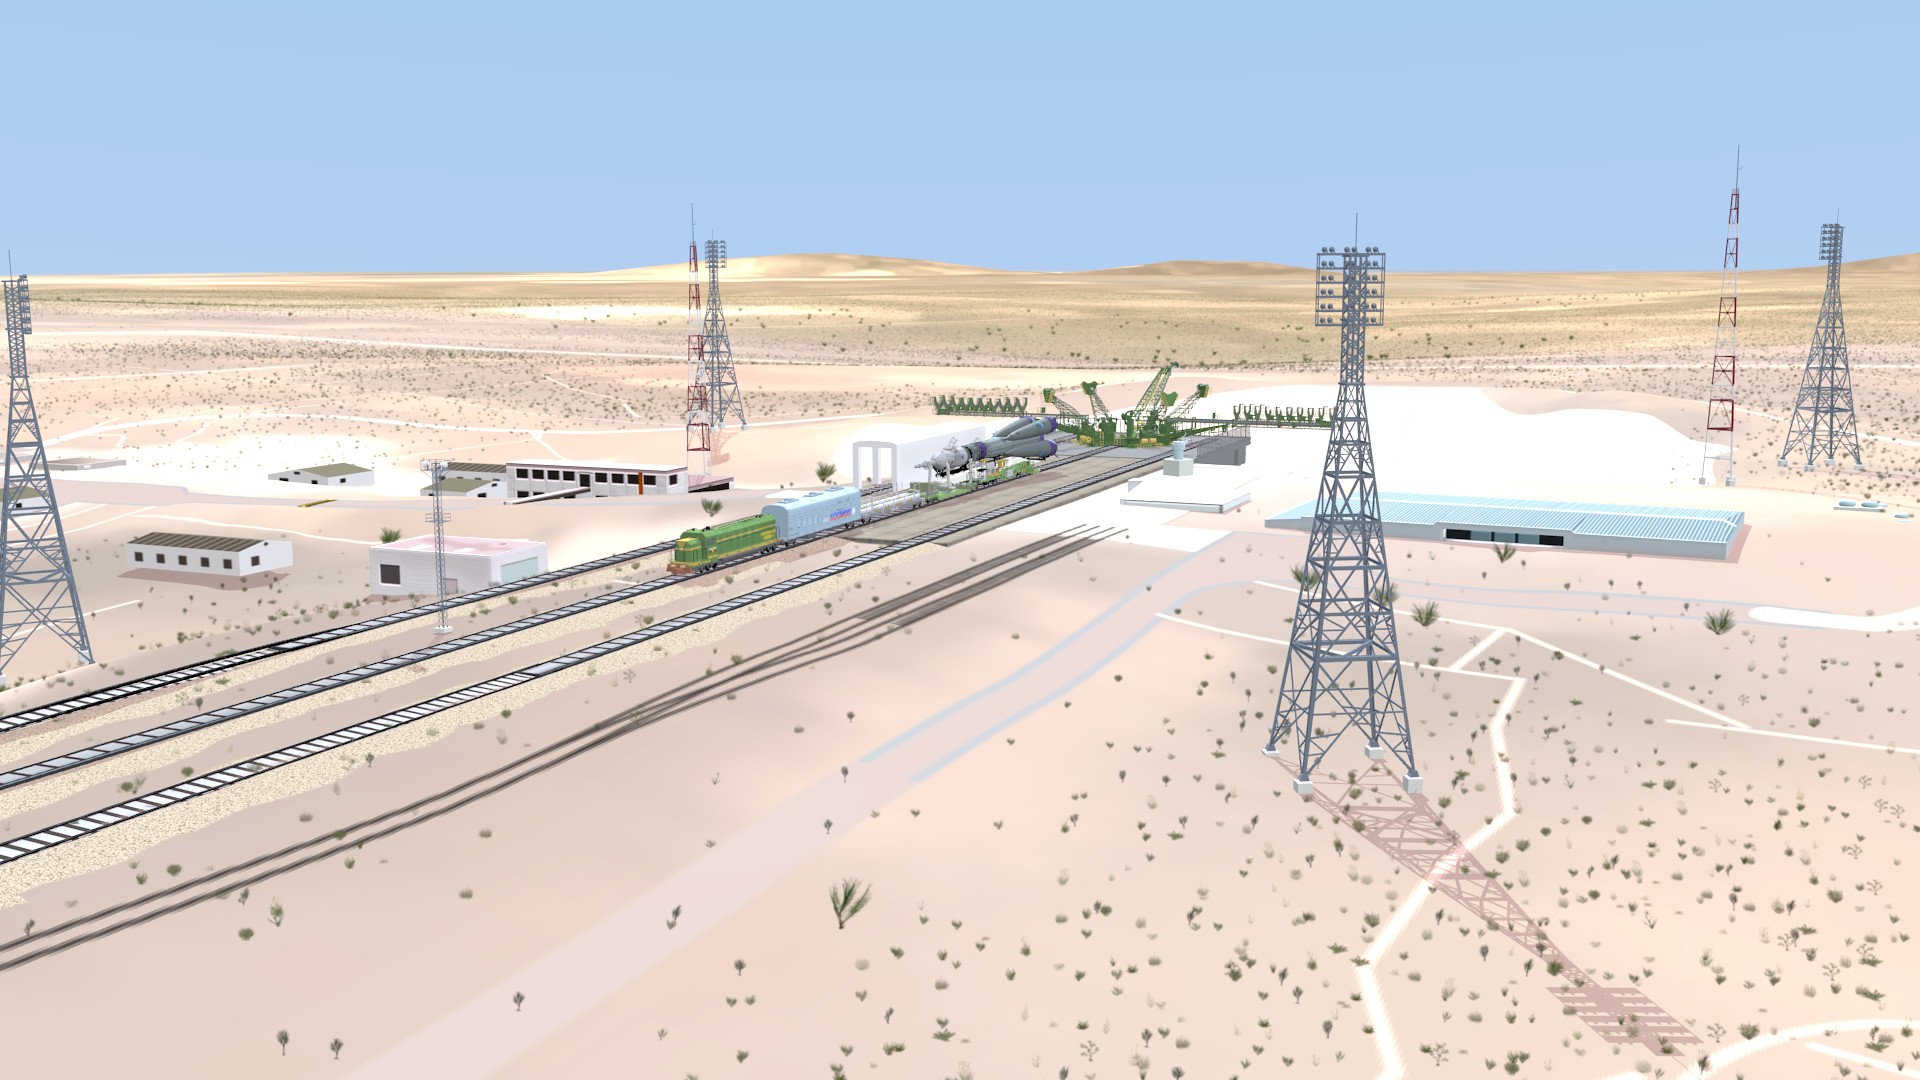
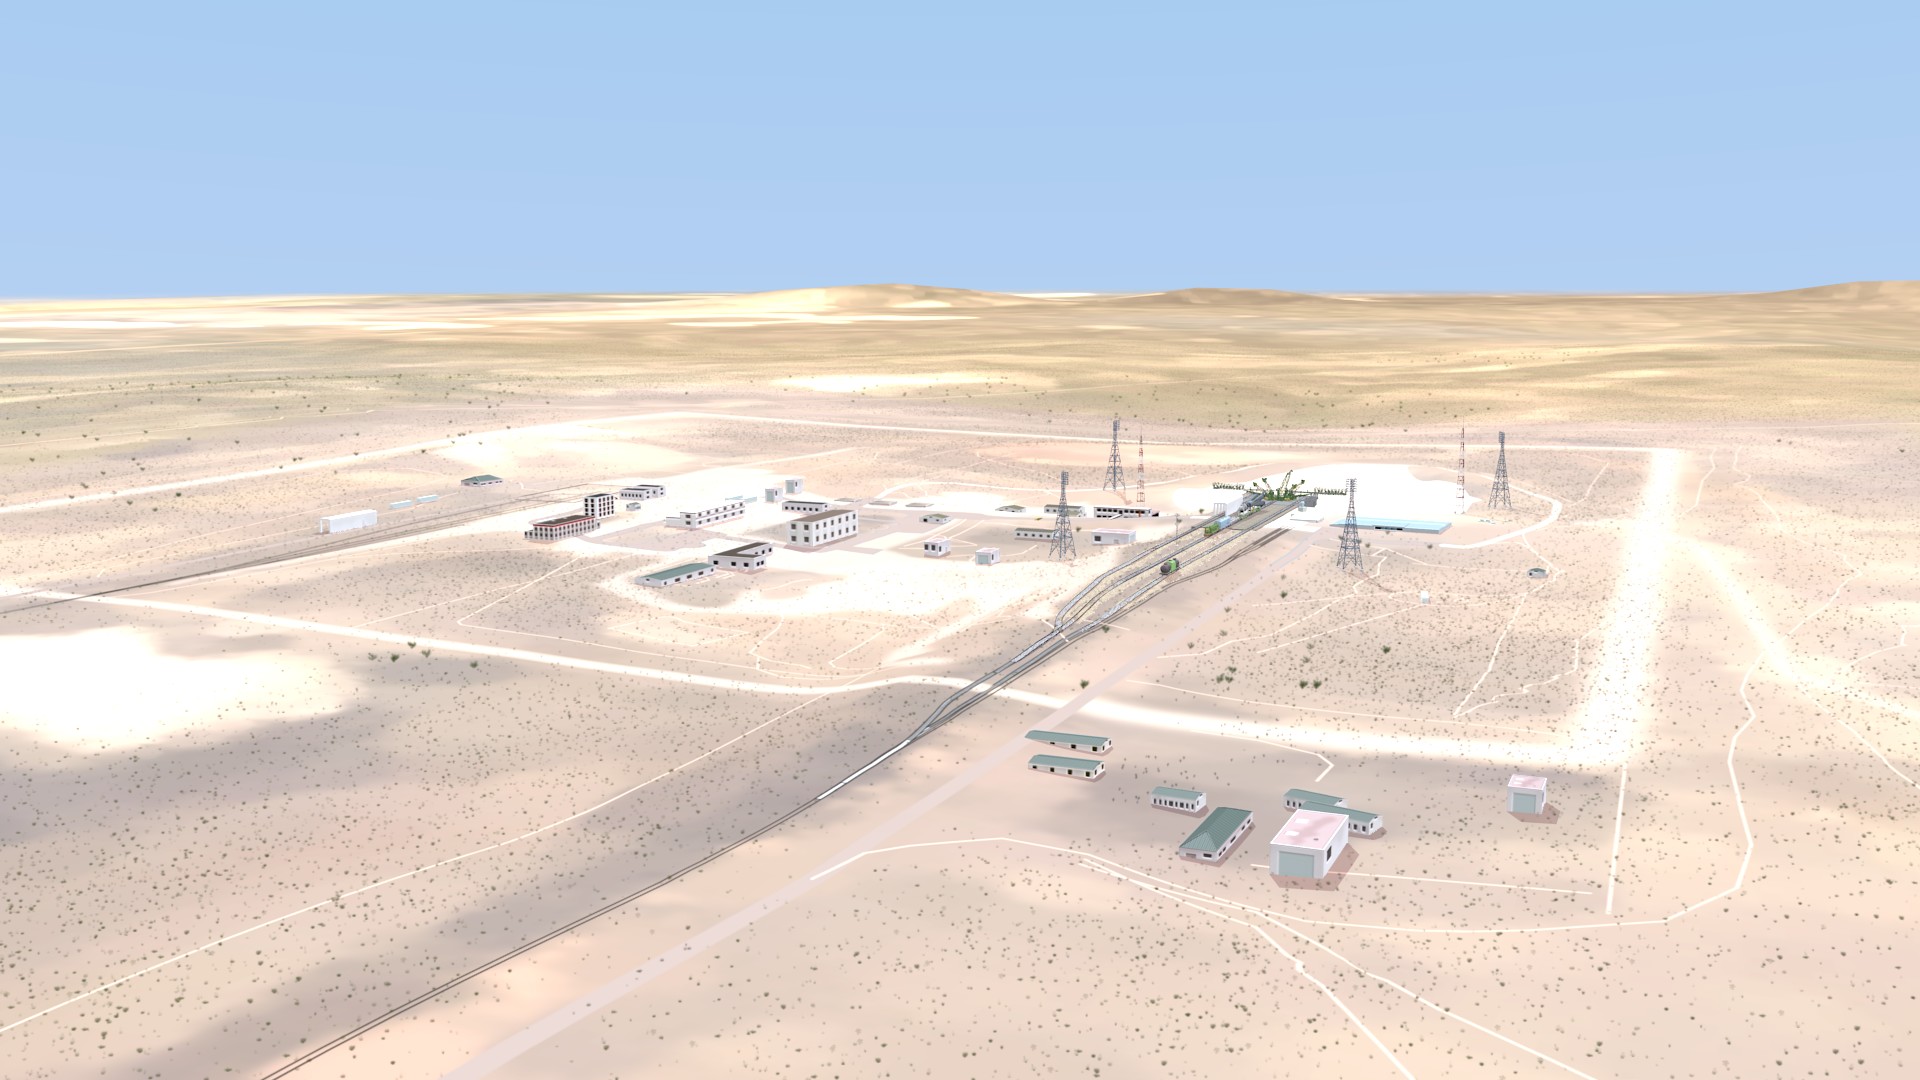
Renders of the set for the Launchpad, after final tweaks to make sure none of the tracks or buildings are floating in the air, or have other noticeable problems. This is using the test lighting in the set, which is not as sophisticated as the sky rig. It’s also missing the distant horizon, which is also part of the “sky” set.
It looks a little more washed out in this light than in the final shot, but I’m mostly checking for shadow problems.
I think this set is finally ready to use.
Next, I will be checking my walk cycle animations for extras that will appear in some of the “Soyuz Rollout” sequence shots.
Aug 16, 2020 at 4:00 PM
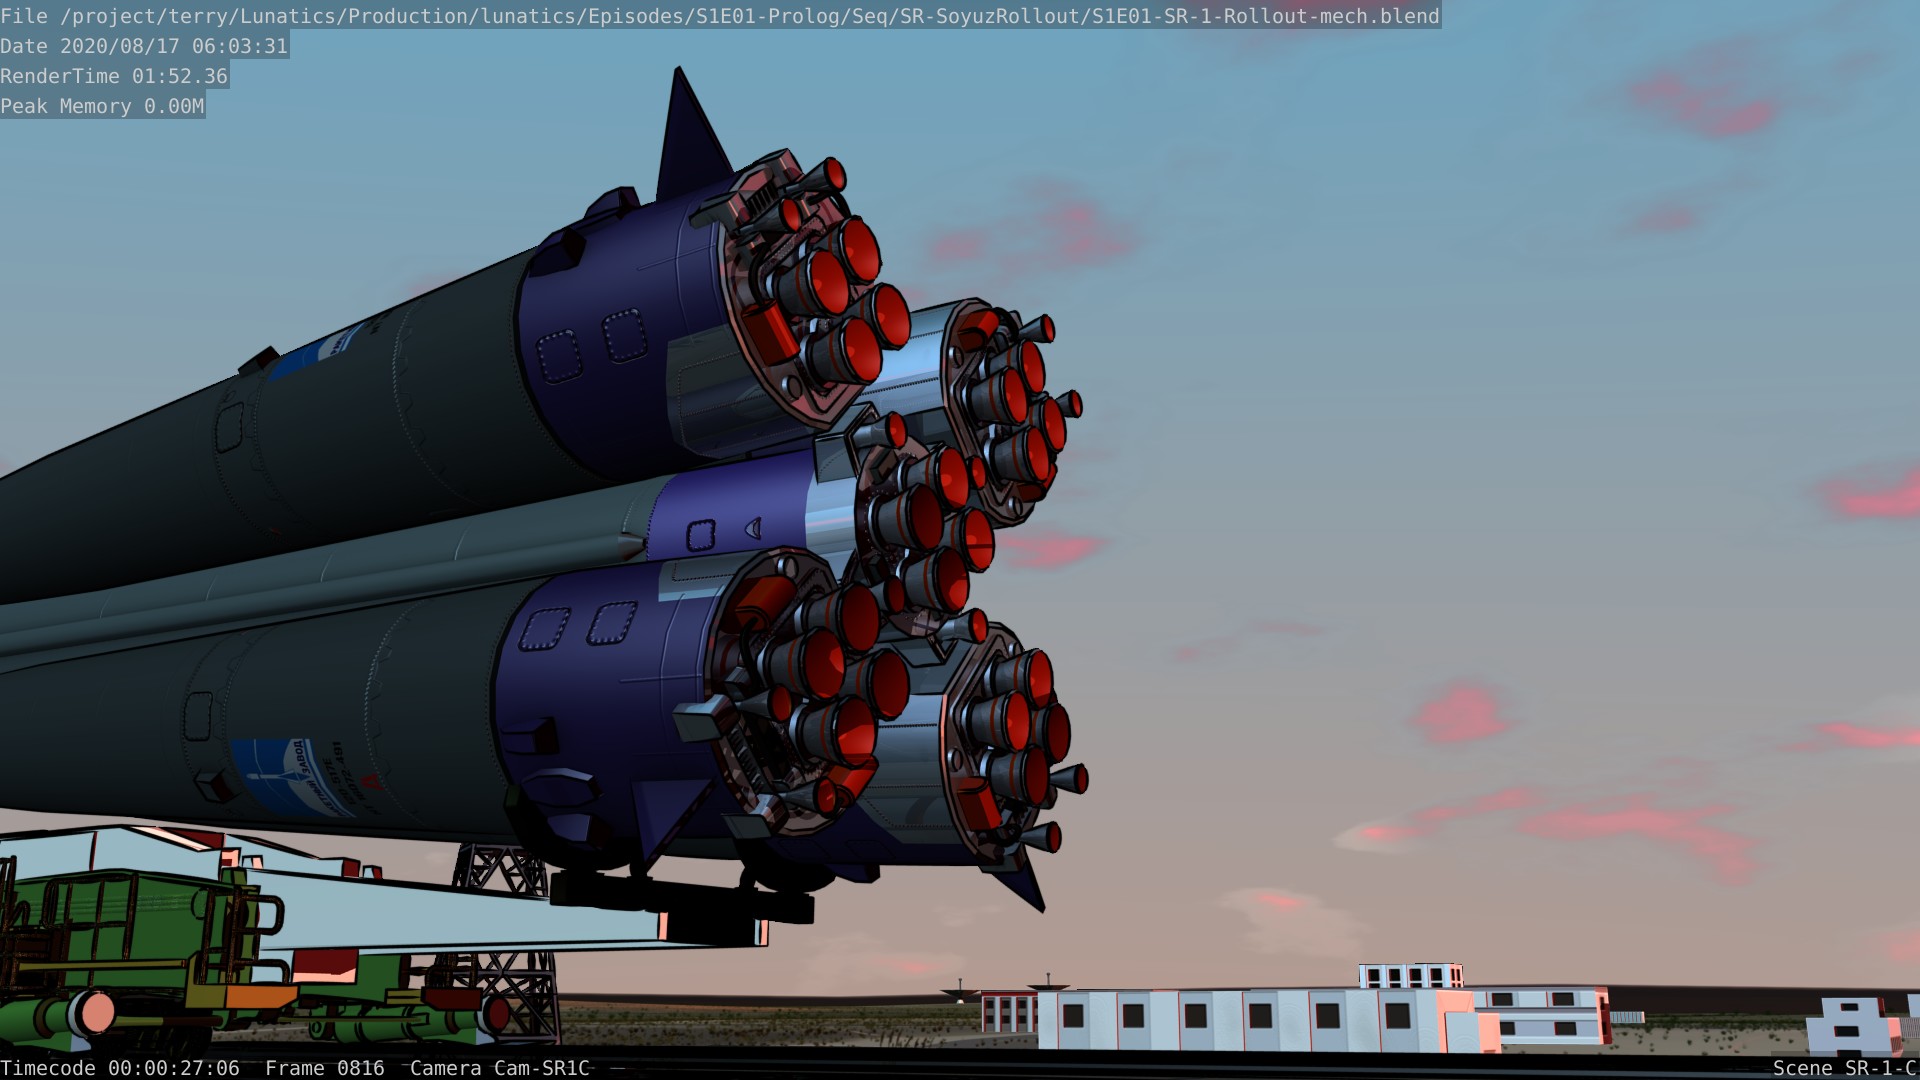
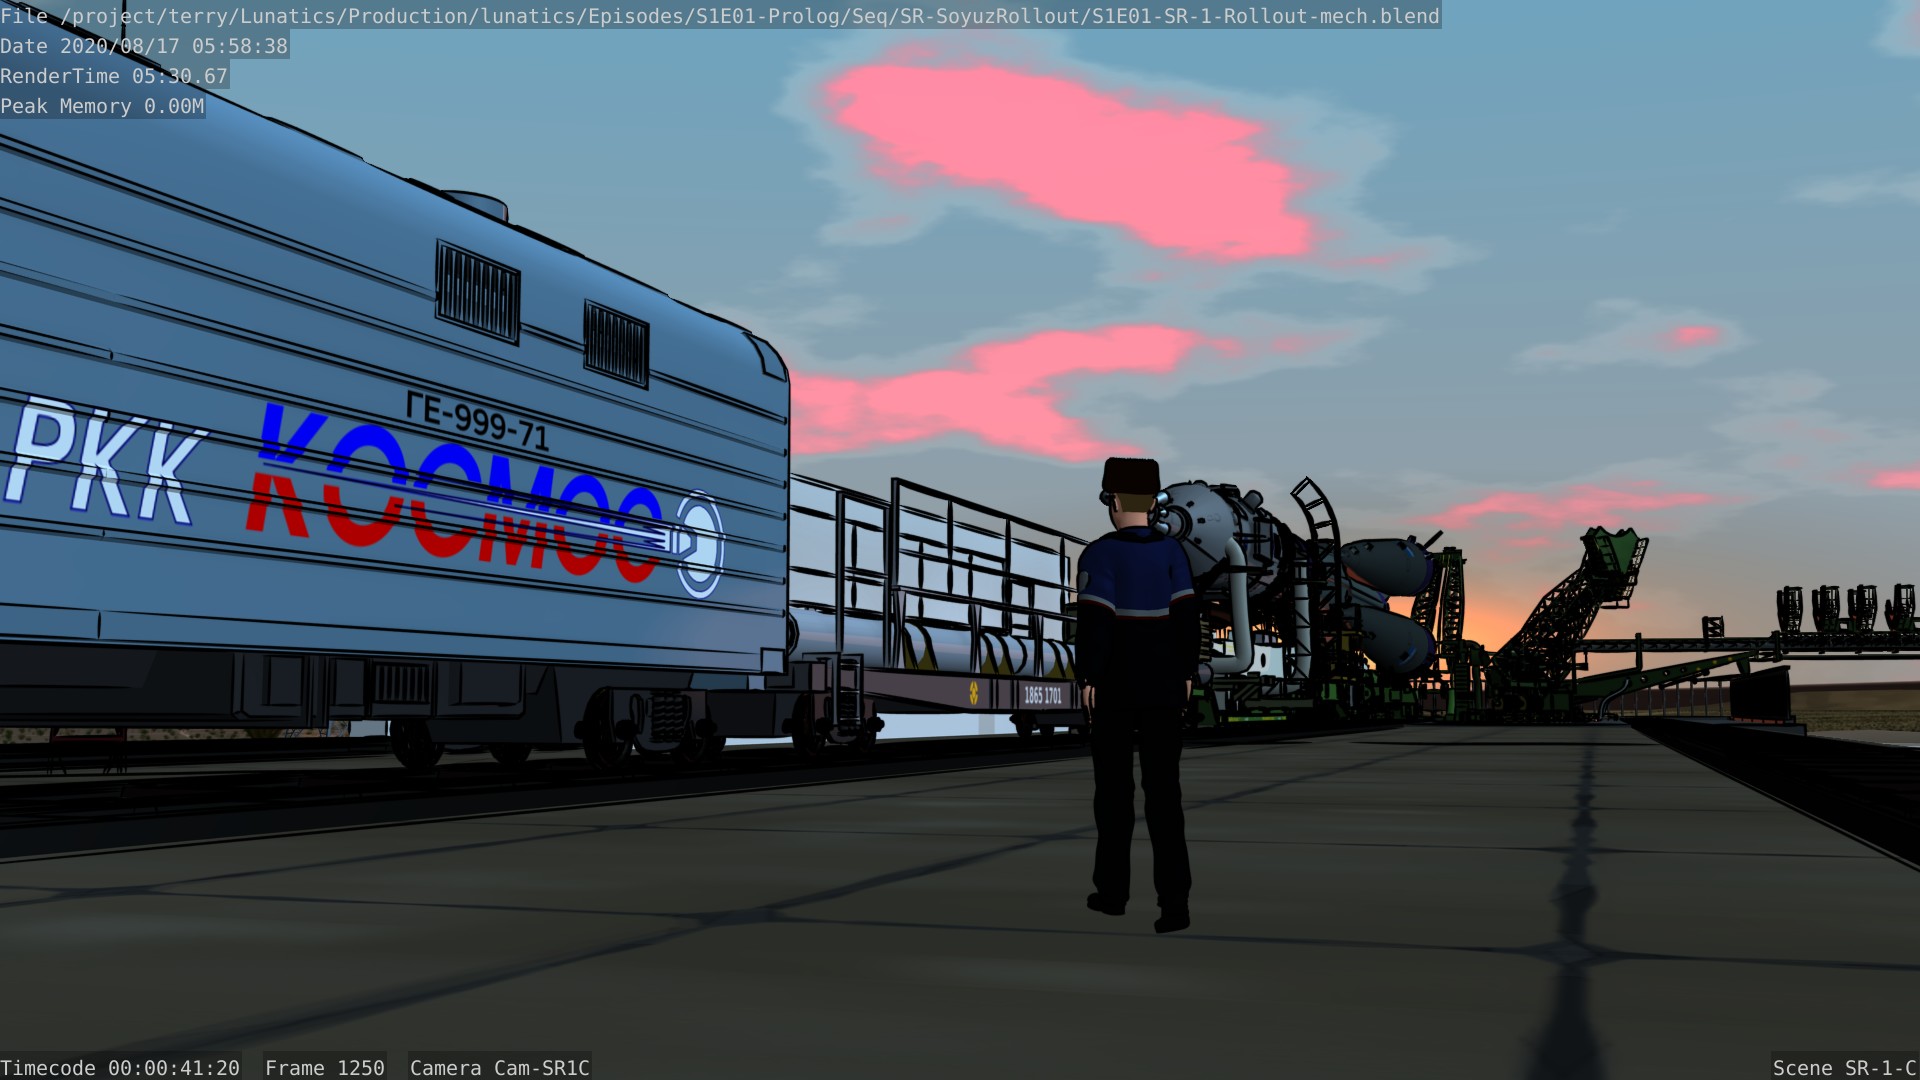
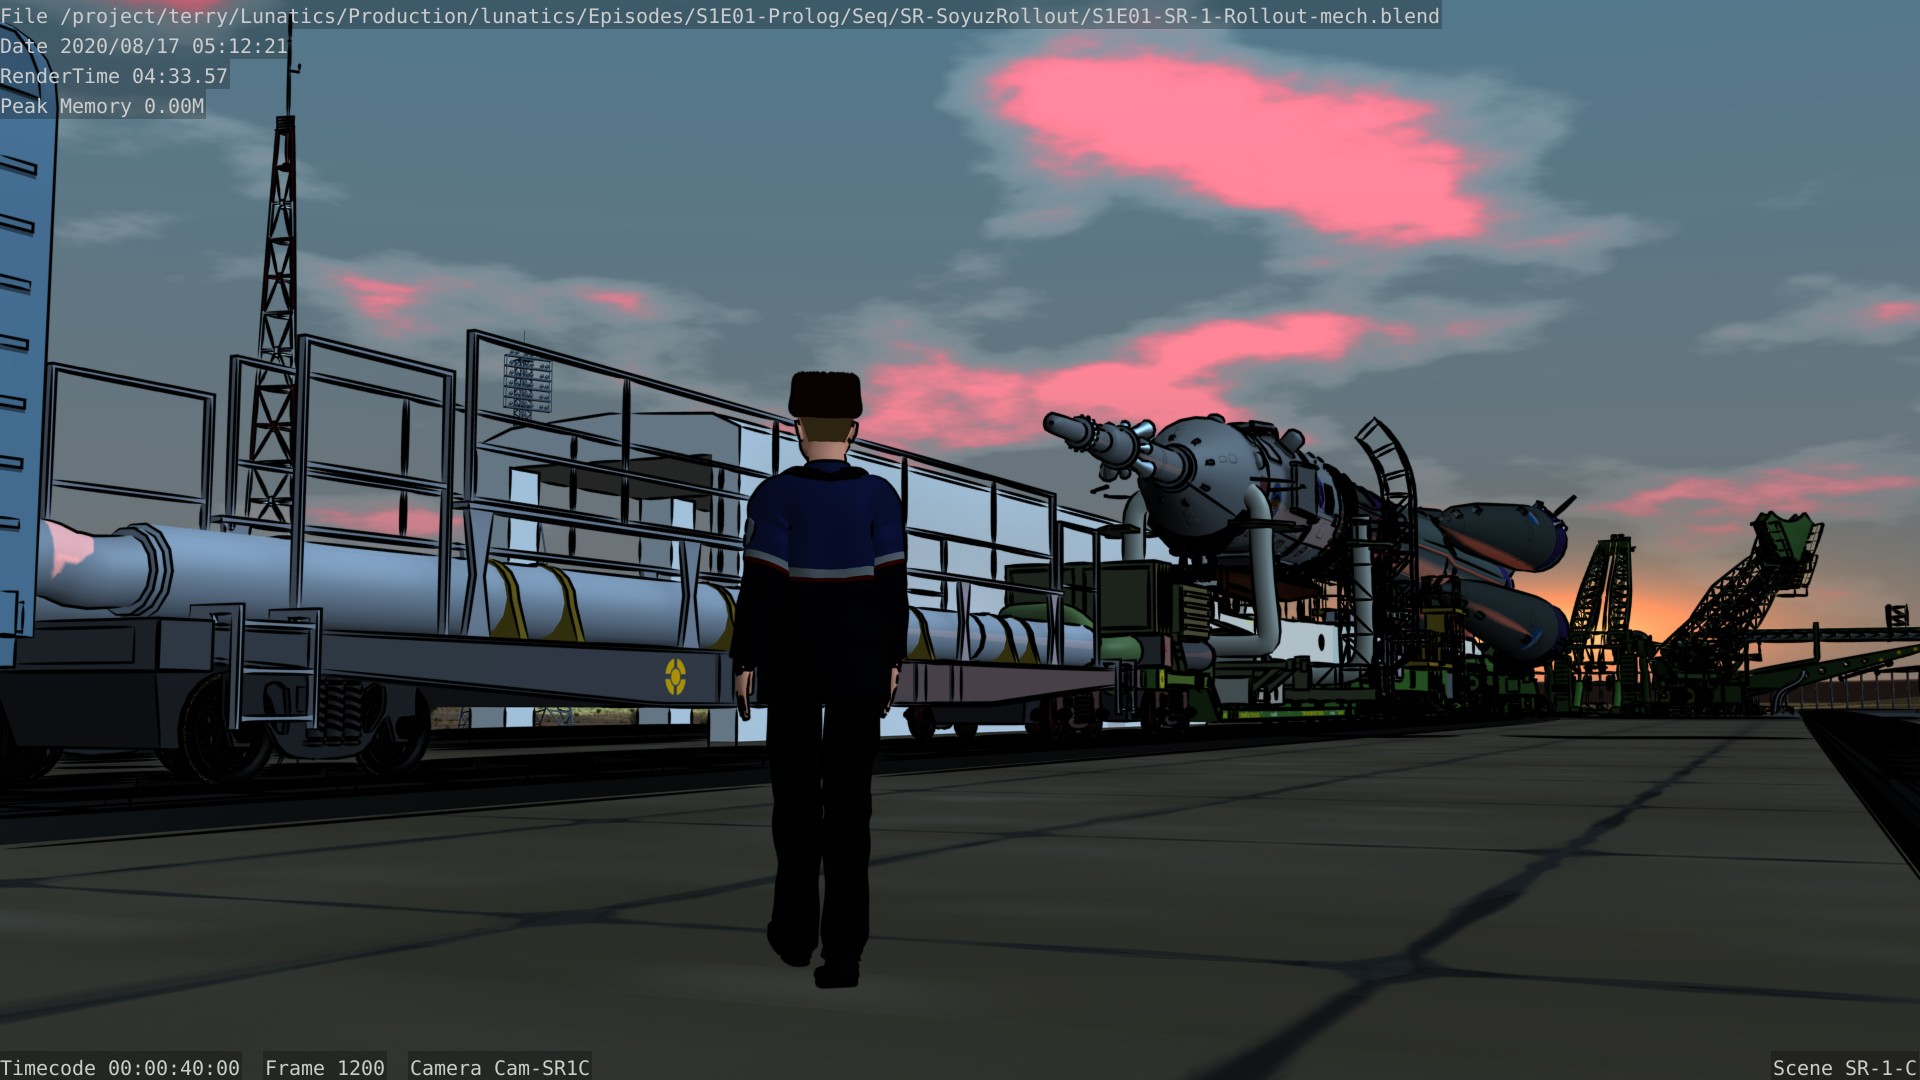
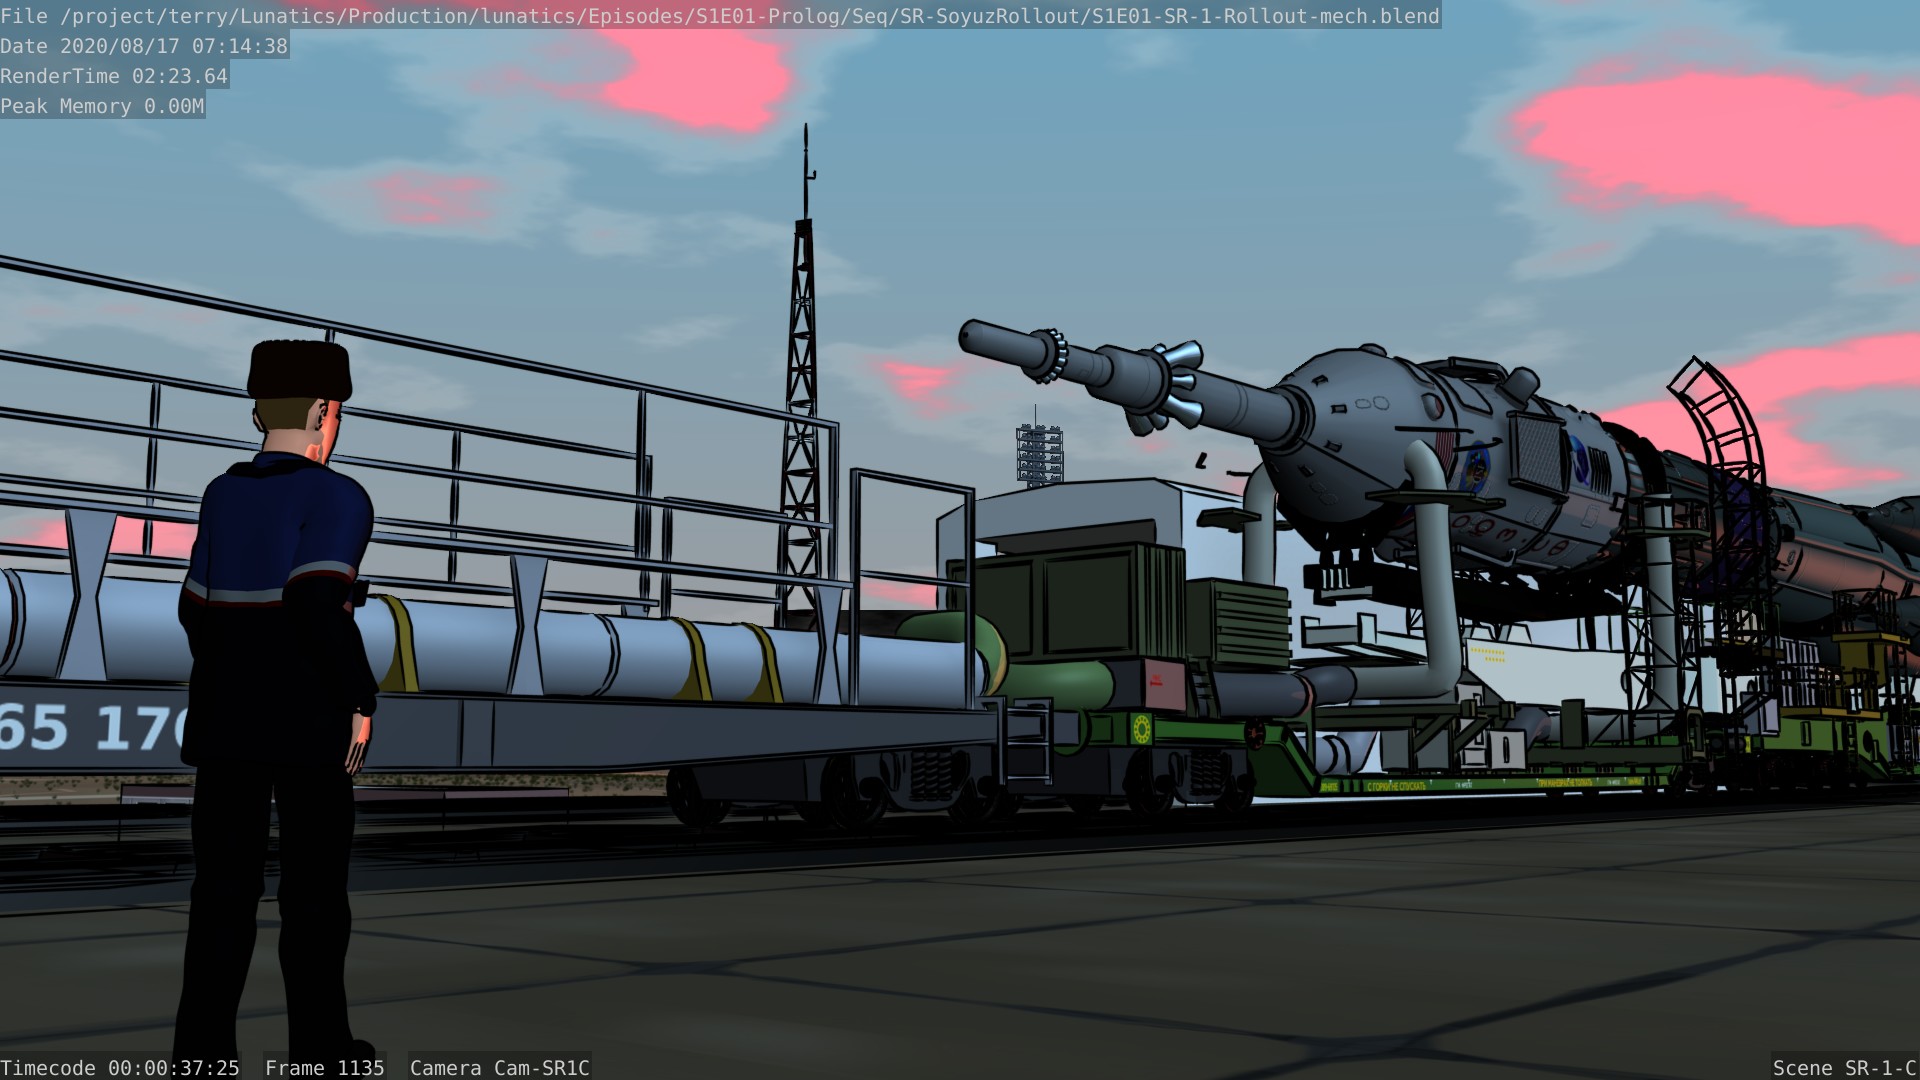
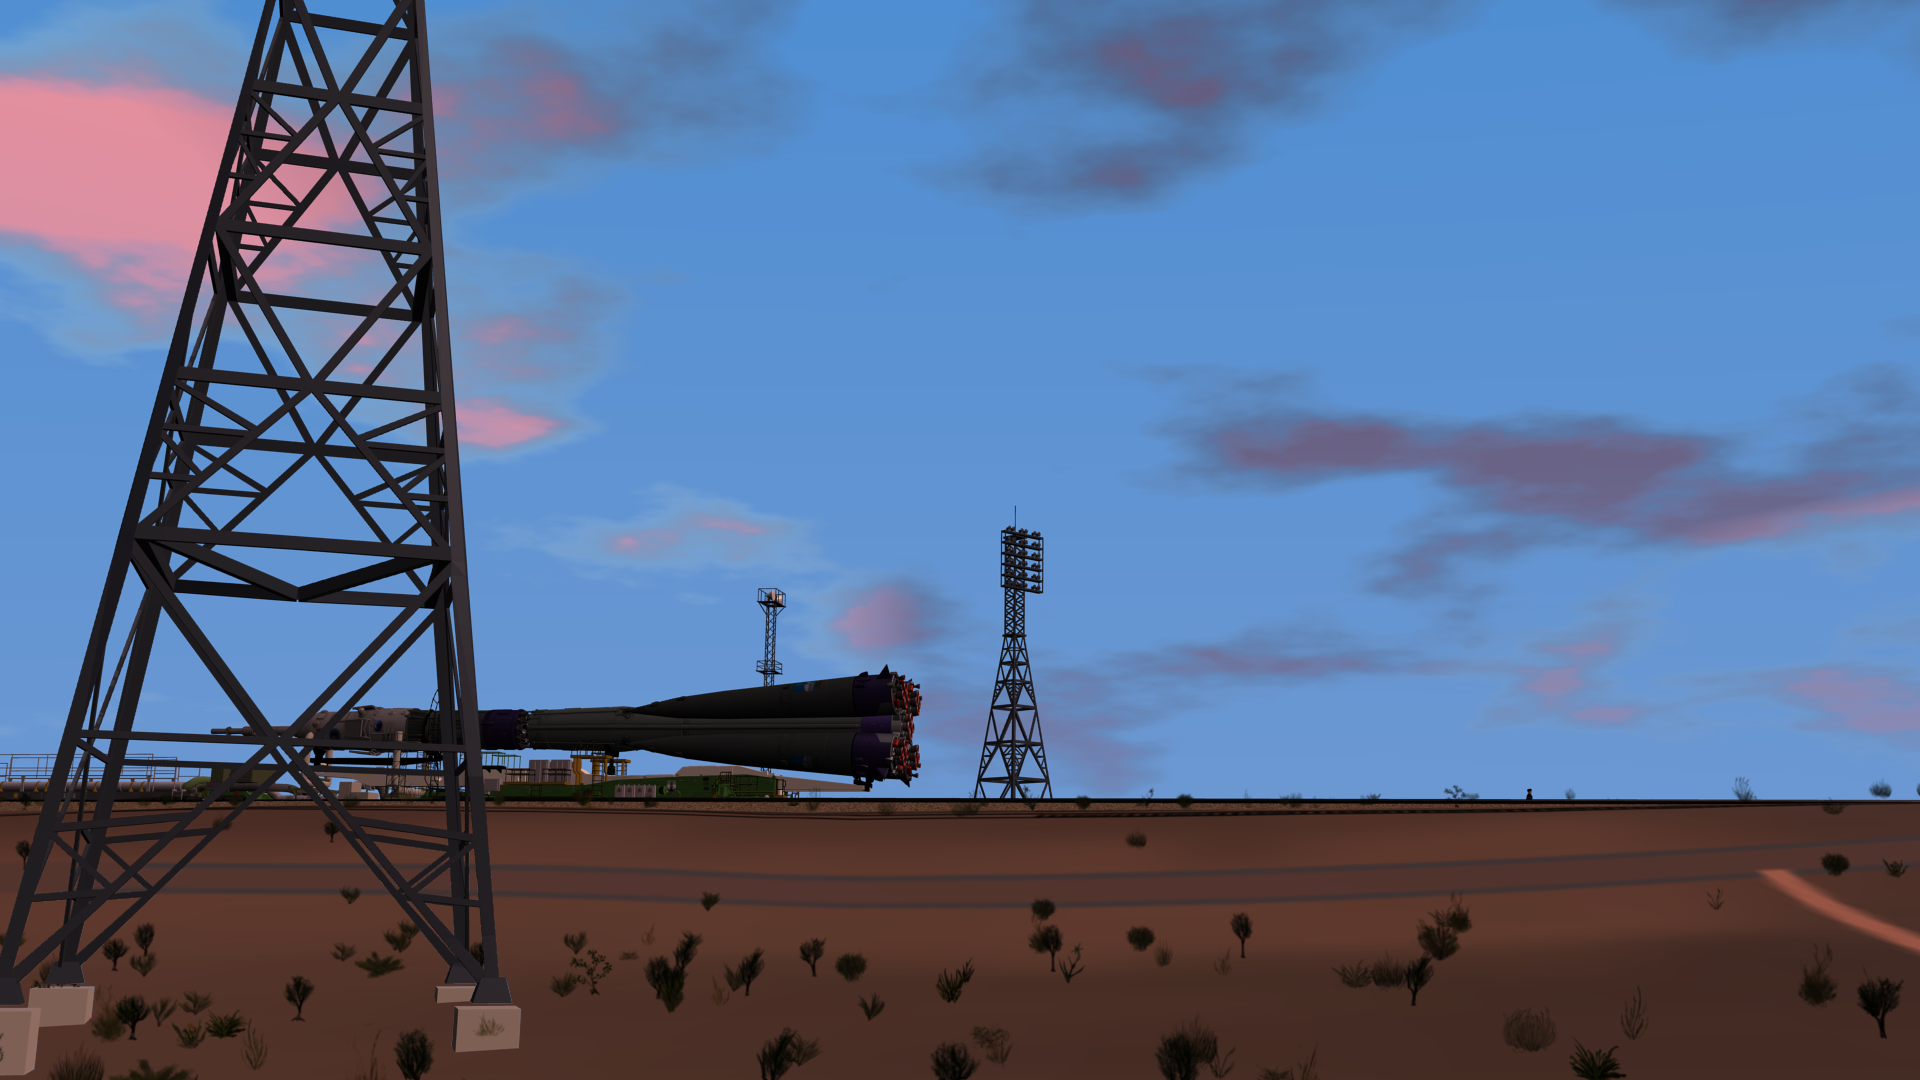
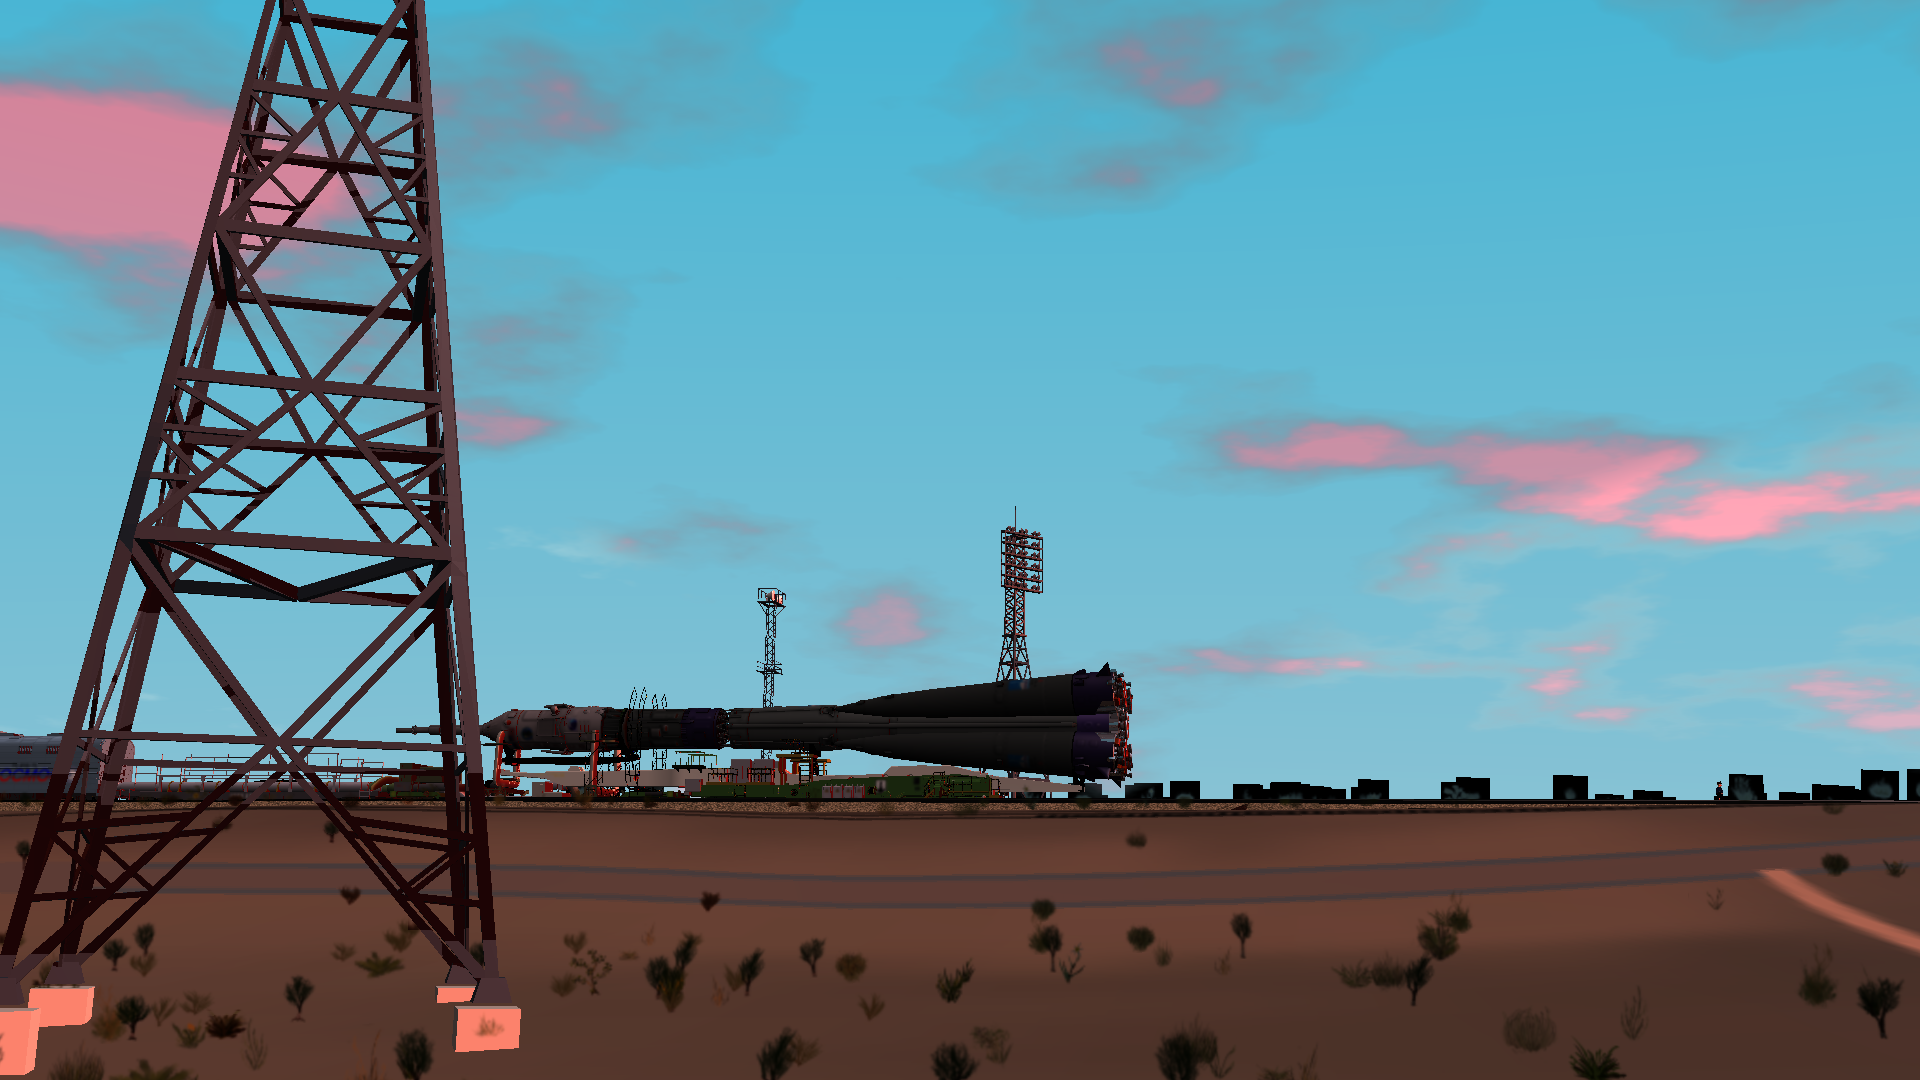
Soyuz Rollout (Revised Work-in-Progress)

This is a shot I haven’t worked on in a long time, finally coming together after all the work on the sky system and the pad crew extras characters. You might recall the earlier version of the shot:
This version also reflects a change in time-of-day: after reconsidering the story and the available resources, I decided that this shot would be in pre-dawn lighting, right before sunrise, with the sunrise happening during the erection of the launch vehicle on the pad.
Adding the two characters walking alongside the transporter also really contributes to the feeling of scale, and I’ve shifted the camera to be at more realistic eye-height, which also shows just how big the rocket is.
It certainly all gives it a more atmospheric feeling.
There are still some Freestyle issues, and the frames are taking too long to render. But the work I plan to do today will help with both (I’m planning to add a separate Freestyle camera, as I did successfully with some of the Touring Baikonur shots, to eliminate some background clutter from the Freestyle render).
Aug 18, 2020 at 4:00 PM
Ack! Bad Interface Design!
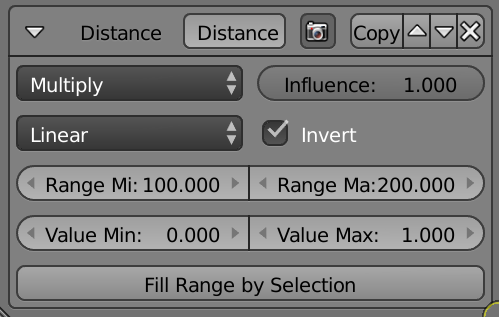
Okay, this bit me today. This is a TERRIBLE interface design.
This is the “Distance from Camera” modifier in the Freestyle line-style UI, which is part of the Render Layers panel in Blender 2.79b.
It allows you to control a Freestyle parameter based on how far away the edge is from the camera. In this case, I wanted to taper the thickness off so that farther off object would have thinner lines (and then eventually no lines at all).
The panel above is set up to do this as you see it here.
The thing that is annoying is that it seemed completely obvious to me that “Value Min” means “value at the minimum distance from the camera” (which is the number right above it). And “Value Max” would then be the “value at the maximum distance from the camera”.
So naturally, if you wanted it to taper off with distance, you’d set “Value Min” to be the maximum thickness (1.0 in this case) and the “Value Max” to be the minimum thickness (0.0 in this case).
But NO. That would be too obvious!
Instead, “Value Min” is always the minimum of the VALUE. And in order to flip the direction, you have to use that little checkbox “Invert”.
Also, this means that, although you CAN set the “Value Min” to be larger than the “Value Max”, it doesn’t actually make sense, and it simply nullifies the effect of the moderator.
Which is certainly not intuitive. It’s also not consistent — this is not how color ramps work in the Texture panel, for example.
This is a Great Sin of UI design, IMHO. I can barely imagine the thought process of the person who came up with this. I suppose they must have thought this made sense. I wonder if this is still a problem in 2.8+?
Ah well, I guess they can’t get it right every time…
Aug 19, 2020 at 4:00 PM
Improved Sky (and Candyfloss Clouds…)
I was getting frustrated with the way my skies were rendering. Even when I punched up the sky brightness really high, they were still coming out very dark (which wasn’t terrible for “early-dawn”, but starts to look really weird when the Sun is coming up):

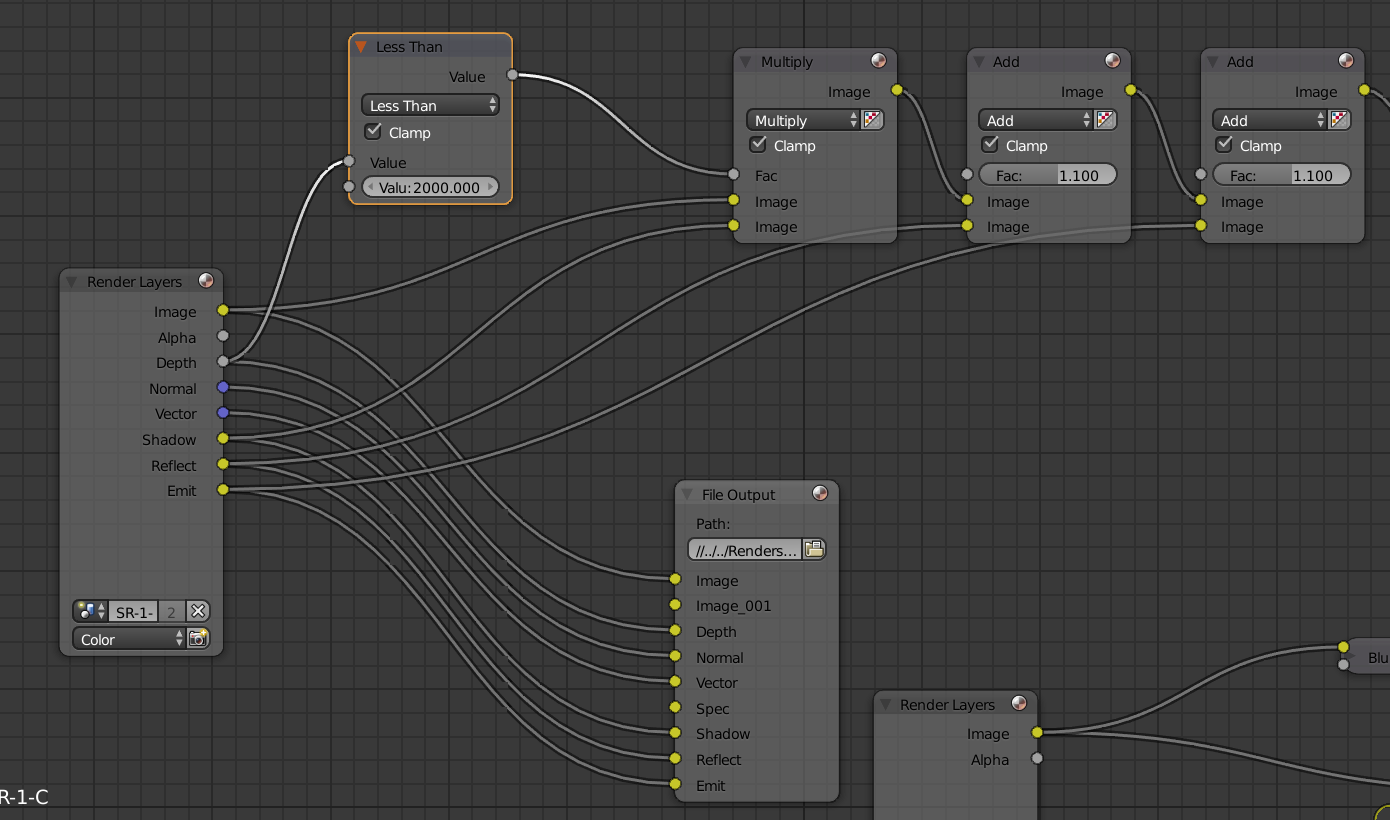
The problem is that the “cloud deck” Shadow pass is black between the clouds, and this gets mixed into the sky color in compositing, making it look both too dark and too neutral, and very unlike the real sky, as well as kind of somber.
I never quite figured out what was causing this in the first place (Sun-lamp shading? Something about how the Shadow pass interacts with transparency? The sky is just black in the Shadow pass? Is there maybe an alpha channel in the Shadow result that is missing from my composite? I don’t know).
But I did realize that I had a Z/Depth pass for my standard EXR render, and implementing a threshold condition based on distance was easy. So I just selected 2km, and attached that to the Shadow influence in my color-layer compositing nodes:
So this:
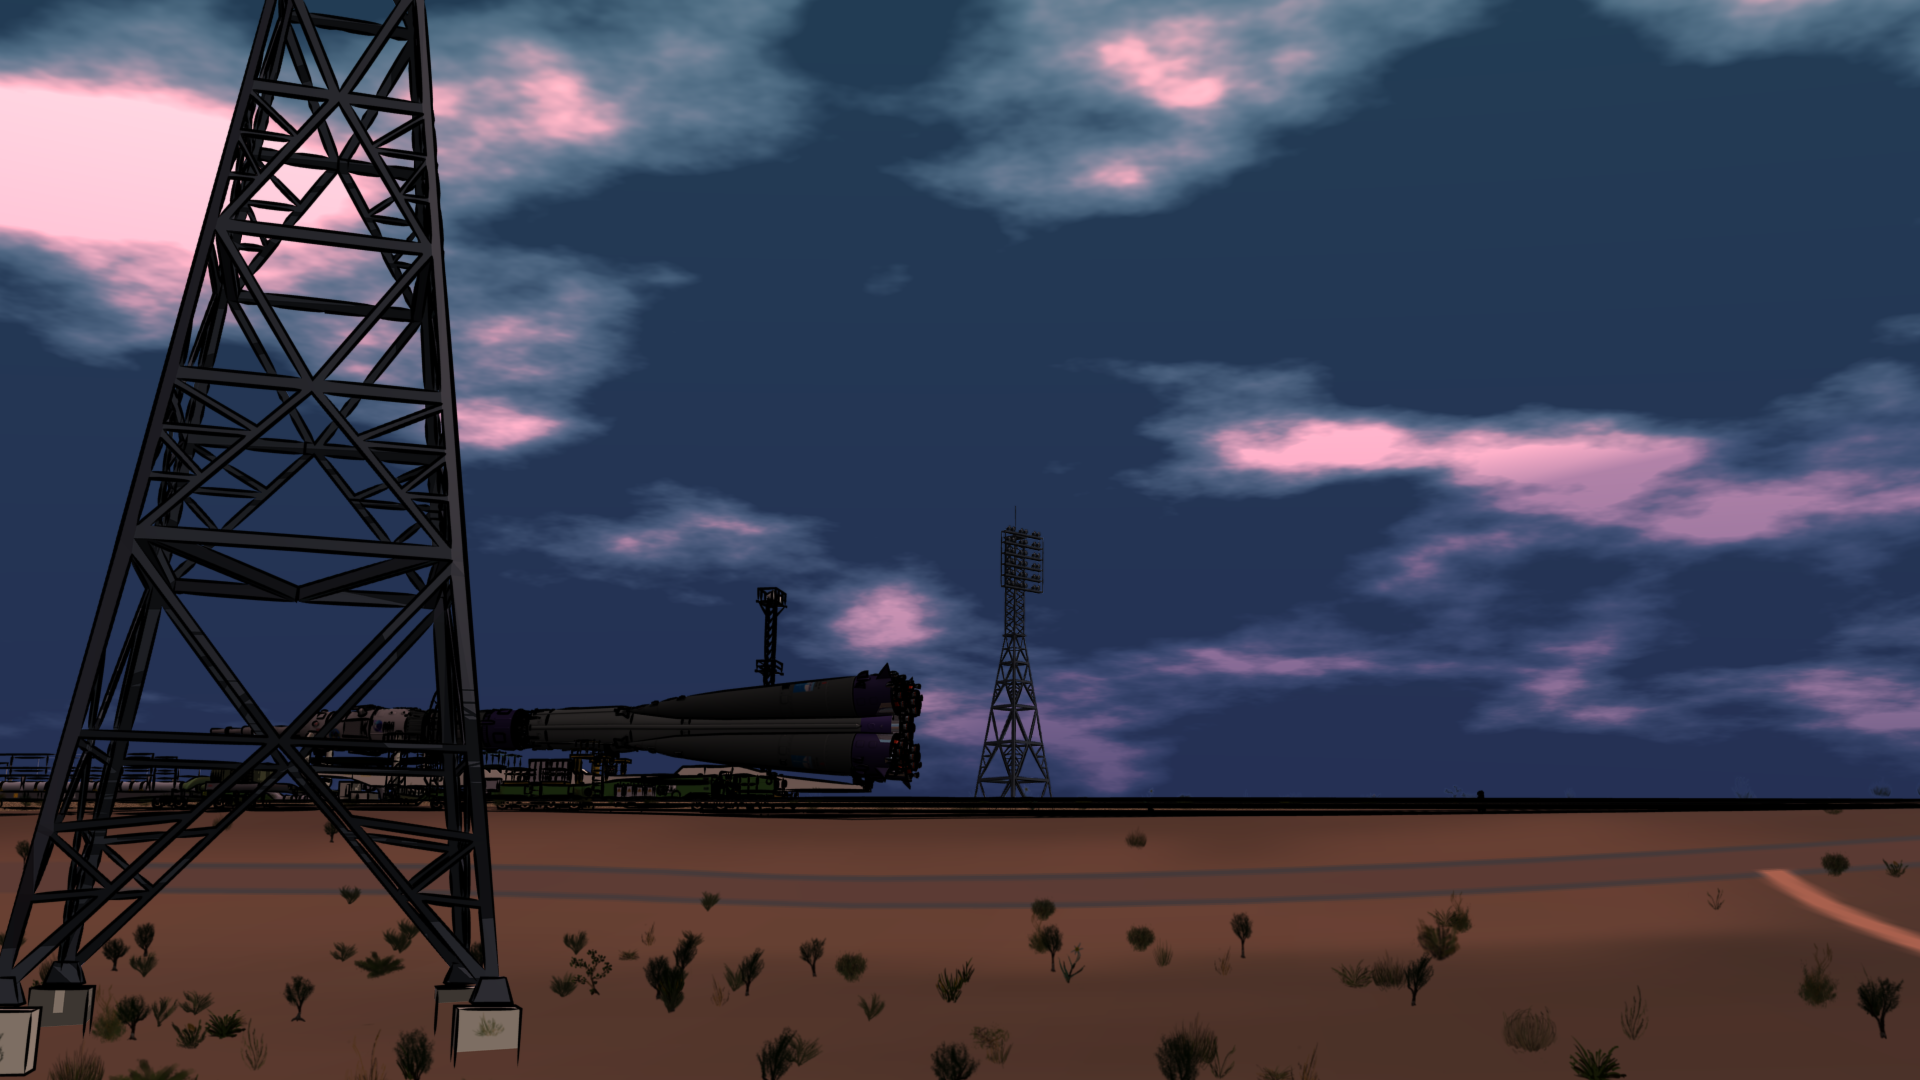
became this:
and I am much happier with it.
As for the candyfloss clouds, I’m not sure they’re completely realistic, especially in the climate of Western Kazakhstan, but I thought they give a nice “fairytale” quality to the shots, and I’ve been planning to include them from the beginning. I’m glad that these simple texture-based clouds look as good as they do.
In related news, I recorded screencasts with commentary for the setups for these shots. I’m hoping to edit these and add them to my “Film Making for ‘Lunatics!'” case-study screencast series.
Aug 20, 2020 at 4:00 PM
Telephoto / Timelapse Test
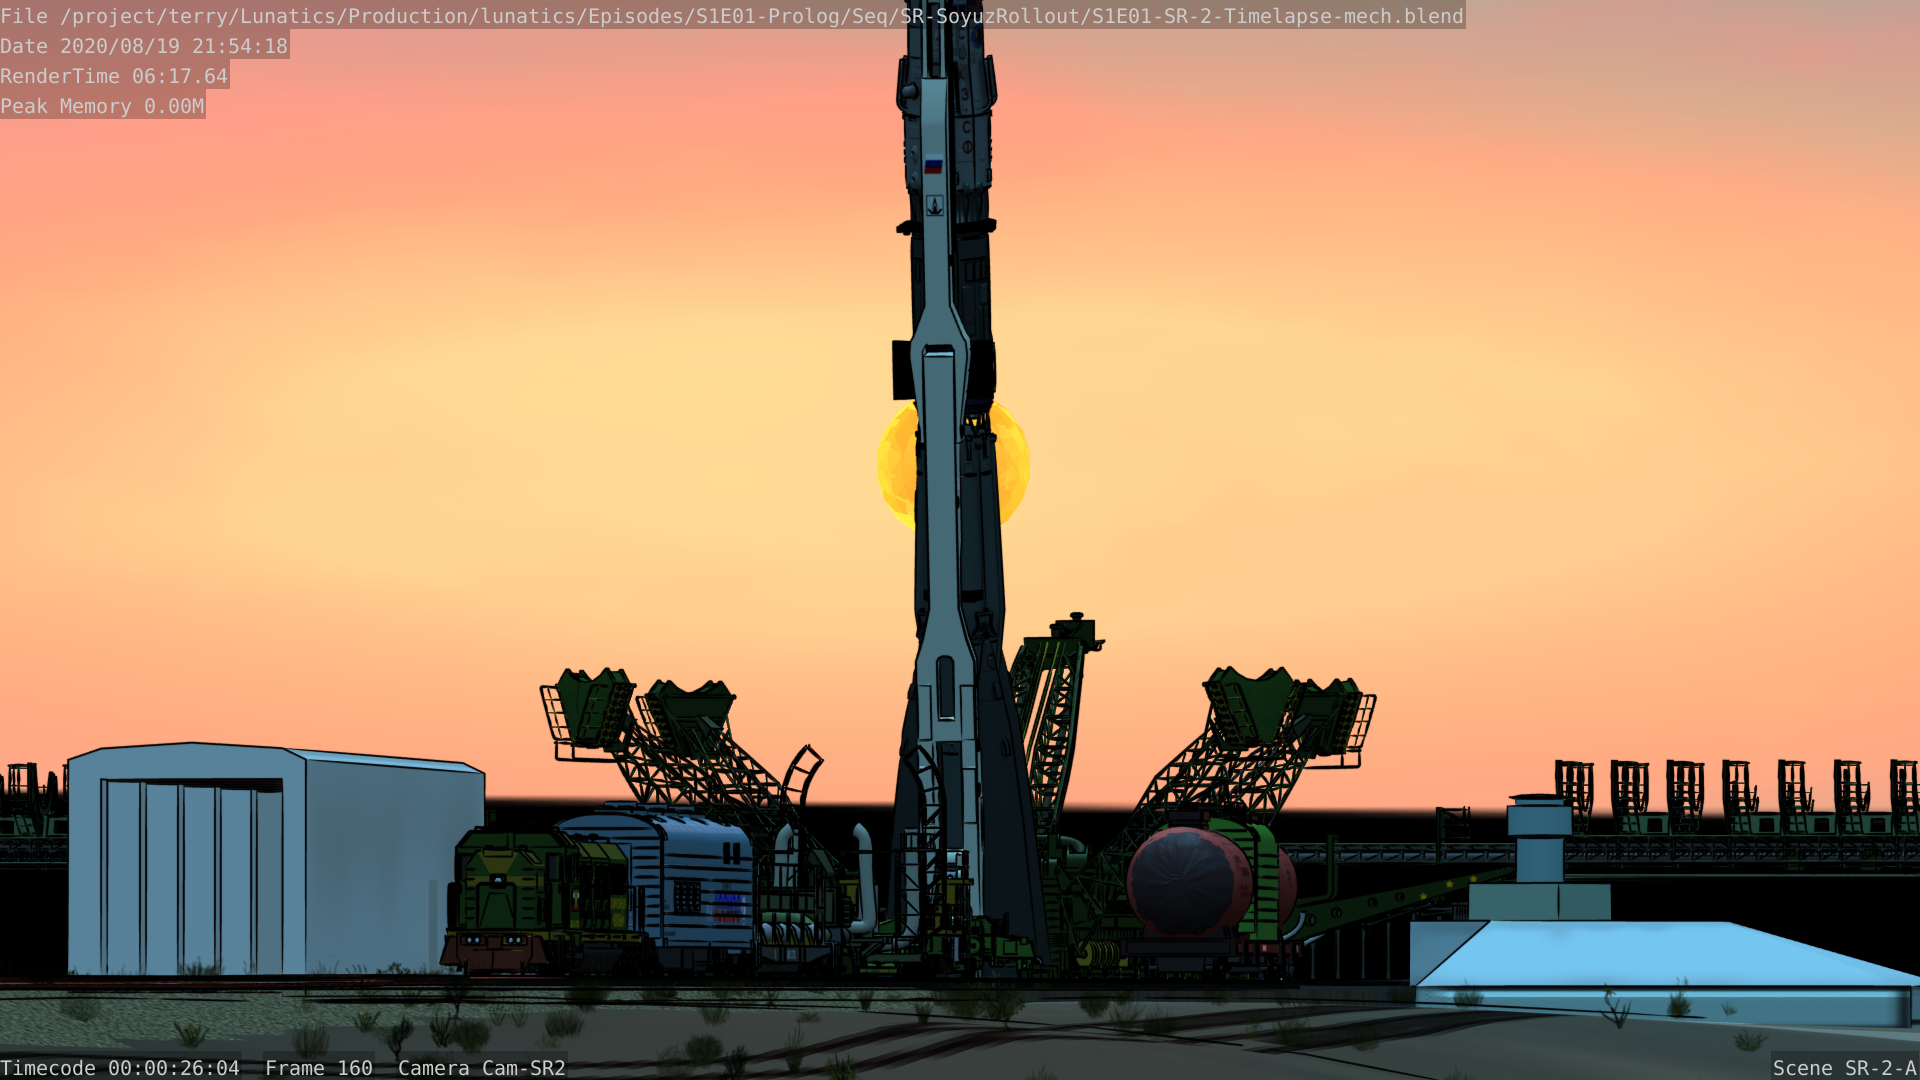
A lot of things are coming together here — I’ve literally spent years on the assets going into this one minute of animation (and of course, this includes the mech model by Chris Kuhn, already several years old). This is another test to see if I really like the framing I’ve come up with here.
It’s using a telephoto lens setting (“300mm”) to get the “big Sun” look (I also did this particular frame to check the Sun’s position as it passes behind the launch vehicle (which is not quite on the pad yet in this frame).
There are still tweaks needed, but it’s working.
Aug 25, 2020 at 4:01 PM
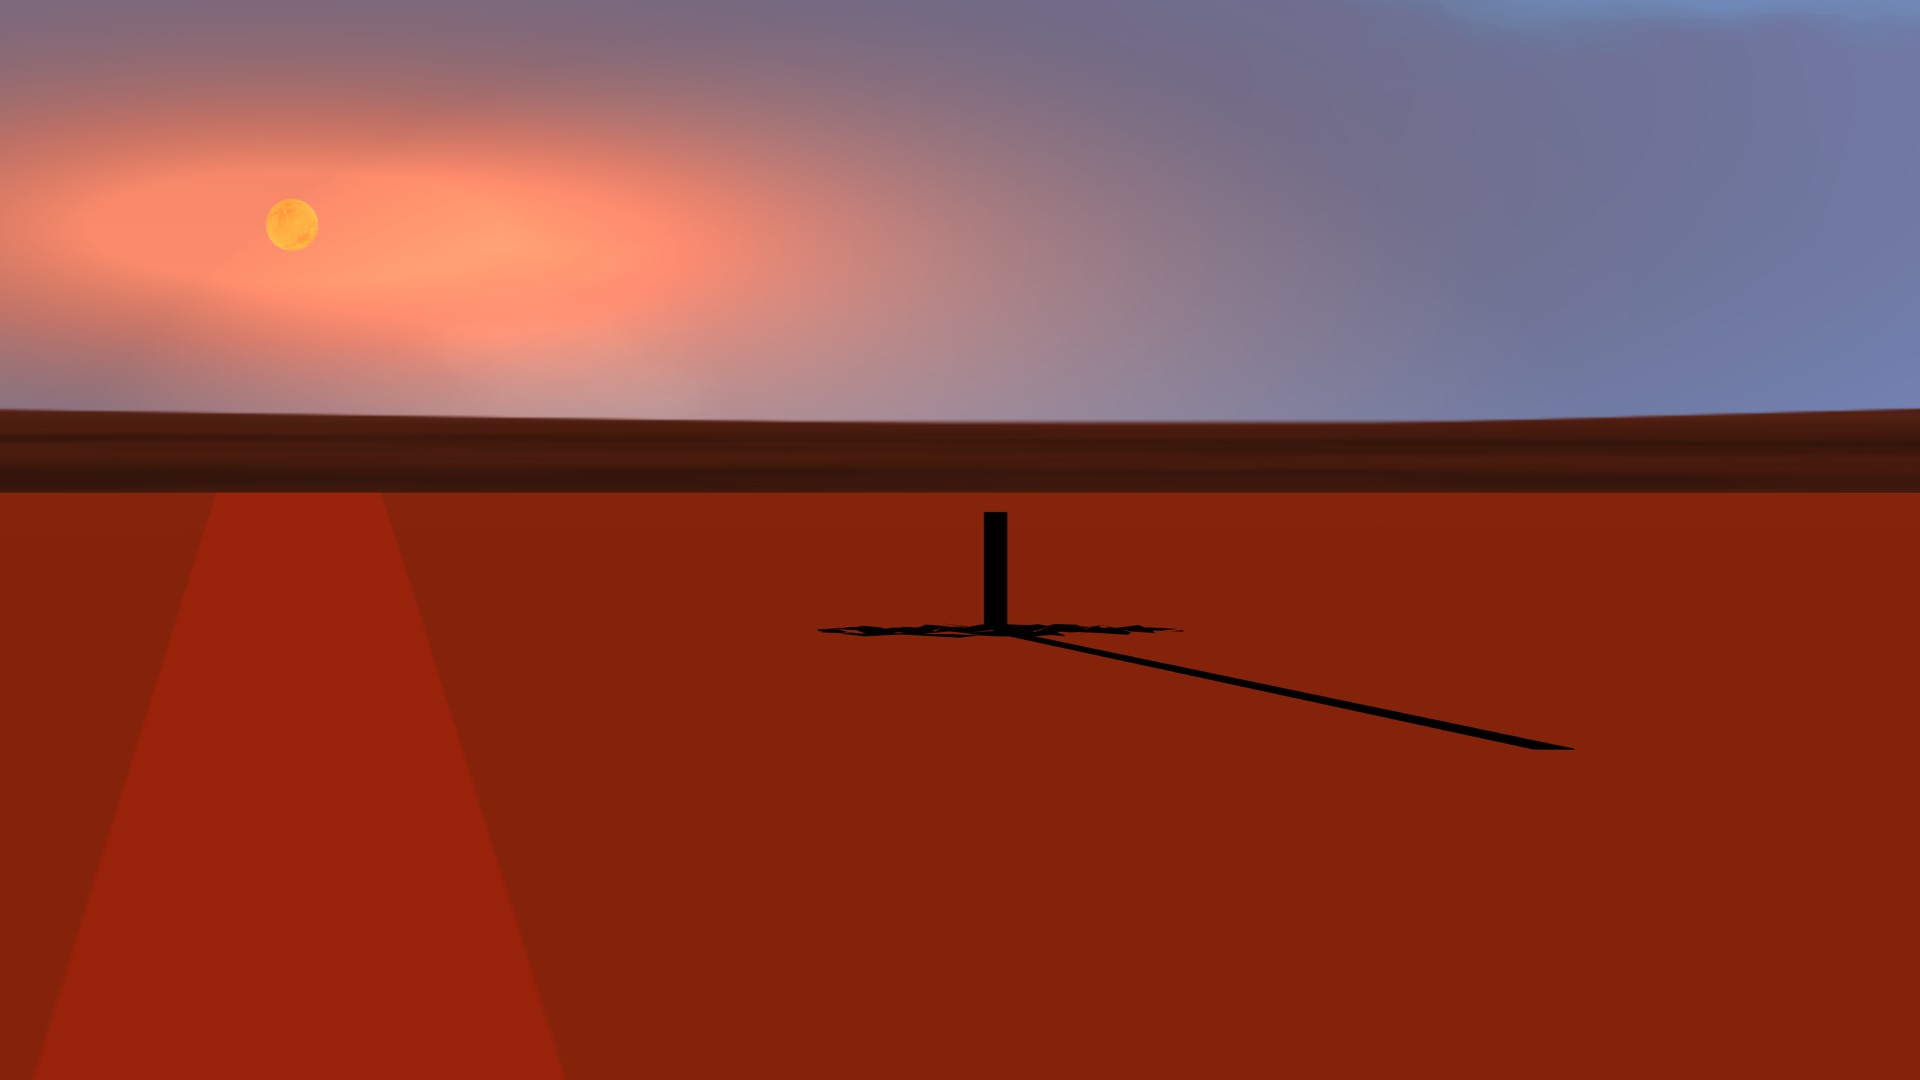
I call it “Test Render with Gopher”
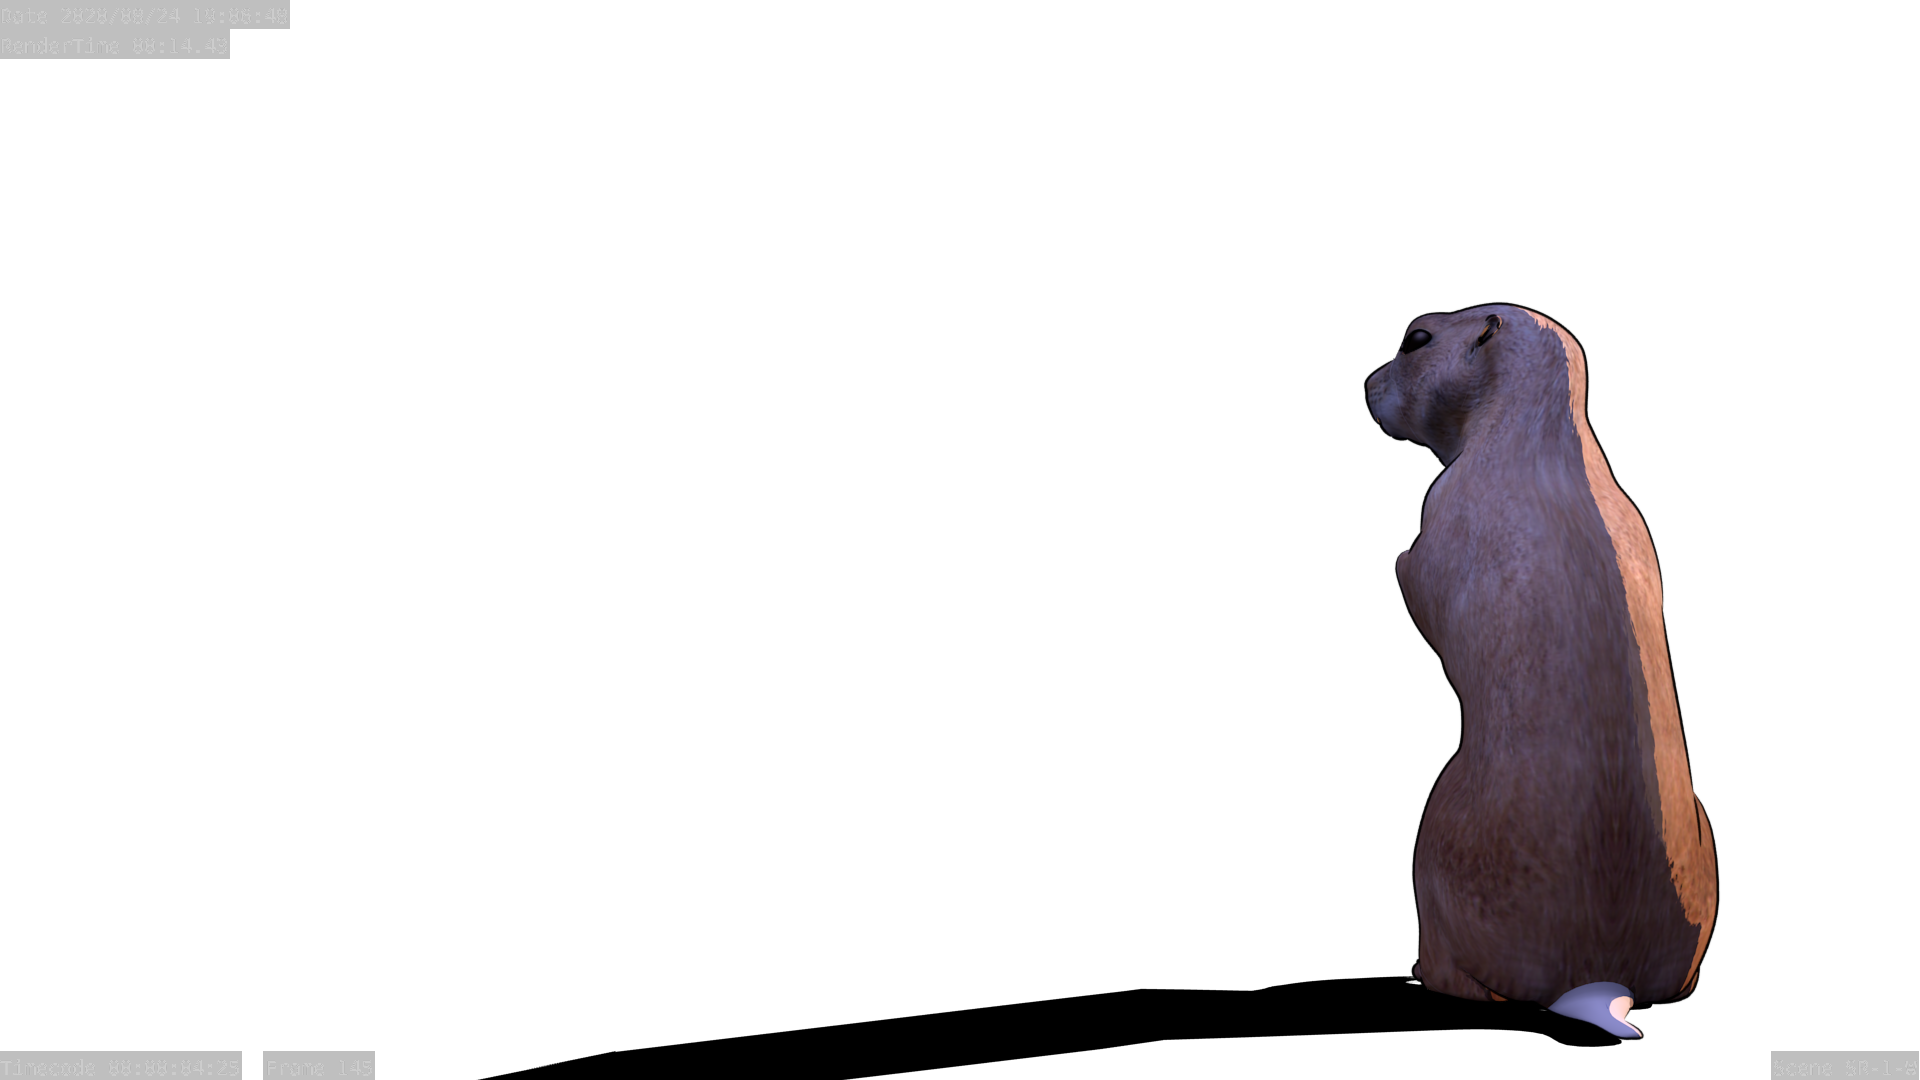
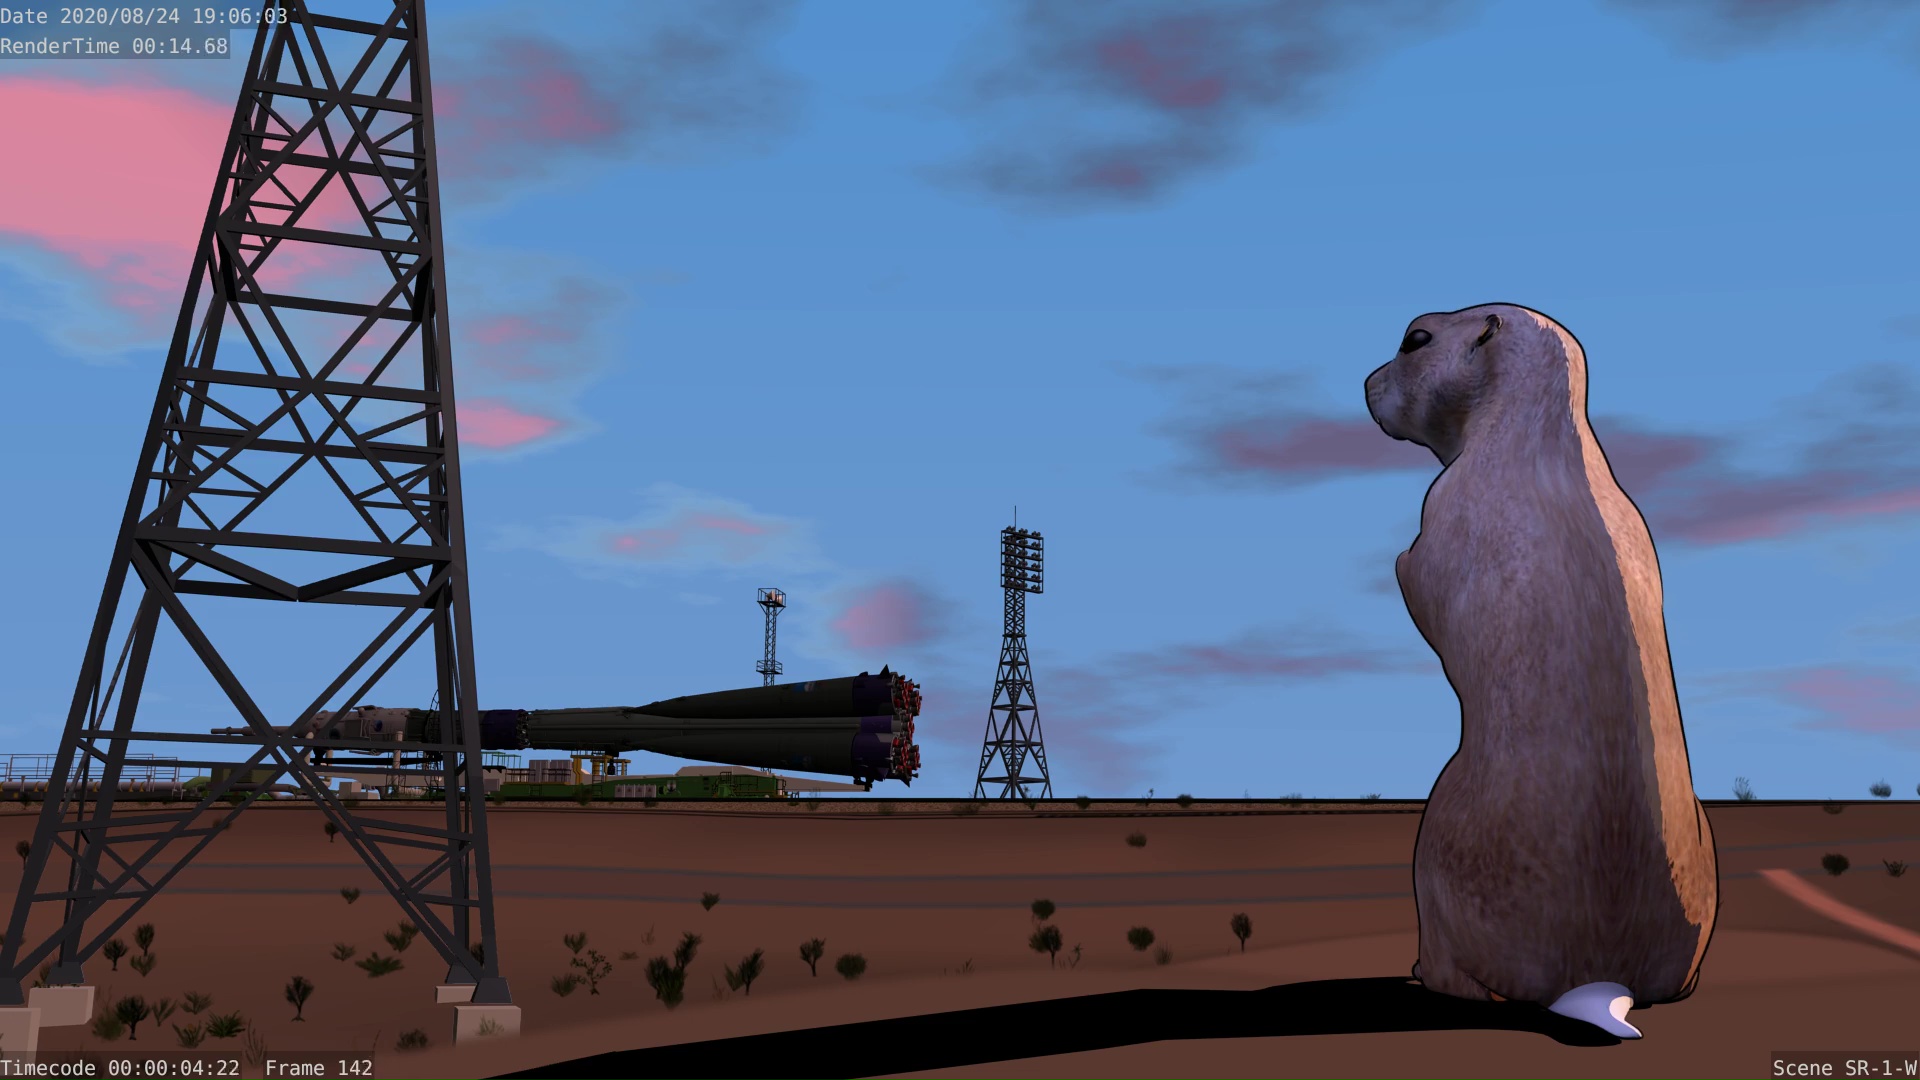
Progress continues on this sequence. A lot more details to work out. But I finally got the gopher back in.
This is actually two renders and a static cel. The shadow is on a shadow-only surface, while the ground he’s sitting on is a static drawing.
I originally figured I’d do a lot more 2D compositing like this on this project (at one time, I talked about a “2.5D” approach), but in fact, there’s only going to be a handful of shots done this way in the pilot.
Aug 26, 2020 at 4:00 PM
Paint-Render Animatic of SR (“Soyuz Rollout”)
There is still much to fix in this animation, but this is a current test render for color, animation, and timing. Of course, this shows off mech work by Chris Kuhn. The Gopher was created by Cosmin Planchon from our first sprint on “Lunatics!”, so it’s one of our oldest character models. Keneisha Perry animated him, after I made an earlier, botched, attempt (he’s a little challenging — he has a deformation rig, only, with no fancy Rigify stuff). The sky and clouds are controlled by my “Combined Sky System” model and rig.
The music track for this sequence is “Once Upon a Time” by AK1974 (CC By-SA, originally downloaded from Jamendo, years ago). It’s the continuation of the track that was used for the intro and the same as one of our preview videos). There’s also a bit of “Nylon” by JMF at the beginning and a By-SA ambient track from “Sound Transit” at the end, No dialog in this sequence. There are some sound effects, but not in this edit.
Most of it is rendered “paint-only” (no Freestyle ink, and also without anti-aliasing), at 6fps (most of the final will be at 30 fps, except the ‘timelapse’ sequences which will be 10 fps, as they are in this video). The final shot of the previous TR (“Train”) and the first shot of the next TB (“Touring Baikonur” — already rendered) sequences are included for context.
The gopher is actually rendered at full 30fps.
During the process of developing this sequence, I made some changes to the concept, including using the telephoto shot throughout the time lapses to capture the “big Sun” and “big Moon” shots (although not “photoreal”, these are geometrically correct for the 300mm virtual lens focal length in Blender).
I had some debate with myself about that choice: the telephoto look flattens the action, and perhaps it makes it seem more abstract and less immersive. But then, this scene is kind of a teaser, which will be reprised with more dramatic close-ups in the LA “Launch” and SF “Soyuz Flight” sequences later, so I decided it’s okay — especially since I love the alignments I could get with Sun and Moon (owing largely to the fact that the launchpad is oriented to launch towards the East).
I also re-timed it to run a bit longer than originally planned, as the pacing was feeling rushed in my earlier animatics.
As for the fixes still missing, I’ll just give you my laundry list from my 2020-08-24 worklog notes, that I made while reviewing it. There’s a lot to nitpick:
        SR-1-A:
            - re-render w/ corrected sky

        SR-1-B:
            - Soyuz/T-E moving too fast? / too far?

            - Billboard problem with plants (sky fix is based on distance,
              and the billboards mess with that -- maybe use the same trick
              I was planning to use to control freestyle rendering for
              billboard extras?)

        SR-1-W:
            - The gopher shot might be finished.

            - We could have him turn to look at the train at the end (possibly
              extending the shot slightly?)

        SR-1-C:
            - Could put an extra riding on the T-E (not really a driver, but
              there are several platforms someone could be standing on)

            - Add an extra watching the train from the side, in the back of
              the shot (maybe pull a town extra for this, so we can put a
              woman in the shot -- preferably with a suit jacket, to match
              the apparent temperature.

            - Also add another walker in the back of the shot -- just want
              some motion back there.

        SR-2-A:
            -(SkyRig): The Sun is weird -- try a disk instead of ball

            - Tanker car animating when it shouldn't be

            - BB extras needed to sell the "time lapse" effect

        SR-2-B:
            - Walker (other way)

            - Additional people watching on the right side

        SR-2-C:
            - BB extras on the platforms

            - Need to explain the tanker car moving -- I think we need a
              revised rig with the train engine parented to it. Maybe the
              variable parent trick we used to make the Soyuz jump rigs
              could be used with the tanker car slider? Then we'd just leave
              it pulled all the way back until we needed it to move?

            - We need set key frames just before the end, where the Moon
              comes into shot, and stretch those to the end of this shot,
              moving the "speed ramp" effect into SR-2-D.

        SR-2-D:
            - Needs to be carefully matched to the end of SR-2-C

            - Frame rate changes to 30 fps, so the animation will immediately
              need to be stretched out 3X.

            - Animation of the Moon (sky-time) should ramp down to a stop

            - Animation of the clouds needs to ramp down from matching the
              end of SR-2-C to a plausible drift
Aug 29, 2020 at 4:00 PM
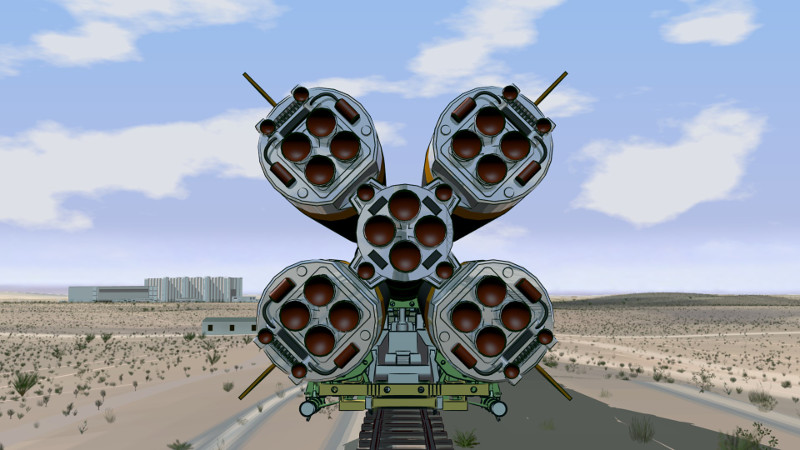
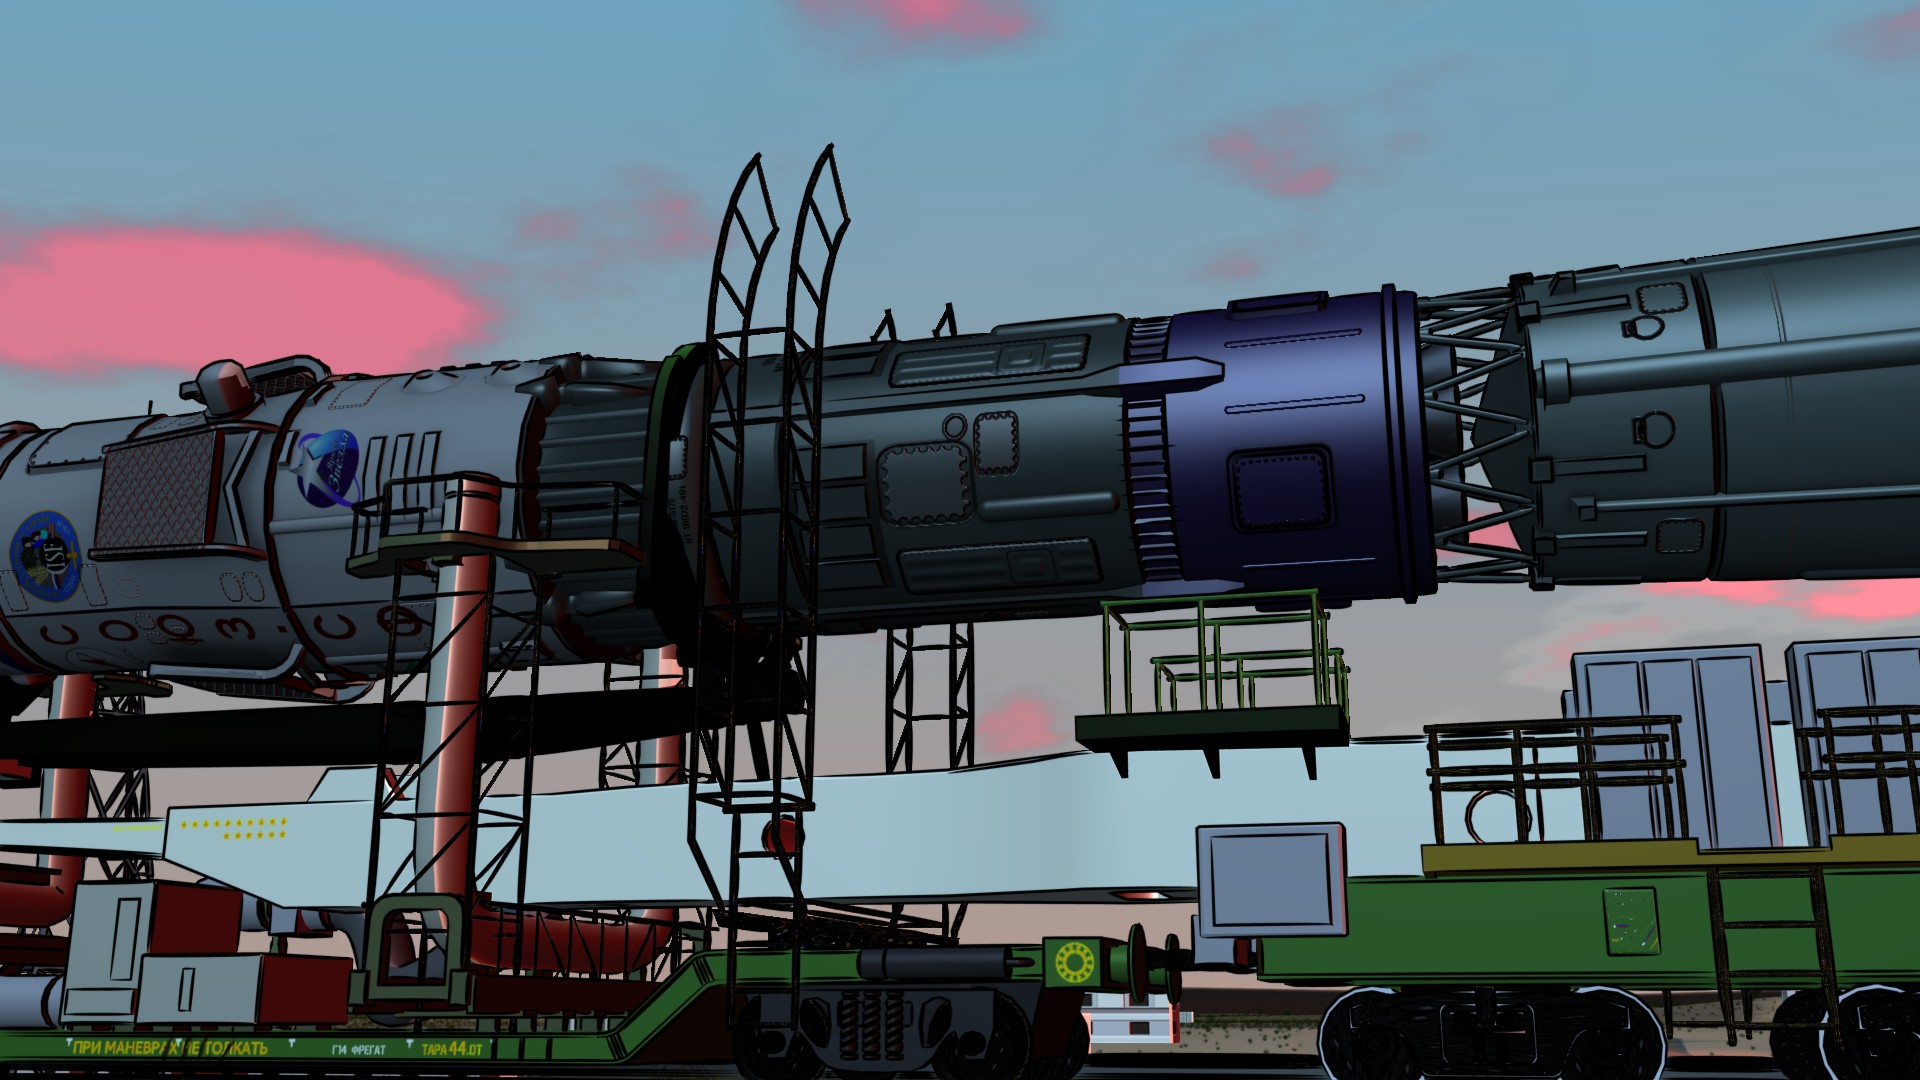
Fixed the T-E Trusswork
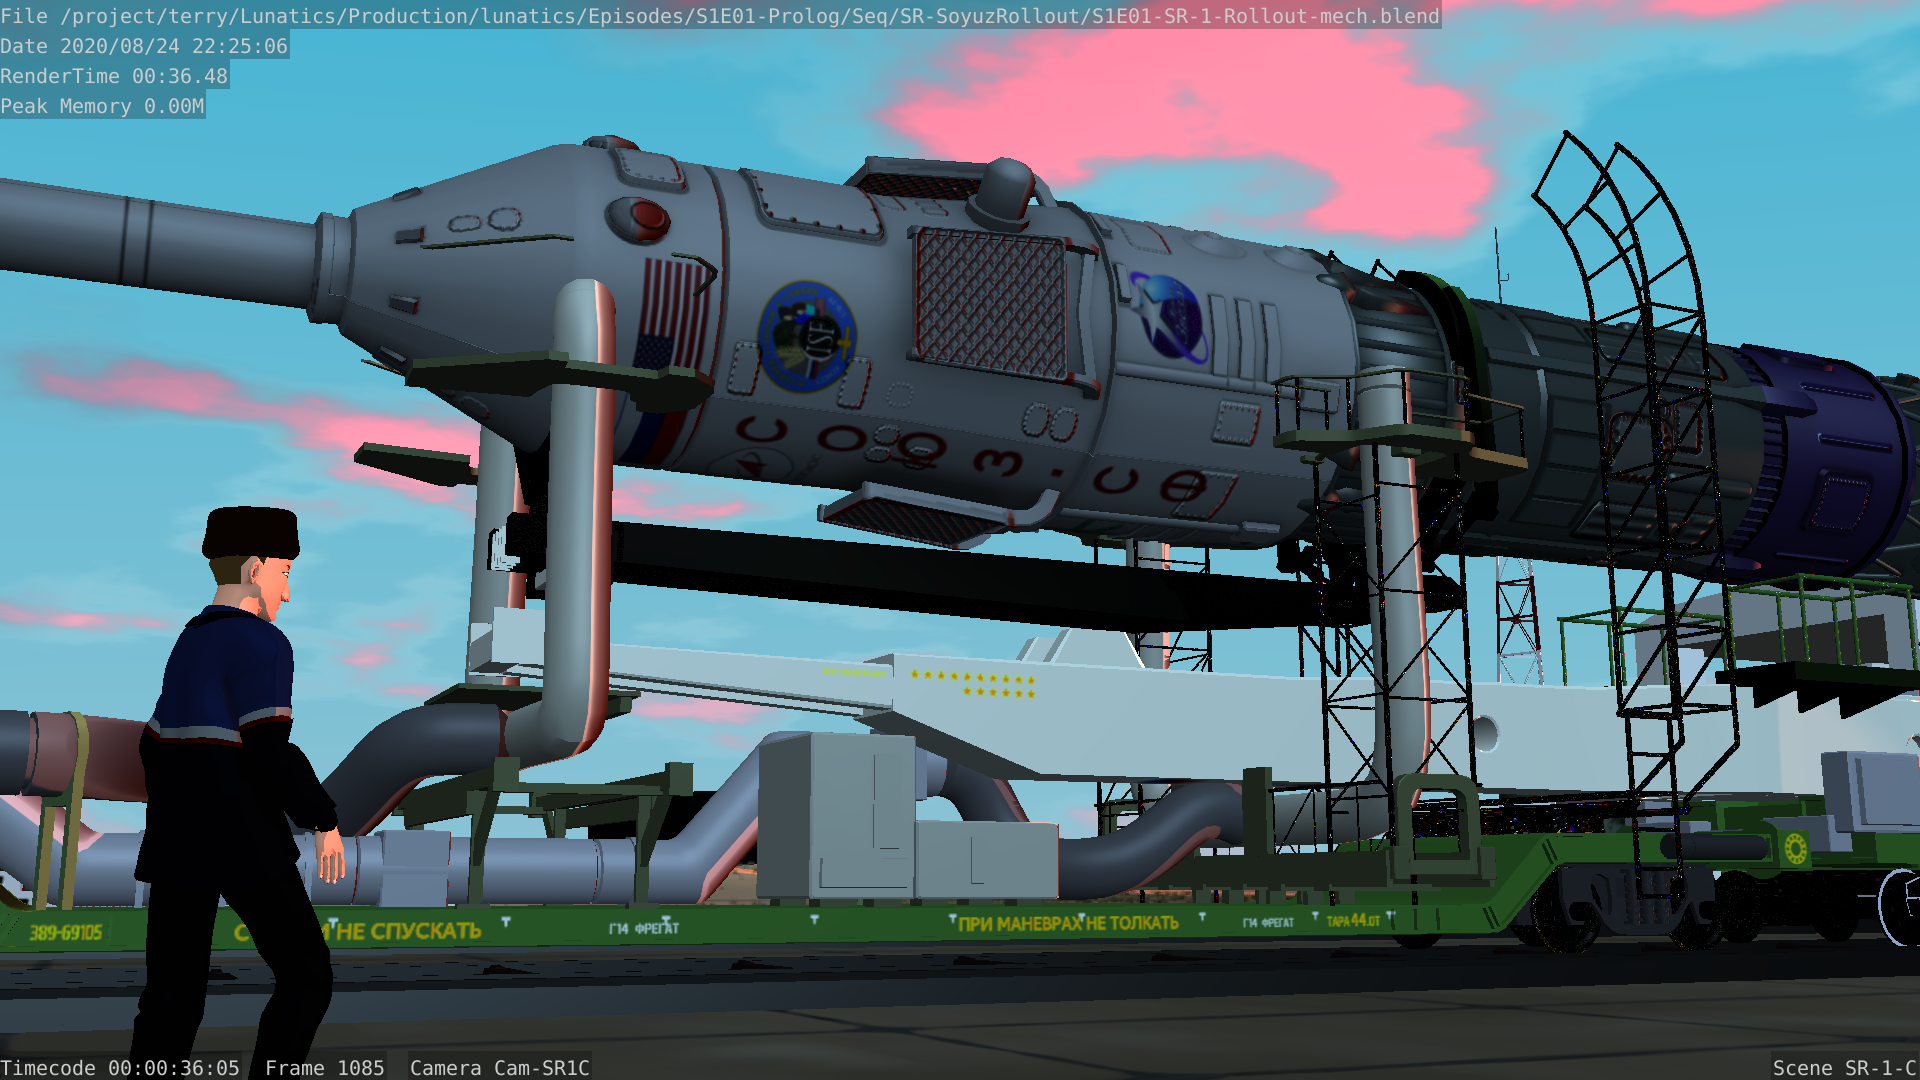
I don’t know if any of you noticed, but the earlier animation had some missing trusswork on the “Transporter-Erector” which resulted in some parts floating in the air very visibly in this shot.
This is just a test I rendered to show that I have indeed fixed the problem. I don’t know exactly when it happened, but a mirror modifier was removed and applied in the wrong way.
I also got rid of the apparent interference of the vent stack with the side of the shroud. Going back to the reference pictures, I realized that these ducts have to be carrying air conditioning (or more often heating in Kazakhstan) into the shroud, to protect the equipment while the spacecraft is being handled. There are four of them, but only one is attached with a flexible duct, which is removed right before erecting the spacecraft on the pad. I think the reason for the extras is just to provide options for different payloads.
In the reference photos of Soyuz I’ve worked with, the port for the duct is on the far side from this shot, and that certainly makes my life easier, since I don’t have to model the port. So I just cut off the duct on this side.
For what it’s worth, it makes the US flag easier to see on the shroud. Following the convention of past flights, this shroud is marked with Russian and US flags to identify the astronauts’ nationalities. There is also a “mission patch” logo and a revised logo for Anya Titova’s satellite company (which is supposed to have provided this launch to the project, which is essentially a surplus / sunk cost, since by 2040, Soyuz is becoming obsolete, making it hard for the company to use it for their commercial flights) — hopefully with a less-awkward Russian name now (?).
![]()
My “Aoki Avionics” logo isn’t as popular (nor visible in this shot), but I’m personally insanely proud of the visual puns. The logo resembles the Japanese kanji “Ki” which means tree, and it is filled with the blue-green color which is called “Aoi” in Japanese — this is the literal meaning of the surname “Aoki”. And of course, the bottom modifies the symbol to incorporate “AA” for “Aoki Avionics” in English. The kanji simply read “Aoki”.
I also made changes to the rigging for the launchpad mech, mainly to allow for the engine to switched over to the tanker car for the timelapse. My original notion, back when I was working with Chris Kuhn on modeling this mech, was that the tanker didn’t need to be animated — that it would just be moved into place “between shots”. However, in laying out the sequence as a timelapse, it looked very awkward when the car moves into place on its own. So I had to reworking the rigging quite a bit to make it possible to put the locomotive on it.