This is the second in my series on upgrading my Primera Bravo II Disc Duplicator to work on M-Disc BD-R media. See the first post, on breaking down the machine and removing the DVD burner drive from it..
Testing Connectivity
After disassembling the duplicator and removing the DVD burner, I needed to test how the data connections would work. The duplicator is a USB device, but how does it actually look to the computer? How does the DVD burner fit in? How does the signal get split between the DVD burner, the robot arm controls, and the printer?
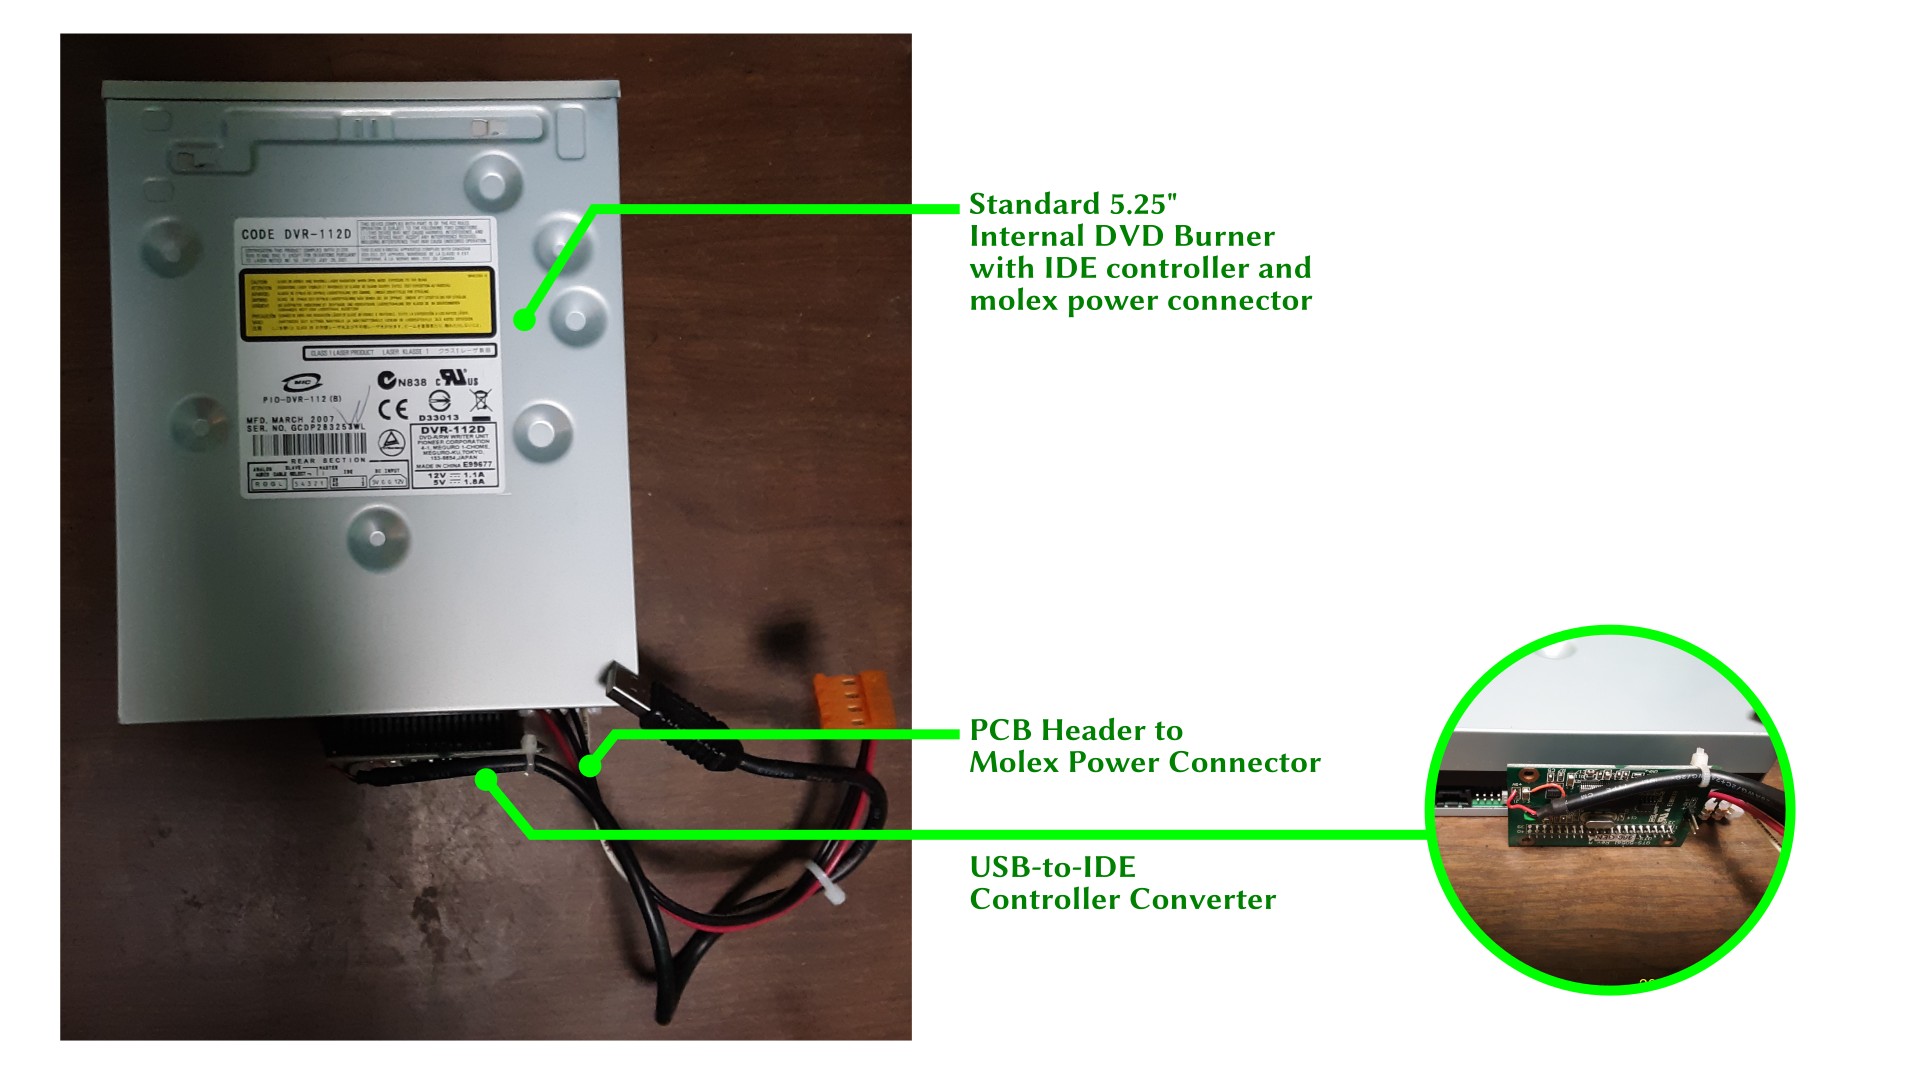
As a control step, I first need to hook up the DVD burner in isolation. Is the connection to it truly a USB mass-storage device controller, as it appears to be? And does the drive work? (It was reported not to work by the seller).
Here’s the DVD burner, as removed from the duplicator.
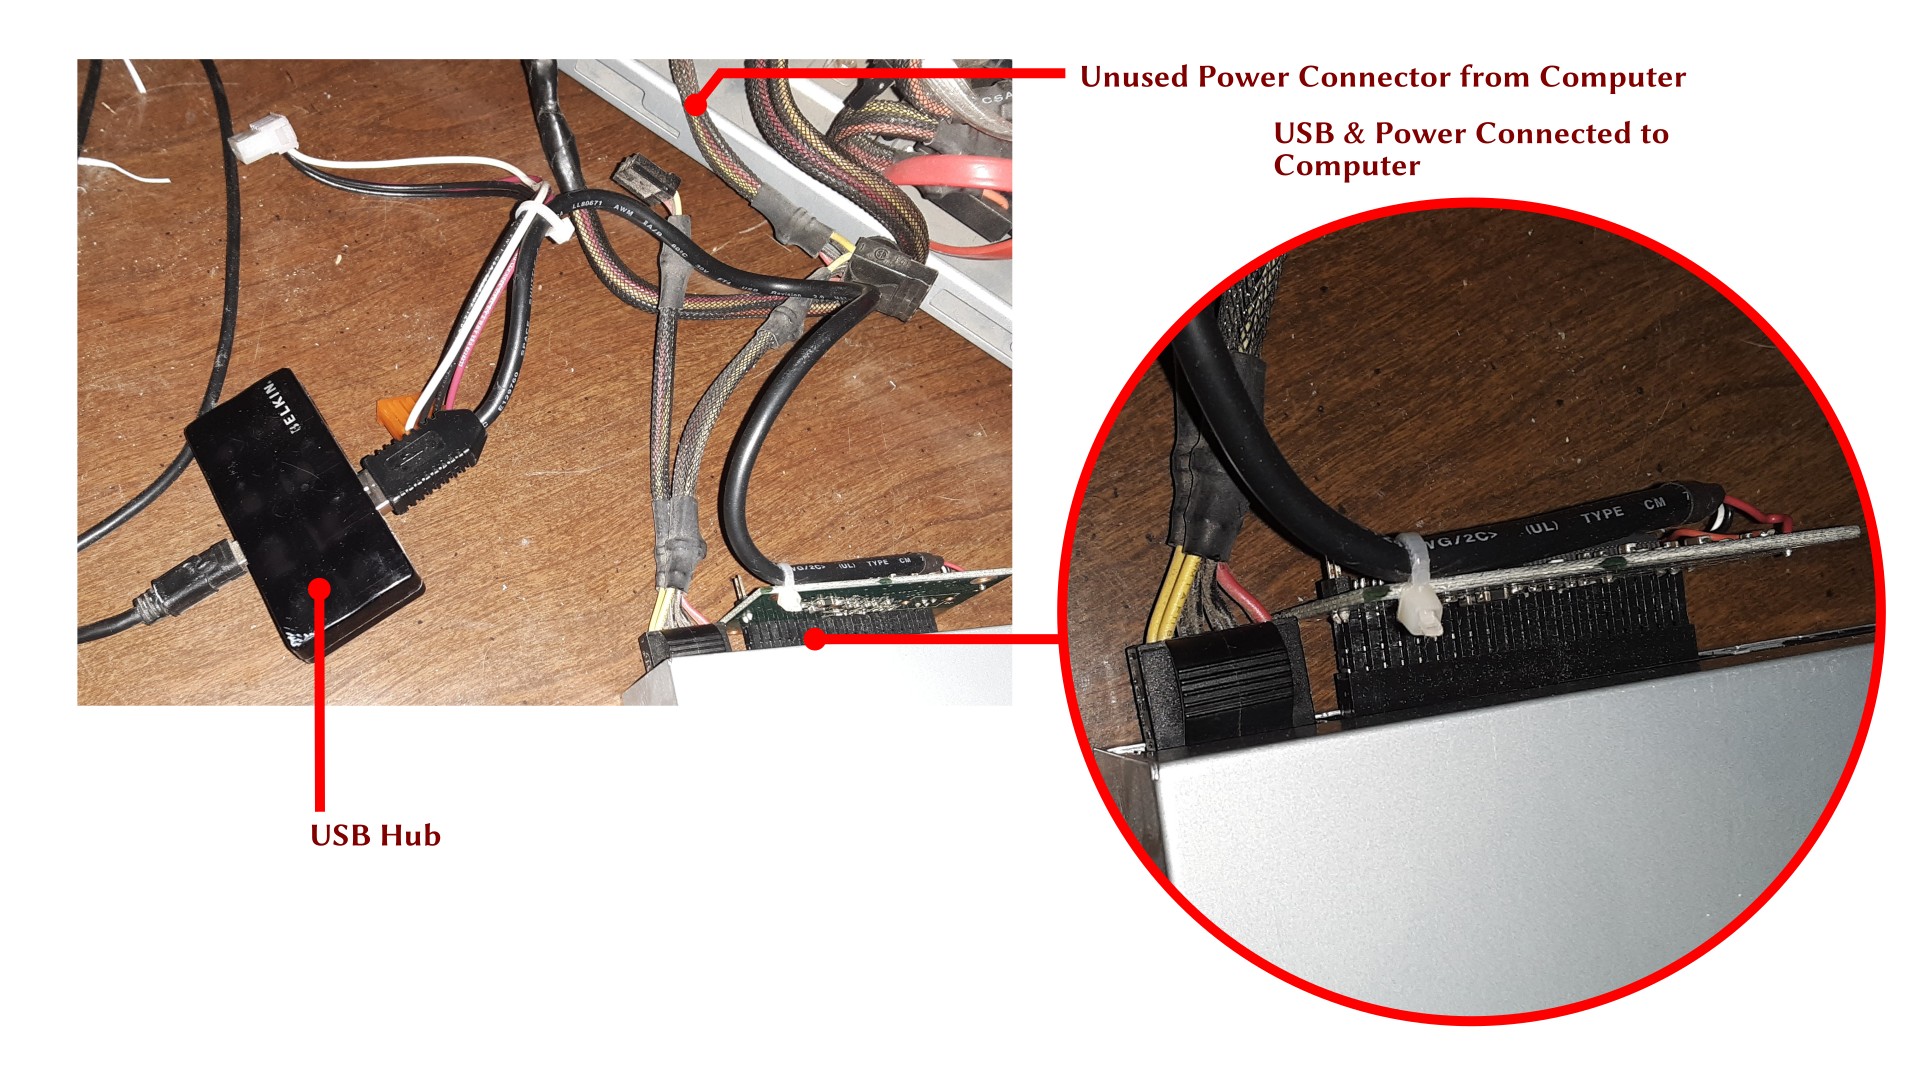
Next, I shut down my workstation (“Sintel”), and connected the isolated DVD drive to it, providing power from a spare molex drive power cable, and connecting the USB through a hub (I didn’t connect directly, because the USB cable on the drive is so short).
Then I powered my workstation back up again, and ran ‘lsusb’ on the command line to see how the drive appeared to the computer software:
terry@sintel(12-01 19:45)~$ lsusb
Bus 003 Device 001: ID 1d6b:0002 Linux Foundation 2.0 root hub
Bus 007 Device 001: ID 1d6b:0001 Linux Foundation 1.1 root hub
Bus 011 Device 001: ID 1d6b:0003 Linux Foundation 3.0 root hub
Bus 010 Device 003: ID 041e:3237 Creative Technology, Ltd SB X-Fi Surround 5.1 Pro
Bus 010 Device 005: ID 0dbf:0301 Jess-Link International
Bus 010 Device 004: ID 05e3:0608 Genesys Logic, Inc. Hub
Bus 010 Device 002: ID 2109:3431 VIA Labs, Inc. Hub
Bus 010 Device 001: ID 1d6b:0002 Linux Foundation 2.0 root hub
Bus 006 Device 001: ID 1d6b:0001 Linux Foundation 1.1 root hub
Bus 002 Device 001: ID 1d6b:0002 Linux Foundation 2.0 root hub
Bus 005 Device 001: ID 1d6b:0001 Linux Foundation 1.1 root hub
Bus 001 Device 001: ID 1d6b:0002 Linux Foundation 2.0 root hub
Bus 004 Device 001: ID 1d6b:0001 Linux Foundation 1.1 root hub
Bus 009 Device 001: ID 1d6b:0003 Linux Foundation 3.0 root hub
Bus 008 Device 003: ID 093a:2510 Pixart Imaging, Inc. Optical Mouse
Bus 008 Device 002: ID 04d9:0169 Holtek Semiconductor, Inc. USB Keyboard
Bus 008 Device 001: ID 1d6b:0002 Linux Foundation 2.0 root hub
By testing various combinations, I verified that the magenta-highlighted line, “Jess-Link International” is due to the DVD burner, with my USB hub showing up as “Genesys Logic, Inc. Hub“.
I also tested the drive by putting a DVD-ROM in it and playing some video off of it. It worked exactly as it should, which lends credence to my theory that the loose USB cable was the only reason the drive wasn’t working in the duplicator.
This is my control: it shows me what the drive looks like when it’s just hooked up as a USB device (and proves the USB connector is actually presenting a USB interface to the computer). This seemed very likely, but now I’ve proved it.
Next, I set up the duplicator electrically. It’s still mechanically disassembled, but I’ve hooked up the components and plugged it into power and a USB port on the workstation computer.
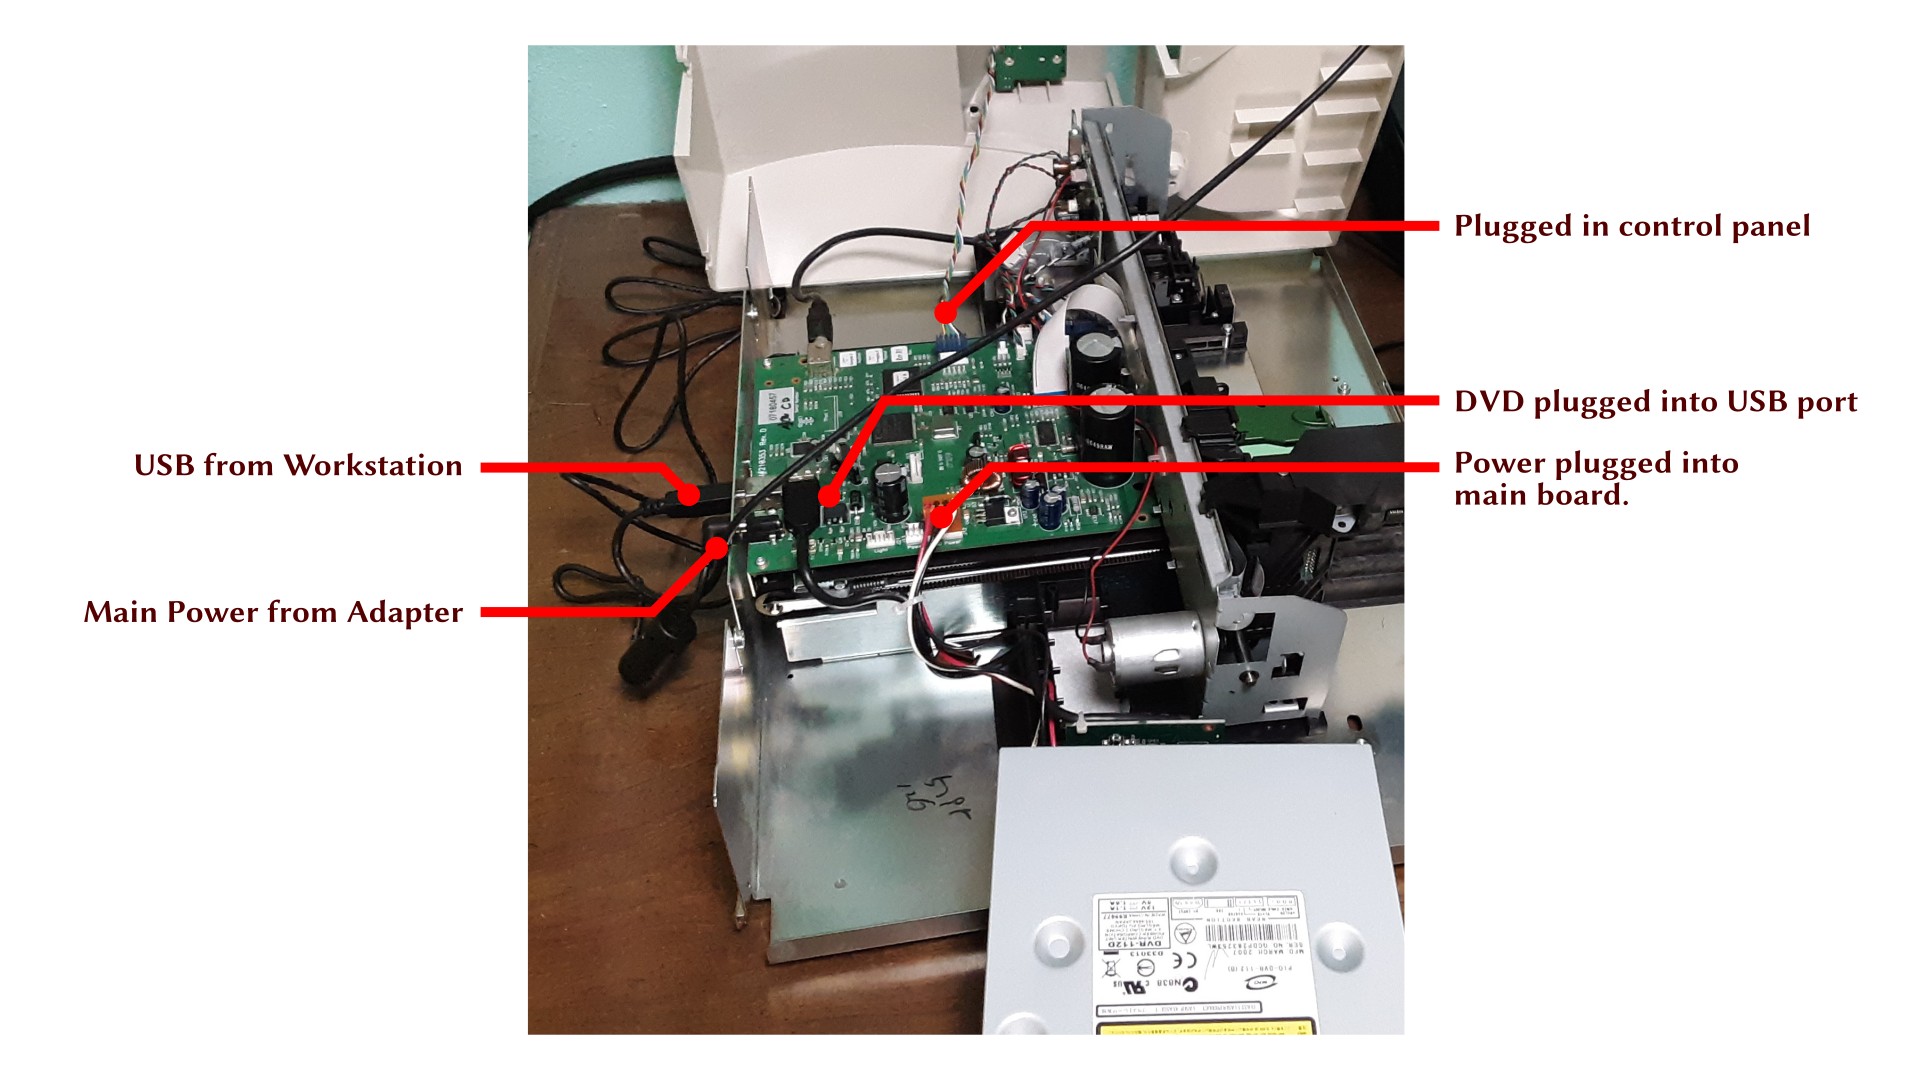
The duplicator wakes up and makes some odd noises when the computer is turned on. I think it’s trying to reposition the carriage. But then I can look at how it presents itself over over the USB interface:
terry@sintel(12-01 20:14)~$ lsusb
Bus 003 Device 001: ID 1d6b:0002 Linux Foundation 2.0 root hub
Bus 007 Device 001: ID 1d6b:0001 Linux Foundation 1.1 root hub
Bus 011 Device 001: ID 1d6b:0003 Linux Foundation 3.0 root hub
Bus 010 Device 004: ID 041e:3237 Creative Technology, Ltd SB X-Fi Surround 5.1 Pro
Bus 010 Device 005: ID 0dbf:0301 Jess-Link International
Bus 010 Device 006: ID 0f25:0008 USB2.0 Hub
Bus 010 Device 003: ID 04b4:6560 Cypress Semiconductor Corp. CY7C65640 USB-2.0 "TetraHub"
Bus 010 Device 002: ID 2109:3431 VIA Labs, Inc. Hub
Bus 010 Device 001: ID 1d6b:0002 Linux Foundation 2.0 root hub
Bus 006 Device 001: ID 1d6b:0001 Linux Foundation 1.1 root hub
Bus 002 Device 001: ID 1d6b:0002 Linux Foundation 2.0 root hub
Bus 005 Device 001: ID 1d6b:0001 Linux Foundation 1.1 root hub
Bus 001 Device 001: ID 1d6b:0002 Linux Foundation 2.0 root hub
Bus 004 Device 001: ID 1d6b:0001 Linux Foundation 1.1 root hub
Bus 009 Device 001: ID 1d6b:0003 Linux Foundation 3.0 root hub
Bus 008 Device 003: ID 093a:2510 Pixart Imaging, Inc. Optical Mouse
Bus 008 Device 002: ID 04d9:0169 Holtek Semiconductor, Inc. USB Keyboard
Bus 008 Device 001: ID 1d6b:0002 Linux Foundation 2.0 root hub
First of all, the “Jess-Link International” line is still present. We also see two new lines: “USB2.0 Hub” and “Cypress Semiconductor … TetraHub“.
The drive appears just as before, and I can still play video from it. The main board on the duplicator apparently acts as a USB hub, through which the printer and robot appear as separate USB devices. I think that the blandly-labeled “USB2.0 Hub” is probably the printer, despite not being labeled as such, while “Cypress…” is probably the hub represented by the duplicator as a whole.
Or so I guess. I will be revisiting that part of the problem later. On the other hand, the printer component is what was officially supported on Linux, and apparently, is little more than the basic Lexmark Z600 printer driver. So however it appears, it apparently does work.
The important thing in this first step is that I have verified what I previously had only guessed, that is:
- The DVD burner is a standard internal 5.25″ drive, easily sourced, and modern drives will fit into the tray.
- Although the DVD is originally an IDE type, the interface is adapted to USB
- The duplicator only acts as a hub, so the DVD burner is directly accessible to the computer
- The duplicator also provides power to the drive.
This means, it will not be hard to interface a (more) modern M-Disc BD-R drive to the machine, and I will be able to access it. I won’t need to make a separate connection to the computer to support it (an option I considered in case my guess had not panned out).
Purchasing for the M-Disc Upgrade
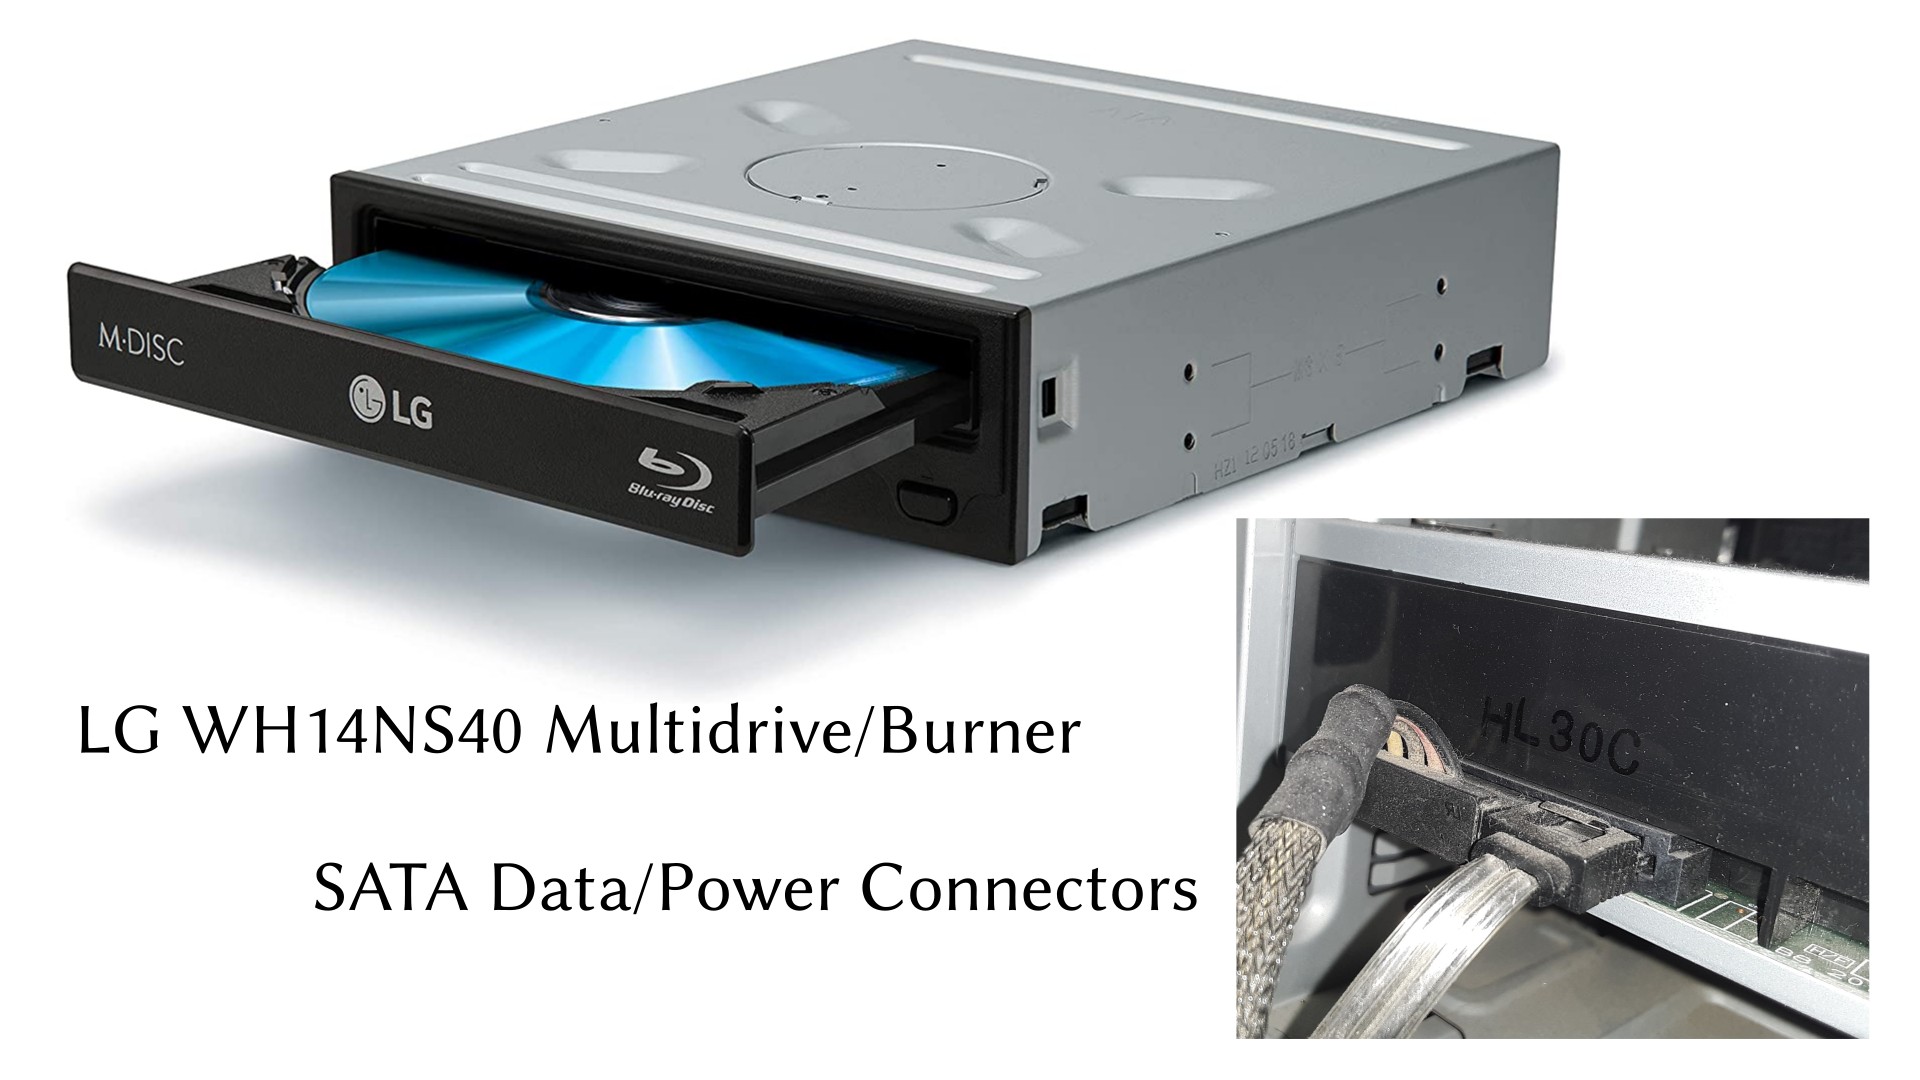
The drive I plan to use as a replacement is the same model that I have used for years on my desktop workstation and my file server: the LG WH14NS40 M-Disc capable BD-R/DVD-R/CD-R multidrive / writer. This has been a very reliable drive which can write to all the optical media I’m interested in supporting. It is a pure SATA device, with SATA power and data connectors on the back. There is no alternative Molex connector (unlike some older optical drives).
Because the drive is SATA, it will need an adapter to connect it as a USB drive. Fortunately, this is a very common use-case, and there are lots of adapters available on the market. The only slightly challenging part is that we must get one which provides supplemental 12V power, because optical drives like the one I’m planning to use require the 12V power which USB adapters don’t provide. I settled on this one by Neeyer, but the brand is unimportant:

Of course, the supplemental power for the USB-to-SATA adapter is provided by a wall plug transformer, which I don’t want to use (it would mean a second power cord for the duplicator). So I’ll actually be modifying the power connector inside the duplicator to pick off the 12V DC that the drive needs. I will have to do a little cutting and soldering for that part.

Now, I’m just waiting until the parts get here to install the new drive.
TO BE CONTINUED…
I will continue after the new parts arrive, expected sometime next week. In that next installment I will document the necessary modifications to the adapter; the installation of the drive and adapter into the duplicator; and the reassembly of the duplicator. After that, I’ll begin the software development phase, which is going to involve some trial and error.
