HIGHLIGHTS:
- Screencasts documenting texturing for the “Aquarium Room” and the Mission Control Room, and the lip-sync process with Papagayo and Blender-Papagayo Plugin.
- Documentation for Animation Computer for K. Perry.
- Worked on upper-stage mech shot.
- Worked on SU-SuitingUp animation blocking, but ran into a lot of problems with timing and shots. End result was a
mess I’d have to untangle later. - Created a whole-episode animatic.
SUPPLEMENT: Whole Episode Animatic (16:35)


Jul 1, 2018 at 4:00 PM
Animation of Georgiana
A short animated scene of Georgiana from our character animator, Keneisha Perry.
Here’s me trying to capture her being playful. Using reference always helps things go faster. I’ll upload this to sketchfab maybe when I finish it tomorrow. #3d #3danimation #lunatics #georgianalerner https://patreon.com/lunatics
Jul 8, 2018 at 3:08 PM
Still Blocking…
I’ve been working on blocking this sequence for over a week, now. I think I have discovered some workflow problems in the process. But I think I may finally have worked out the right way to do it.Basically, Blender is known to become quite difficult to use in scenes with a lot of armatures — and this scene as set up has nine of them. My plan is to figure out a good way to break it up for the animation step.
Jul 11, 2018 at 4:00 PM
Sequence File Linking

I hope I don’t run into some kind of limit on the number of scenes per file with this! I think this is my most complex linking problem in Blender so far.Conceptually, it’s not really that complex — just a lot of elements to combine. The animation scenes on the left were all blocked in the one “SuitingUp” sequence file, but for performance reasons and convenience for Keneisha while animating, they needed to be broken apart somehow.
Mainly the goal was to reduce the number of armatures in any one scene, while not making it too hard to keep relationships between the characters correct.
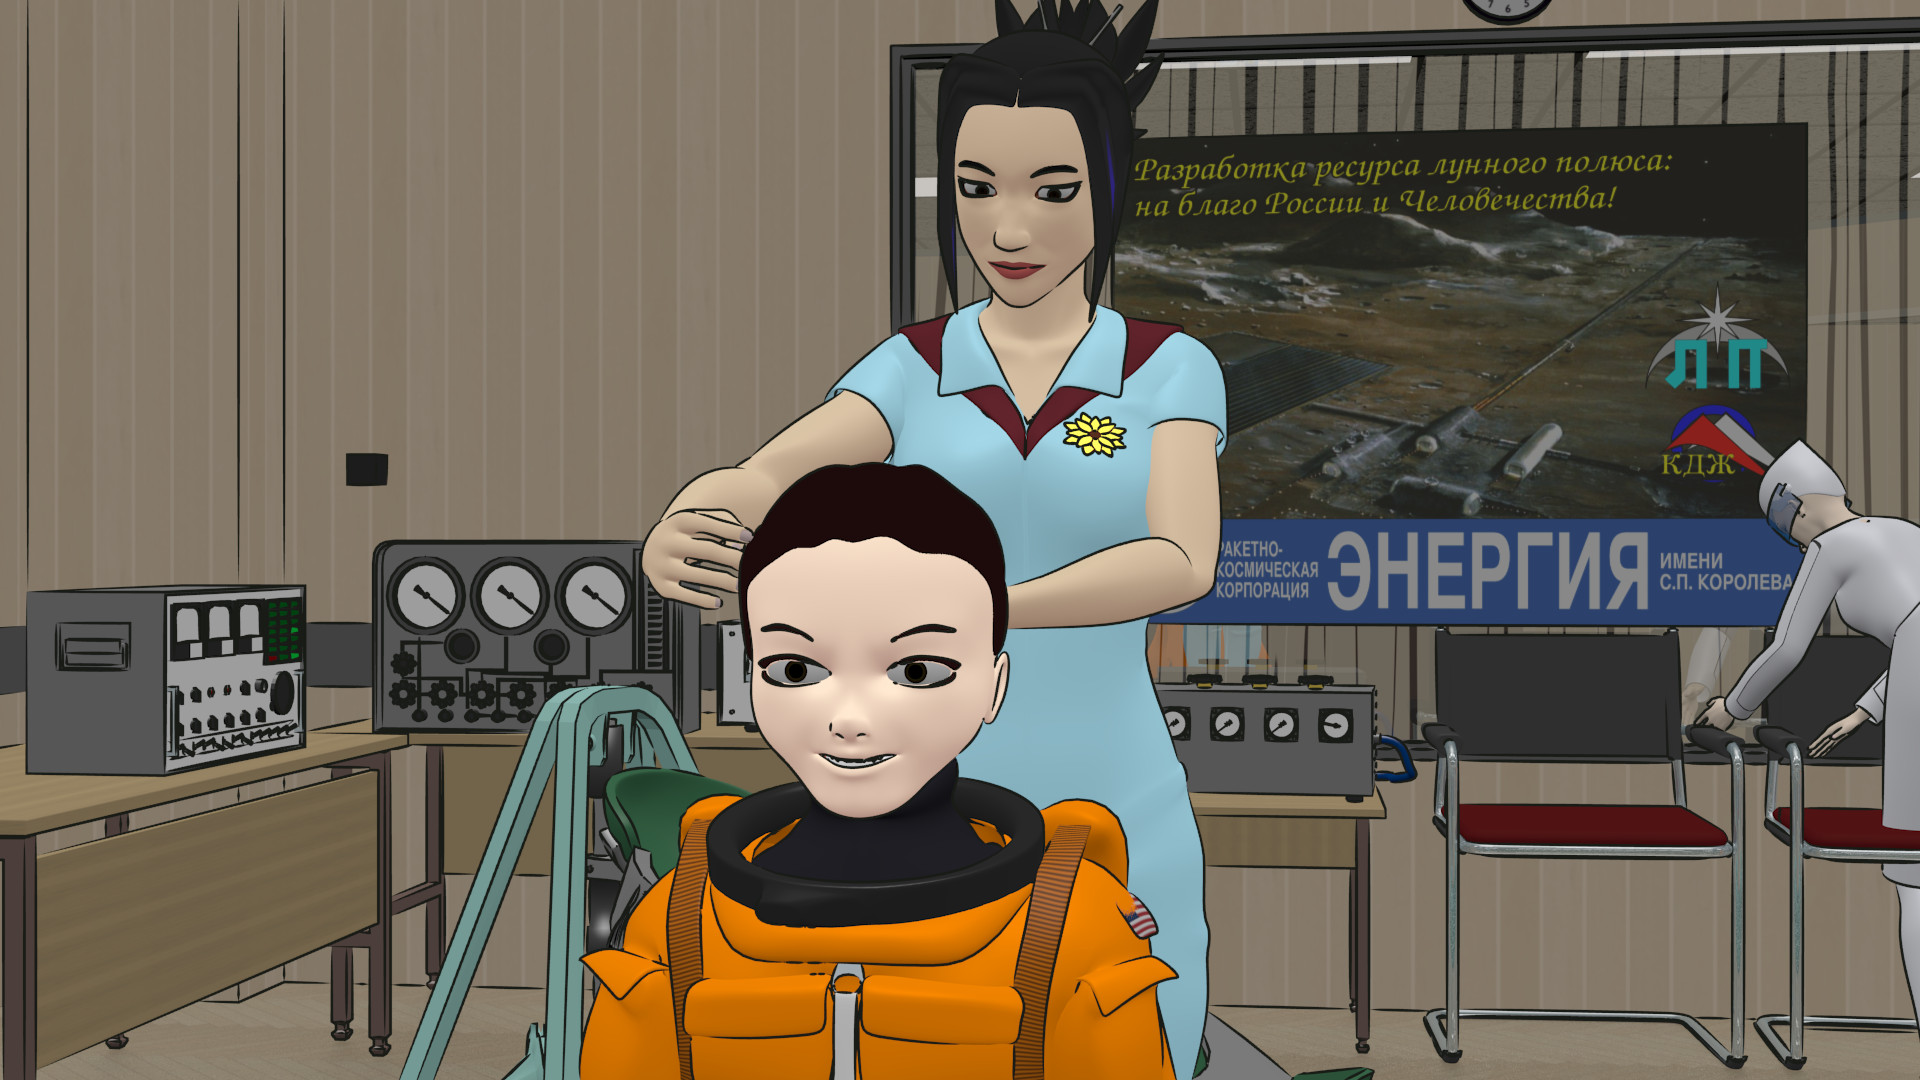
First I divided the scene up into sequential “actions” or “animations” “A0” to “A8” — each of these represents a continuous bit of animation, while there are time-jumps between them (“ellipses”).
The first few shots involve variant versions of the characters, which require their own armatures, but only have a couple of characters in shot (A0 is a static picture of a crate, so it has no characters in it). Like this shot of Georgiana’s hair being brushed (A1) before putting on the communications cap (there’s a technician in the background in this storyboard, but there won’t be in the final shot — there is also no brush, you may notice).
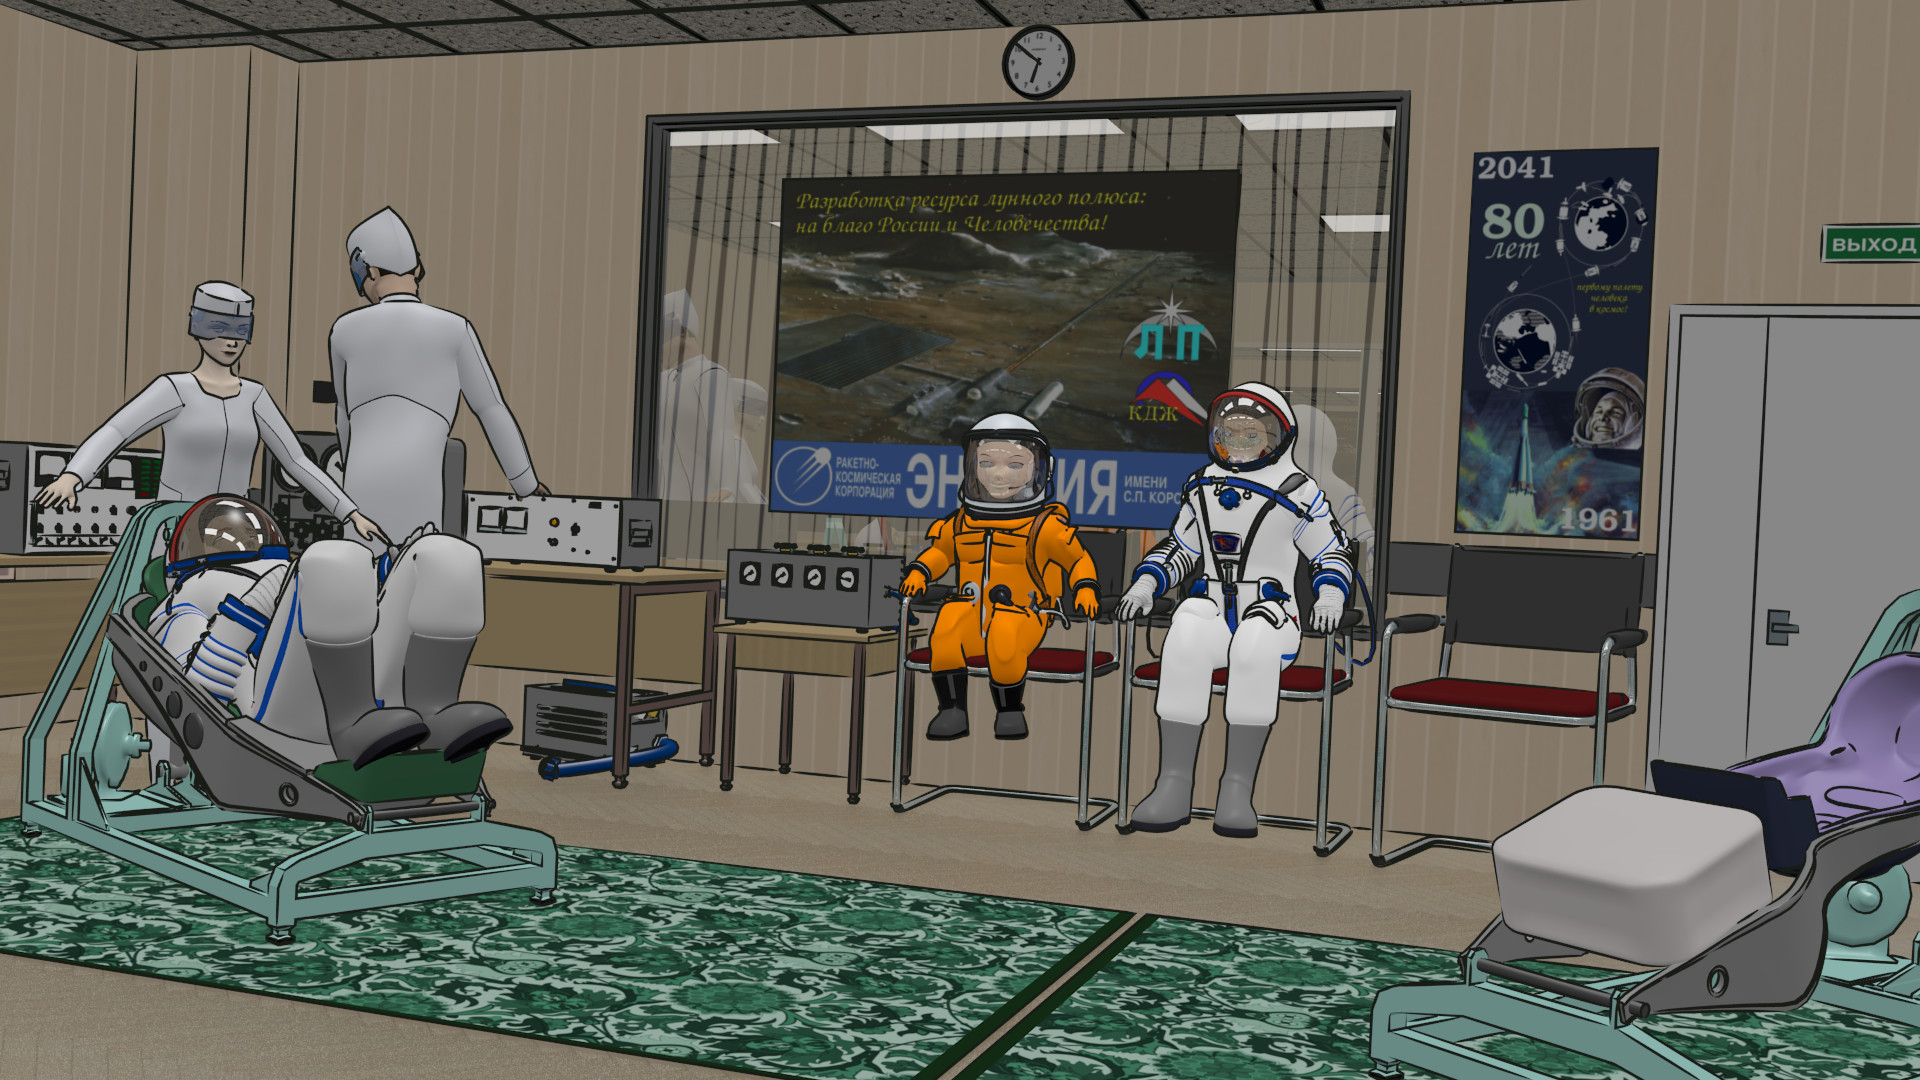
Then for a few scenes where there are a lot of characters at once, I divided the scene into “foreground action” and “background action”, creating a separate animated file for the technicians who are working in the background of some of these shots, but don’t interact much with the foreground characters.
Like this shot (A5):
Then, the challenge is to combine everything back together and produce two film strips for “Cam1” and “Cam2” which have overlapping shots of the action to be combined in Kdenlive (although the sequence is roughed in, I want to have some flexibility to adjust shot-boundaries and/or include transitions — for example, I might want to put dissolves in to indicate elided time more explicitly and less jarringly if the cutting seems too jumpy. There is meant to be a certain amount of unease in this scene as well as anticipation, but it’d be easy to overdo it).
For the complete animation scenes, I just do my usual trick of making the animation file the “background scene” of the scene the cameras are defined in. In this case, though I have the extra problem that there are multiple animation scenes in sequence, so I’m going to define the cameras in their own scenes, then link them into individual shot scenes.
For the combined animation sequences, I have to put the background together in the camera file, from multiple sources. To do this, I will use object-linking into new empty scenes, which will bring them together — then those scenes will be the backgrounds for the shot scenes.
Each shot scene will need to do two render passes — one for color and one for ink, which are then composited in that scene. Then the composited output will be accessed as a strip from the original camera file.
Technically, I could use a separate scenes for this, but I already need 25 scenes in this file, so I thought maybe I’d double these up. This will be linked into the Visual Sequence Editor, and all the shots for each camera combined into the resulting strip.
I also use the VSE to put black filler into parts of the animation that won’t be used (e.g. the parts where I know the other camera is being used), so we don’t waste time rendering animation we don’t need. This doesn’t matter for the GL previews, but later on, I’ll be limiting this as severely as possible to minimize the time required for full rendering.
Technically I could avoid some of this complexity (and if Blender does have a low limit on number of scenes in a file, I may have to), but then I would have multiple camera-direction scenes and the complexity would be moved into the Kdenlive step (which is what comes after I get my two camera strips for the scene). My preference is to handle it here in Blender if I can.
The “Armatures Included” notation on the left doesn’t have a key in the diagram, but these are the library character models needed for the sequences:
H(fs) – “Hiromi-Flightsuit”
H(s) – “Hiromi-Sokol” (spacesuit)
G(hb) – “Georgiana Hair-Back” (just for this shot)
G(s) – “Georgiana-Spacesuit”
S(s) – “Sergei-Sokol”
T1 – “Cleanroom Technician 1”
T2 – “Cleanroom Technician 2”
P1 – “Porter 1” (the “It’s time” guy at the end of the sequence).
Jul 13, 2018 at 4:01 PM
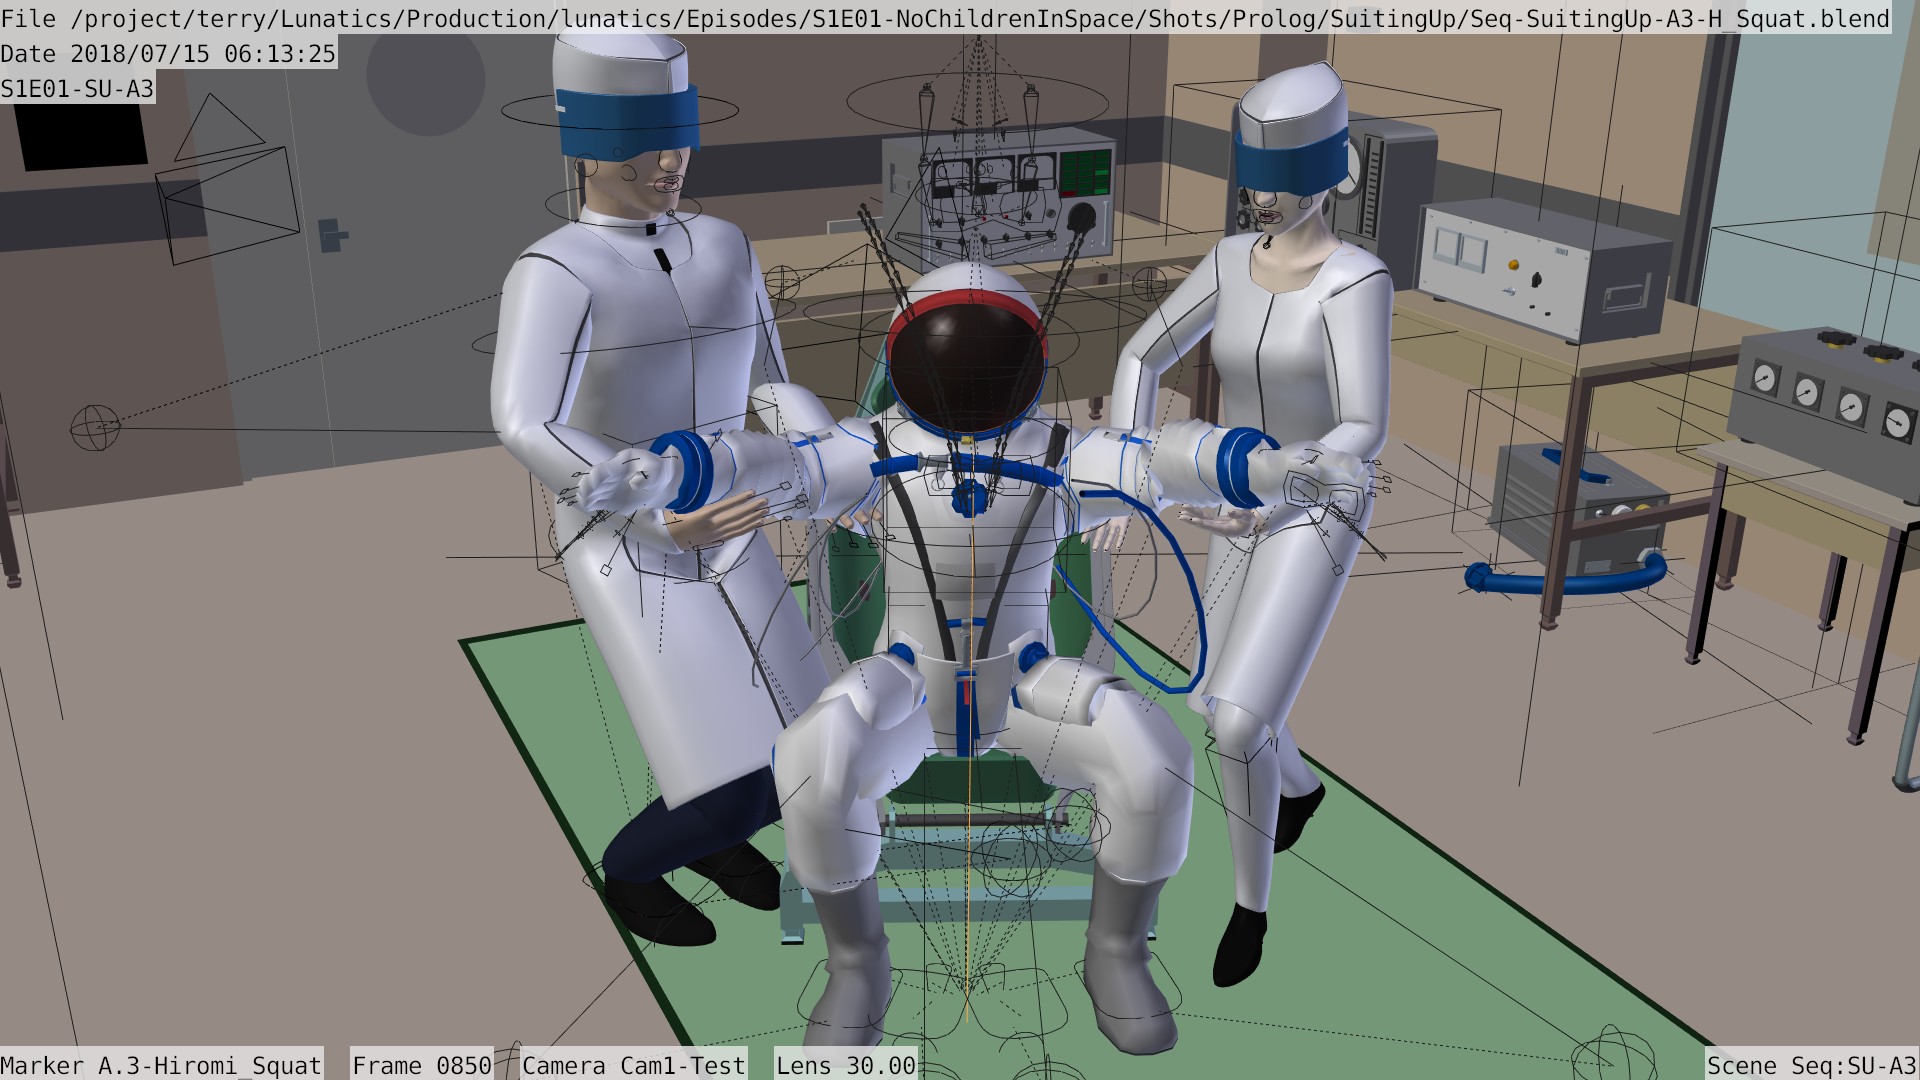
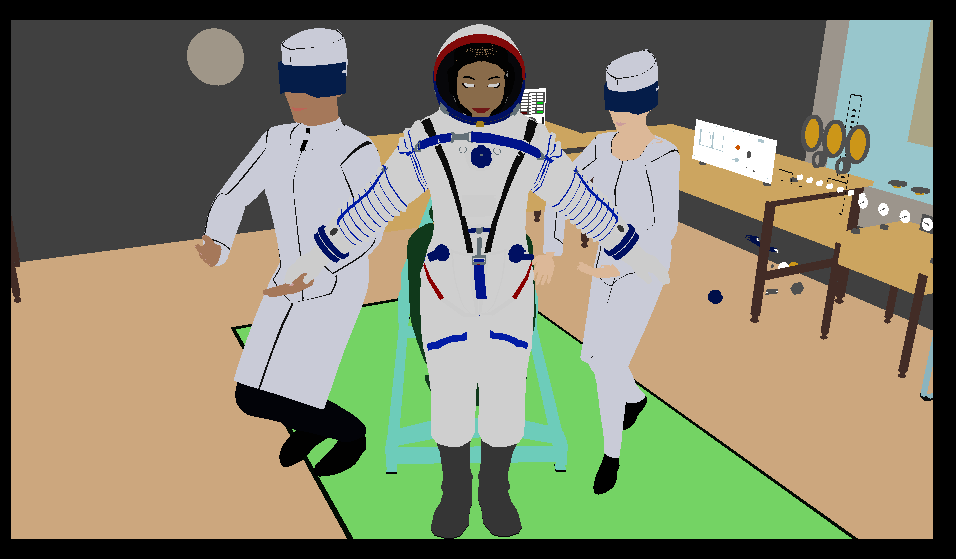
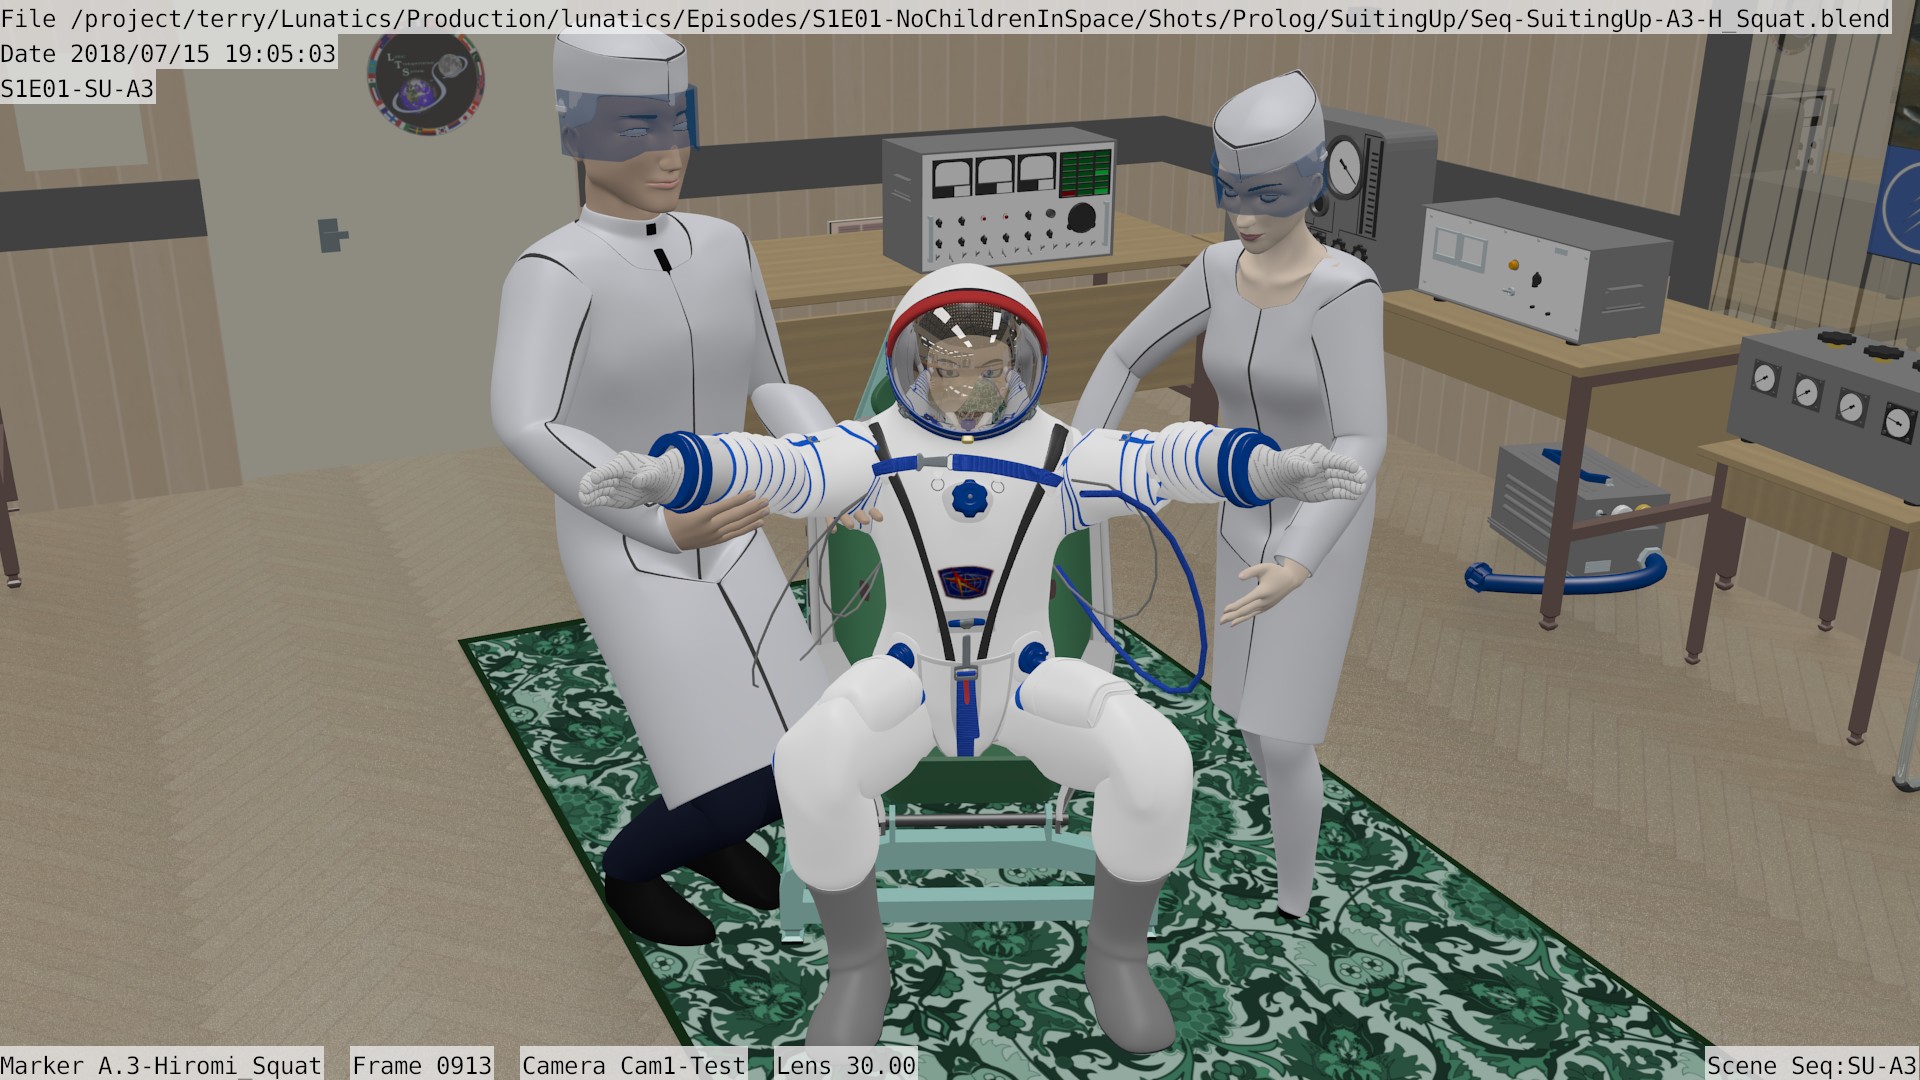
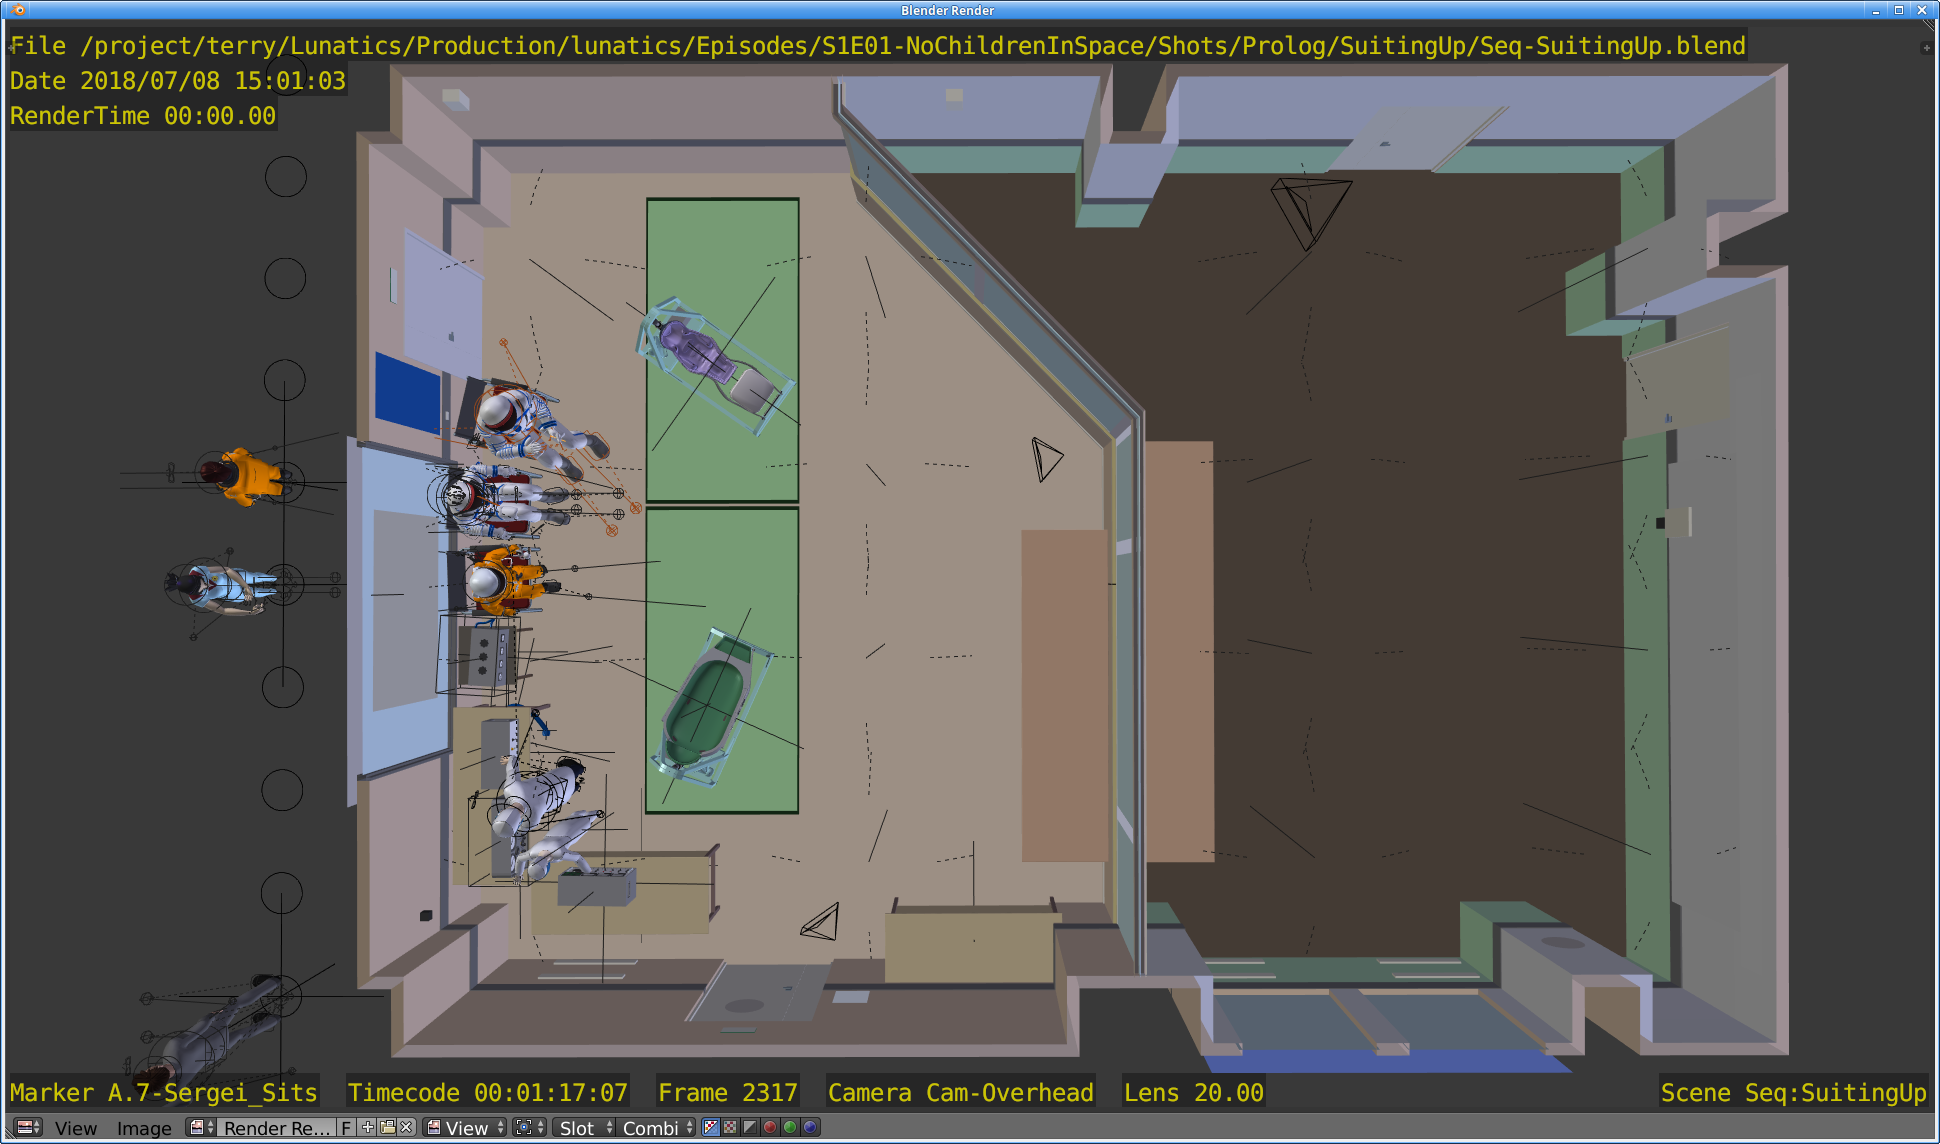
Background Test Render
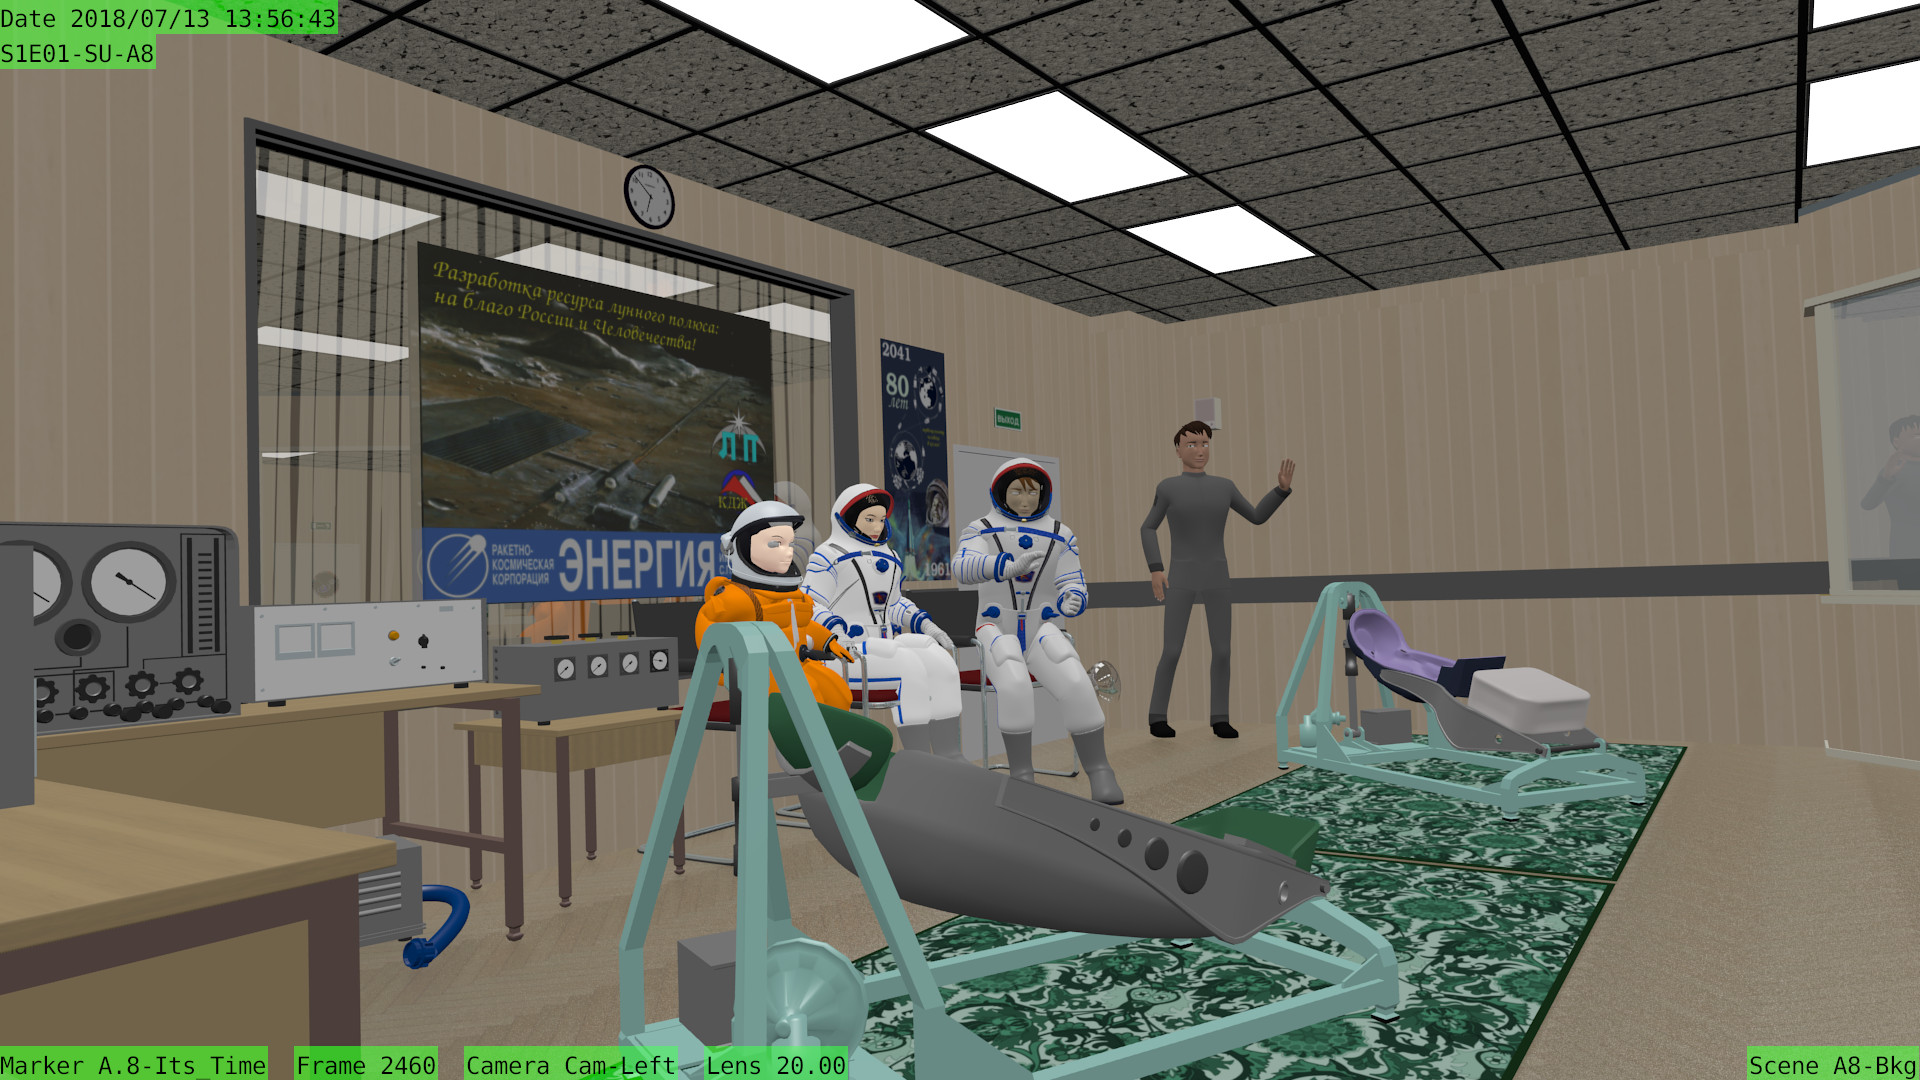
This is one of the camera-file scenes I described in the previous post (“A8-Bkg”), which is not the actual shot, but a test camera view of the action (“Cam-Left” — meaning a camera positioned at “stage left”, that captures most of the action and allows me to make sure characters are where they are supposed to be).This render has the “stamp” notations turned on, and I’ve adopted the convention of using “black-on-color” lettering for these intermediates, “black-on-white” for animation cameras, and “color-on-black” (or “color-on-clear”, because the alpha is low) for the final shot cameras (I may have already posted a few of those from the Press Conference sequence (“S1E01-PC”).
Who knew filmmaking involved so much accounting, right?
(Okay, yes, I did know that).
Anyway, it turns out Blender is not creating any problems for this camera file with so many scenes in it. Which is extremely useful, because this does seem to be a good way to do this.
This Blender file is encoding all of the information about shot timing and relationships so that in the end, I’ll be able to ask for just two renders — one for “Cam1” and one for “Cam2” to create this sequence, rather than needing a dozen separate shot files (I mean, they’re still there, but the relationships between them are automated, which reduces the opportunities for human errors in the rendering process).
Should be finished with this sequence blocking today, then I’ll check it into the repo, and move on to the last multicam setup for episode one, which is for the Soyuz interior shots (should be simpler — only three characters, plus the bear, which has a bit of armature in it).
Jul 15, 2018 at 7:56 PM
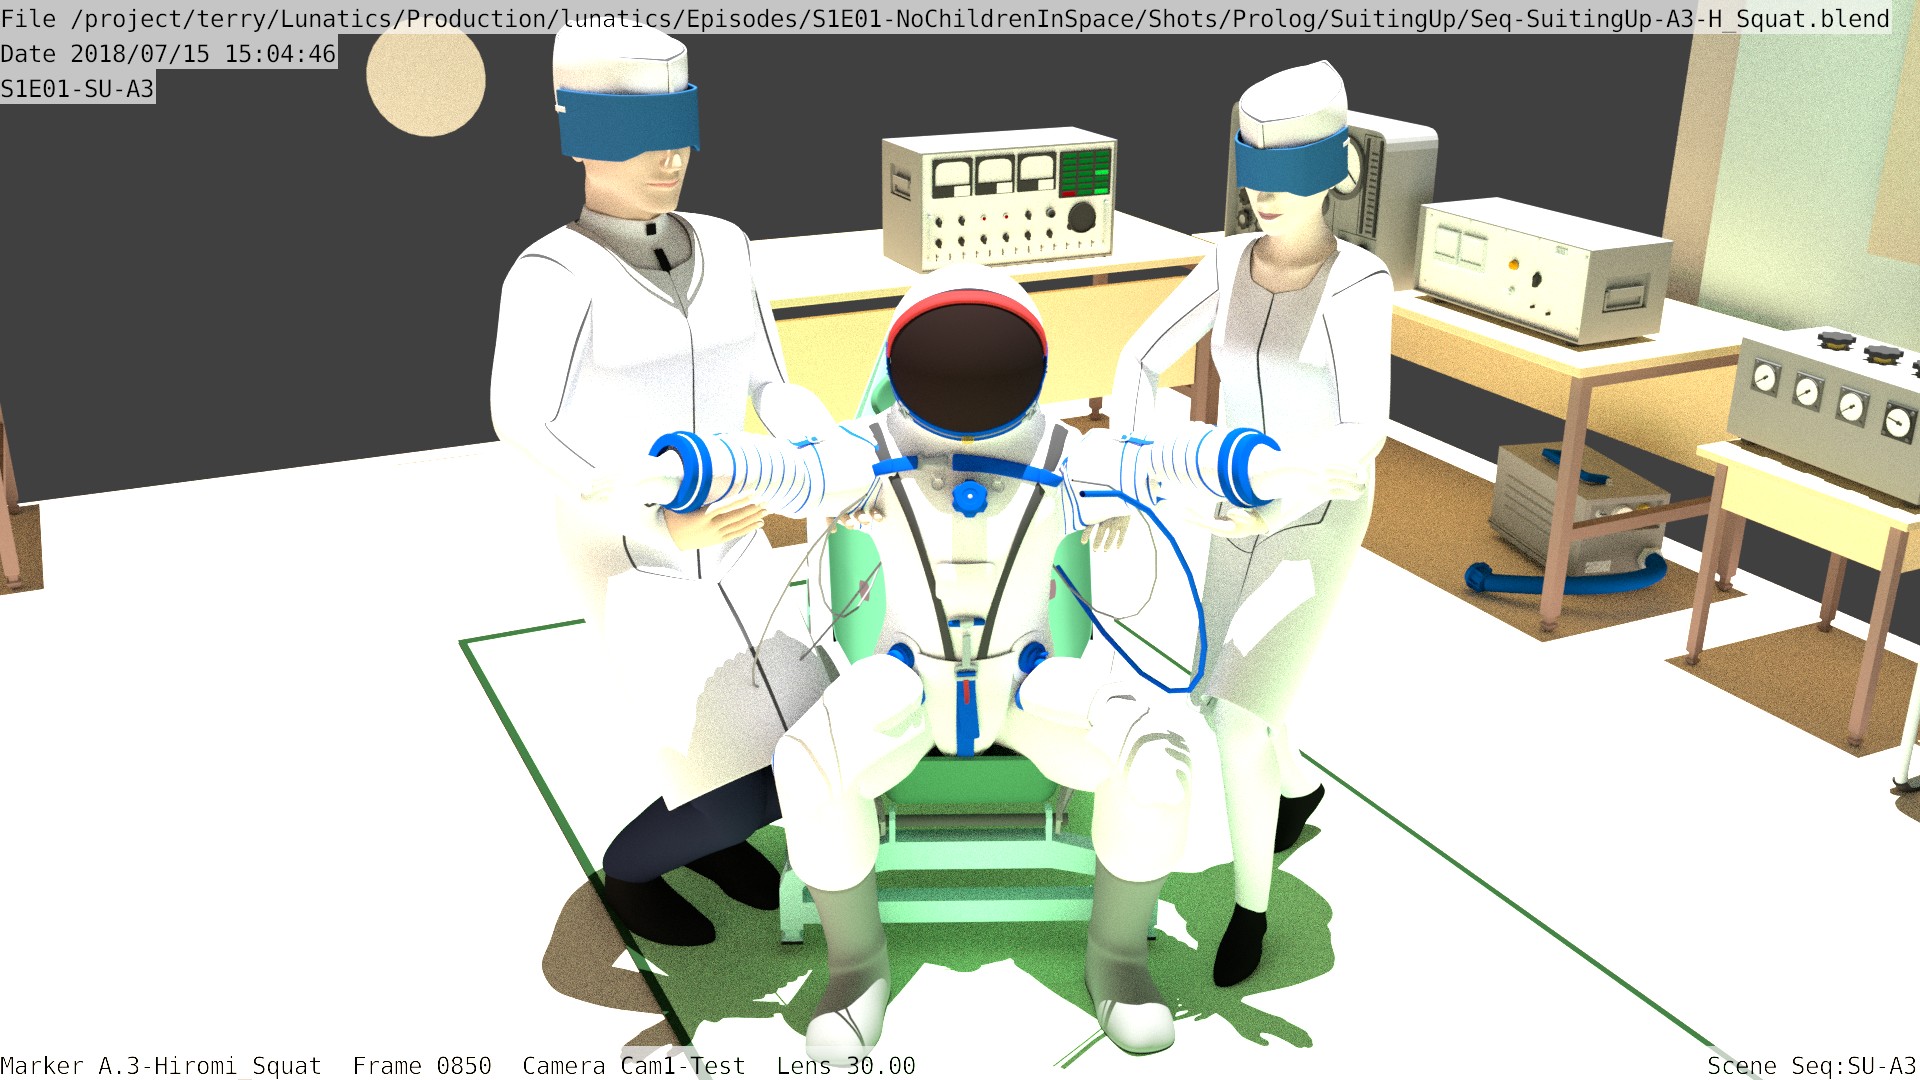
Ink & Color Look Test
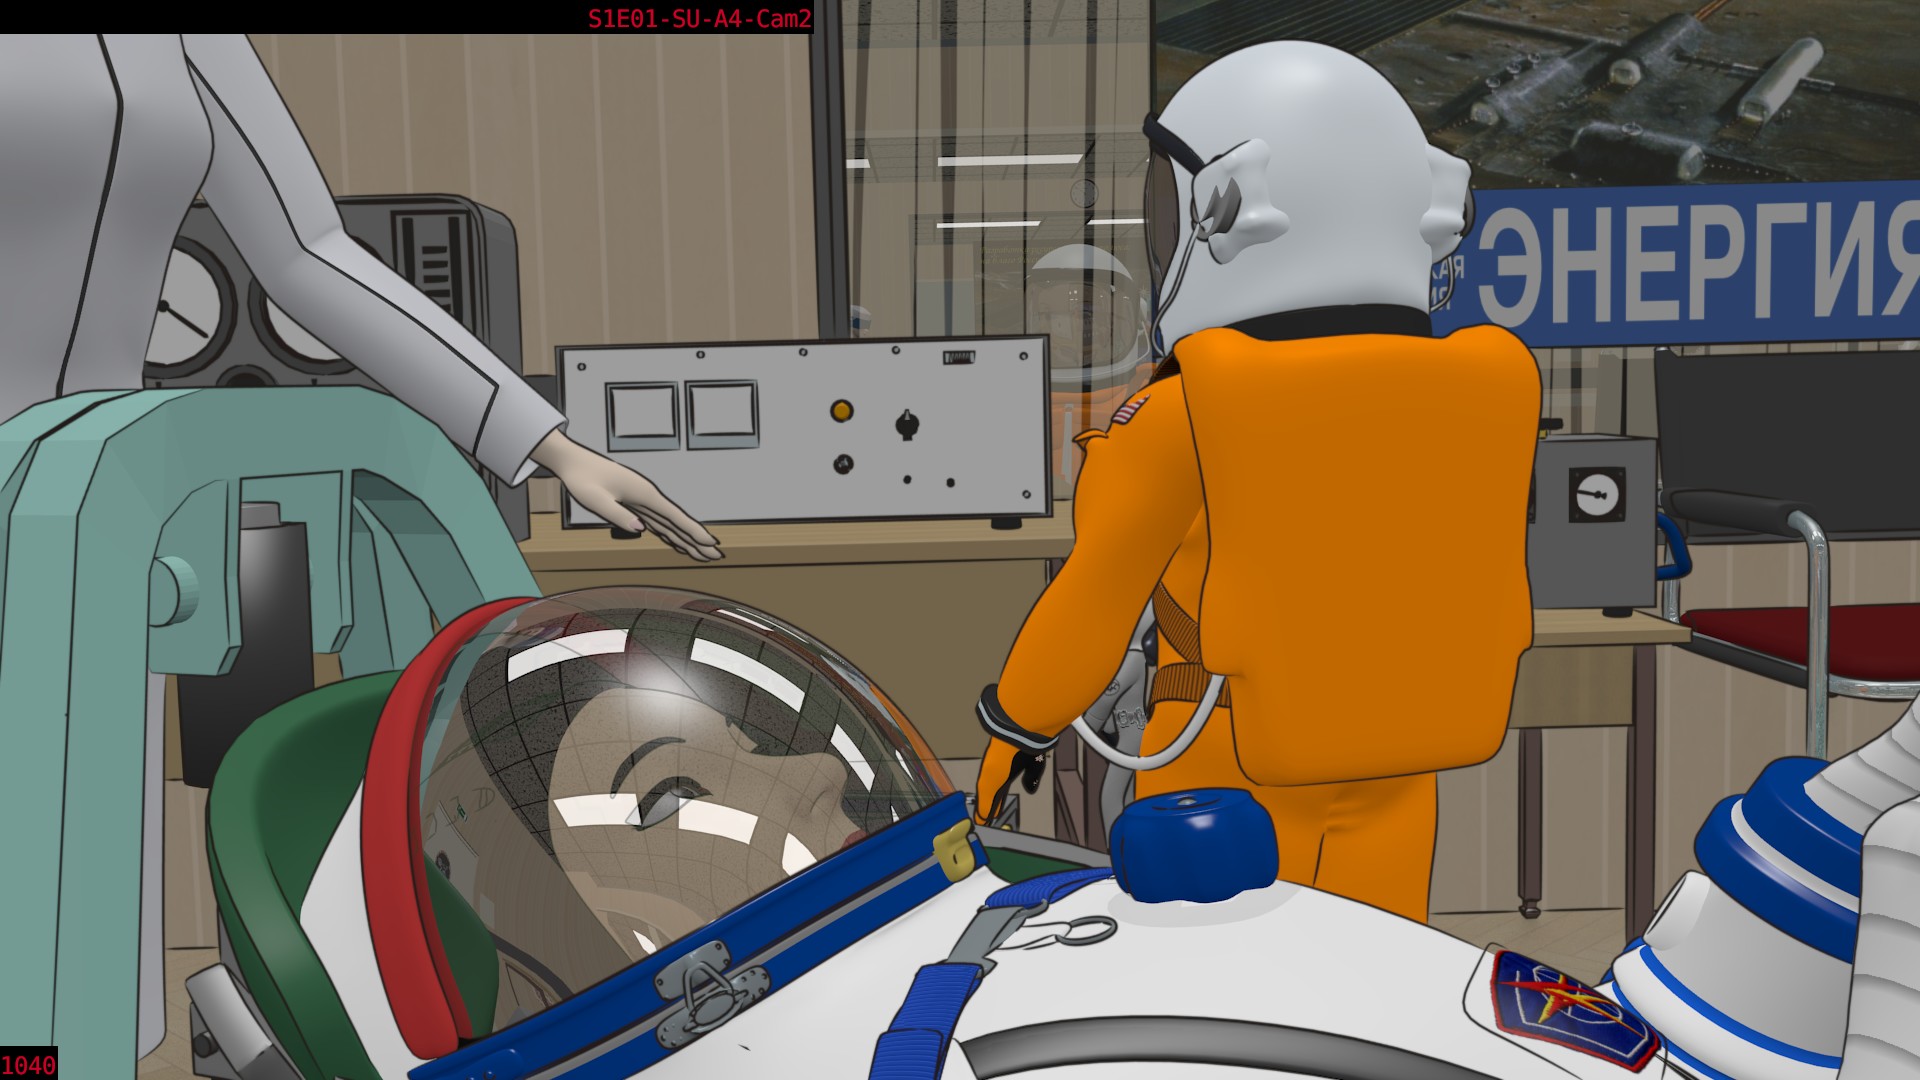
After years of work, I’m finally to a point of combining elements to get a true look at the composited ink & color style that we are trying to get.There may need to be some tweaking on the “Transparent Ink” color — that is to say, the color of the ink lines when they are seen through a transparent medium, such as the spacesuit visors in this shot.
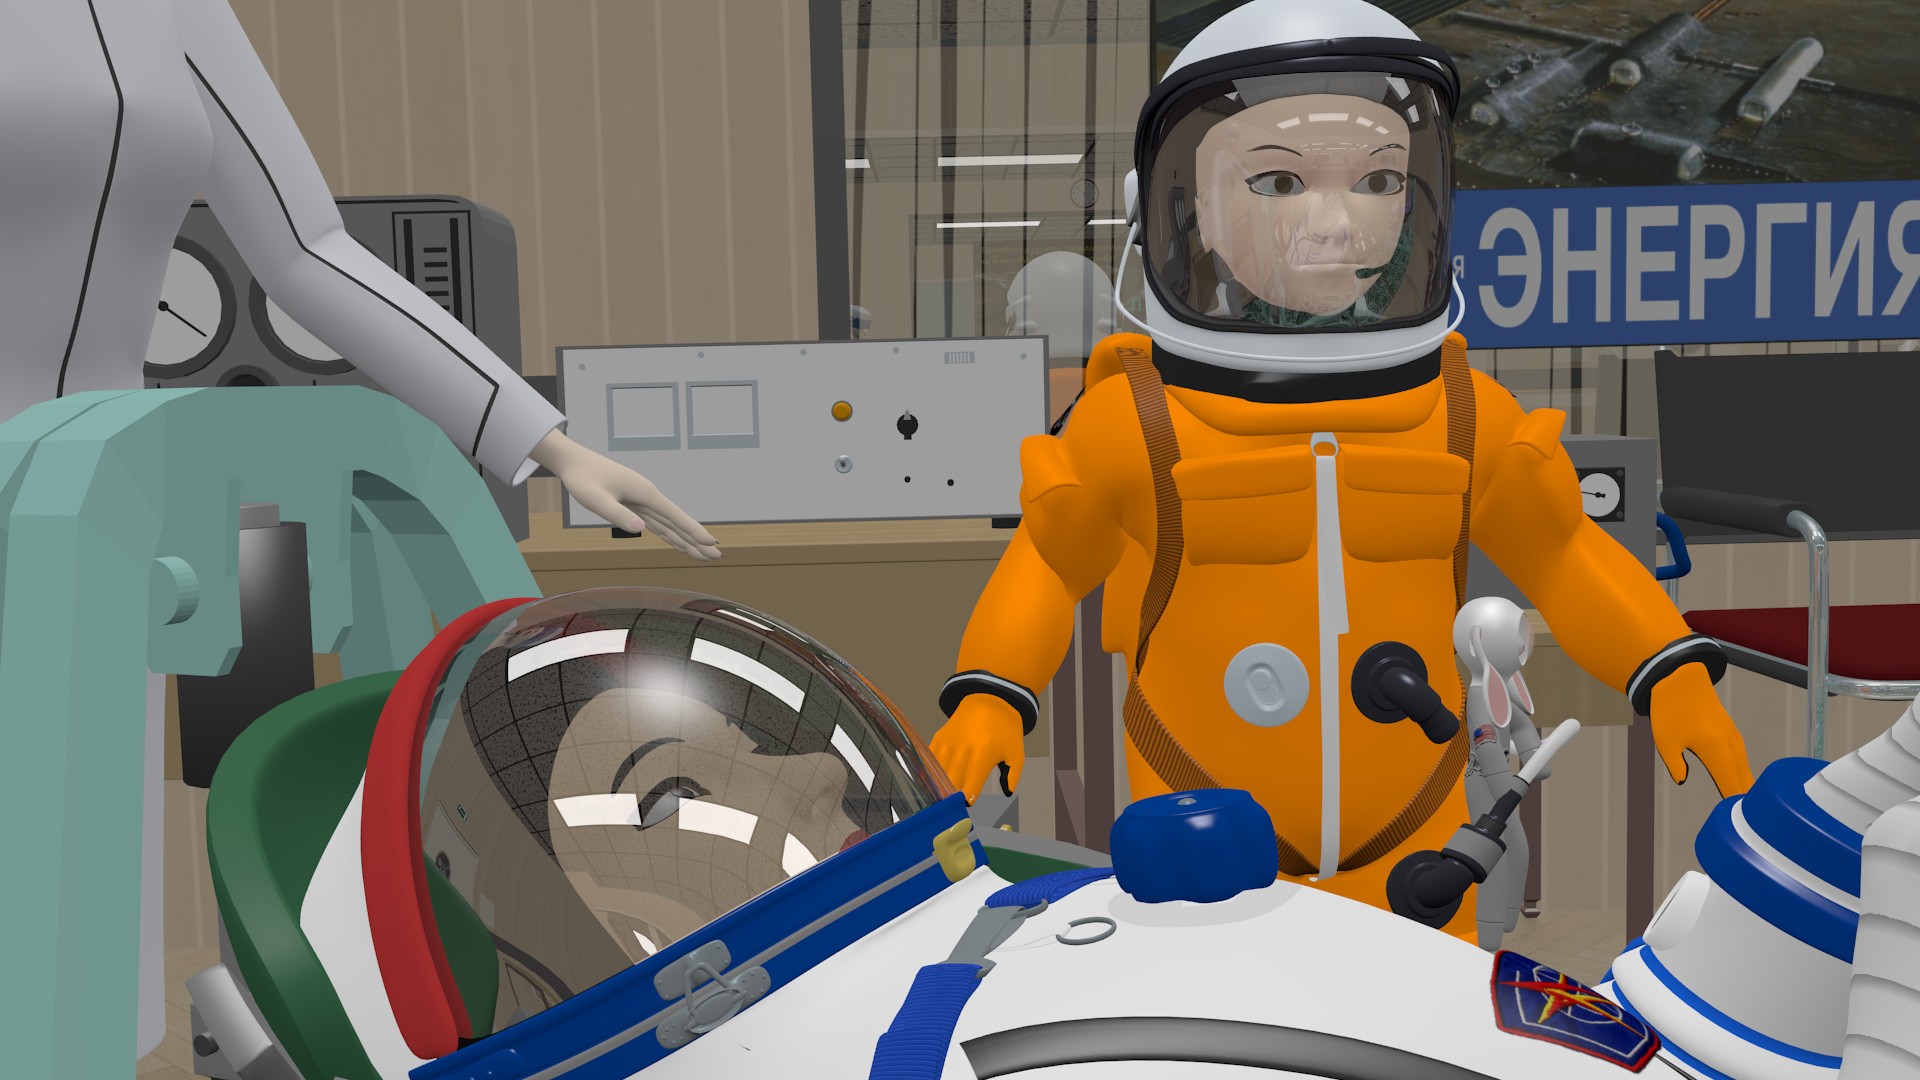
Here’s the color layer by itself:
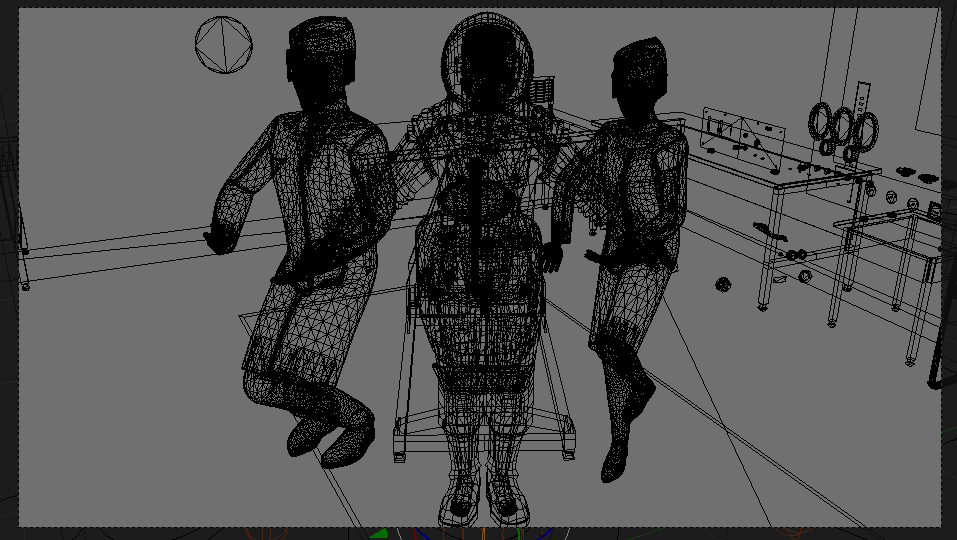
And here are he ink lines against a plain white background:
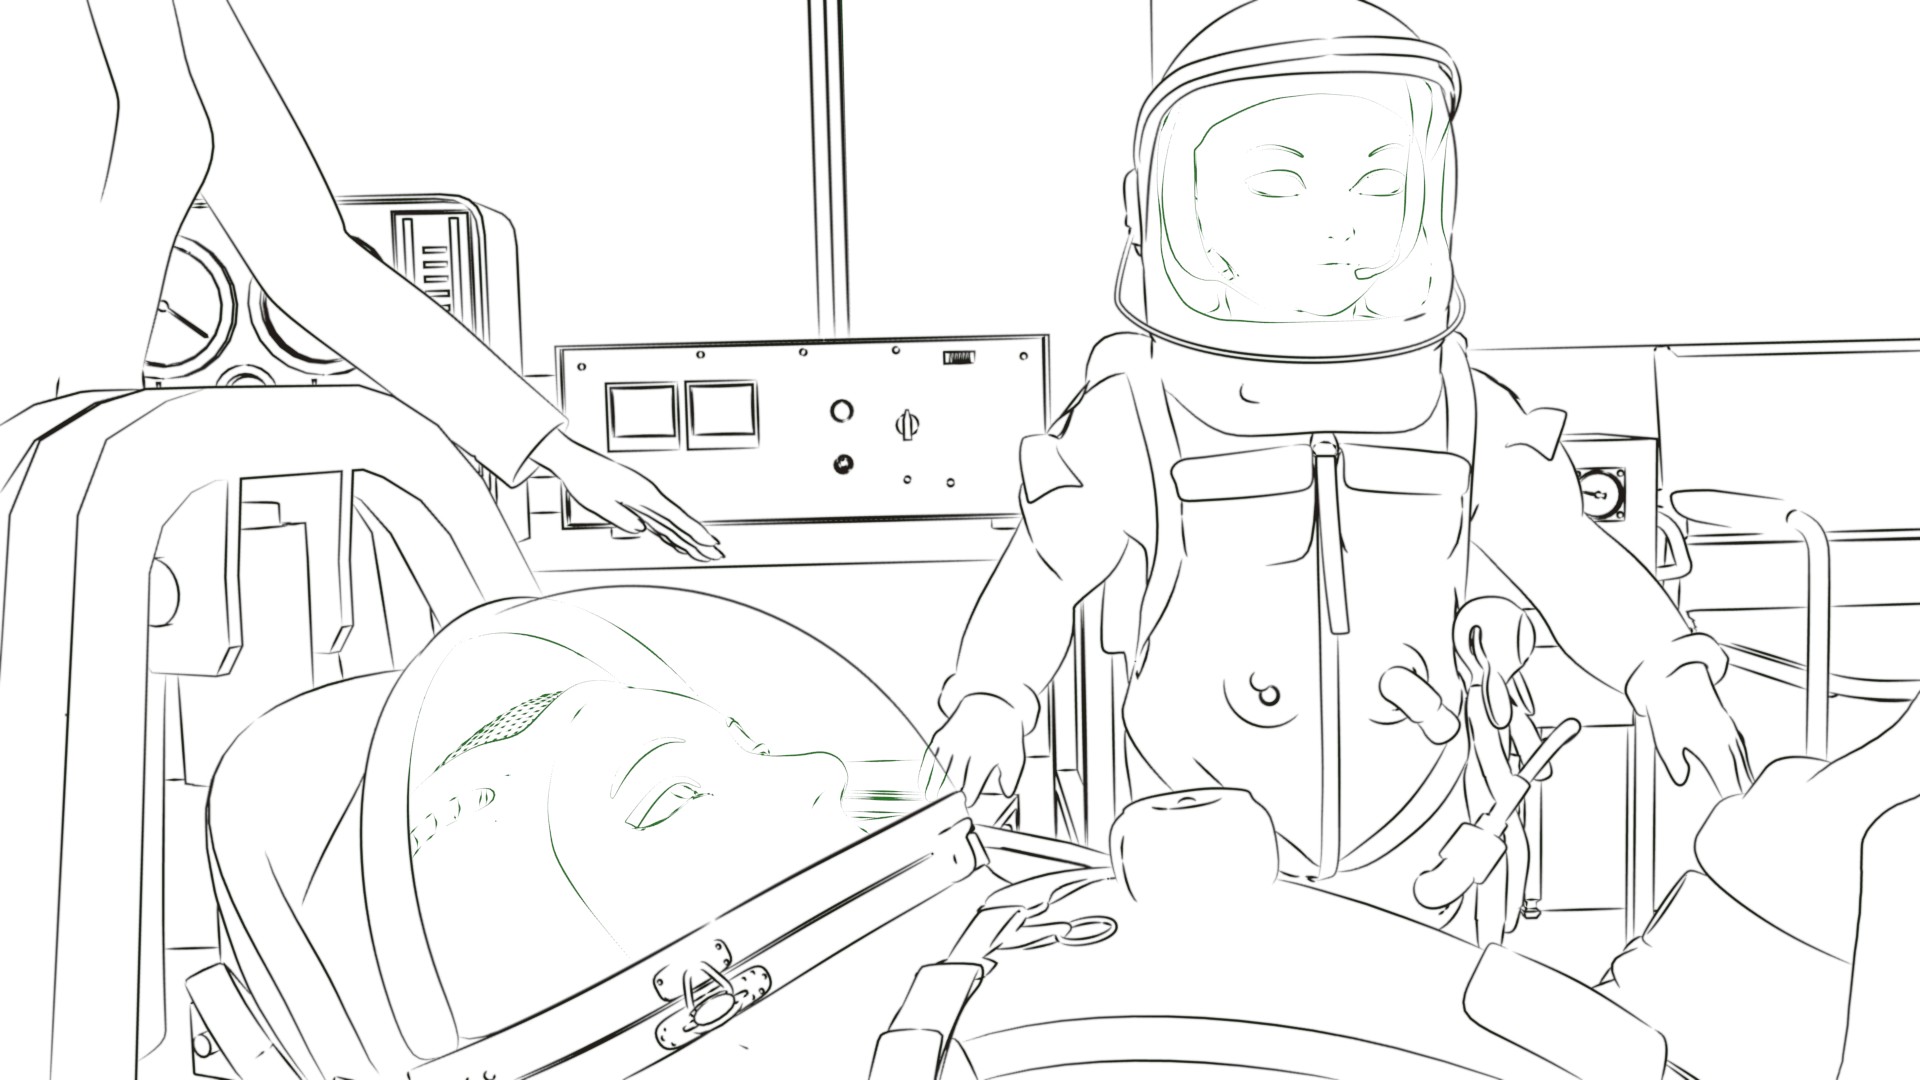
The role of the lines is to add sharpness and detail that is somewhat erased by the flat “toon” shading used in the color pass.
It’s funny how green the green transparent ink lines look in the composited image, when you can hardly tell their color in the isolated image.
But in any case, I’ll be selecting just the color balance I want on the ink lines for the shots in this sequence. I may use somewhat different colors in different scenes, to match the palette better.
This combination of NPR and optical effects is rather subtle to pull off. Too much realism can look out of place with the toon shading, but I did want to include reflections as a composition element in many scenes.
(The character faces are unposed in this shot, BTW — hence the blank looks — this is from the blocking setup).
Jul 16, 2018 at 4:00 PM
Finished Linking Diagram for “SuitingUp”
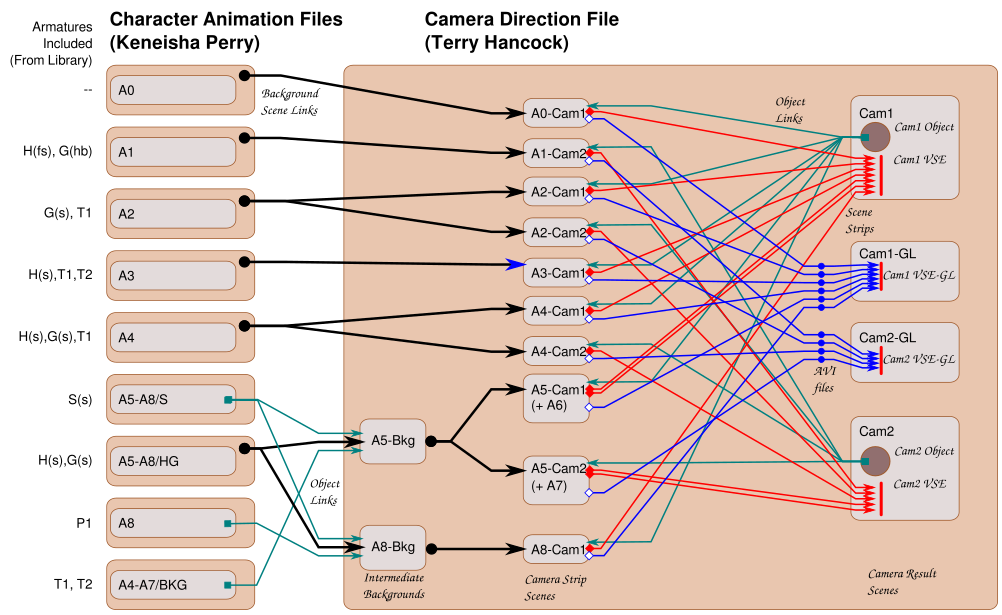
Just a quick update: I posted an earlier version of this diagram, with what I had planned to do with the linking. This is to document what I actually cam up with (this file works and is in the repo now).The main differences are:
I merged the A6 and A7 actions into the A5 Cam1 and Cam2 shot scene, since the dependencies were the same. There wasn’t much reason to use separate scenes, and this simplifies things a bit.
I wanted combined GL renders of the Cam1 and Cam2 strips, and the only way I could figure out to get them was to render the GL from each shot to files and then assemble them in the VSE in separate scenes. So I added the “Cam1-GL” and “Cam2-GL” scenes to do that (the blue arrows show the GL rendering pipeline this requires — the dots being video files on disk).
As you probably know, the GL renders are MUCH faster than the final renders. It’s practical to make GL renders on my workstation, whereas final rendering is going to be done with a cluster (on my workstation, each sequence would take days or weeks to render in final form).
The way this workflow works for me is that I create the GL rendered versions of the camera strips and edit those in Kdenlive. Observing where the actual clip boundaries fall, I can trim the strips in the “Cam1” and “Cam2” VSEs to reduce the amount of those shots that has to be rendered (to cut down on final rendertimes).
Then I actually create symlinks to those files. And it’s the symlink that open as a clip in Kdenlive. This way, the links can be updated to point to the correct version of the GL AVI video, and Kdenlive will automatically be updated (because it uses the linked files directly rather than making a copy).
We can use that right up to the final renders, which will match frame-for-frame to the GL renders, although the format will probably be different, which may require manual editing in Kdenlive.
Jul 17, 2018 at 4:01 AM
Freestyle + NewDepsgraph fixed in Blender 2.79

Trying out Blender 2.79 today. I had read that the bug I encountered earlier with using Freestyle and the New Depsgraph together had been fixed, and I am pleased to see that for myself (I used them together for this render).
Jul 20, 2018 at 10:18 PM
Moon Day 2018
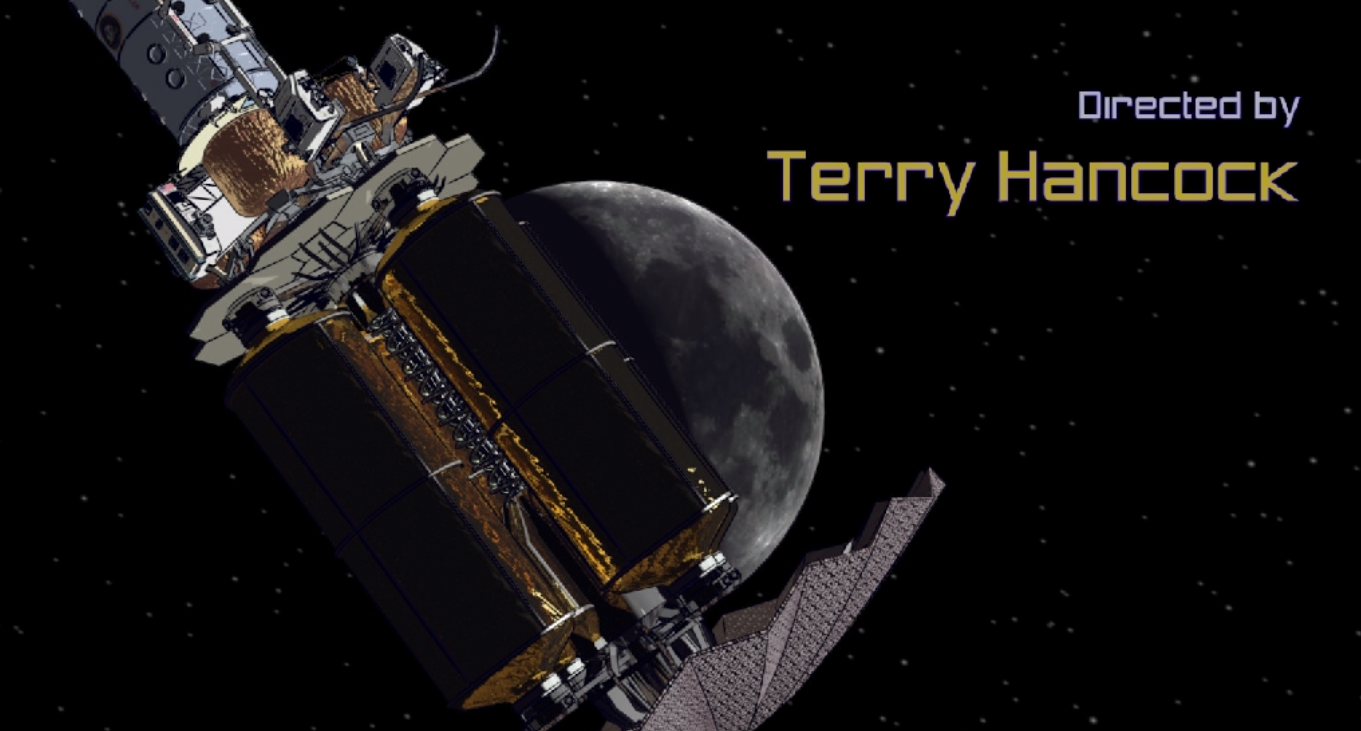
Today marks 49 years since Apollo 11’s historic landing on the Moon.
We call it “Moon Day”.
I think most of us assumed we would be going back before now.
I spent most of the day revising the lettering and animation in our main title sequence. The “Minya Nouvelle” font we started out with has drawn some criticism for being a little too “comic-book” and not enough “science fiction”. I’m trying out a font that I’ve used several times in project presentations that I’ve come to like a lot (“Zero Threes”), and which is perhaps a little more fitting.
Both fonts are part of the “Larabie” font set.
Jul 22, 2018 at 5:05 PM
Titling Animation Tests
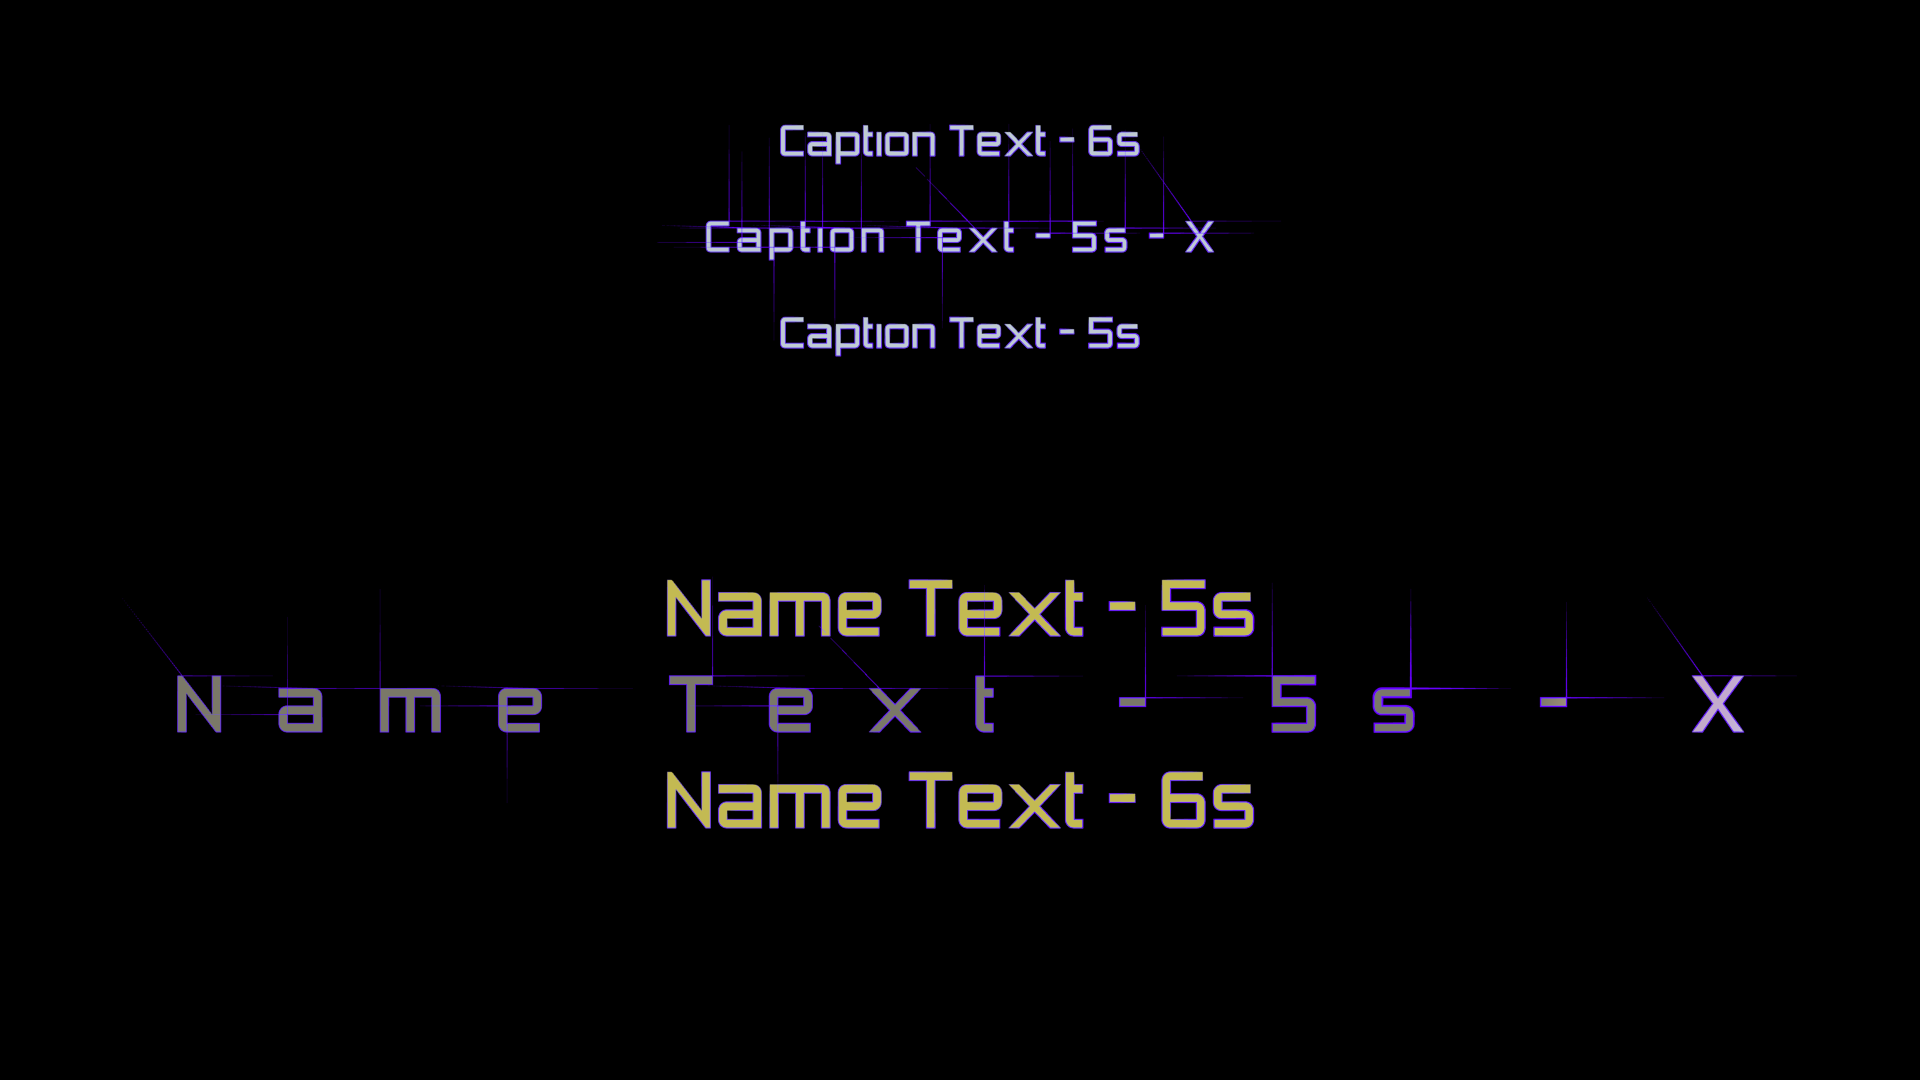
Another look at the titling. I’m doing an animated effect on the letters which is basically a much simpler version of the idea for the main title text (no tumbling), and I think it fits in better than the earlier style I was using (which was not animated).It’s tricky to get a consistent look for all the title credit animations, though. Since the materials and linestyles are animated, it’s hard to simply link them into individual title animations. So I think it’s unavoidable to have to “append” (copy) rather than link the materials — which means I need to create a standard set of styles to copy from.
After that, there are a few additional tweaks to match each individual title.
Is it worth all this work on the title sequence? Well, if we produce more episodes, we are going to see it a lot!
Jul 27, 2018 at 4:27 AM
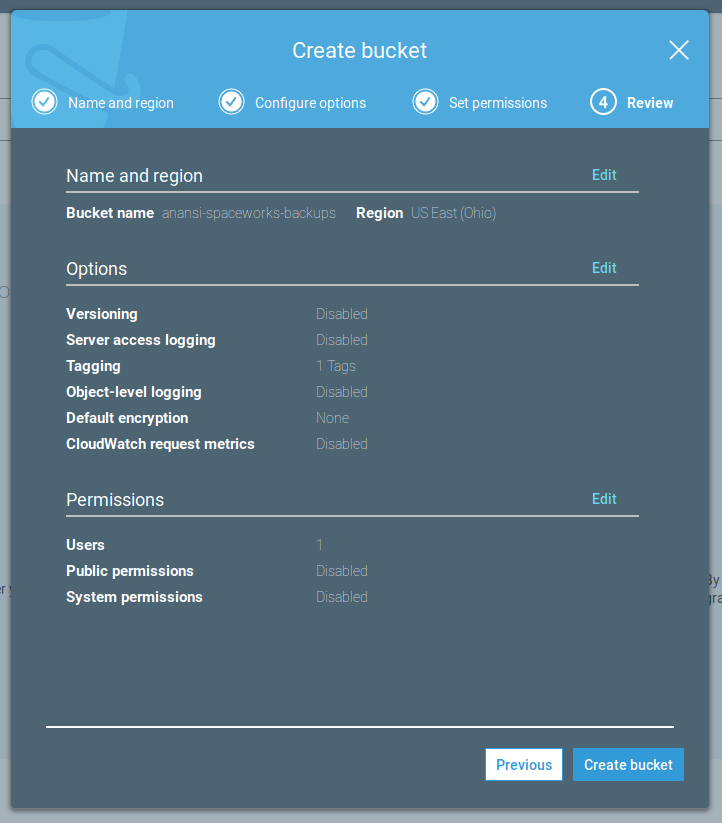
Amazon Storage for Backups
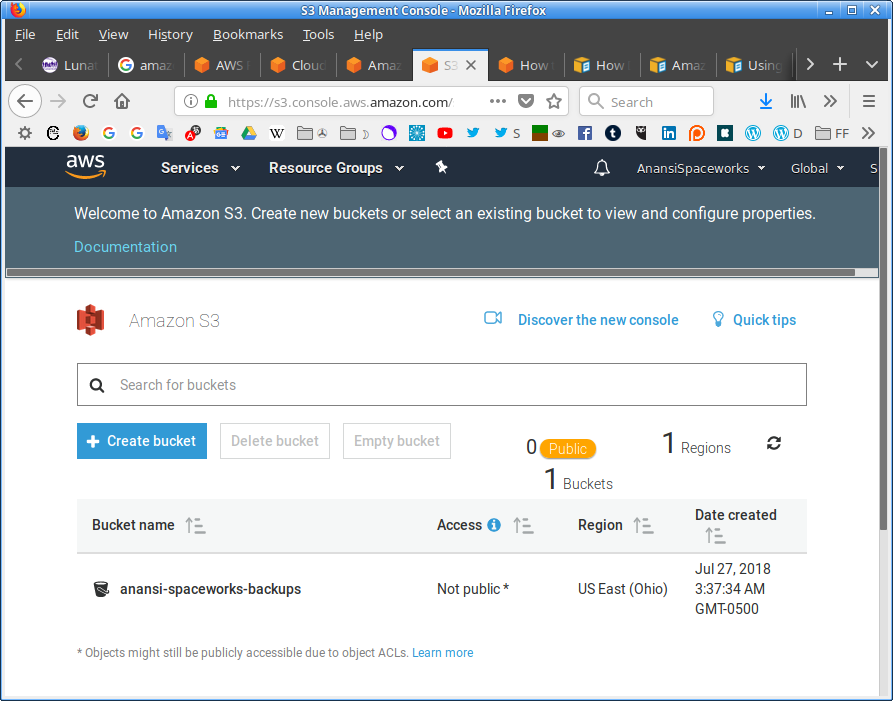
I am now the proud owner of an Amazon S3 “bucket”!
As I’ve mentioned before, we’re migrating to a “DevOps” model of website maintenance, using Ansible. One of the things we need to be able to do is to backup and restore the data repository for the project — currently a Subversion repo and a TACTIC repo in the future.However, we are not exactly on a fast internet connection out here in the country, and I did some back-of-the-envelope calculations which told me it could literally take days to upload the repo from my local on-site computers to the server. This would require the server to be down for that long, waiting for the data to rebuild the site after reimaging the server. Clearly I need a faster way to restore the server!
Our internet service is “asymmetric DSL”, which gives us much slower uploads than downloads (most internet users are consumers who don’t upload a lot of data, and the service is optimized for that). This is what creates the problem for us — the 12 mbps download rate isn’t so bad, but we only get about 0.5 mbps upload, which is a very tiny straw to suck a 30 to 50 GB repo through!
After reviewing the options for storing repo data, I had already concluded that the best option would be to move it into cloud storage — Amazon’s “Simple Storage Service” (“S3”) is far cheaper than storage on our regular web hosting provider, and it makes practical storing the many gigatbytes needed to make our entire source repo available online.
So it occurred to me that this would work for making the backups as well — just move the data into S3 instead of downloading to local machines, and then it can be as quickly uploaded again (of course, we’ll also download a copy locally, just in case, but we won’t typically need to upload that copy).
The only problem I see so far is that S3 requires special software to access — it’s not quite the same as doing upload and download to regular files on a Linux machine. So I will have to install the “awscli” tool on the server in order to move these data files, and of course, develop an Ansible script to automate this magic, which has to be aware of the S3 service.
The first step is to get the AWS account and set up an S3 bucket which I have now done.