HIGHLIGHTS
Very productive month!
LUNATICS PRODUCTION
Worked extensively on the LA-Launch and SF-SoyuzFlight sequences this month. Assembled new animatics for them, identified work needed on their shots, and constructed a new full-episode animatic. Fixed or updated the sets, effects, and other modesl for the LA & SF sequences.
Did some research on infrastructure for digital puppetry and mocap. I’m anxious to get started on that, but I want to finish episode 1, first.
Decided to revise the way I draw my linking diagrams for sequences.
Changed the formatting of my sequence Kdenlive edit project files, and added calibration features.
Discovered I can embed Kdenlive project files as clips in a Kdenlive project, which allows for a much better way to combine sequences into an episode, so I set that up.
ABX DEVELOPMENT
Wrote a script to automate packaging it into an add-on.
Set up automated “unittest” tests for the “accumulate” module. Just doing functional tests manually — I can’t really see how to automate that without doing an inordinate amount of work, since it would have to somehow verify correct results in Blender. It’s easy to test by hand, though, if a bit tedious.
Converted “Copy NLA” to “Copy Animation”, with options to copy both dope sheet and NLA animation, as well as scaling animation. Note that this work was needed to fix the broken and wrong-scaled character proxies in the TR-Train sequence in “Lunatics!” There’s a good chance I can do it, now.
Converted “L.Ink Compos” to “Ink/Paint Config”, and added options for handling “Ink-Thru”, “Billboards”, and “Separate Sky”. This was an extensive re-design, along with refactoring the code.
Minor changes to the Lunatics Properties (probably going to change these to “Project Properties”?). I’ve spent some time plannin out how to collect data from YAML files, but haven’t implemented any of it, yet.
I am continuing this work into May.
LIB-RAY DEVELOPMENT
Converted my functional tests to a unittest.TestCase, but I still have to set up and test the Rocket library is working.
Had a good insight on how to integrate my previous visual testing into the unittest framework: I need to add “assertLooksLike()” method and similar tests. I might use the tests I was using before, or adopt the
PySSIM module for visual testing.
Created a test video for compression and mastering tests.
OTHER DEVELOPMENT
Collected the code information for programming the Primera Bravo II robotics. Started the “Bunsen” project in Eclipse. I plan to include the Primera Bravo II driver as part of it.
MARKETING
Started a regular habit of logging out of my Lunatics! Patreon and into Film Freedom on Tuesdays, to write Film Freedom related posts on the week’s work — particularly good for posting my development progress.
I got a new patron on “Lunatics!” this month, although I think he might actually be one of the previous patrons come back (but that’s also good).
TRAINING
While I was feeling down from the Pfizer vaccine reaction, I watched a LOT of video presentations on programming topics this month. It was almost like I arranged my own little “virtual conference”, even thoughthey were talks from lots of different conferences.
BOOK: FILM MAKING FOR LUNATICS
Started working on the first of a book series, which I hope to sell along with a video series, called “Film Making for Lunatics”.
This book will be all about the motivations and goals of the project, with technical content focused on selecting software tools, archives of free software, and business model considerations.
BOOK: COMPLETE GUIDE TO LIB-RAY
Started working (again) on the final “Lib-Ray from Scratch” chapter. Researched the software tools I need again. Looked up some updates. Started framing what I need to write here.
STUDIO CLEANING/ORGANIZING
Boxed a lot of books and reorganized others in the library. Started clearing off my computer workbench, but it’s still pretty cluttered.
Apr 2, 2021 at 4:00 PM
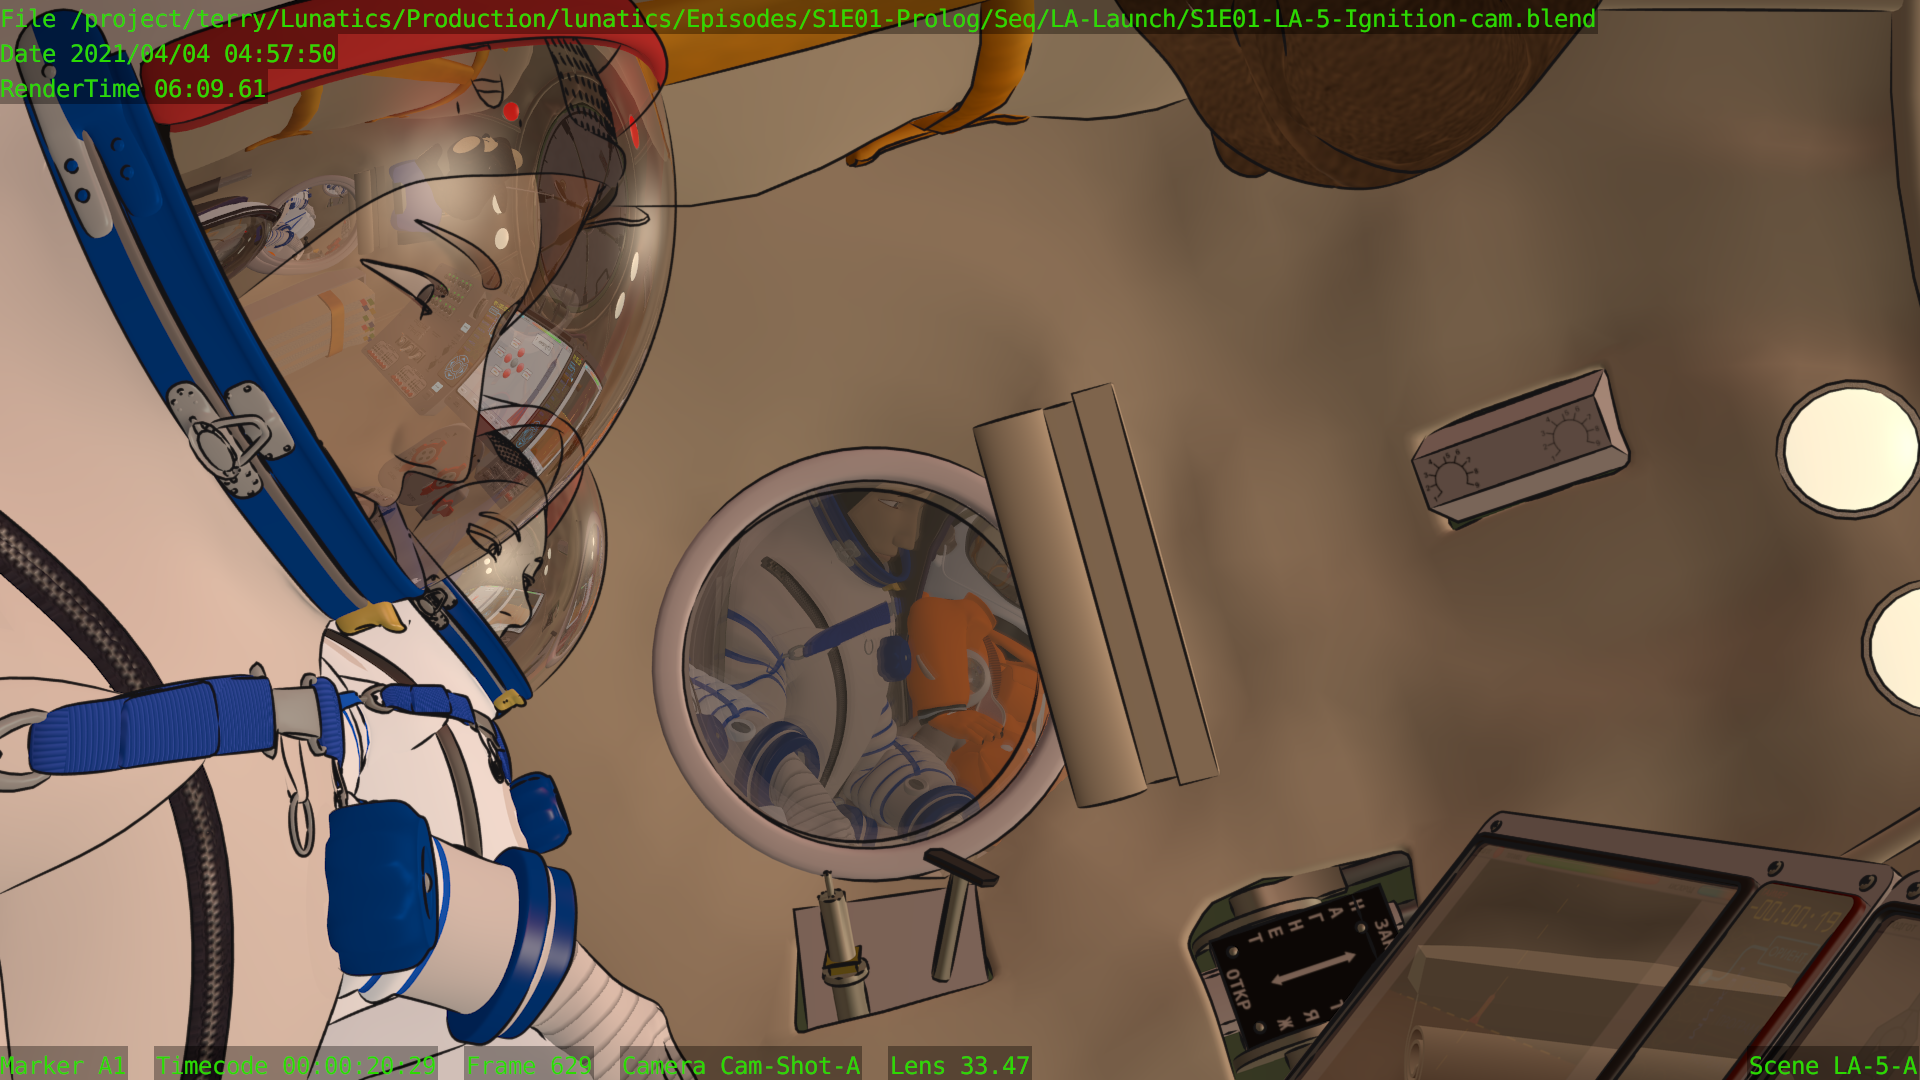
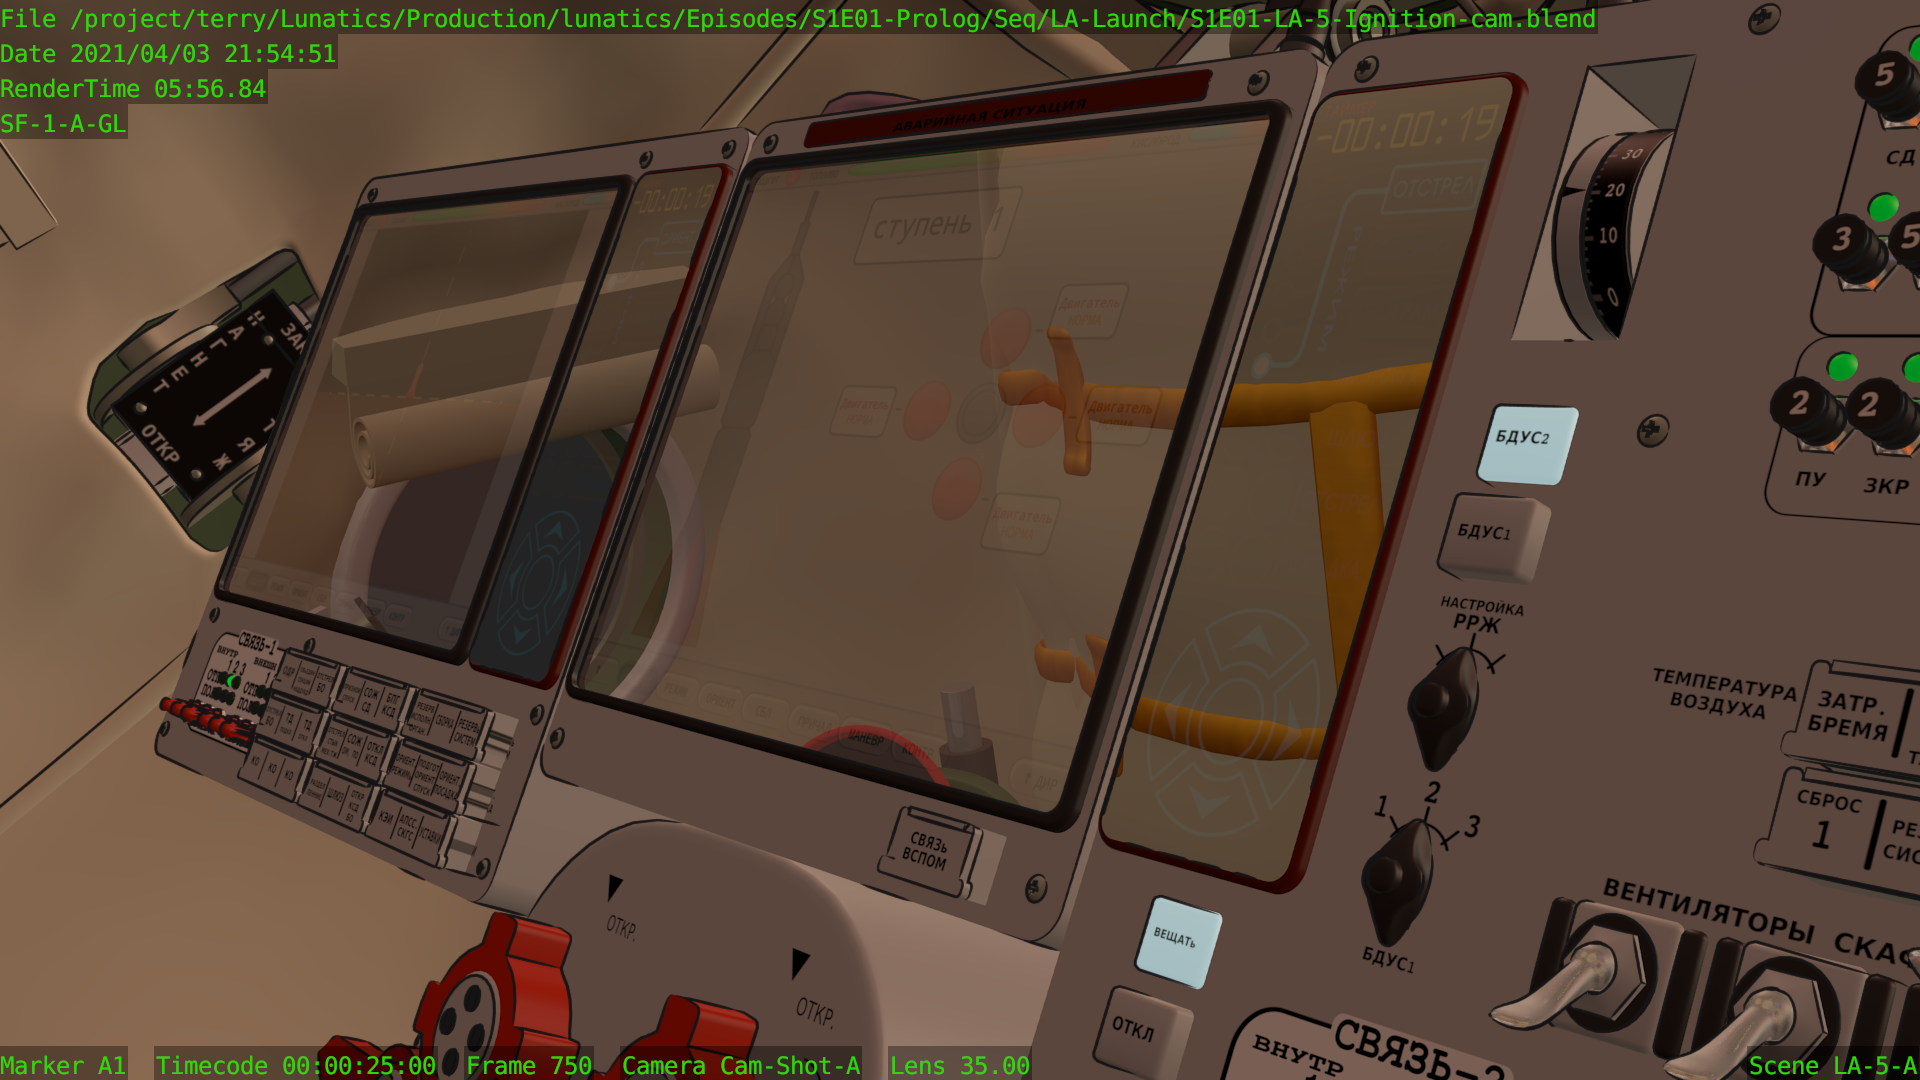
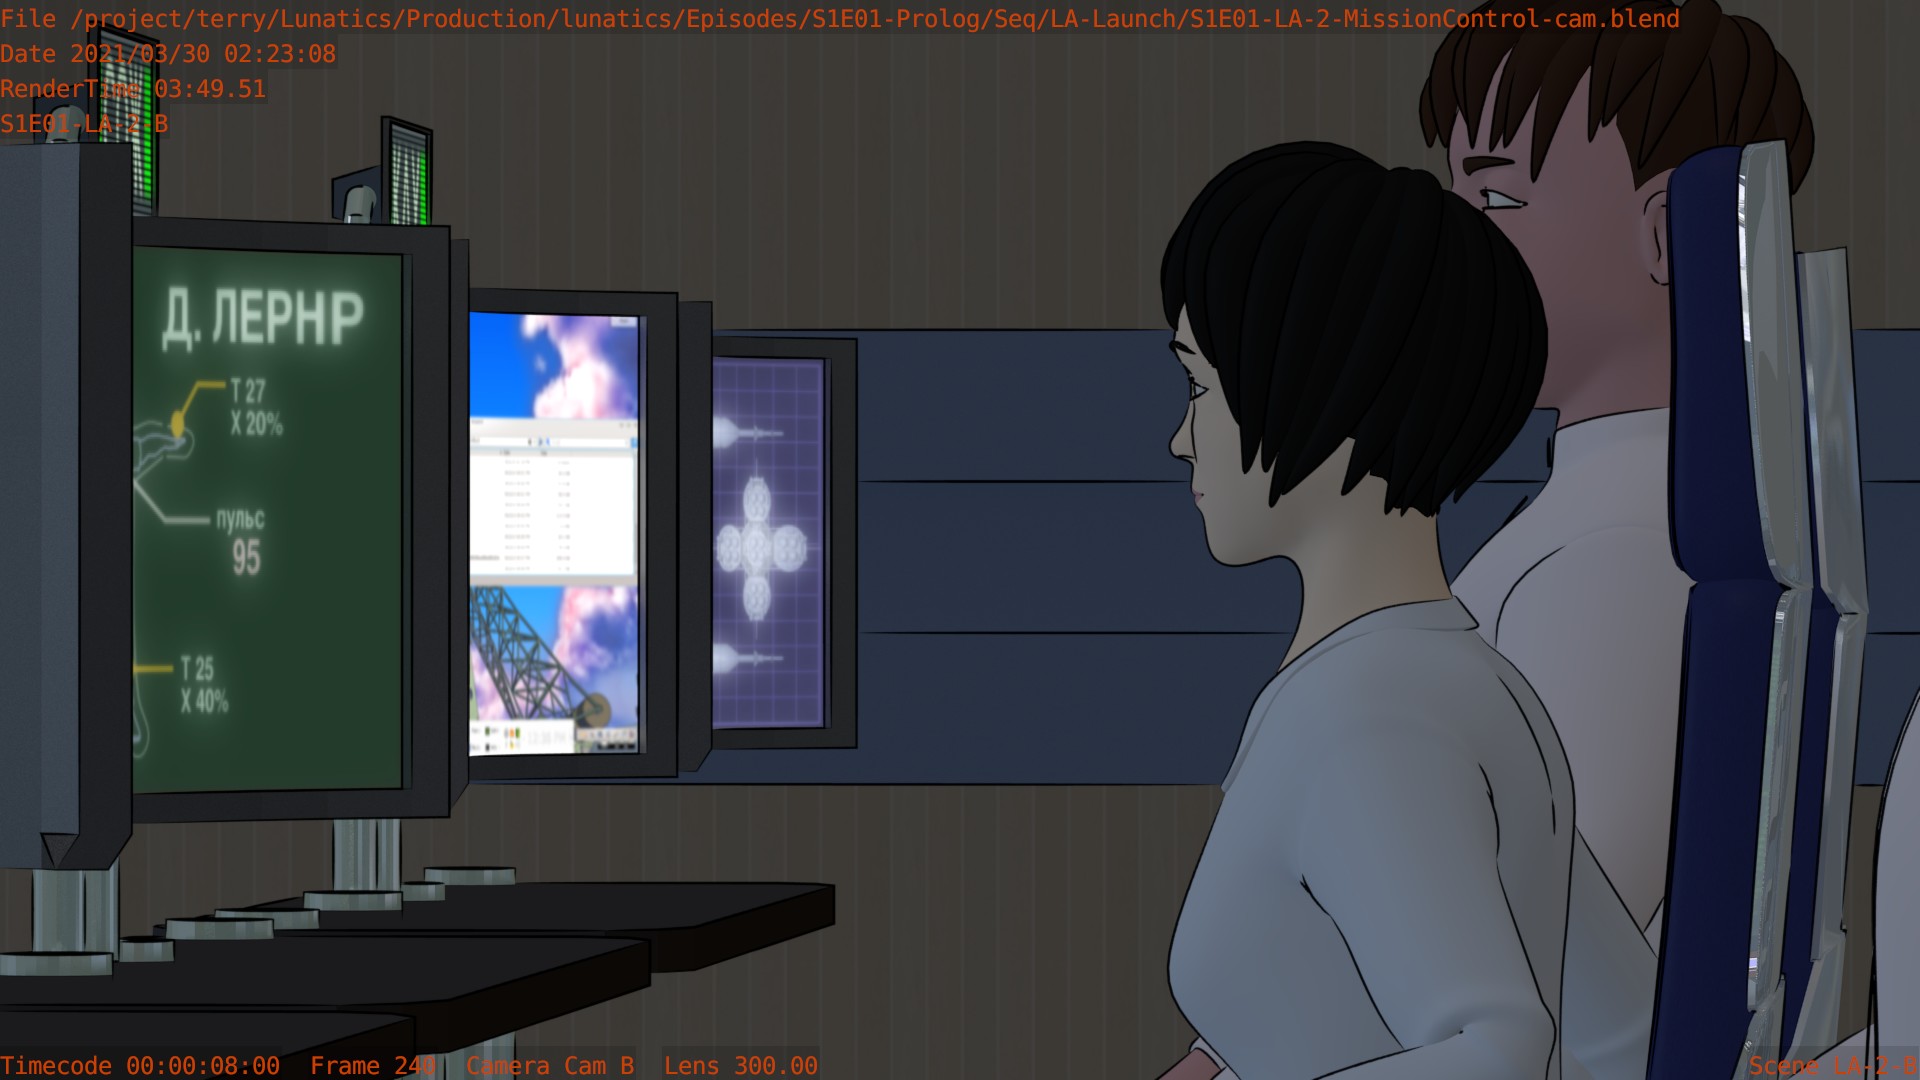
Check Renders from Block LA-4 (Soyuz Interiors)
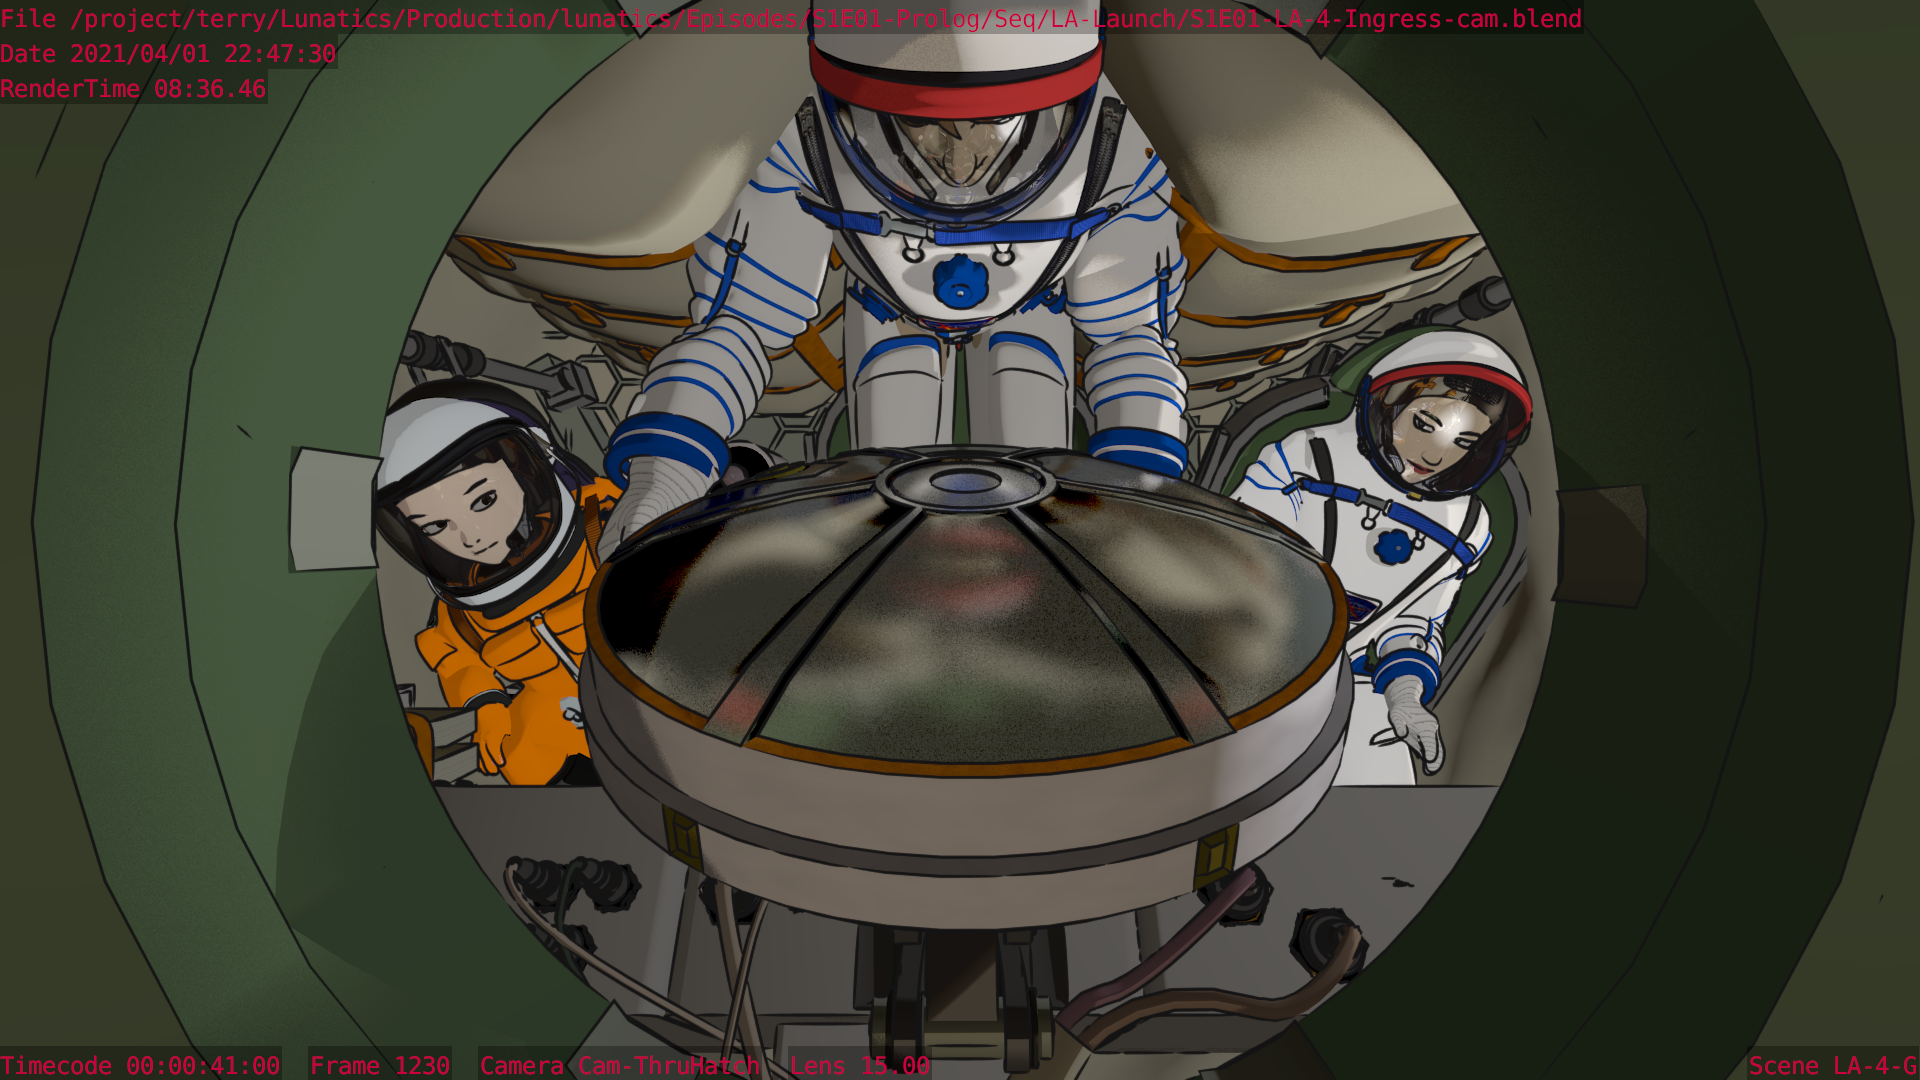

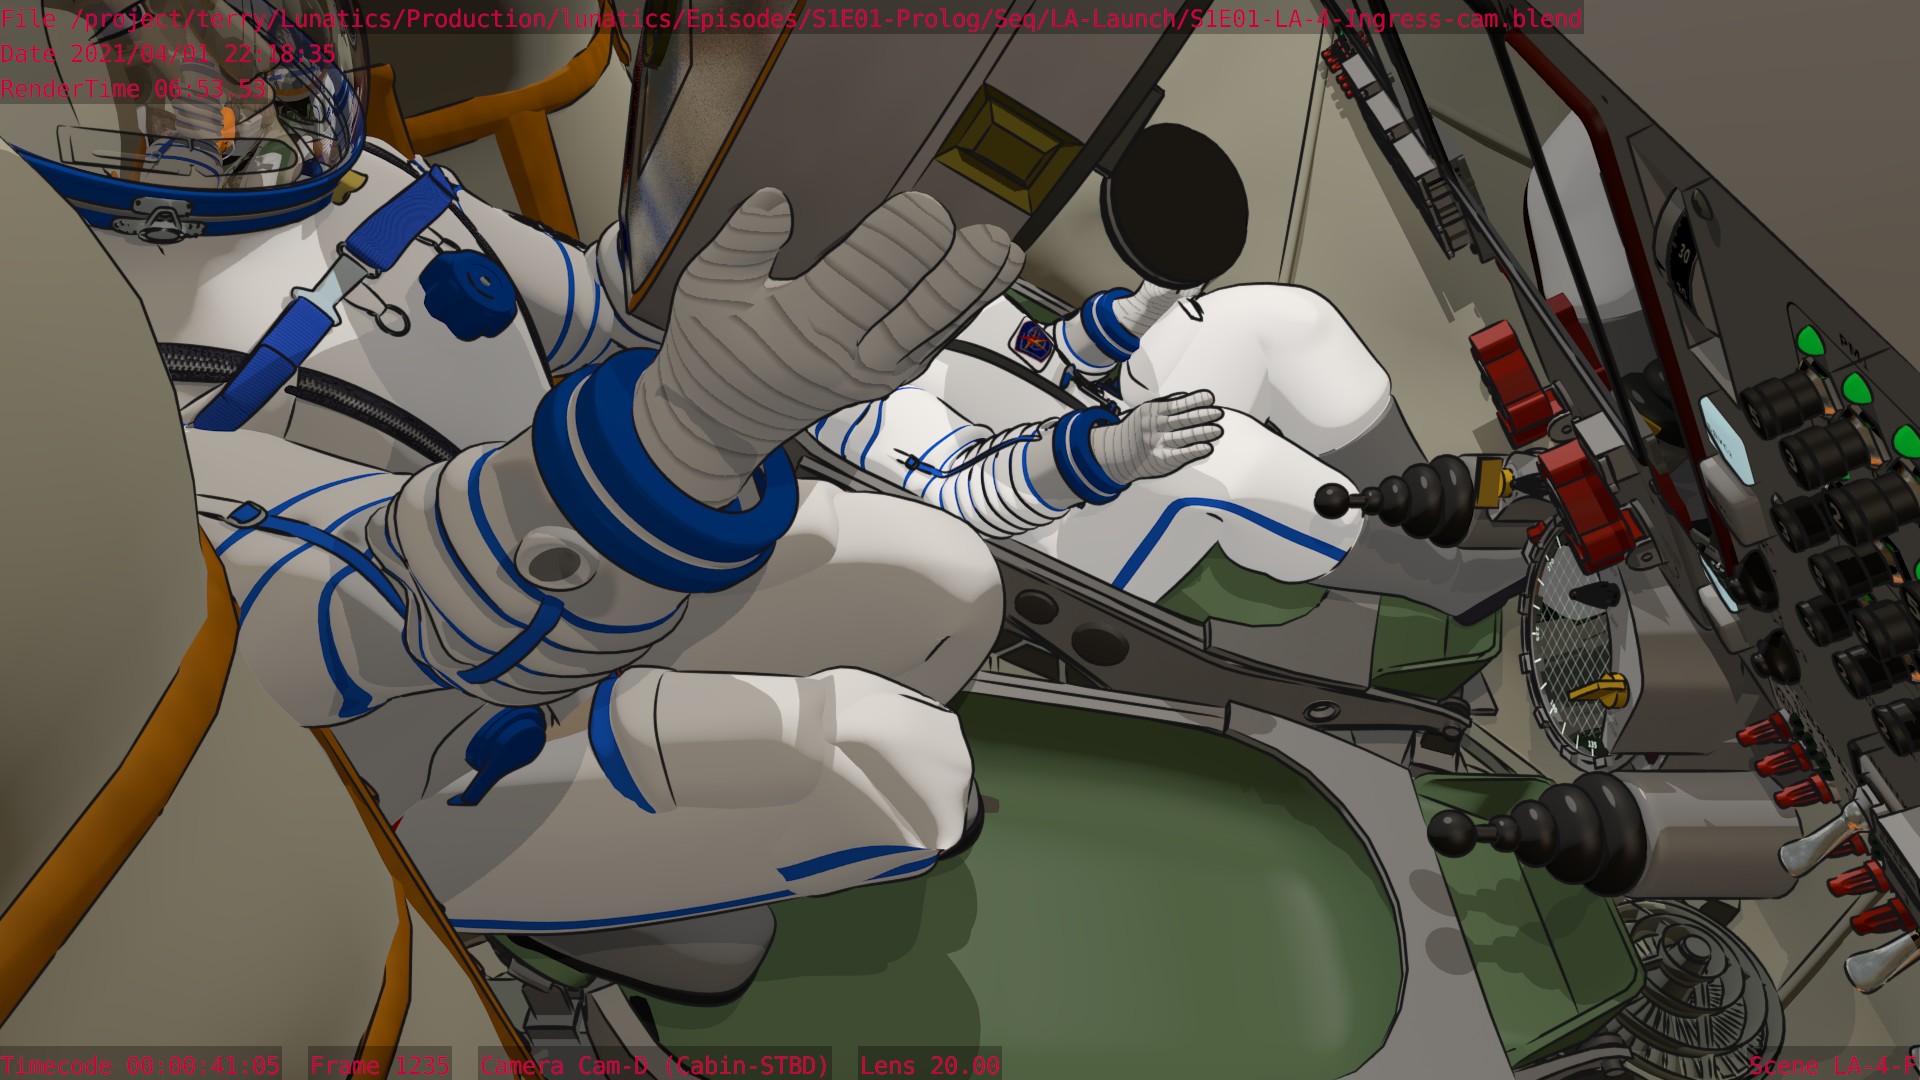
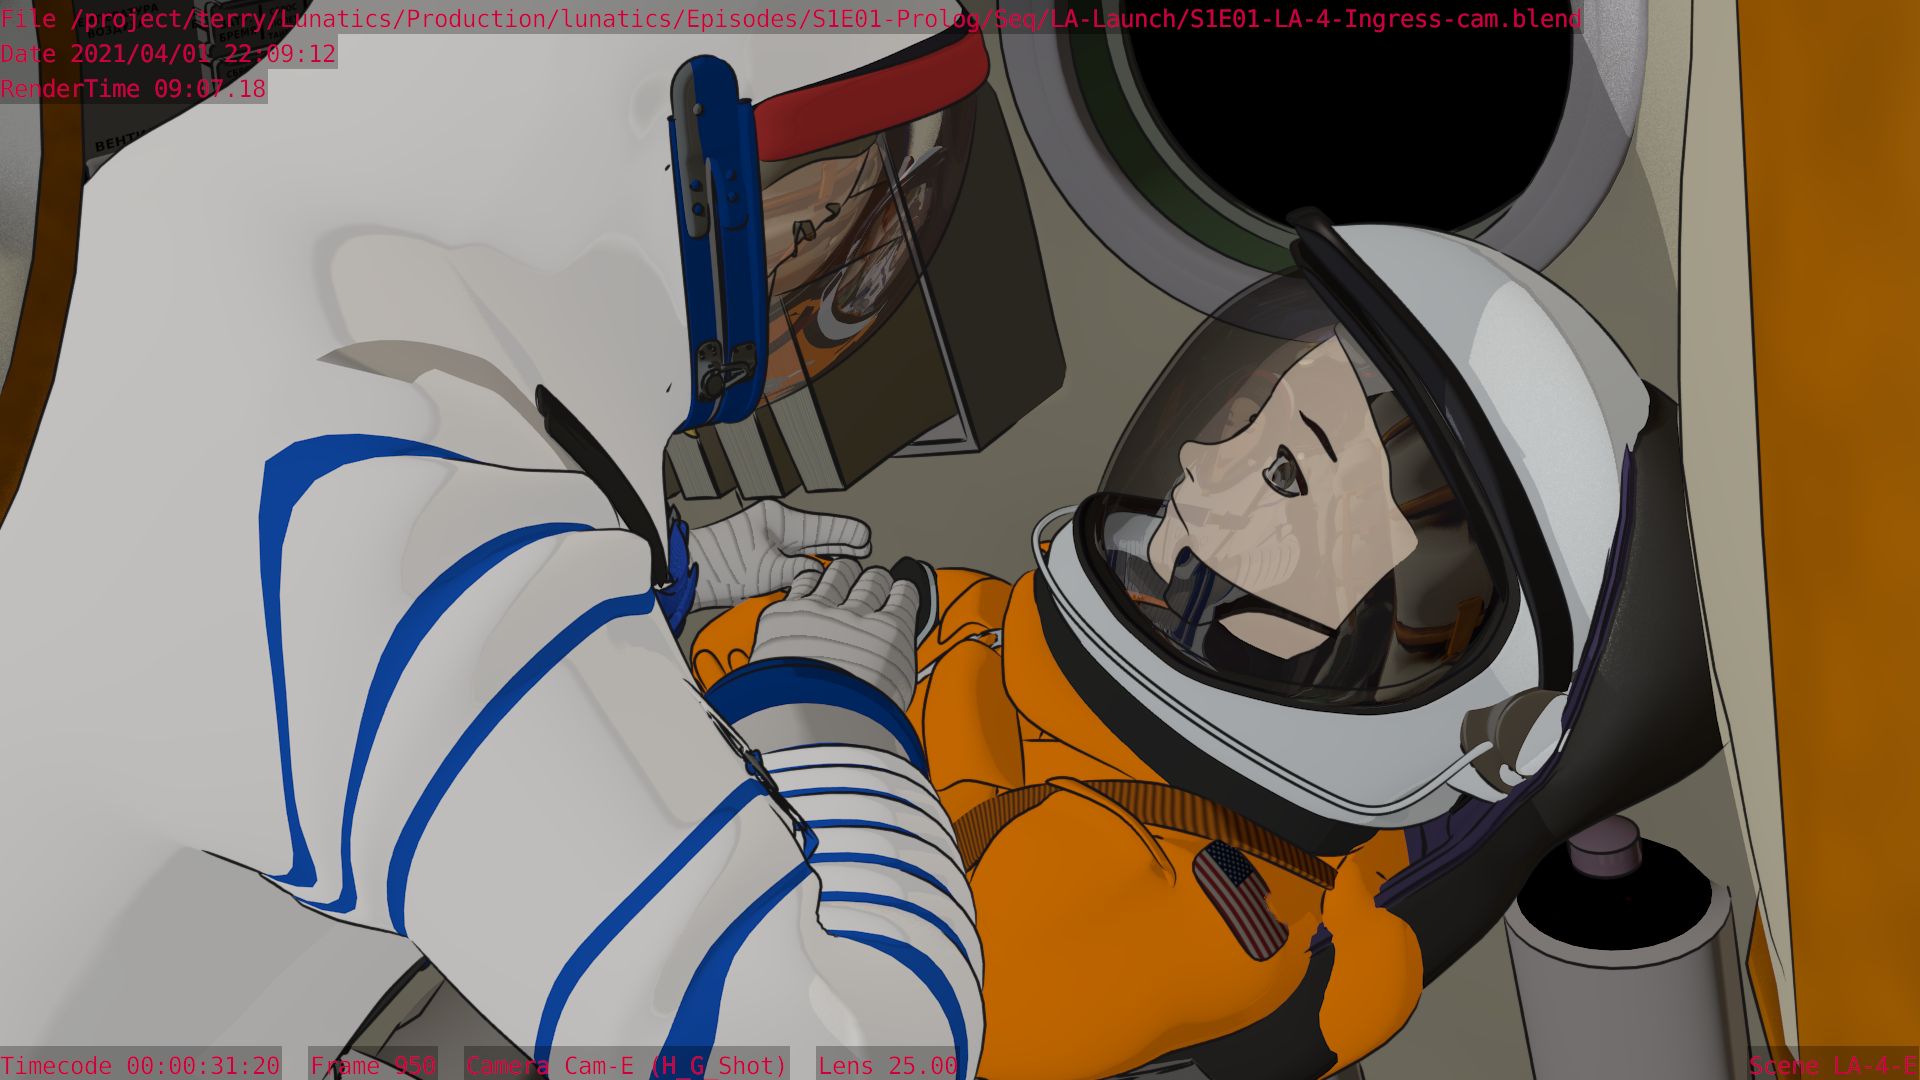
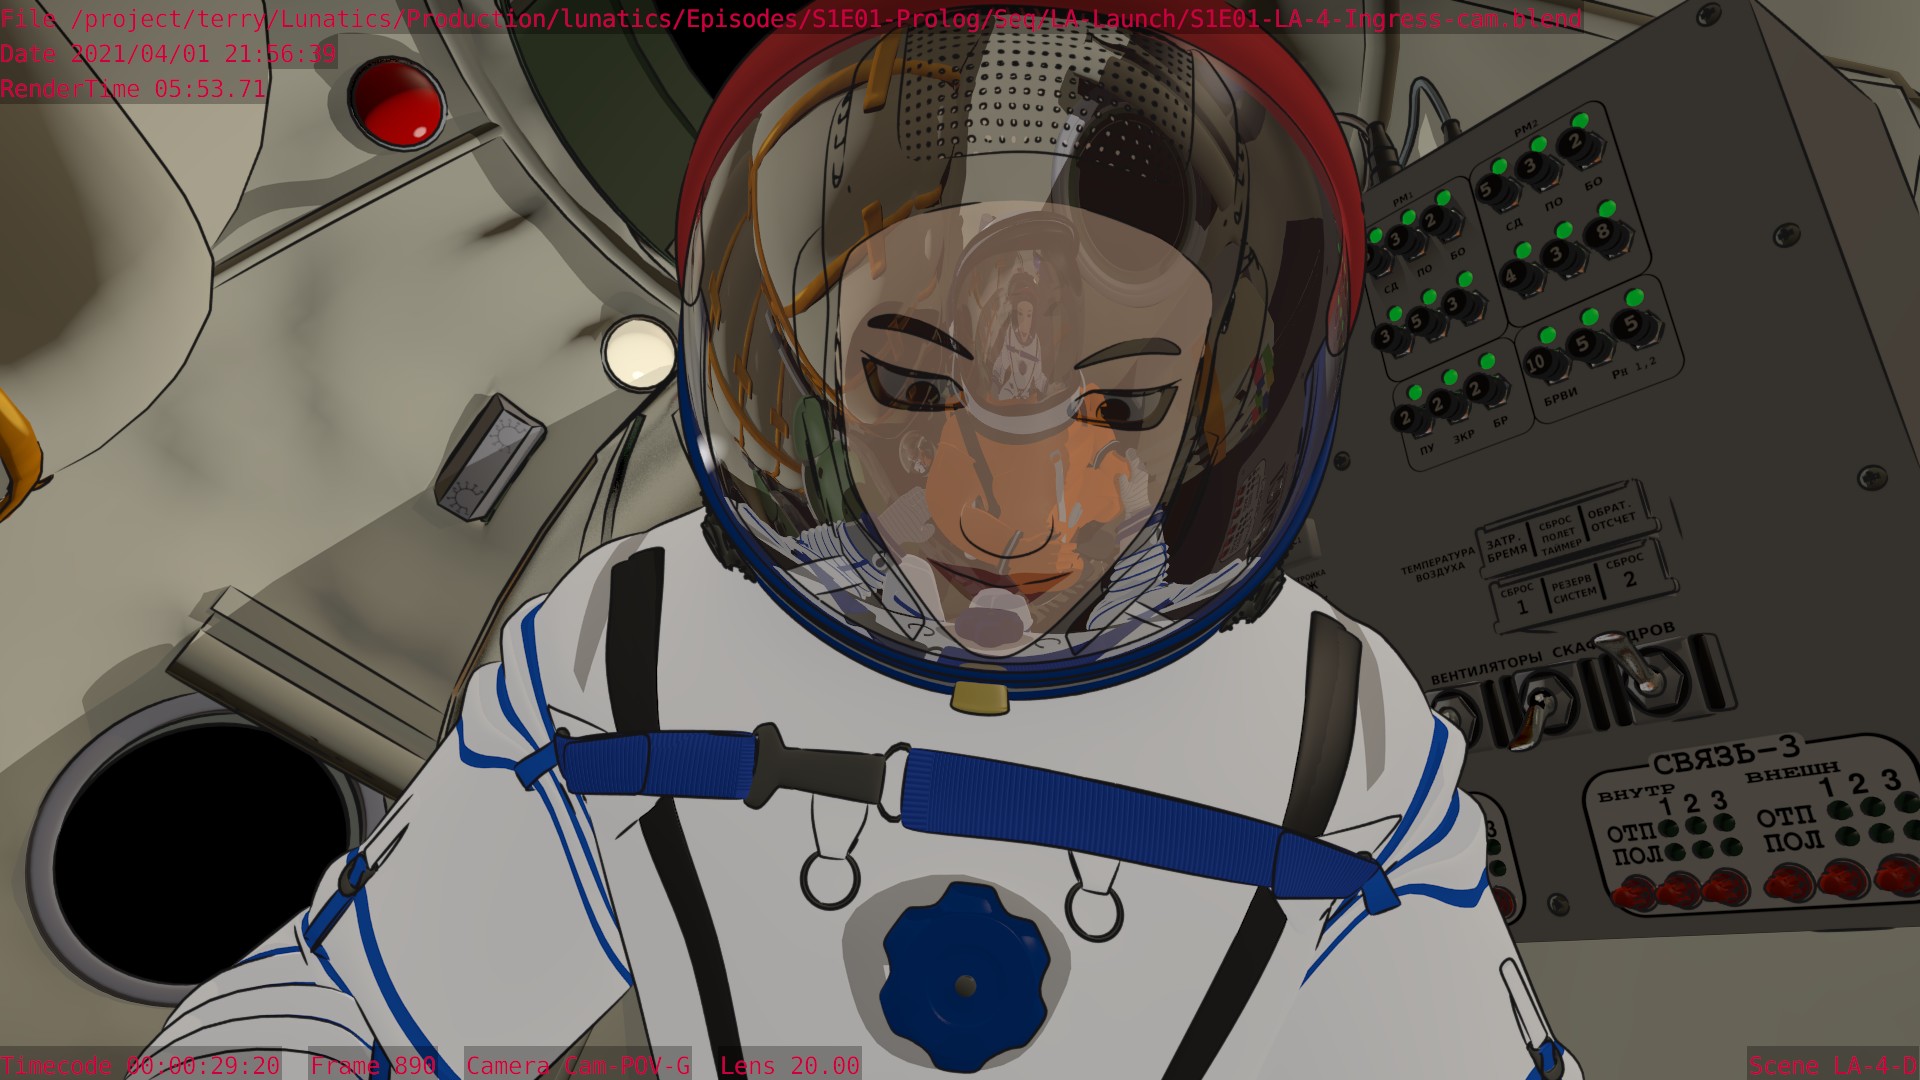
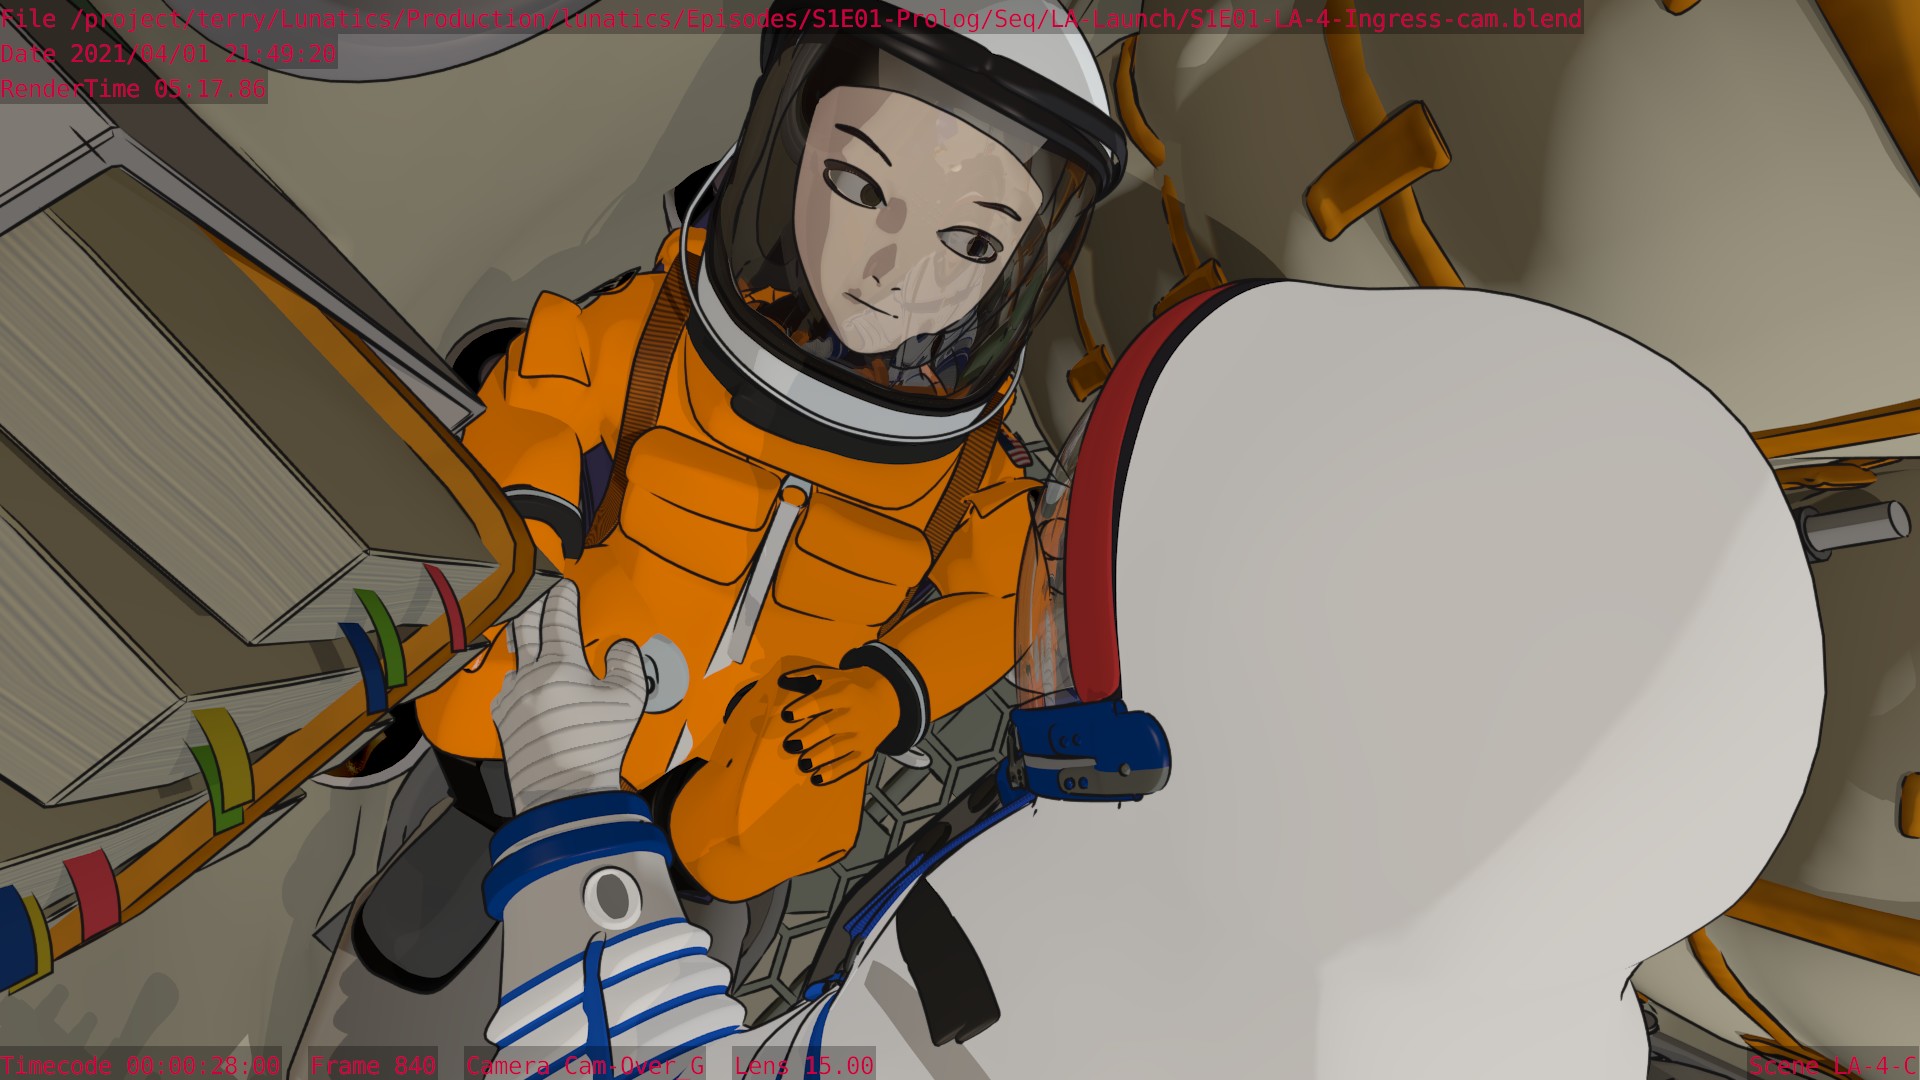

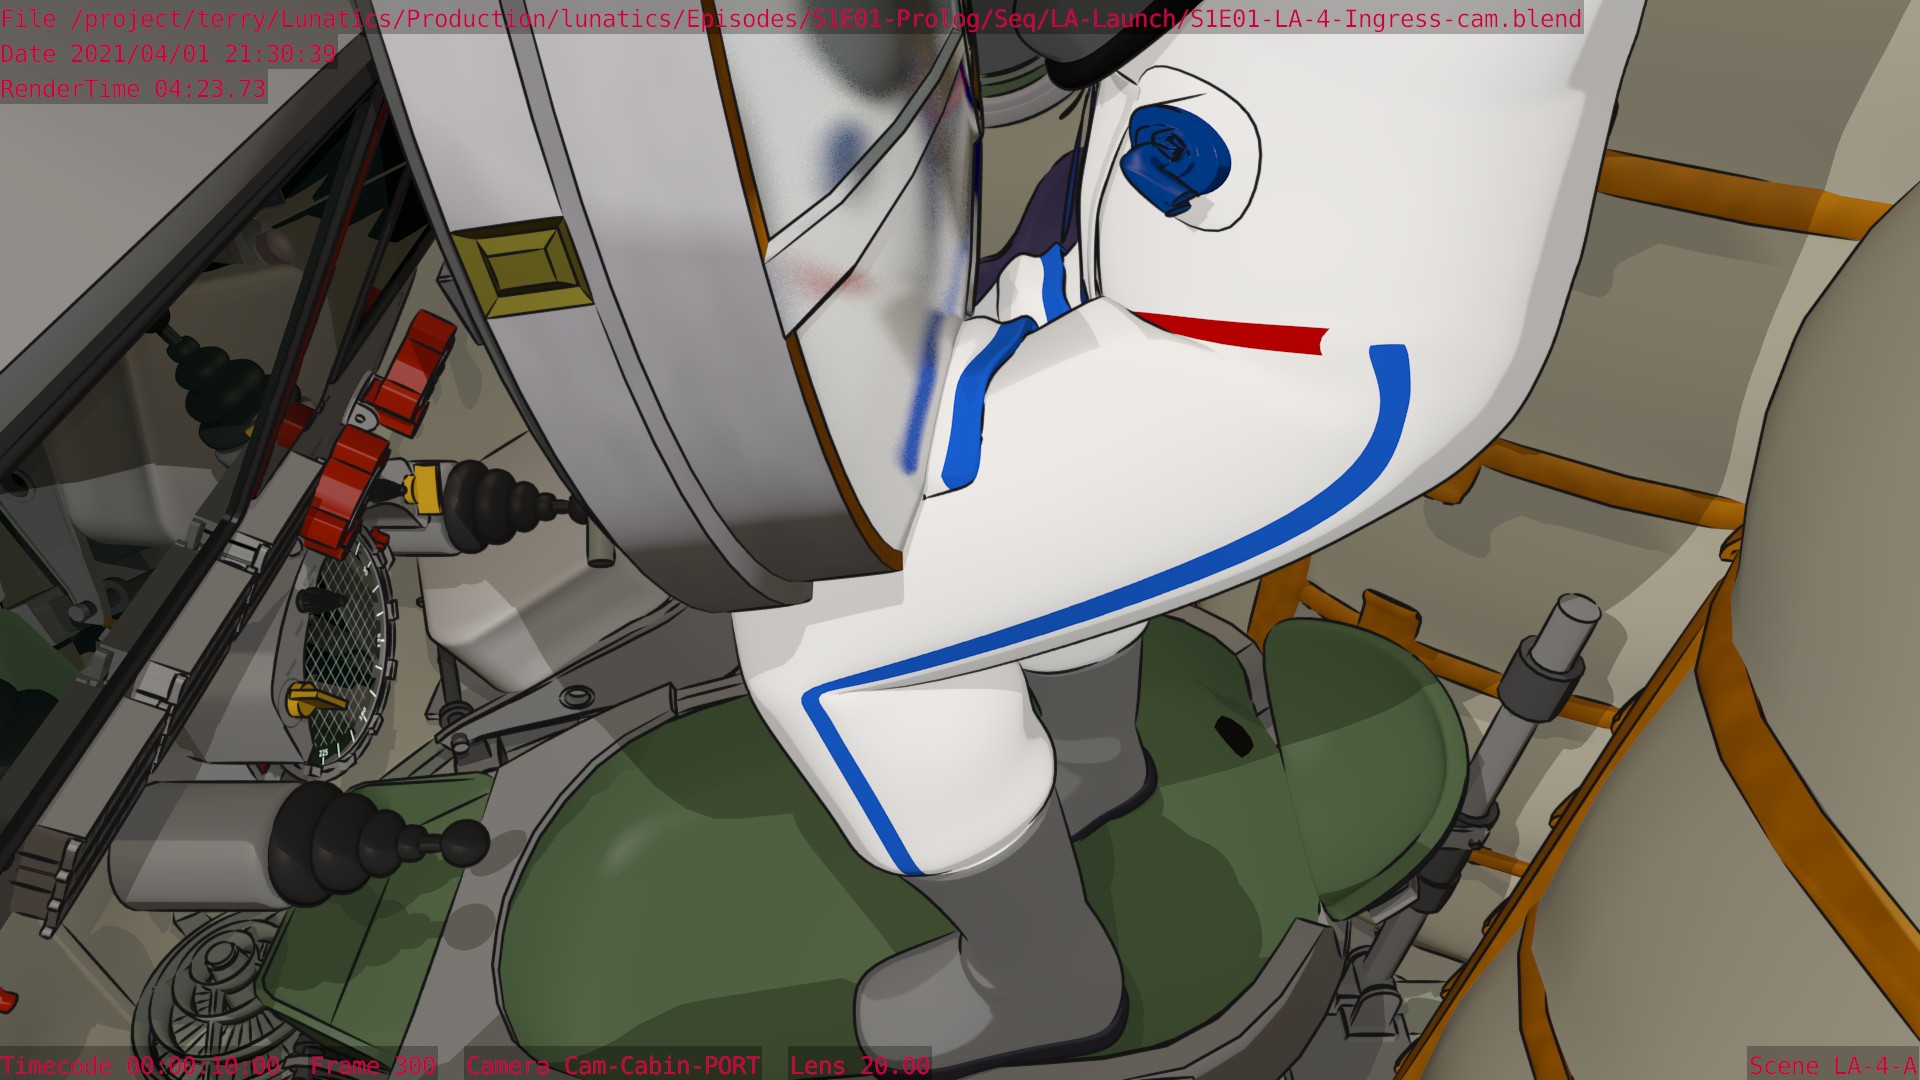
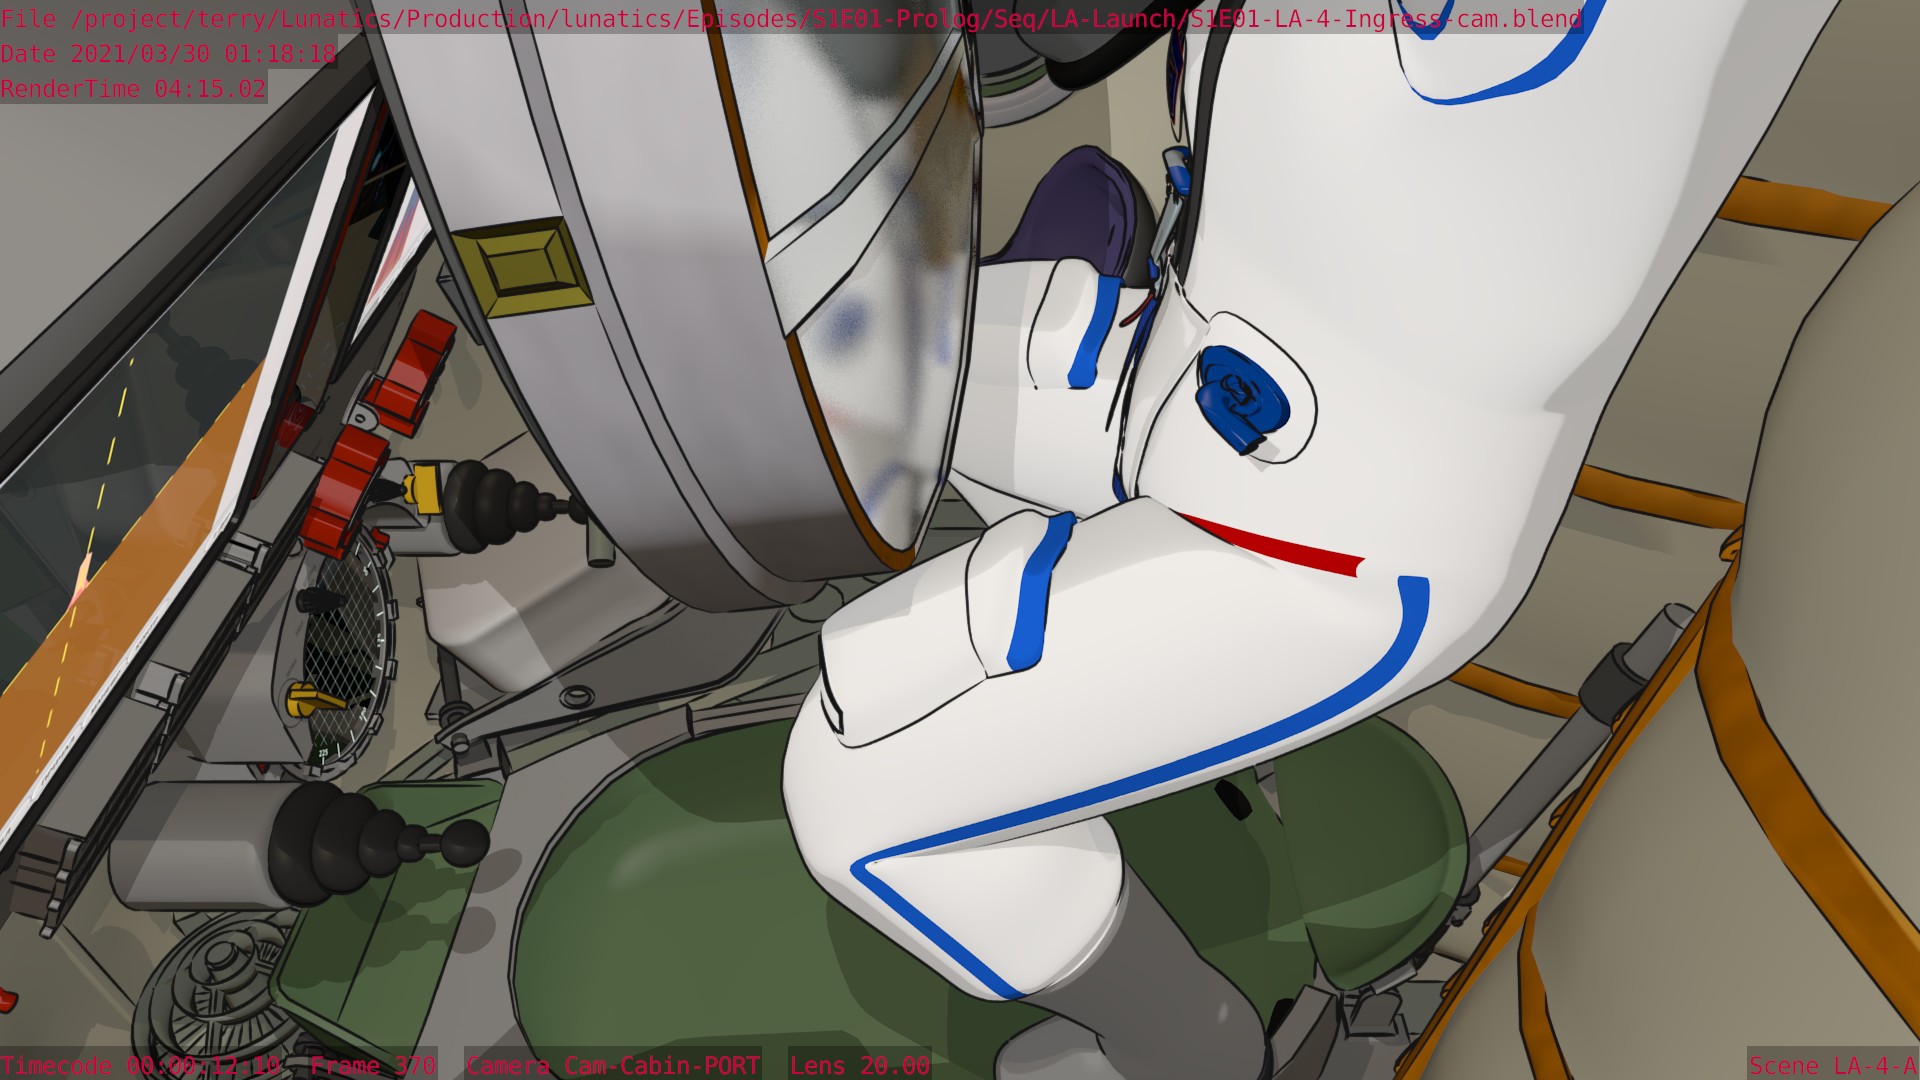
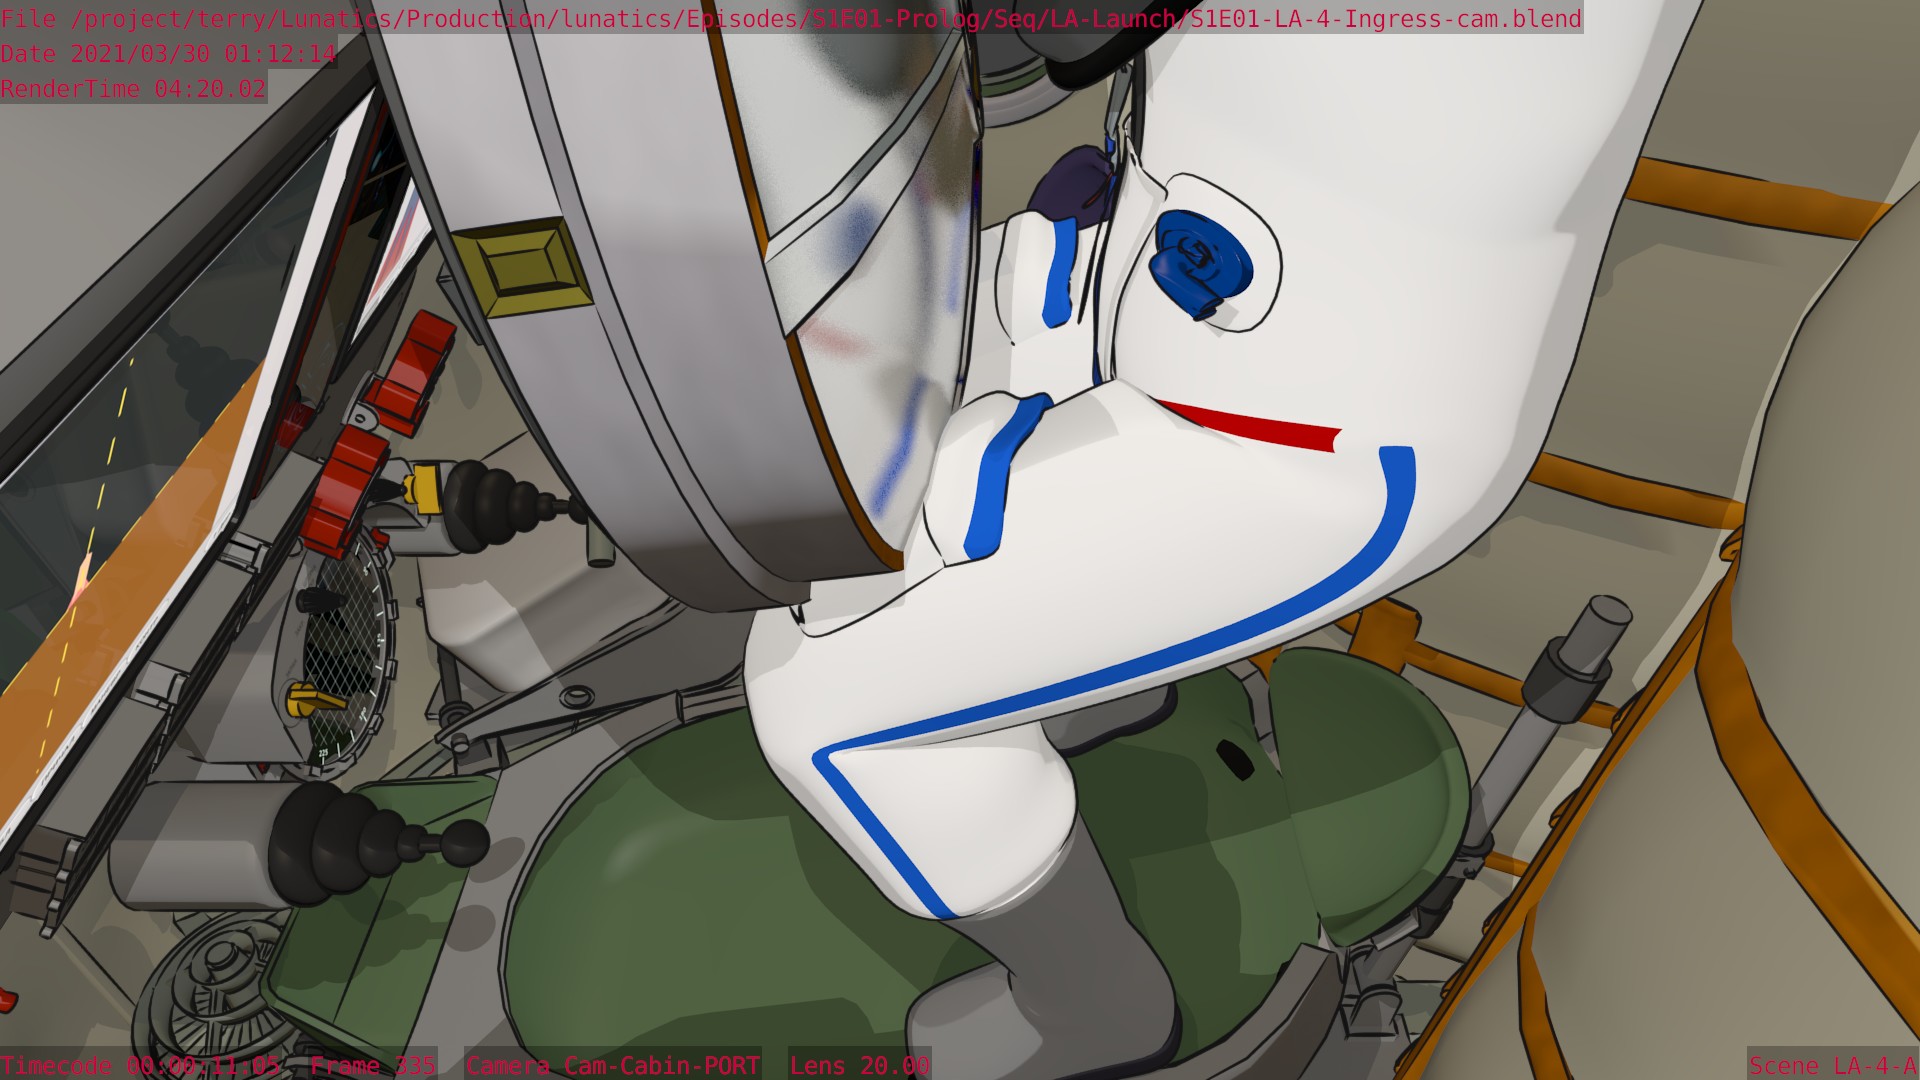
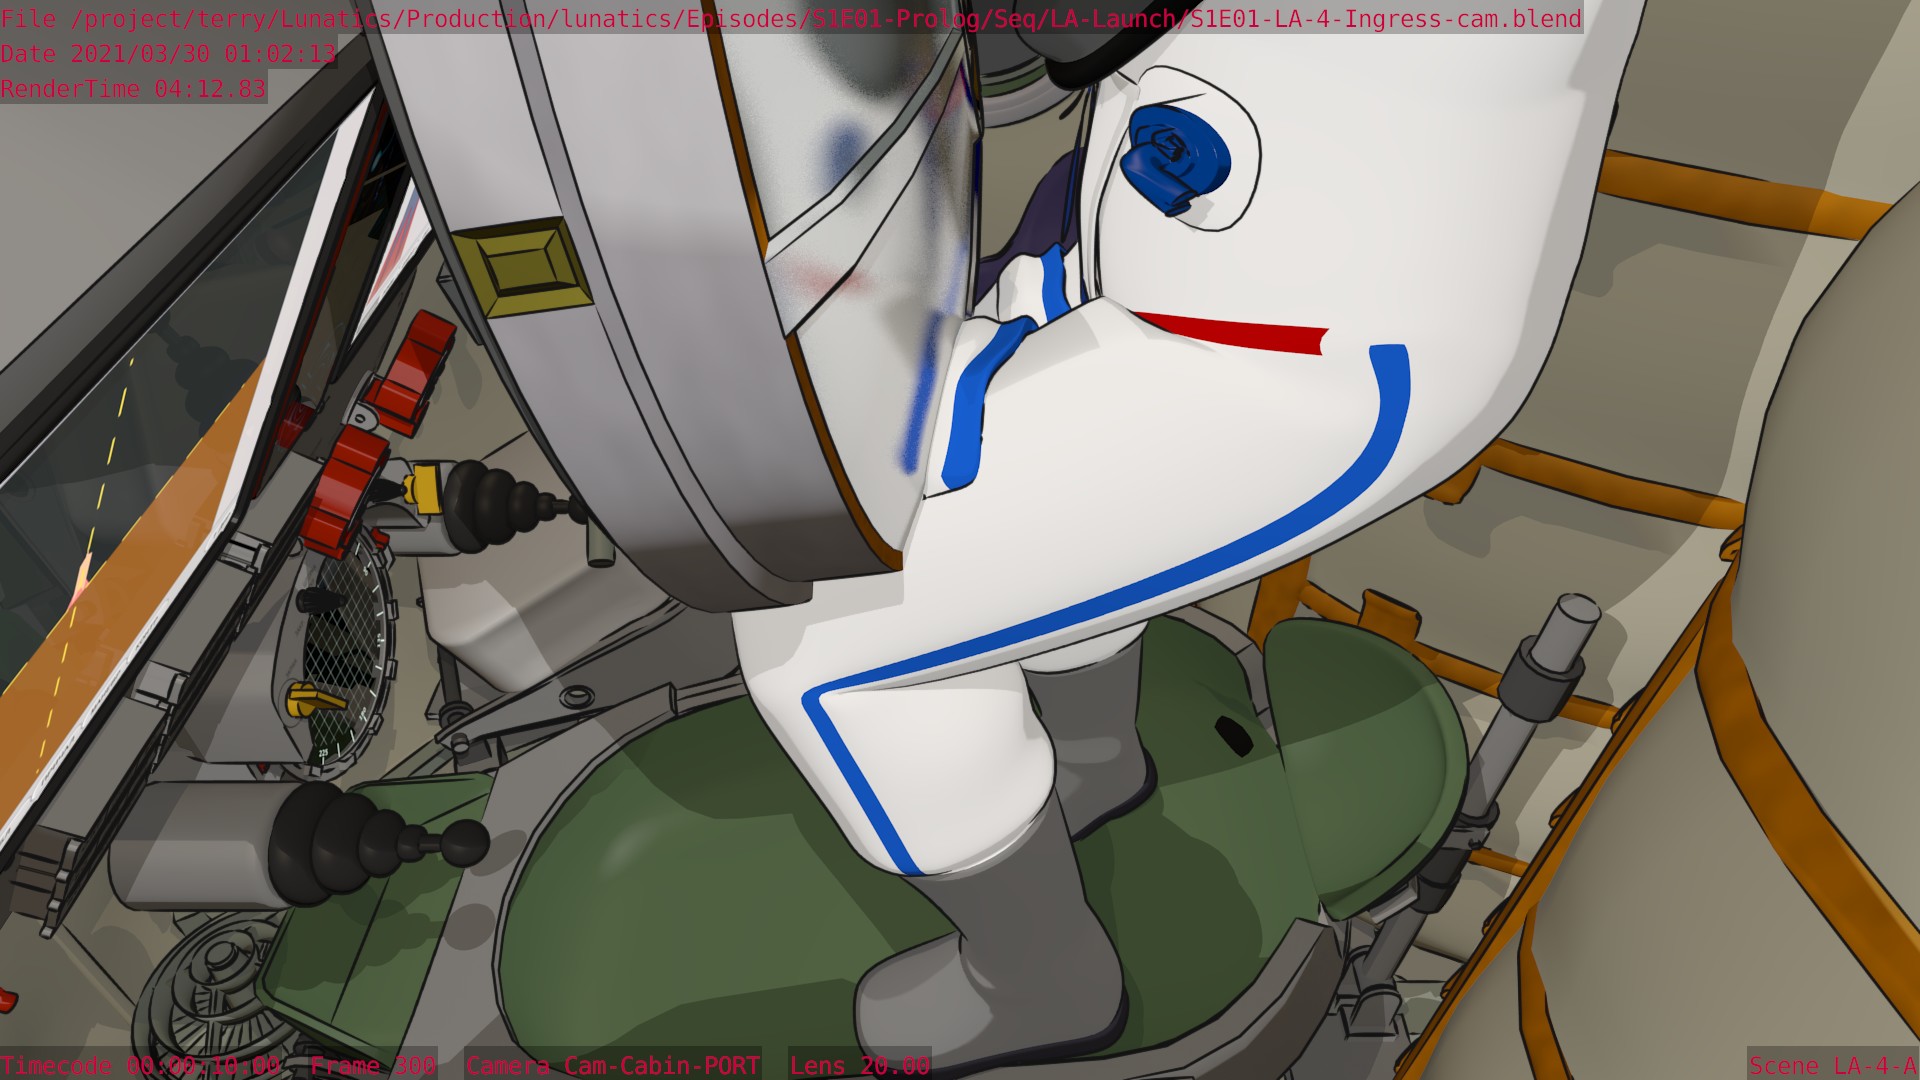

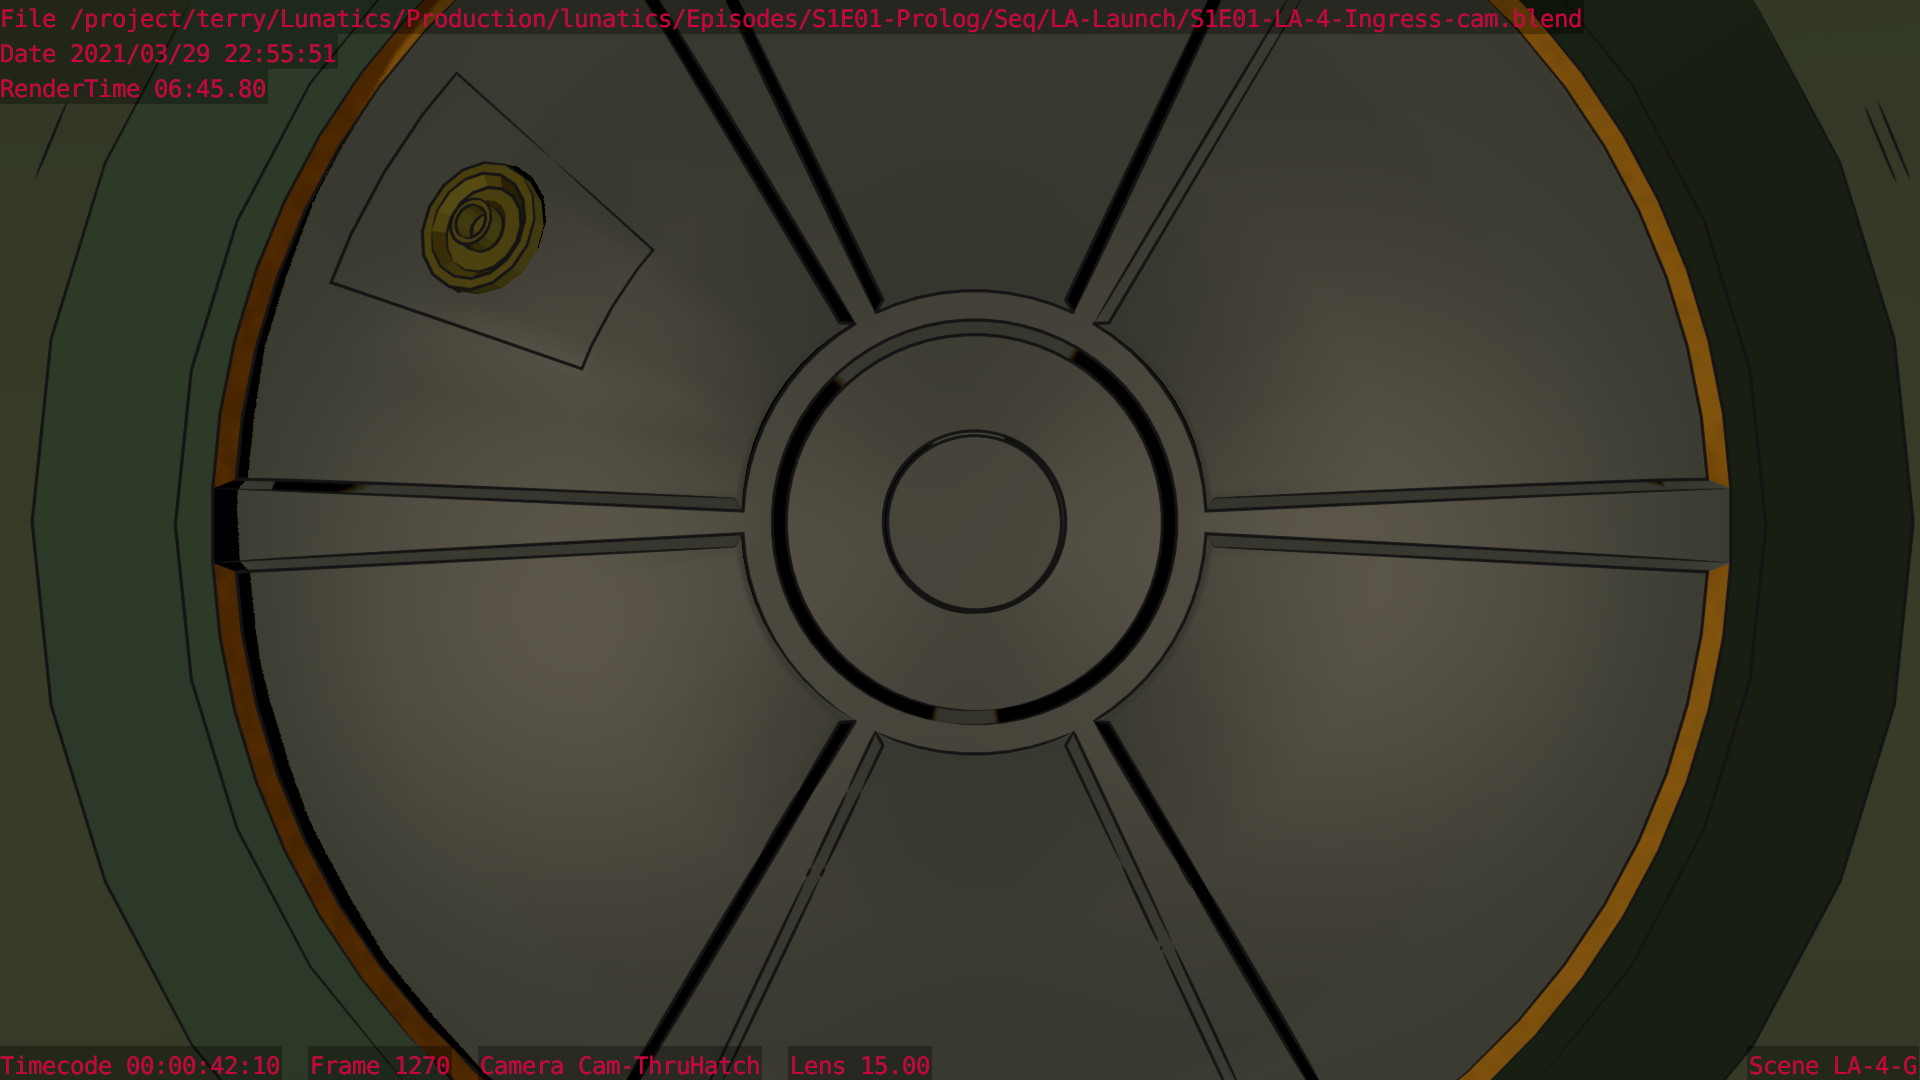


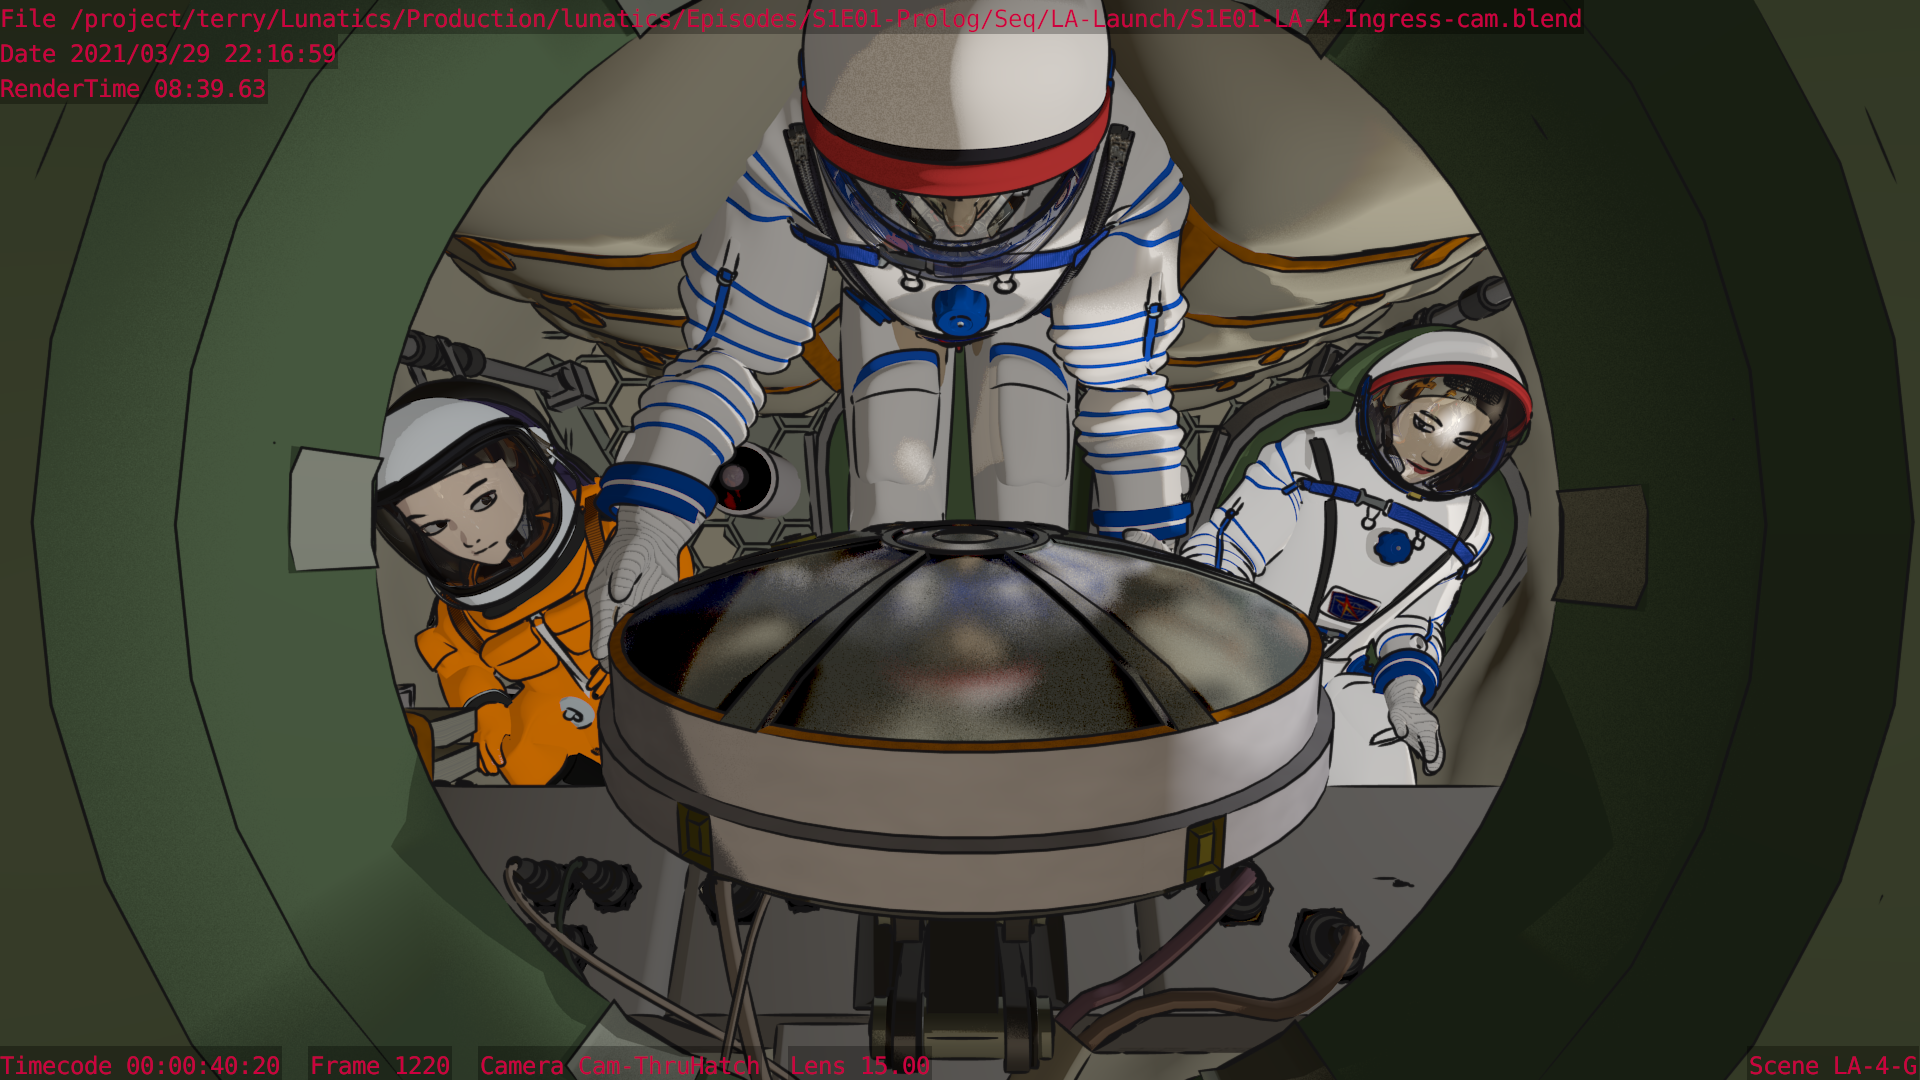

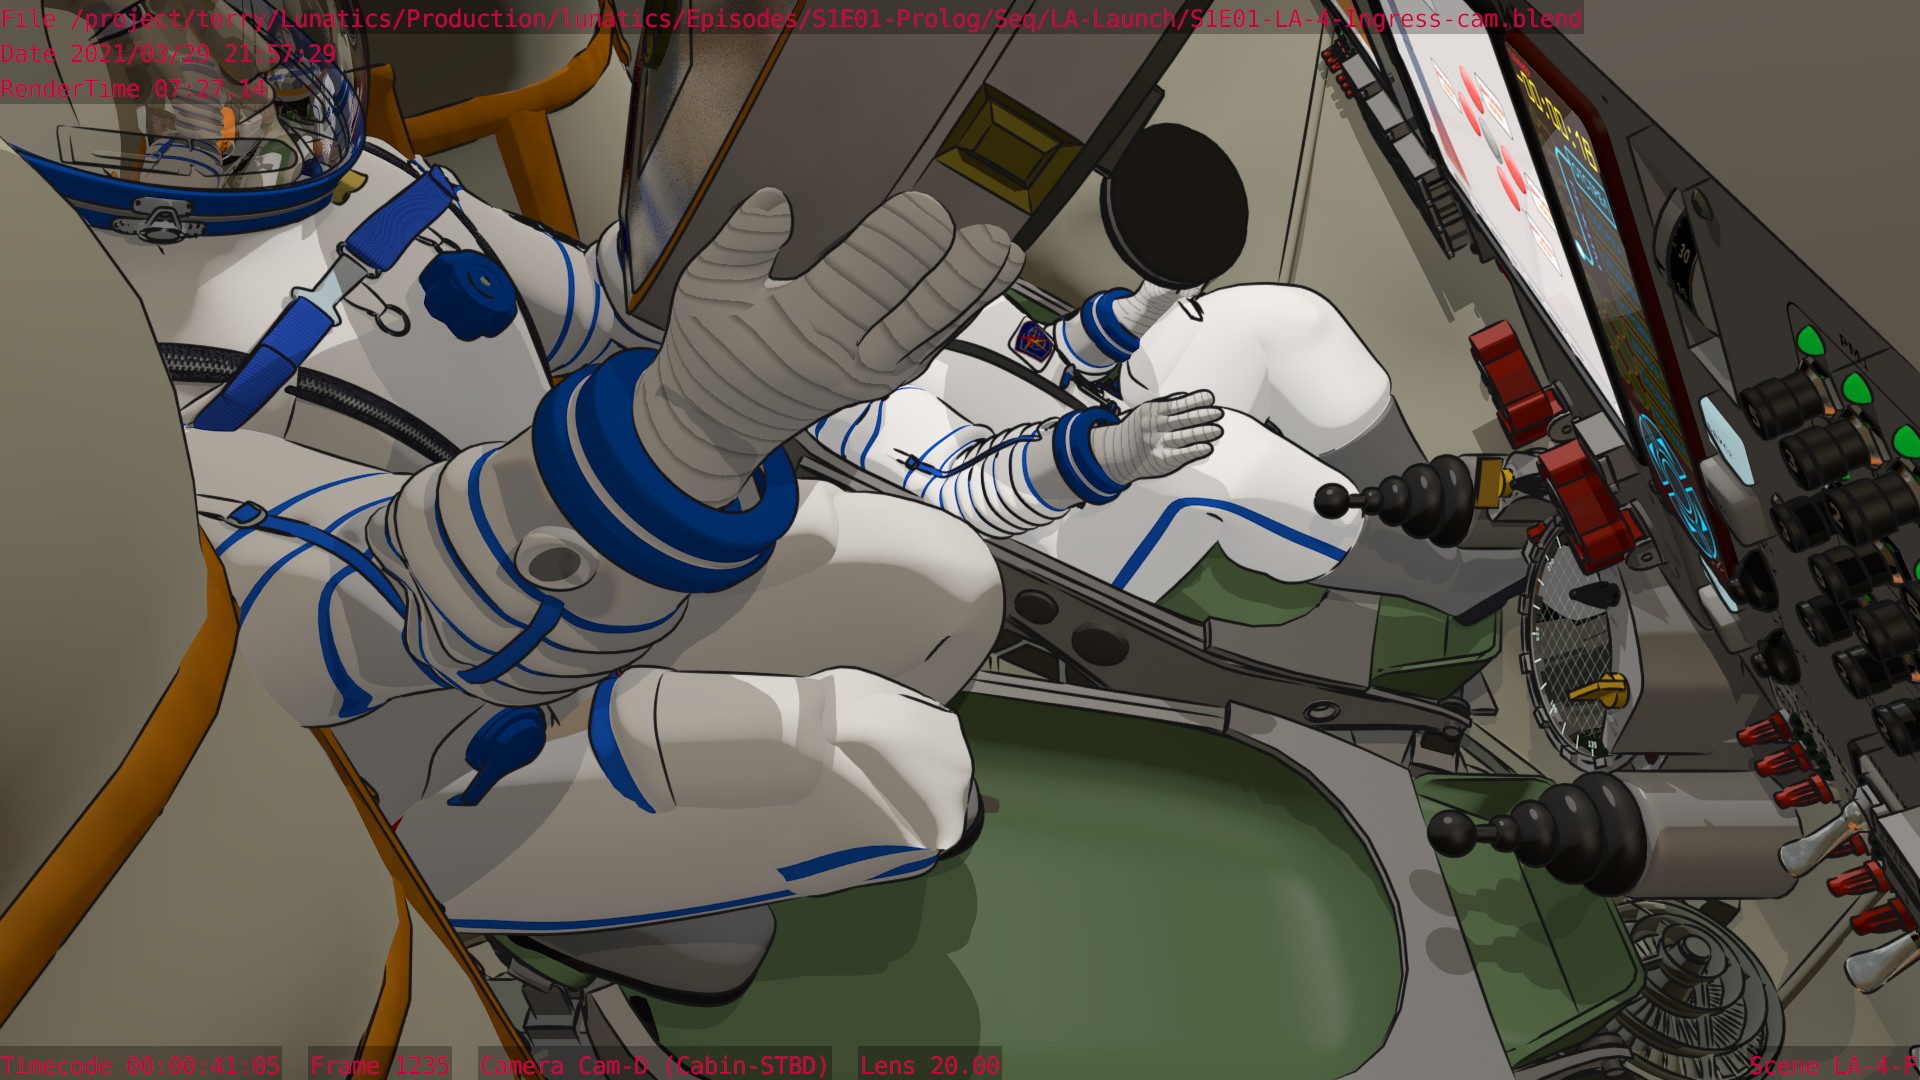
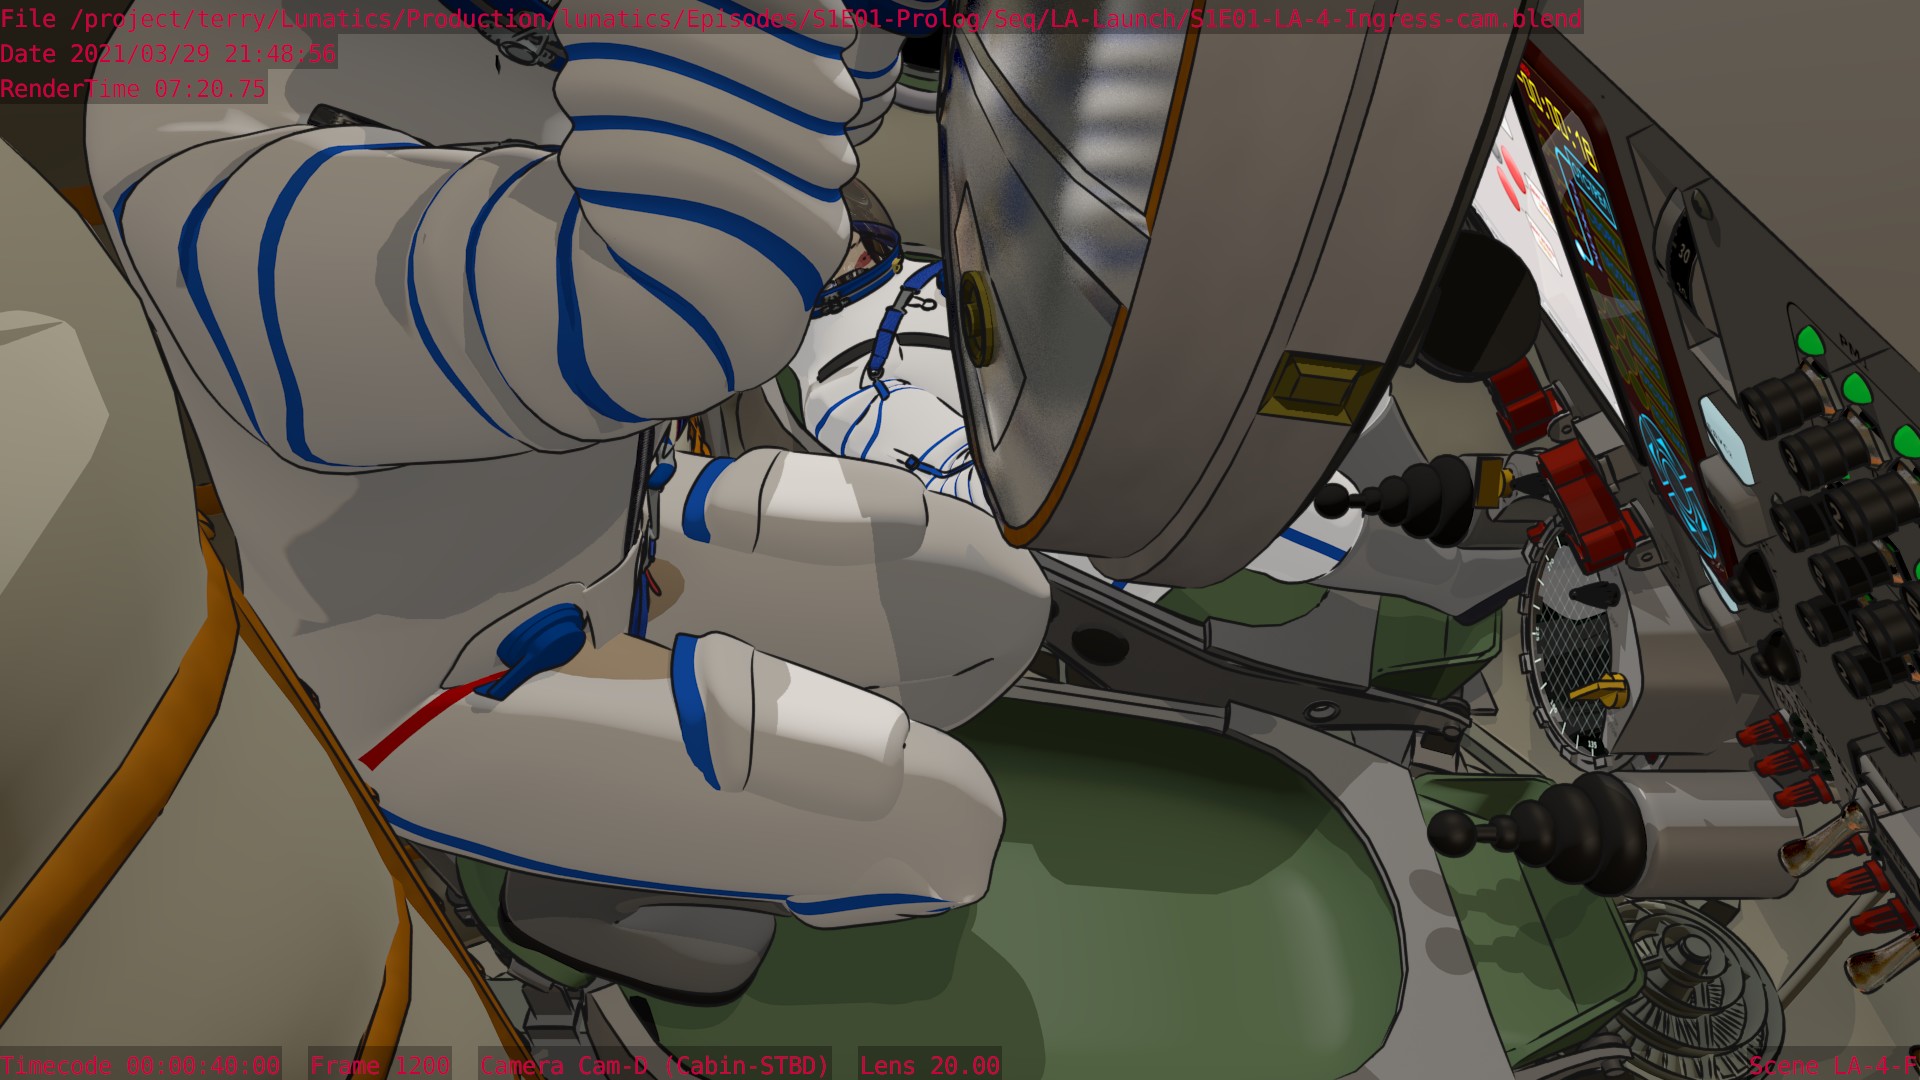


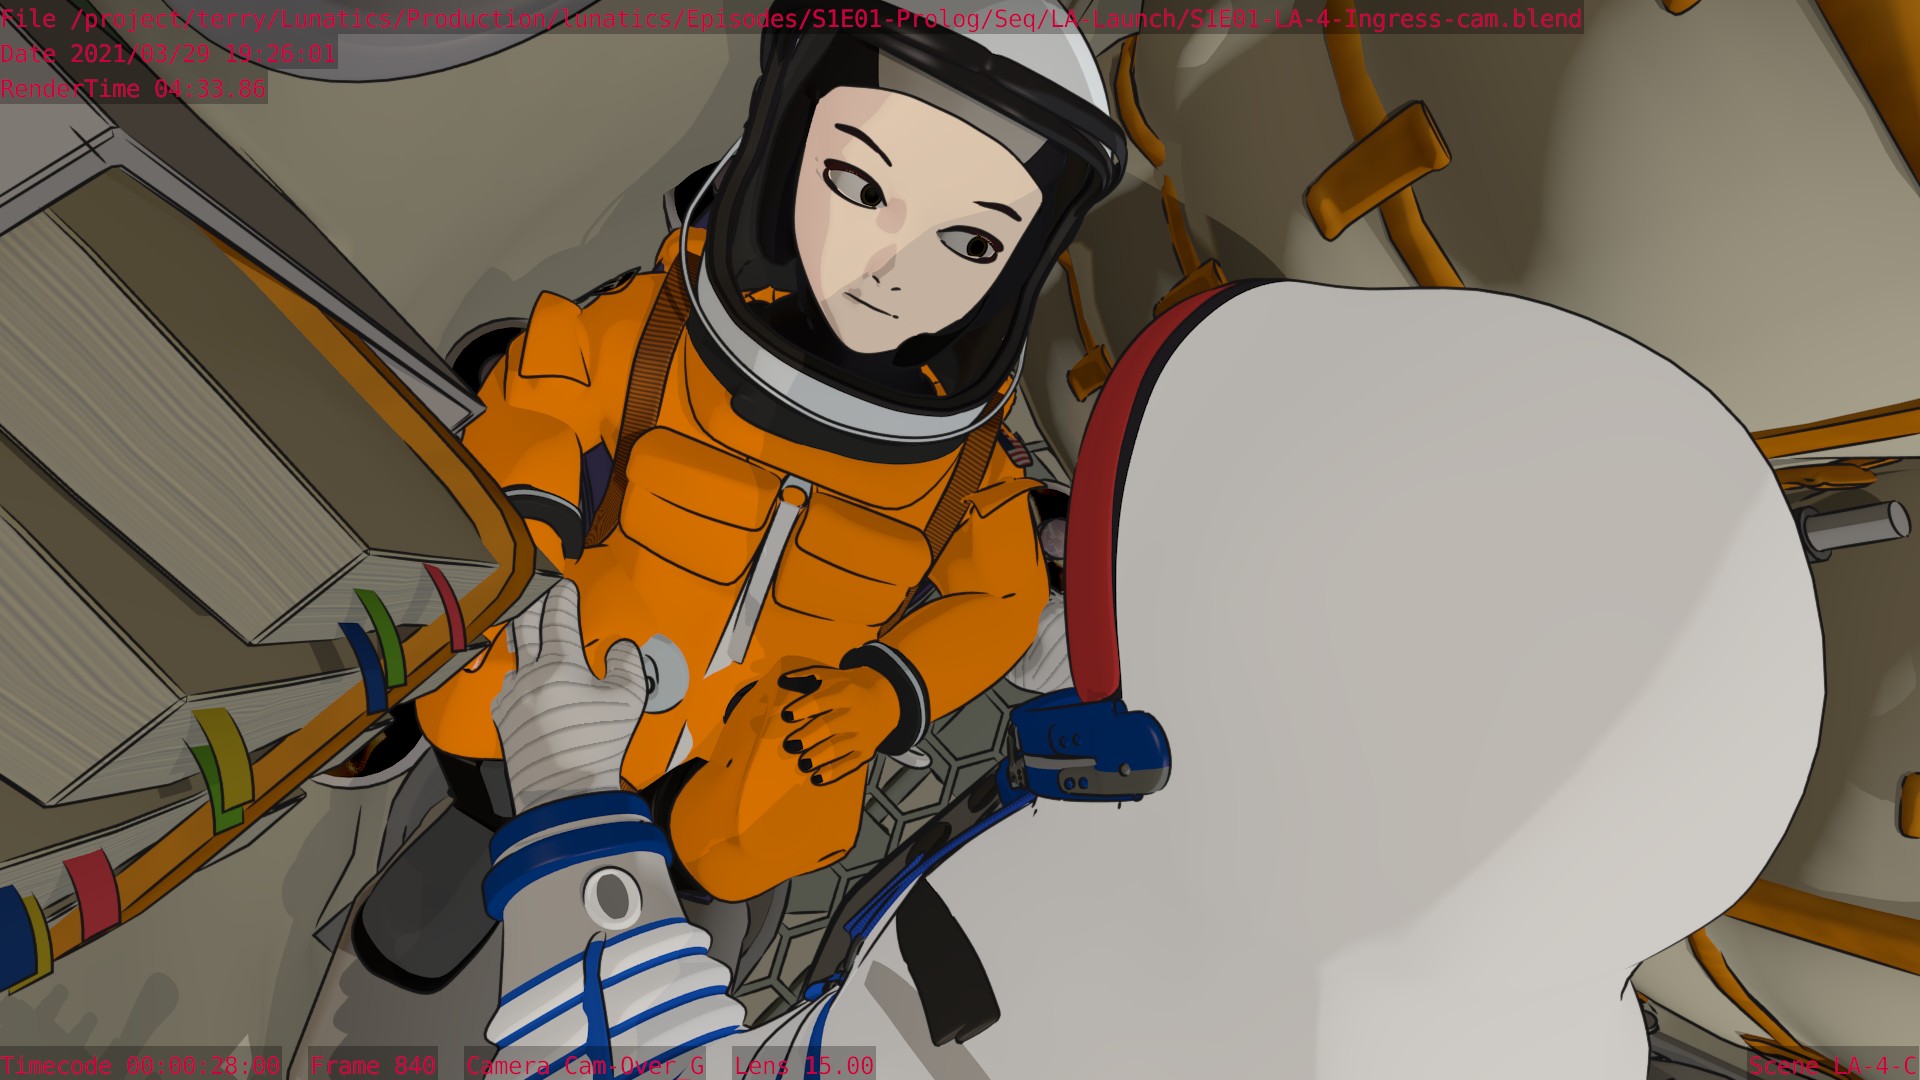


Check renders from the LA “Launch” sequence, block 4, which is the characters getting into the Soyuz. The purpose of these is to test that the linking and rendering settings are correct for final rendering. I typically render the beginning, middle, and end of shots, though it depends on the action.
These are now set up for Multilayer EXR rendering, with color, shadows, normals, motion vectors, reflections, and ink as separate layers. What you see here are the “preview composites” which are rendered directly to PNG images as a preview.The final production allows for the layers to be re-composited, at which point I can make minor corrections to glitching ink lines, adjust the color, or change the strength of shadow or reflection effects.
These mostly look right to me, except the console monitors are on, and they should be dark in this sequence. The monitors don’t seem to be responding to the brightness control, so I probably have a rigging problem to fix before they’re ready to render.
Apr 2, 2021 at 4:00 PM
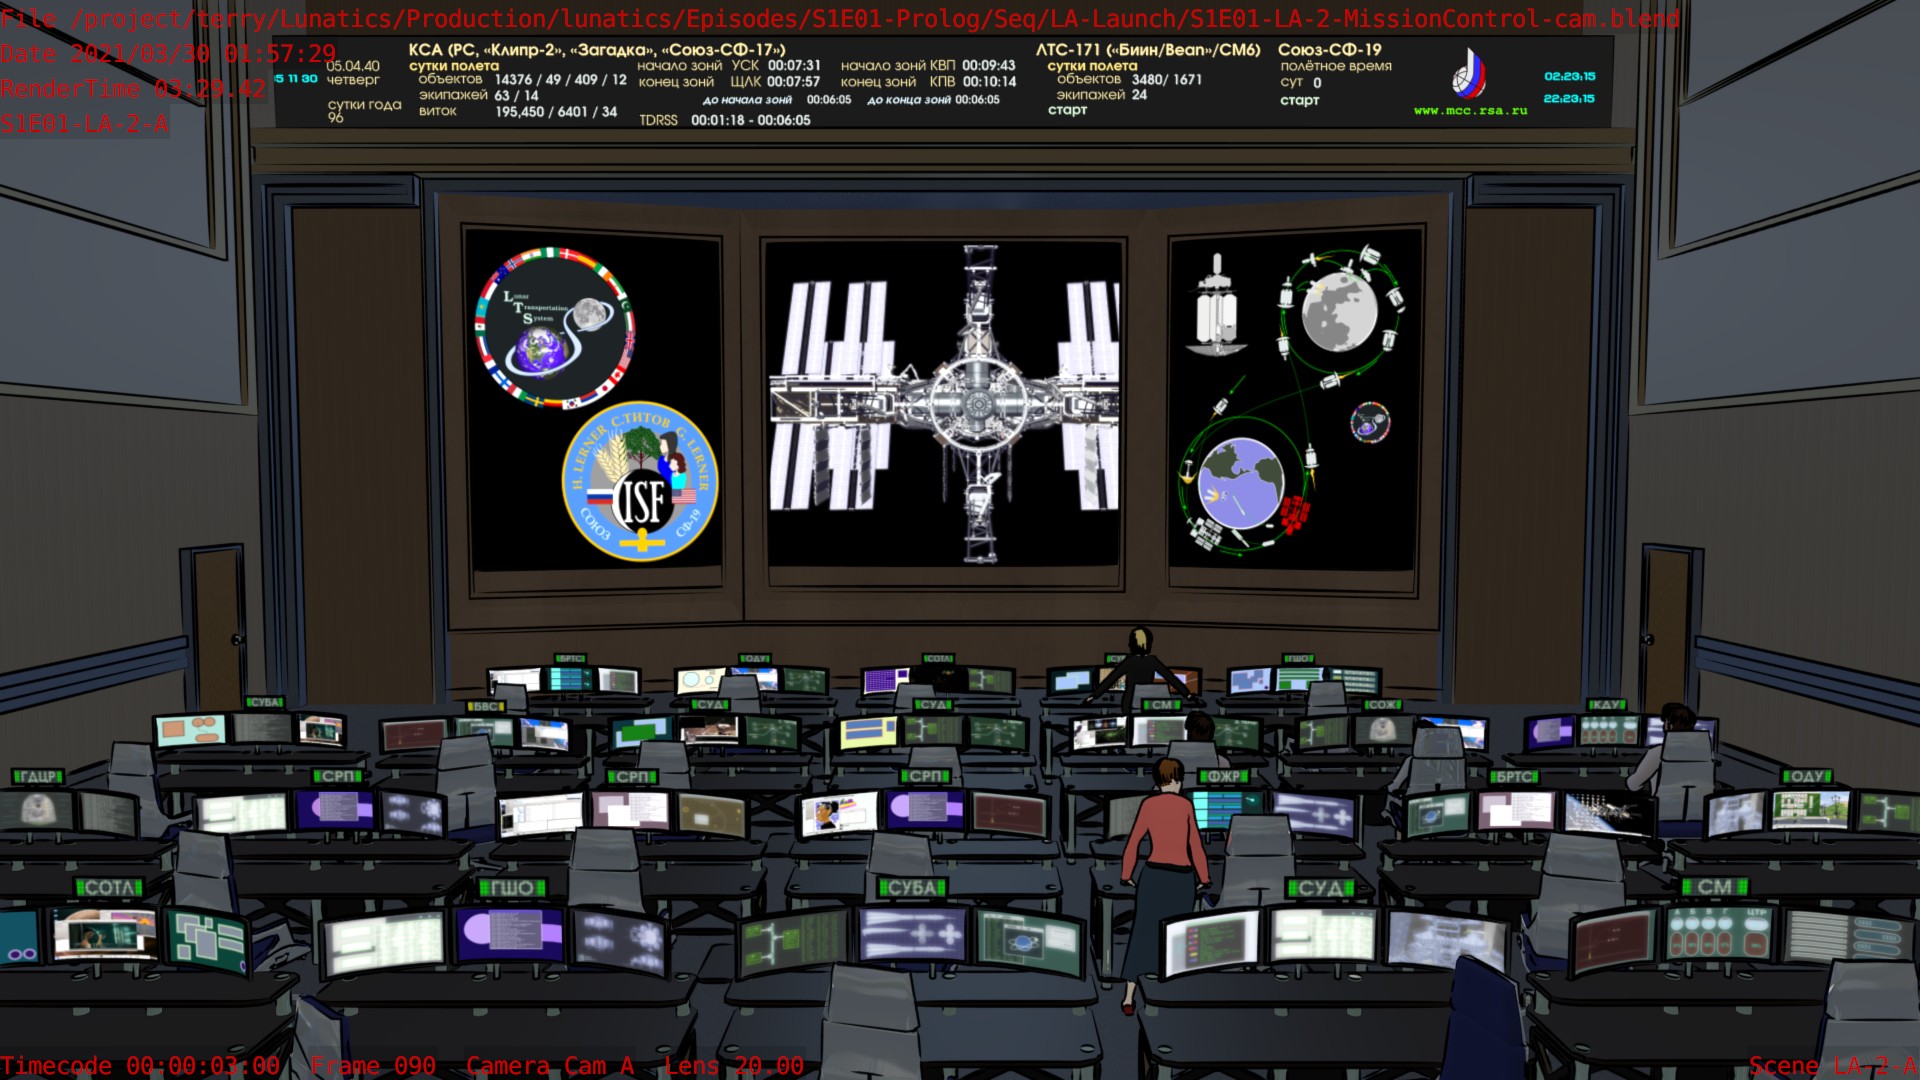
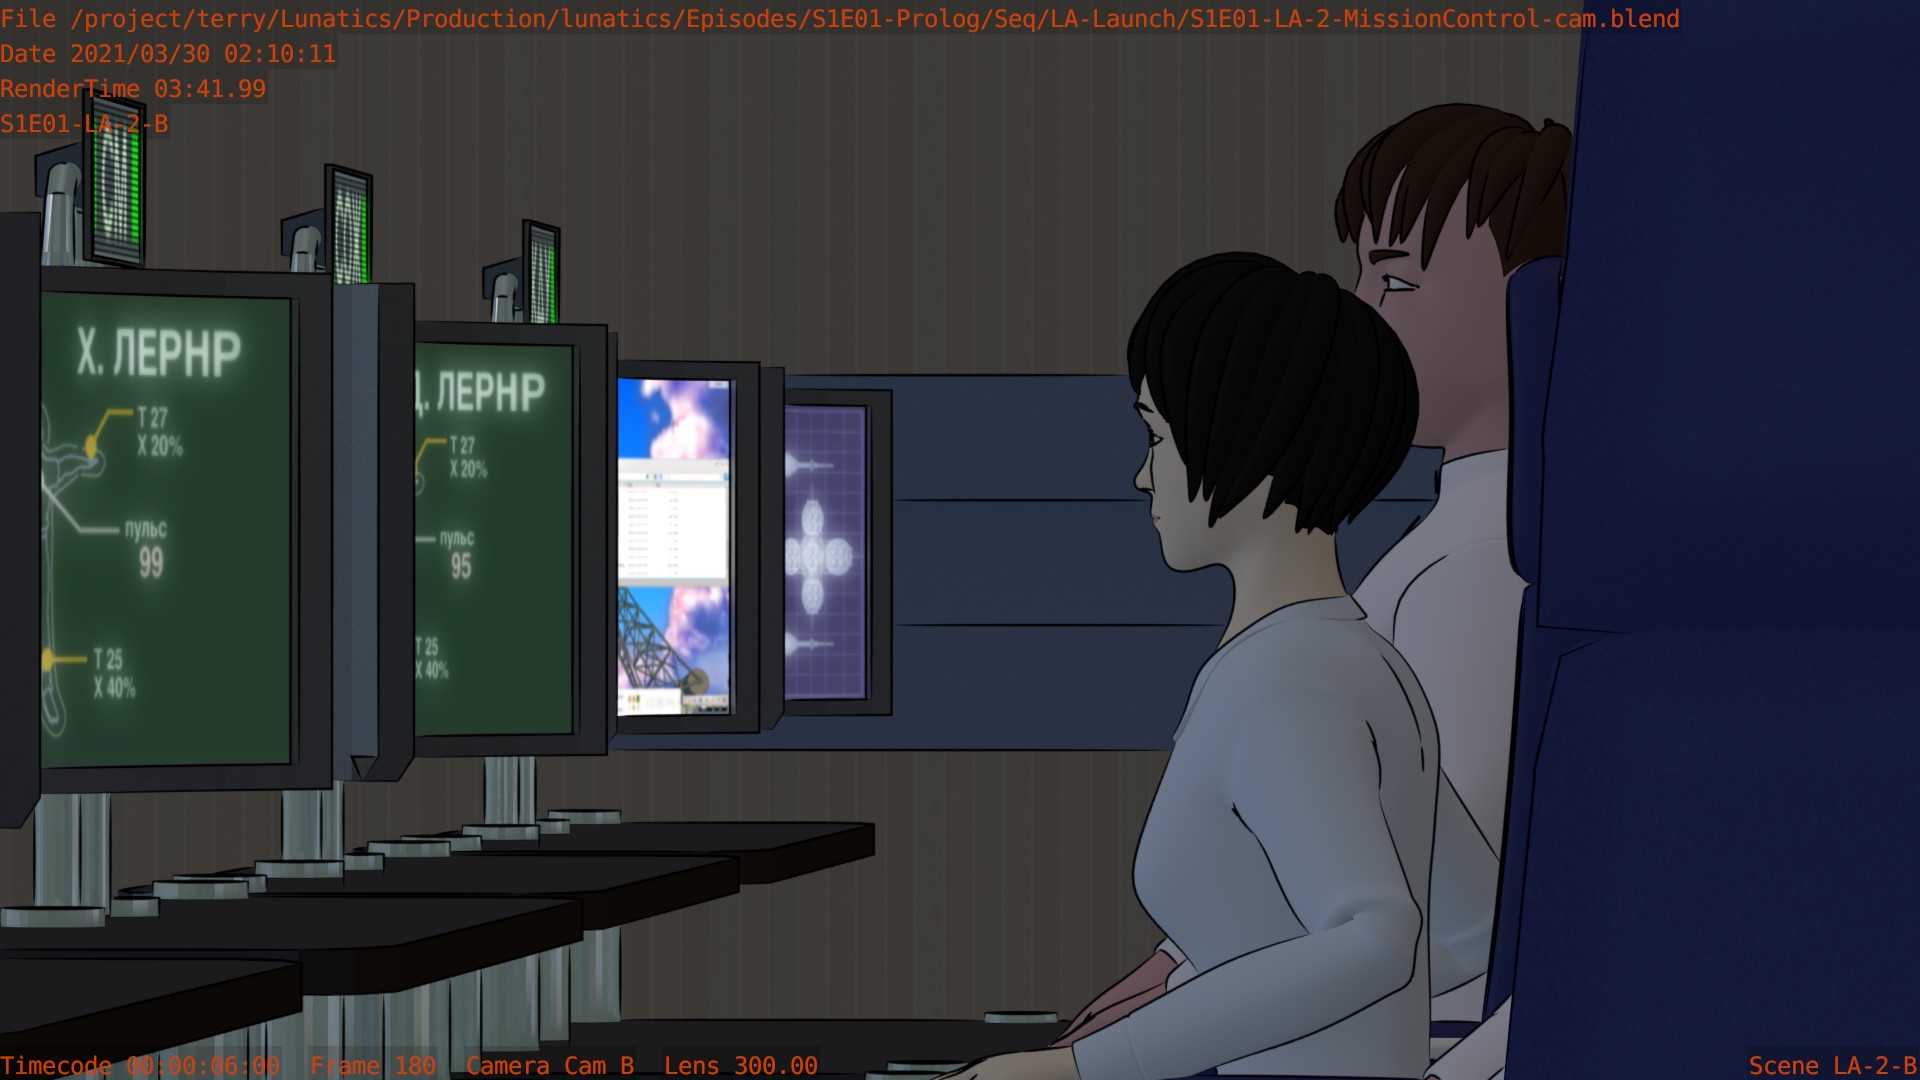
Screens Fixed
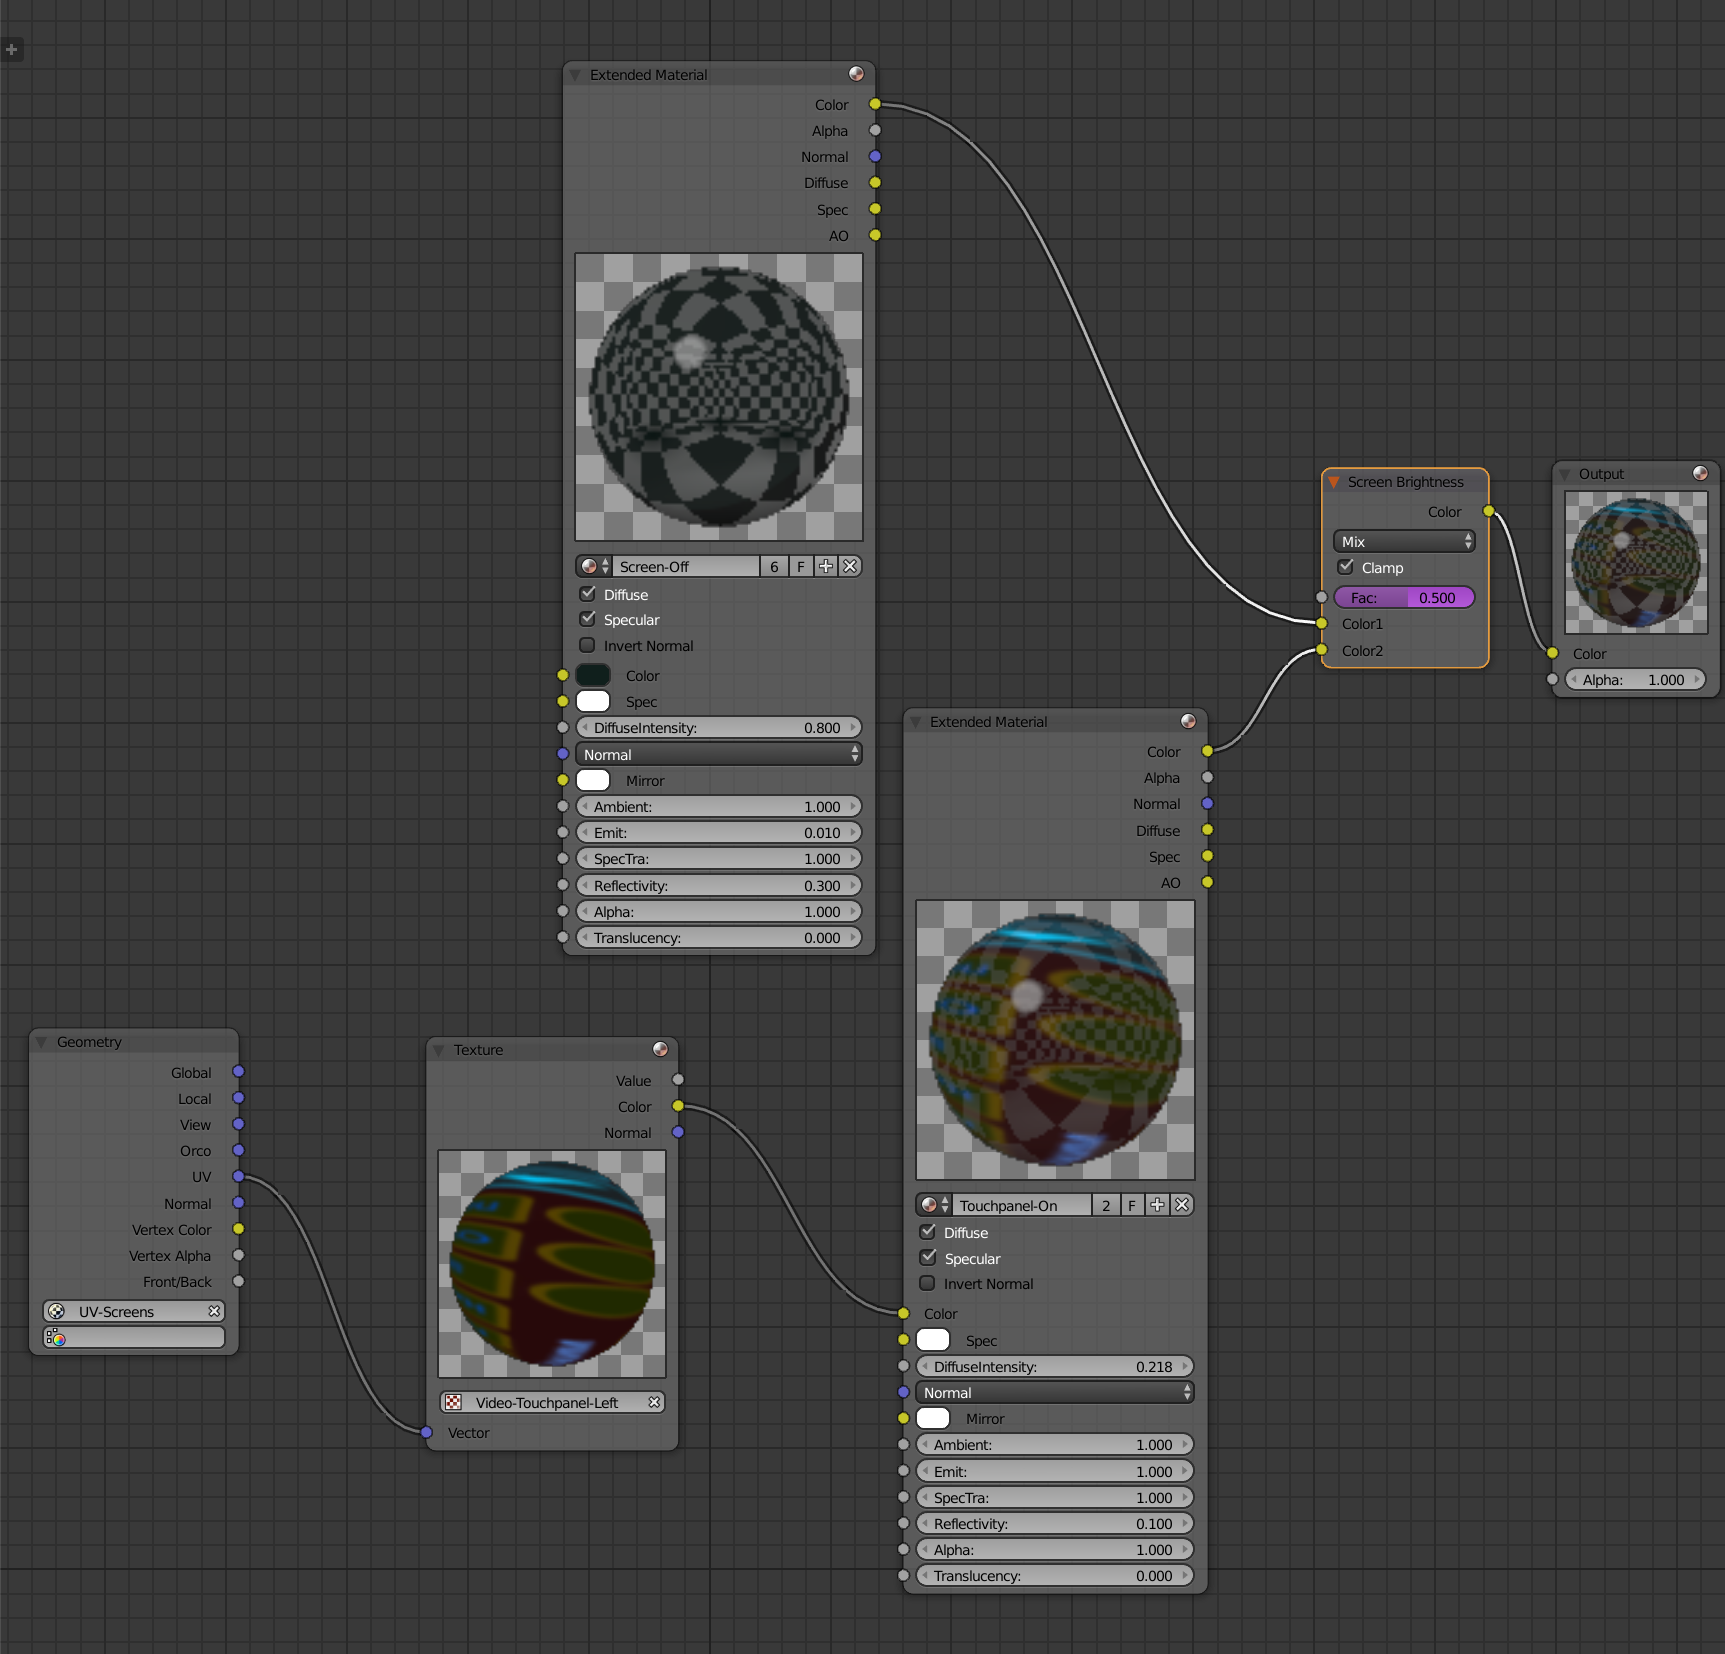
I’m still not quite sure what went wrong, but I revised the set file and reset the keyframes in the animation file to turn the screen brightness down to zero, and rechecked these shots. They’re correct, now, and I think they are stable. I reset the armature in the set file to the rest position, and then checked the posed shots, so the proxy armature seems to be working (that was one of my theories about what might have gone wrong).
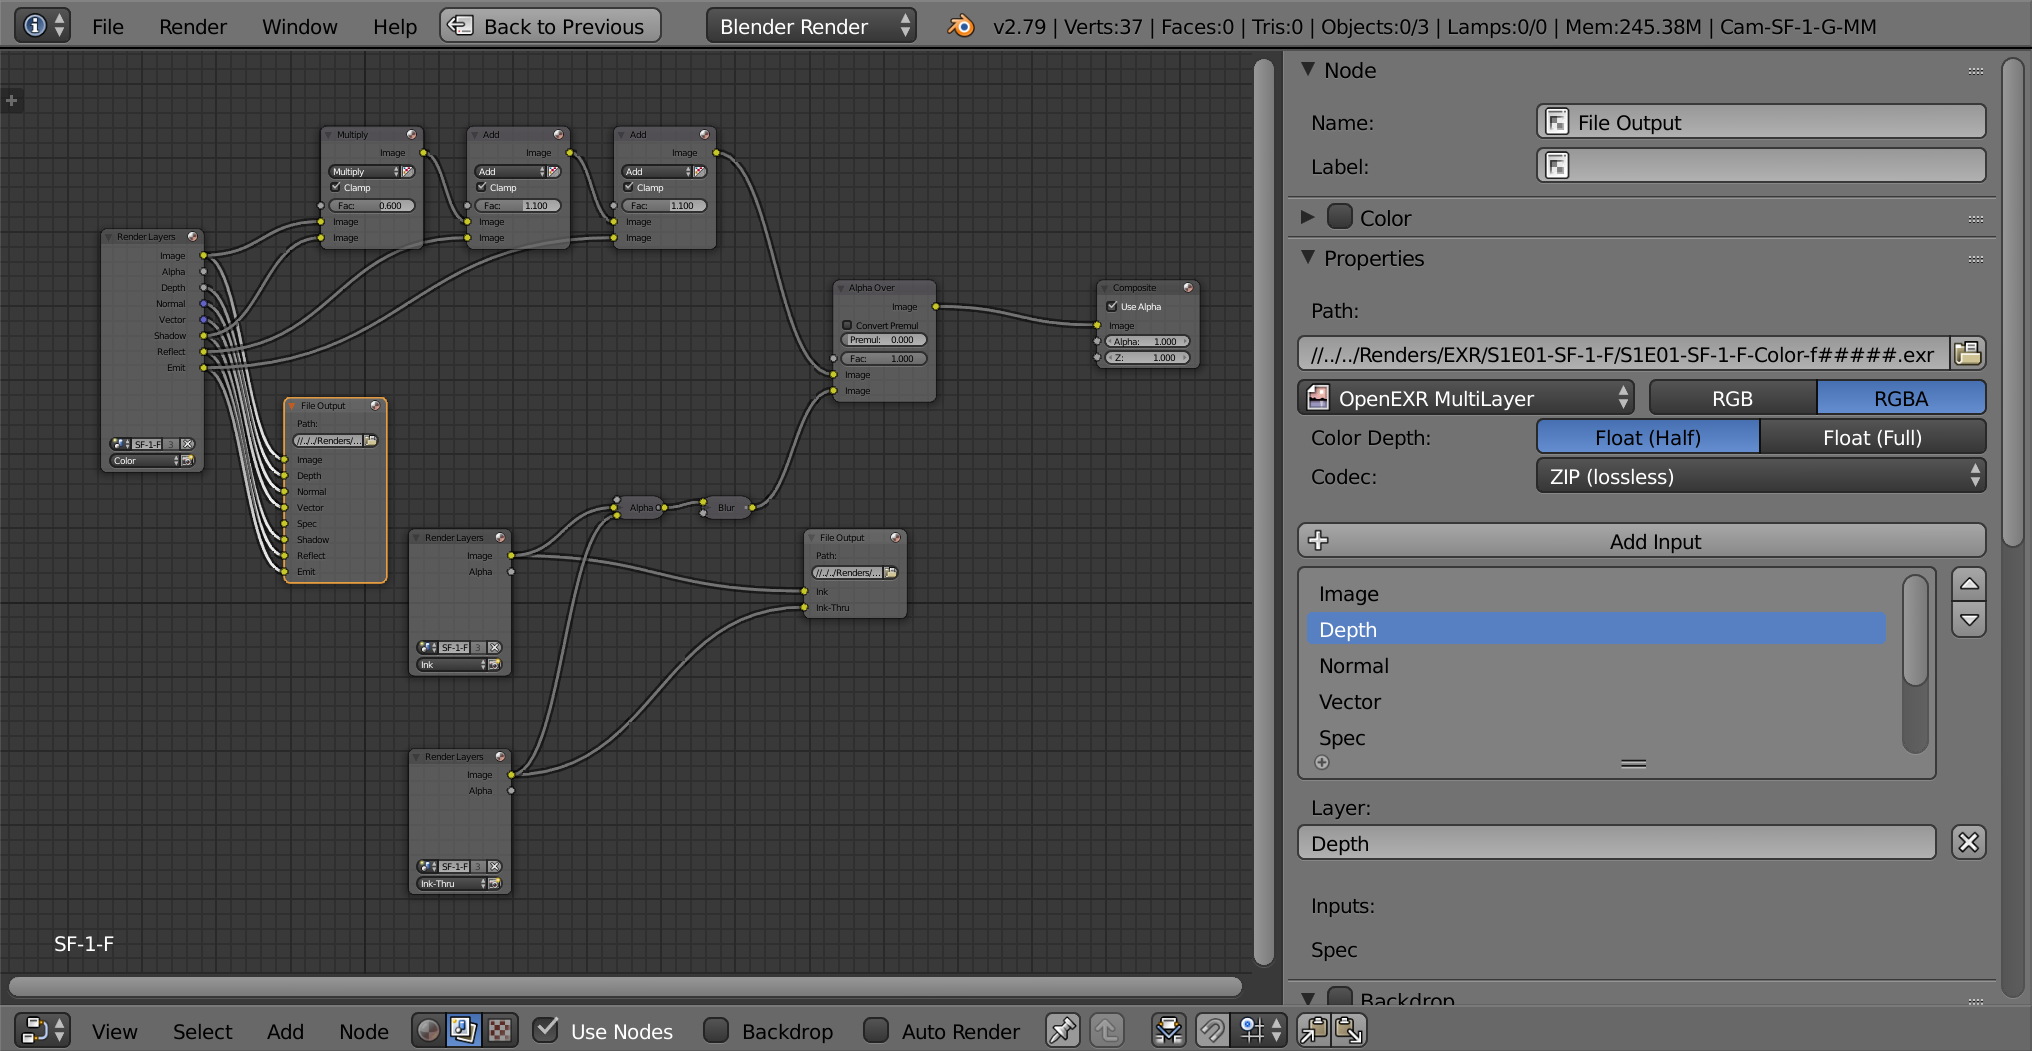
The screen brightness is controlled by a driver on a node in the node-based material for the screens, like this:
This is controlled by a driver, which takes its input from a slider bone on the set control panel armature:
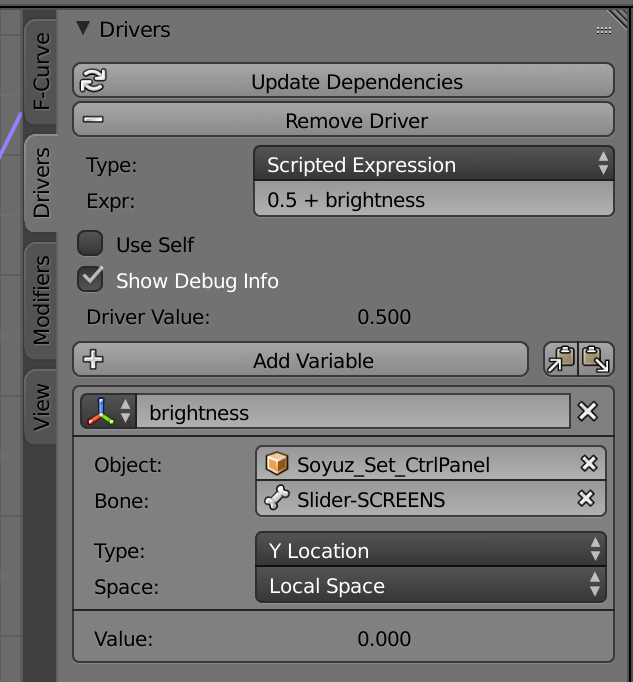
Which is taking the position from the highlighted bone below (the control panel elements are armature bones with custom shapes):

Apr 4, 2021 at 4:00 PM
Flames!
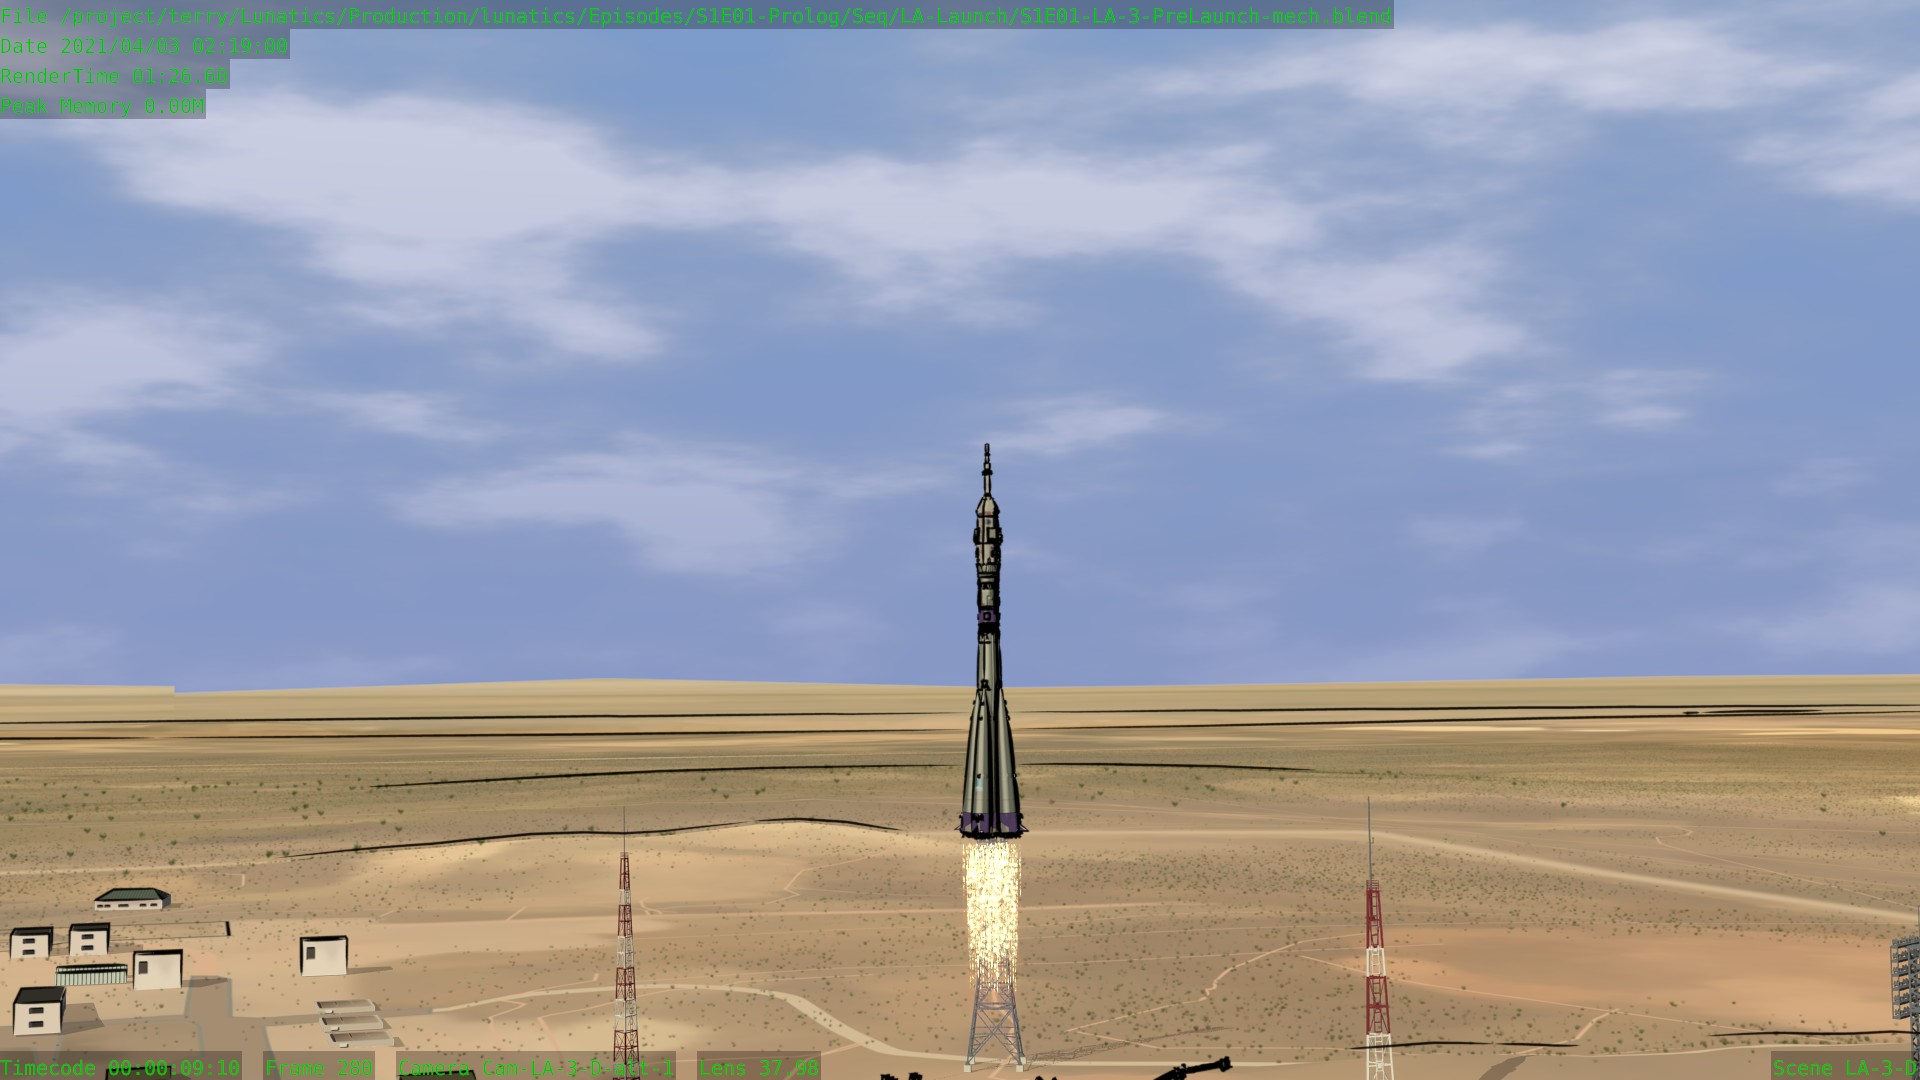

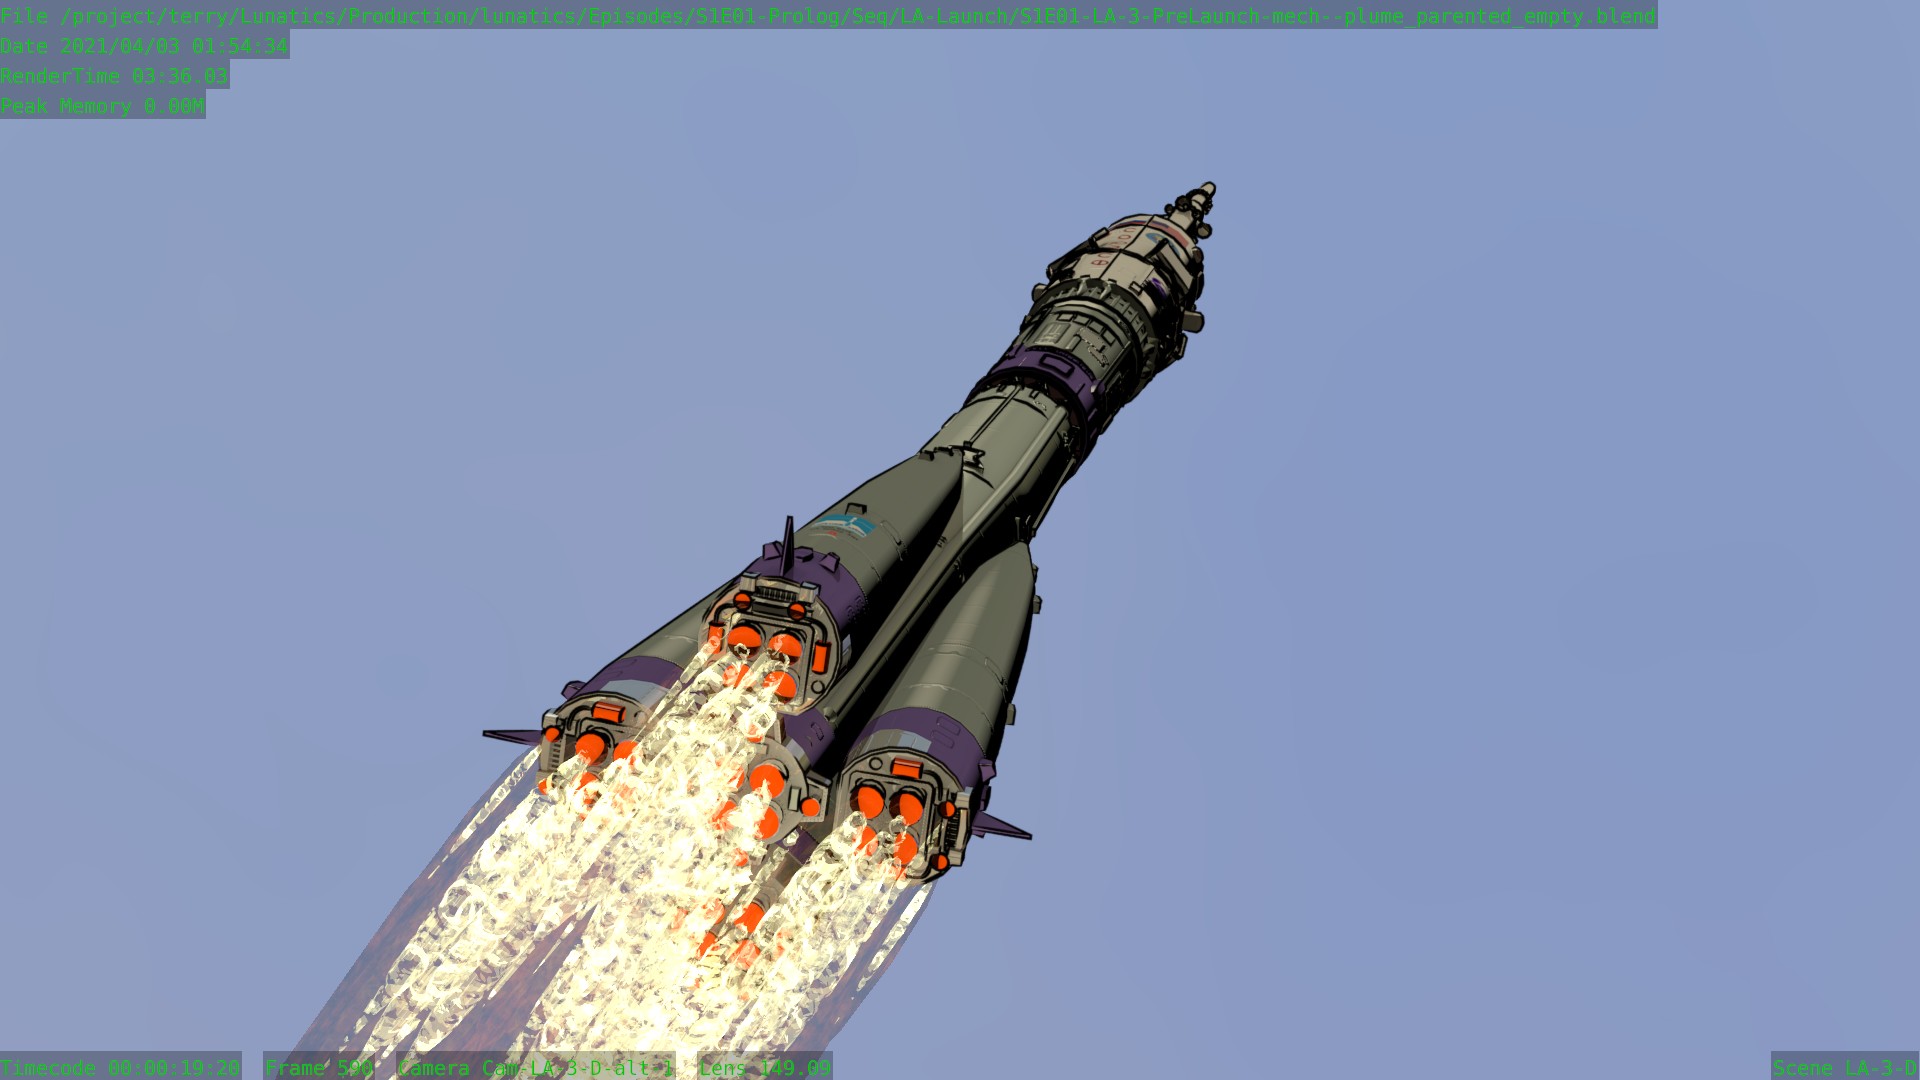
There is finally a rocket plume on my Soyuz launch animation.
This is a draft — I haven’t attempted to actually animate the flames themselves yet. The goal of this test was to attach the flames to the rocket as it takes. This was a little tricky to do, since the rocket is part of a dupligroup, and thus it was a little tricky to match the plumes up to the rocket (it’s not possible to directly select the rocket to parent anything to it).
However, I found I could parent an object to the Soyuz position control in the Launchpad proxy, and then use a transform constraint to provide an empty that is matched to the rocket’s movement.
Then it was a simple matter to attach the dupligroups for the core and pod rocket plumes, along with the flame lamp (representing the light from the fire), and the Freestyle proxy (which I need to blot out the ink lines behind the flames).
The shading on the flames still needs a little work (there shouldn’t be a dark halo around them, for example), but I think I’m getting pretty close here.
I decided to forgo a more sophisticated simulated flame/smoke effect at the launch. I wasn’t really planning to use an angle that would make it apparent, and this simple plume effect looks pretty accurate from these angles.
Apr 7, 2021 at 4:00 PM
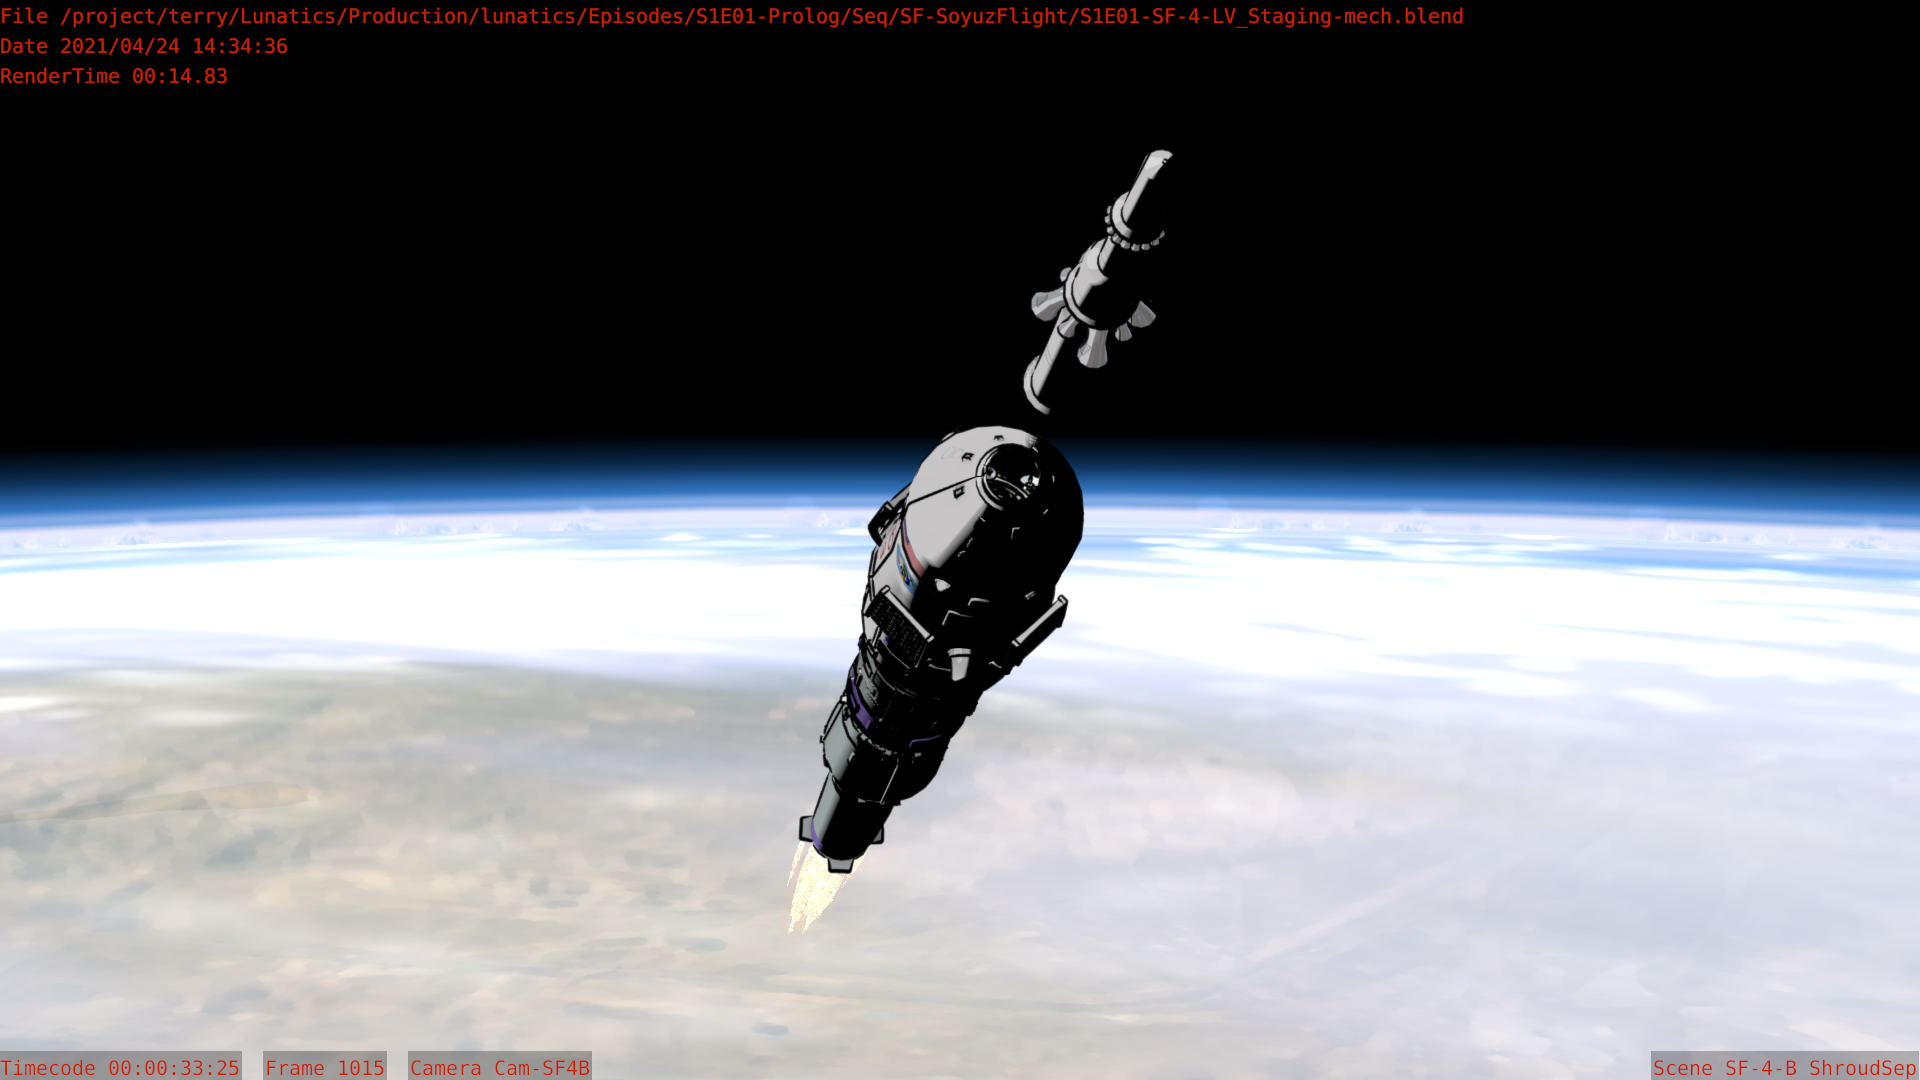
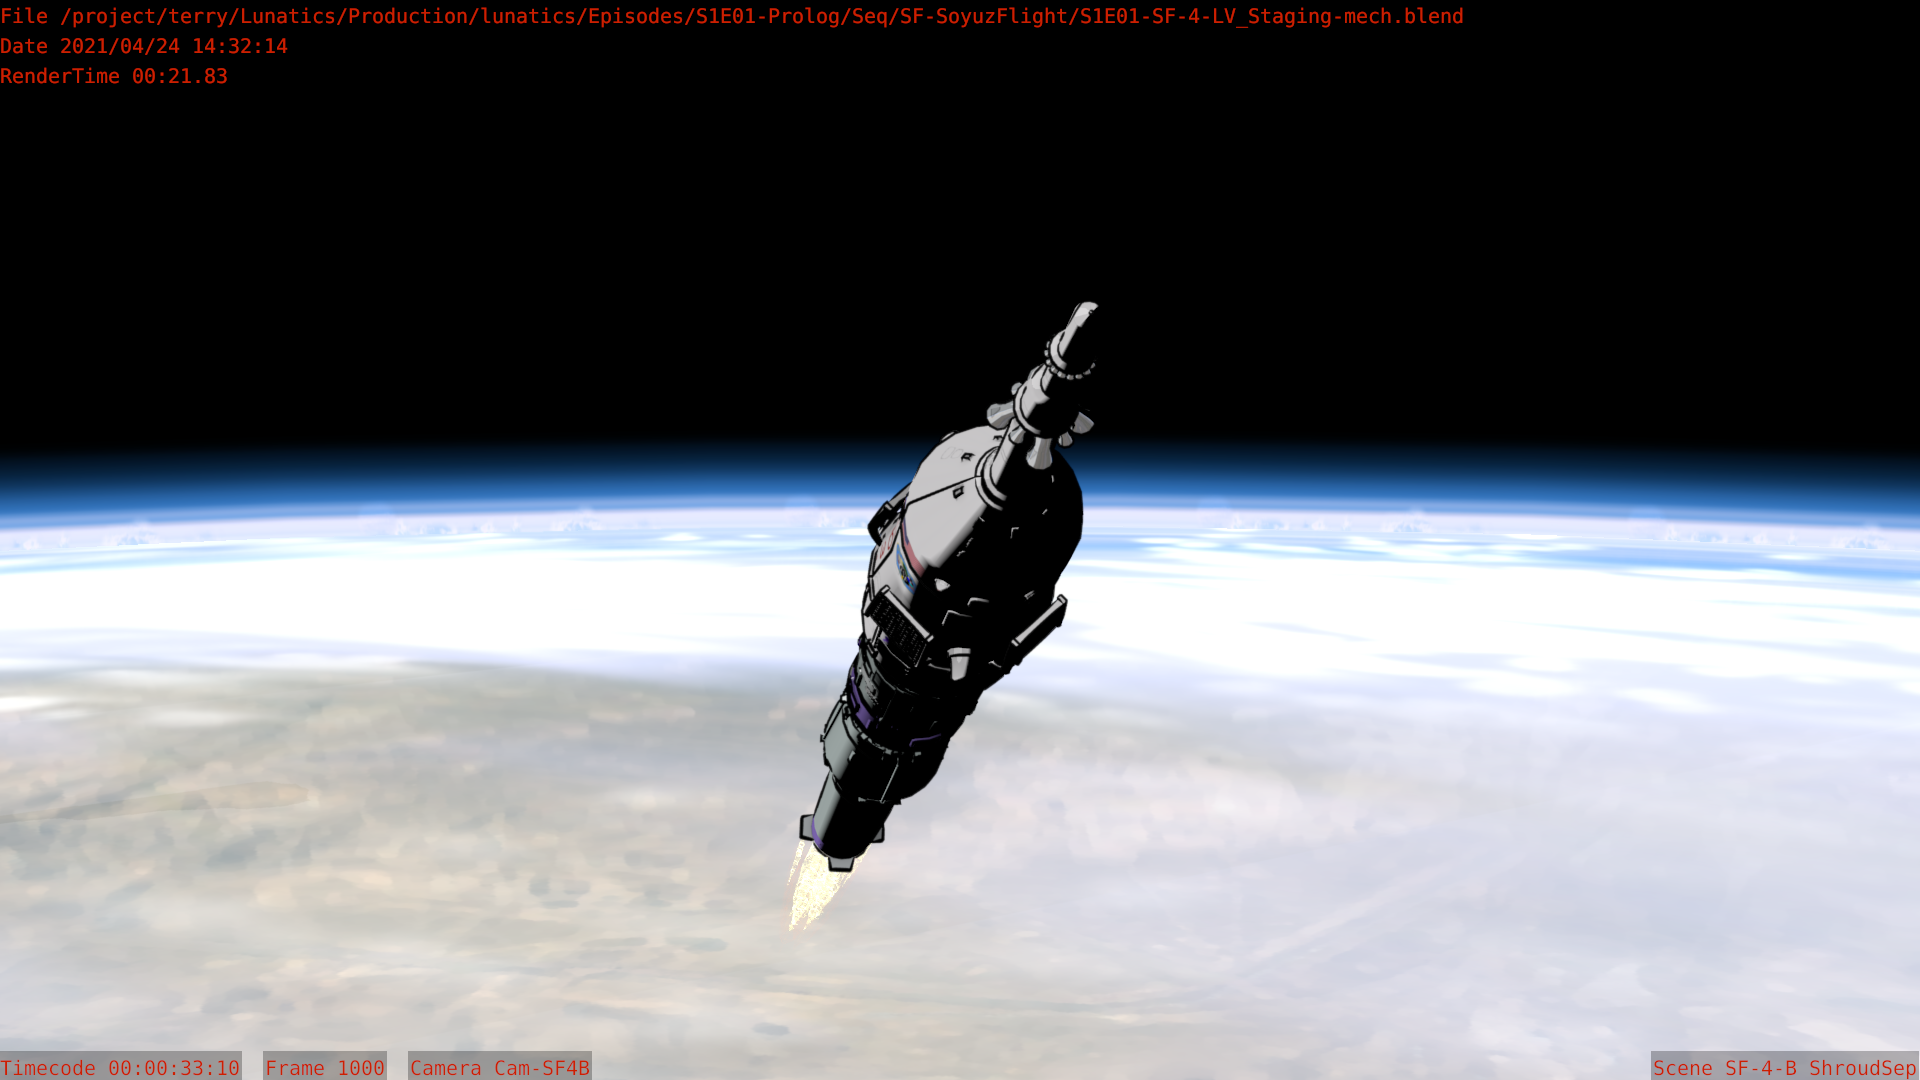
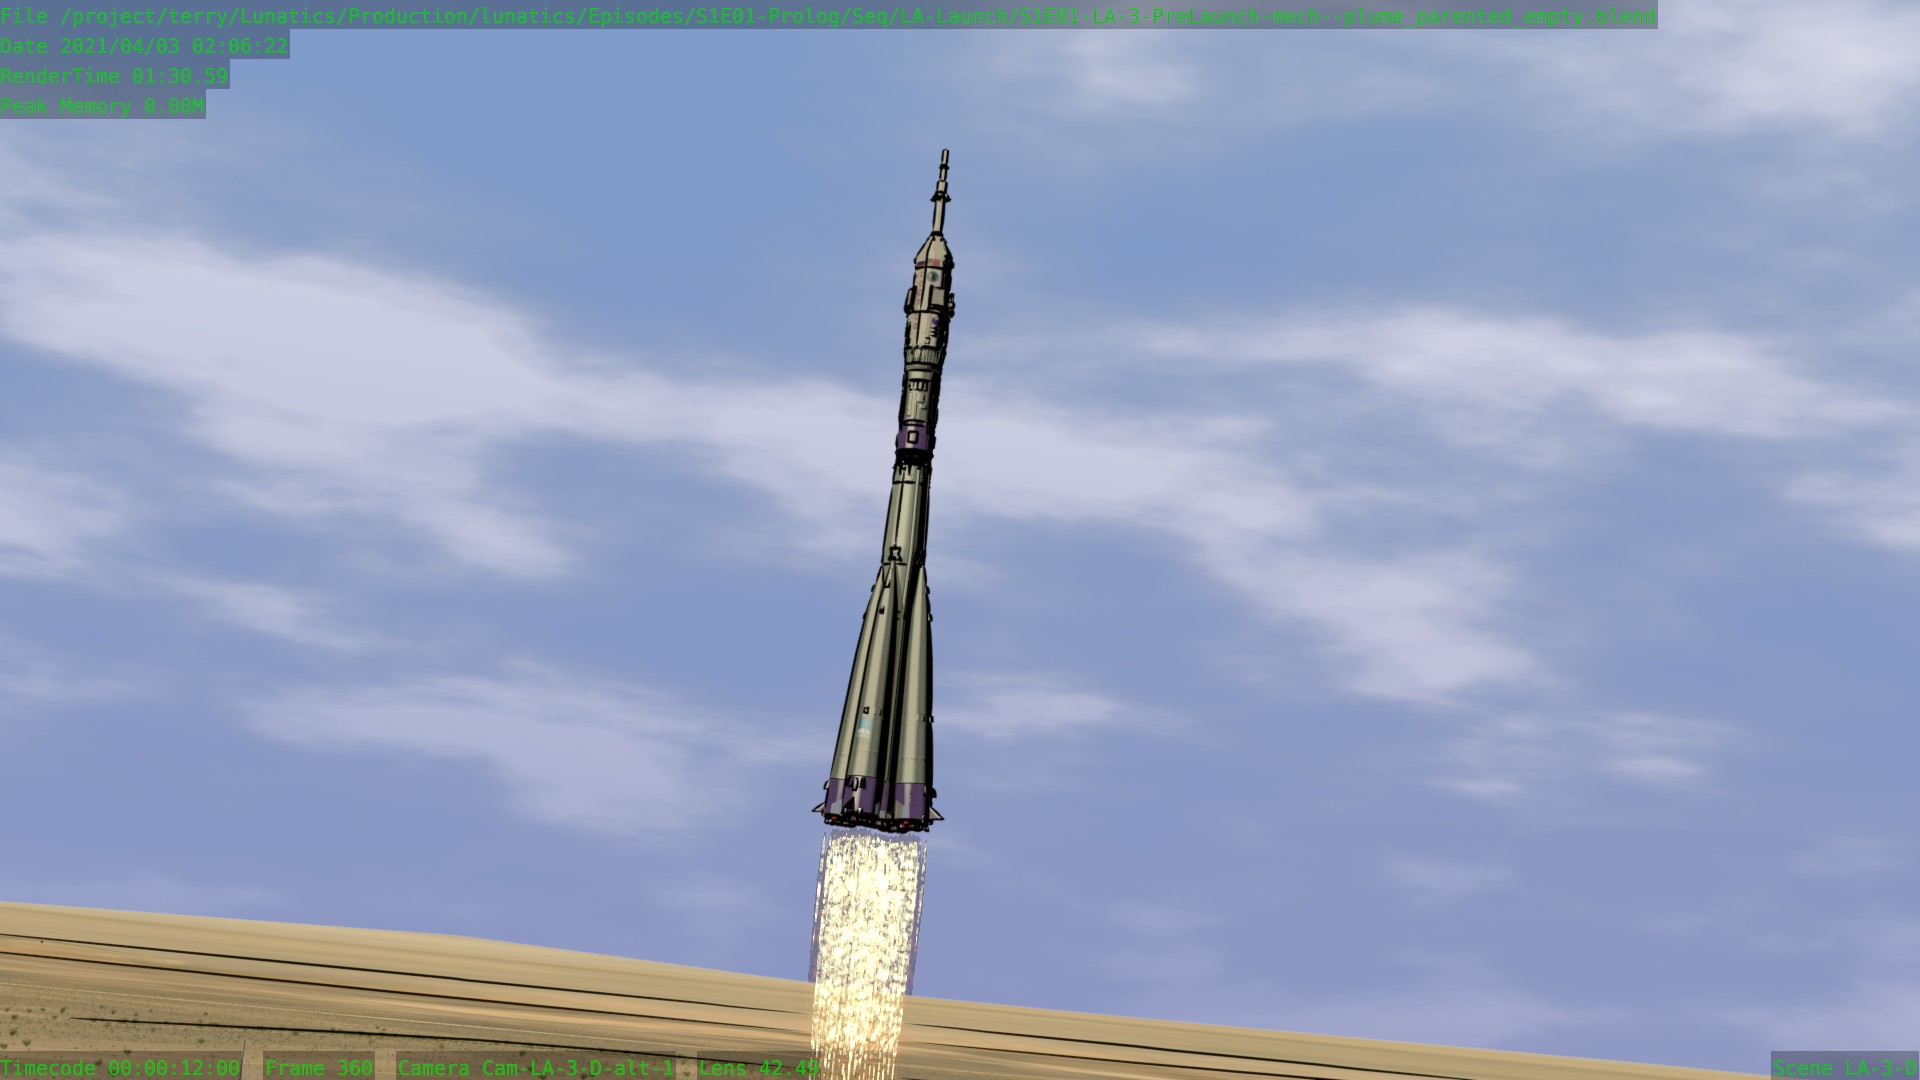
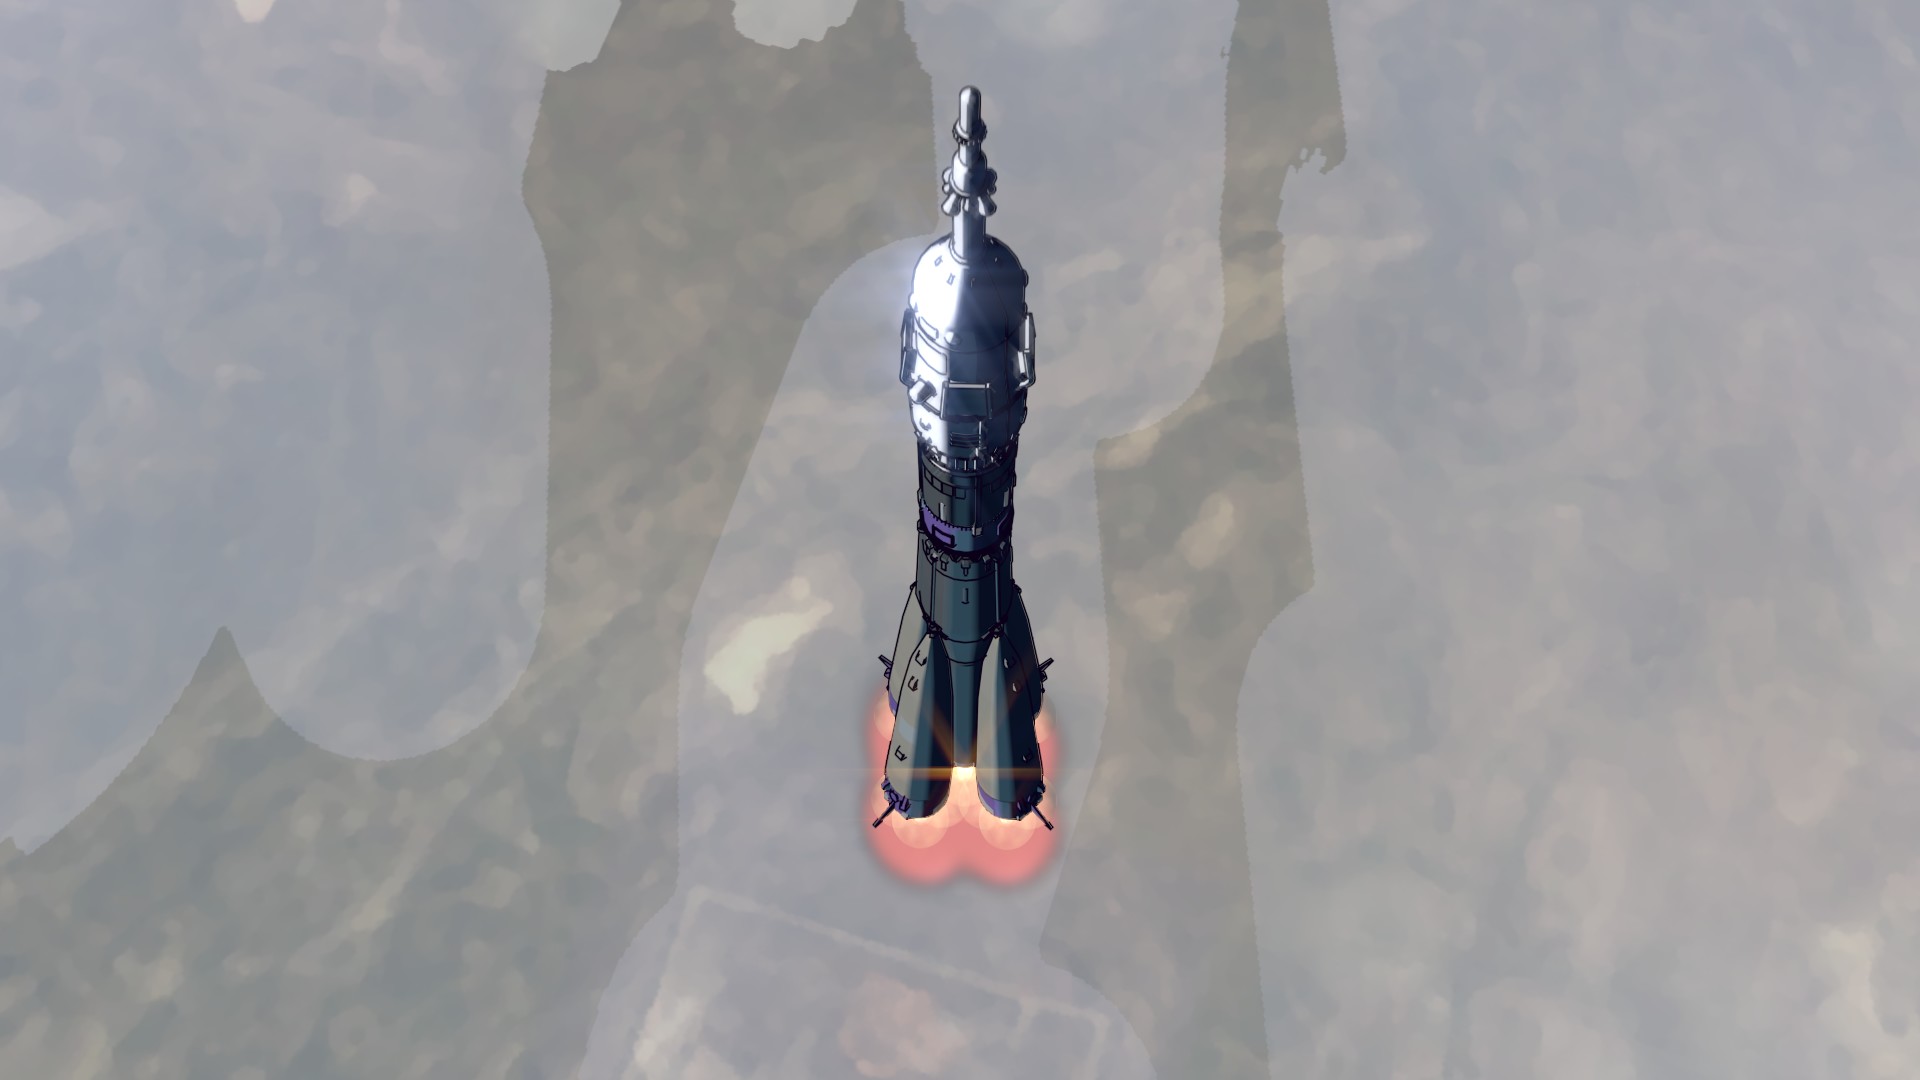
More Flames
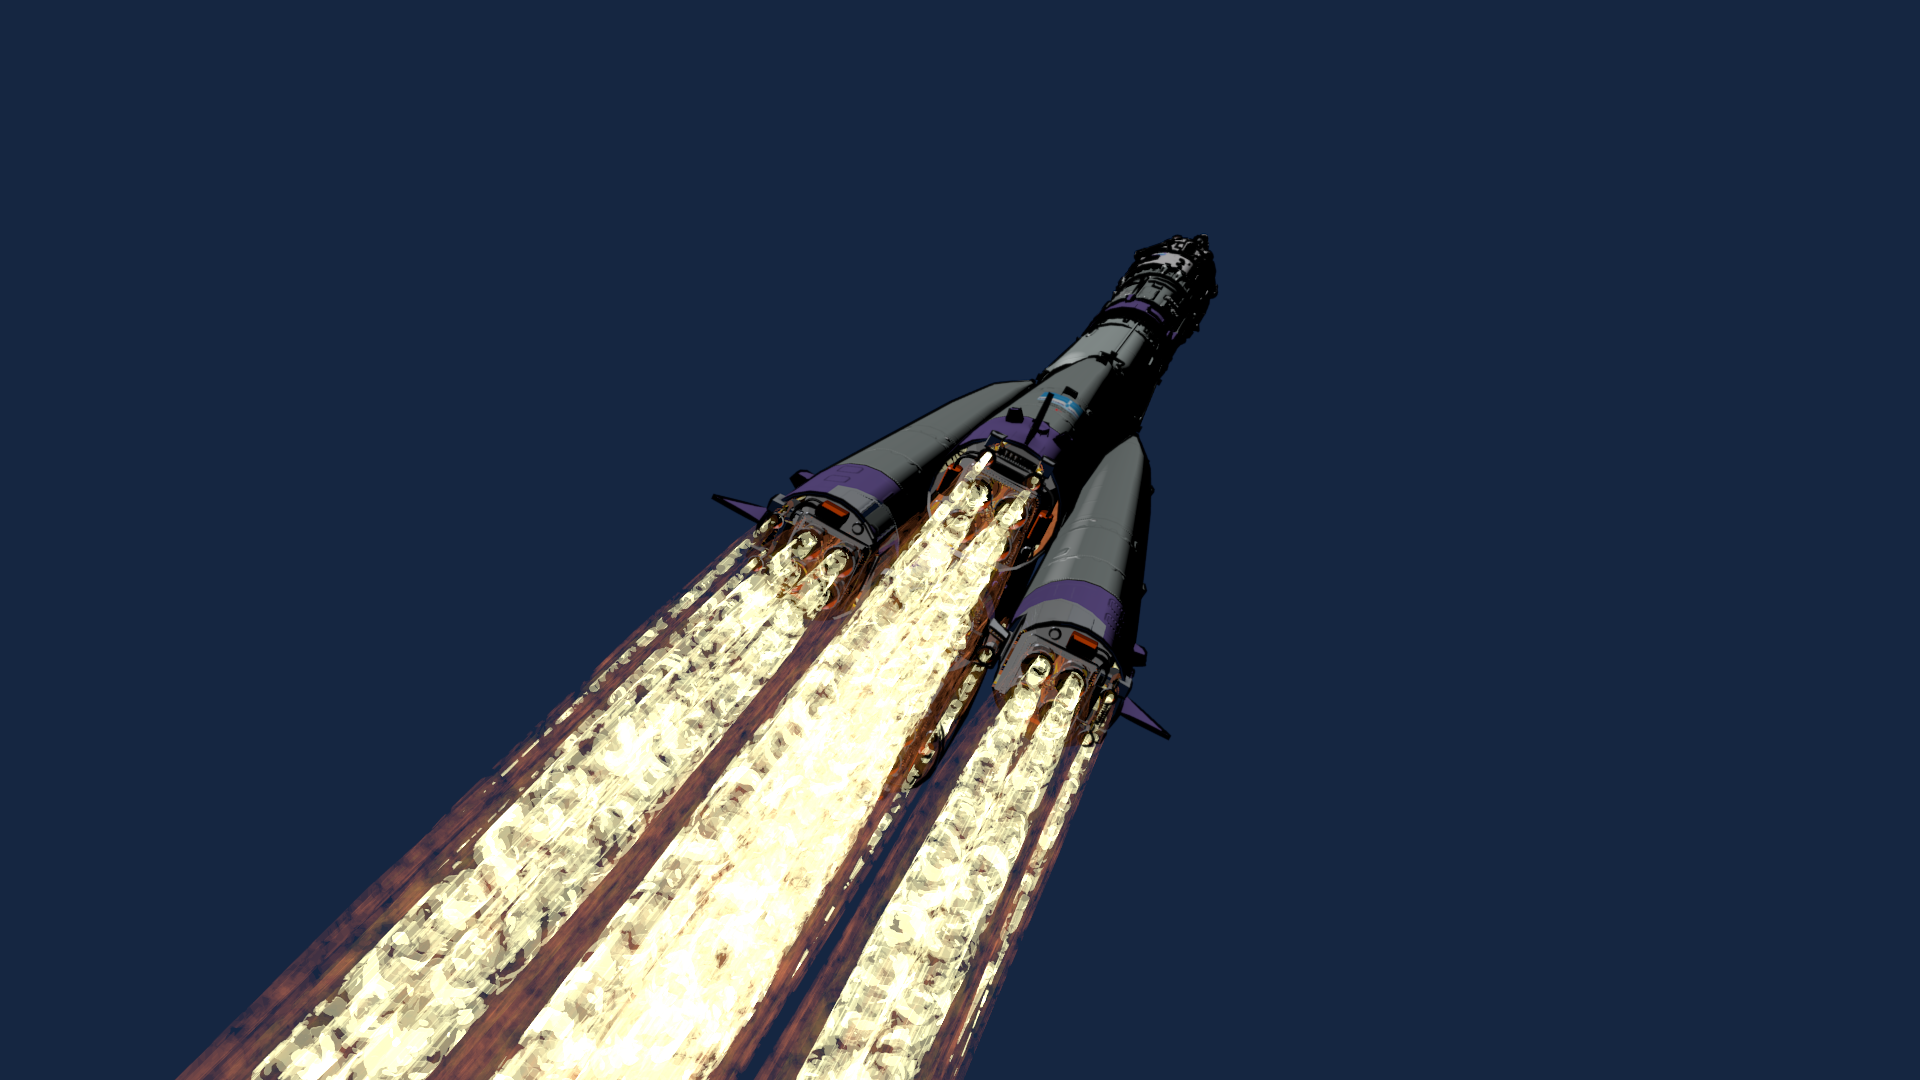

This shot is particularly simple: it’s just the whole launch vehicle, with the flame plume behind it, pulling away from the camera, as if taken from a ground tracking camera (sort of — the change in perspective has been exaggerated).
This is (once again) the first shot in the “SF-SoyuzFlight” sequence, which is the end of the episode. It’s meant to transition after a cutaway from a nearly-identical shot at the end of the “LA-Launch” sequence, even though the setup for the two shots is entirely different.
The simplicity means it’s faster to render, and gives me a chance to preview what the flame effect is really going to look like in action, and troubleshoot any rigging errors.
The rigging for the flames is kind of interesting. There is a separate armature for each flame plume — which means a total of 32 plumes and armatures. This armature has driver-based animation, which incorporates a noise channel and the control position from a “Control Panel Armature”, which sets the overall parameters of the animation from the noise channels. So it’s kind of inverted — normally the noise channel would be a tweak on a manually-controlled animation, but in this case, the noise channel is dominant, and the Control Panel Armature is just moderating it.
Only the Control Panel needs to be proxied into the shot file, since the individual plume armature are just part of the internal rigging.
This allows for the animator to control the “stretch”, “fade”, and “flutter” of the flames, which control the flames overall properties, while allowing the noise channel to control their detailed individual movement.
So, for example, when I control the “stretch”, the plumes’ average length is affected, but the plumes also individually stretch randomly from frame to frame on their own, driven by a randomized noise channel. A similar thing happens with “flutter”, where the control changes the amplitude of the random bending of the flame tips (as from turbulent flow), but the actually fluttering is automated random motion. The “fade” control affects material properties the flames all share.
So this shot file has only about six actual keyframes (two each for three channels), with the rest being driven by noise.
Apr 8, 2021 at 4:00 PM
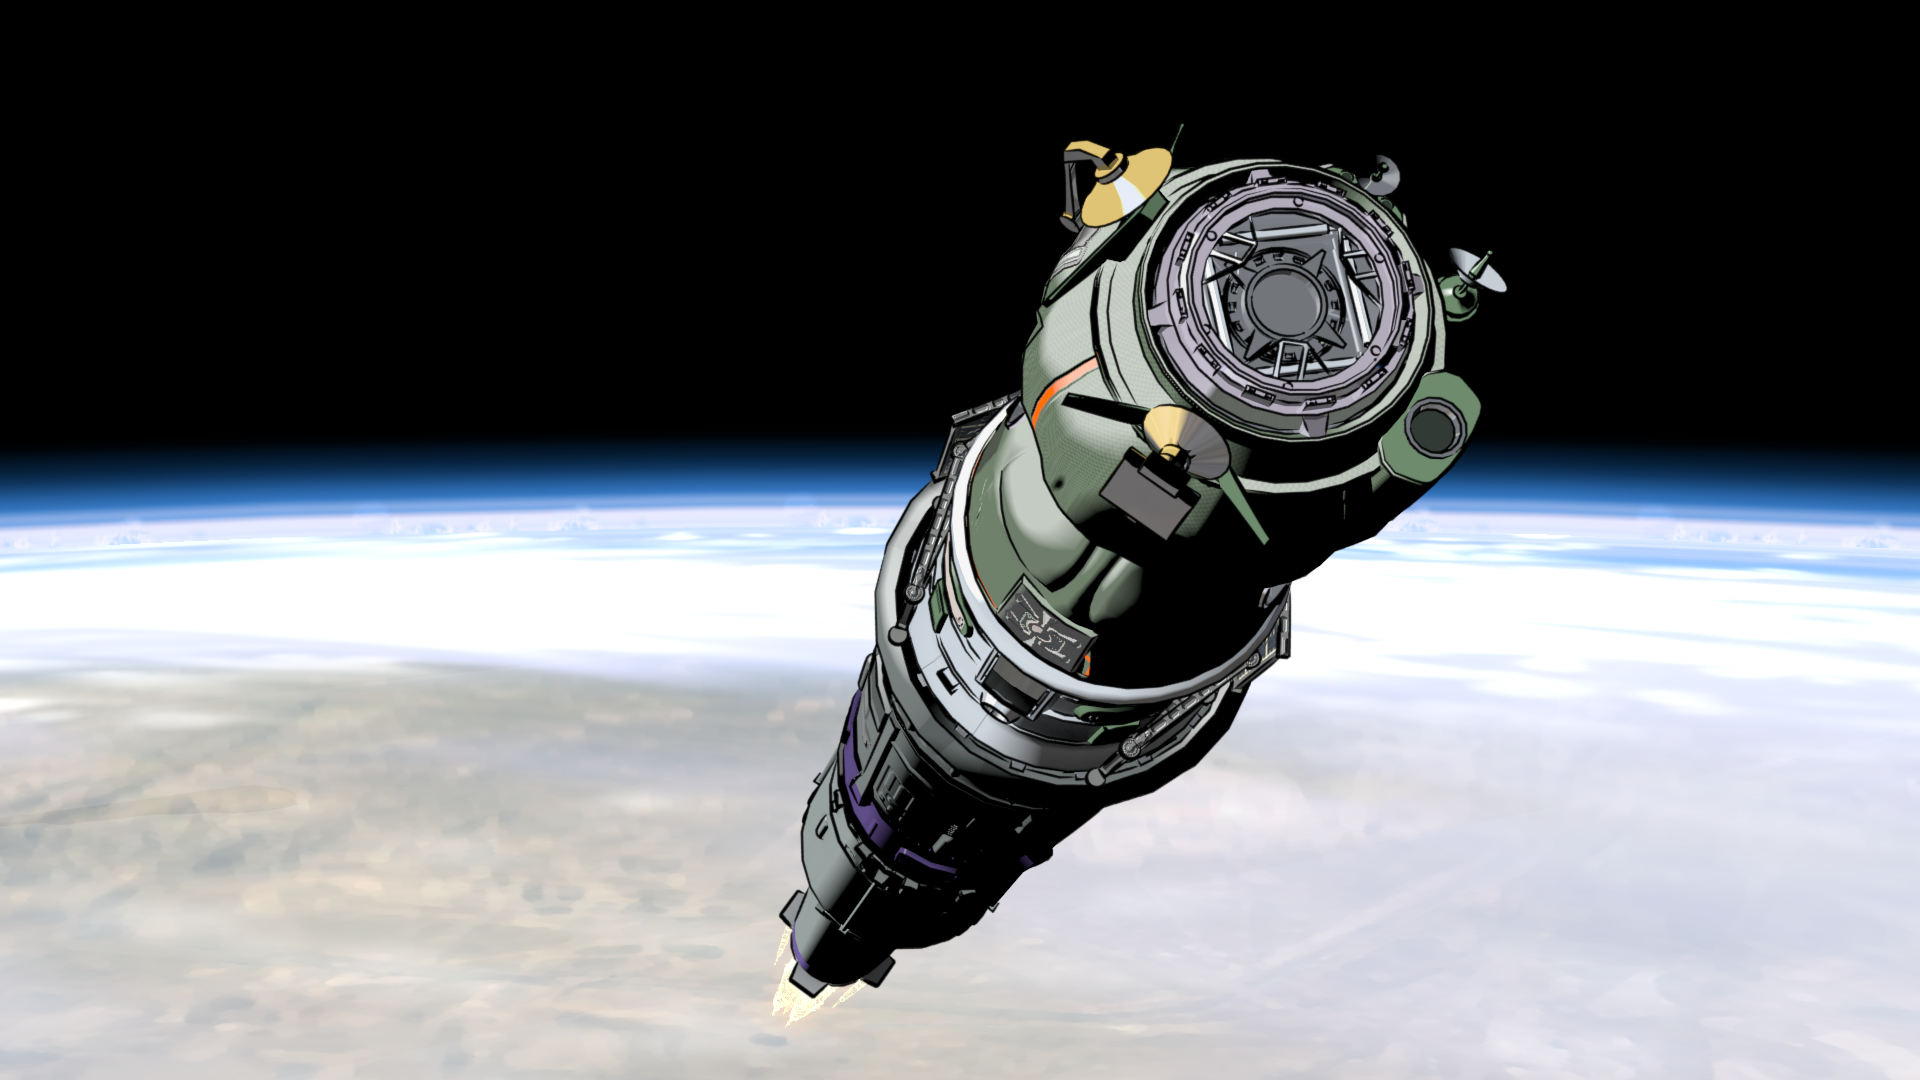
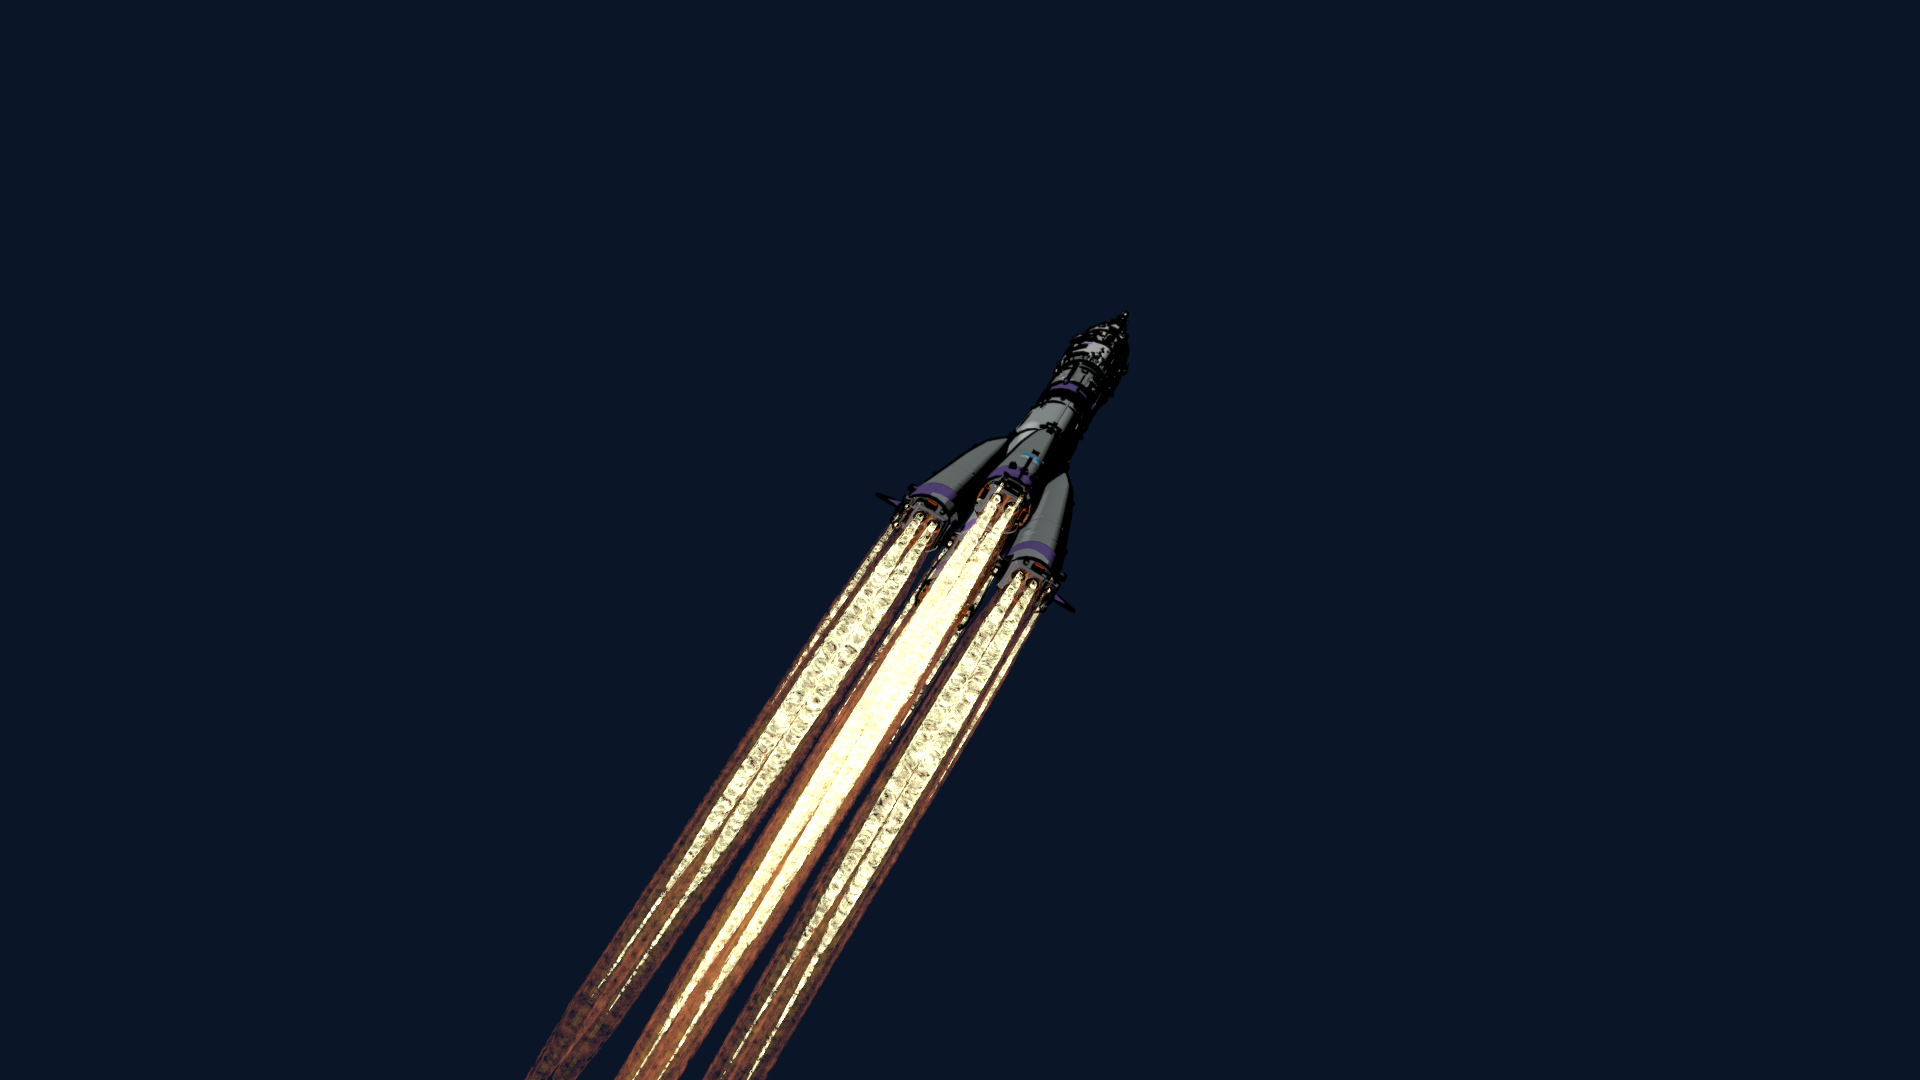
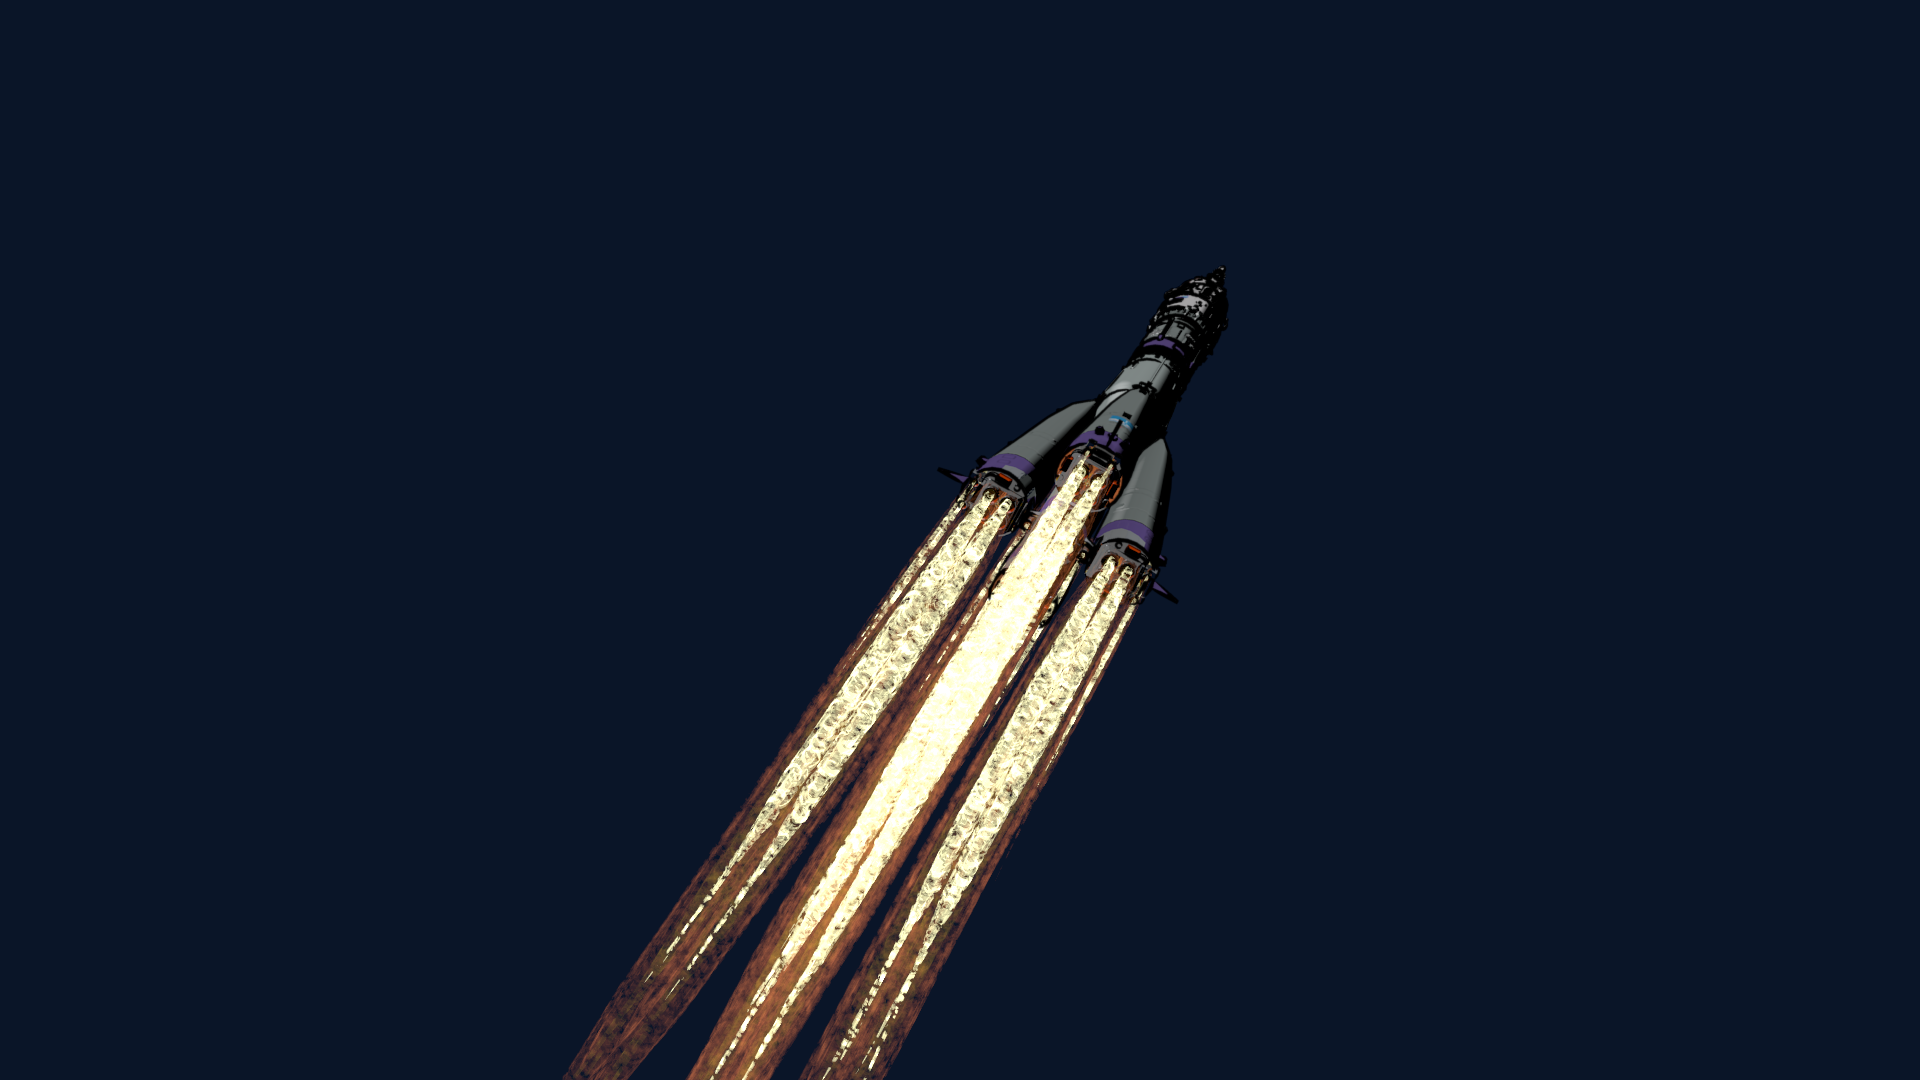
SF-3-A Render
Because this shot is very simple, it also renders pretty fast (under 1 minute per frame on my workstation), so I went ahead and rendered it with ink and color. This is the preview-composited PNG-stream — very nearly final.
I’m unsure how long this shot will actually be — the plan is to use it partly as a transition, where it will be inset in another shot, but I’ll have to check the timing in the animatic. For this test, I just did five seconds of animation.
Apr 12, 2021 at 4:01 PM
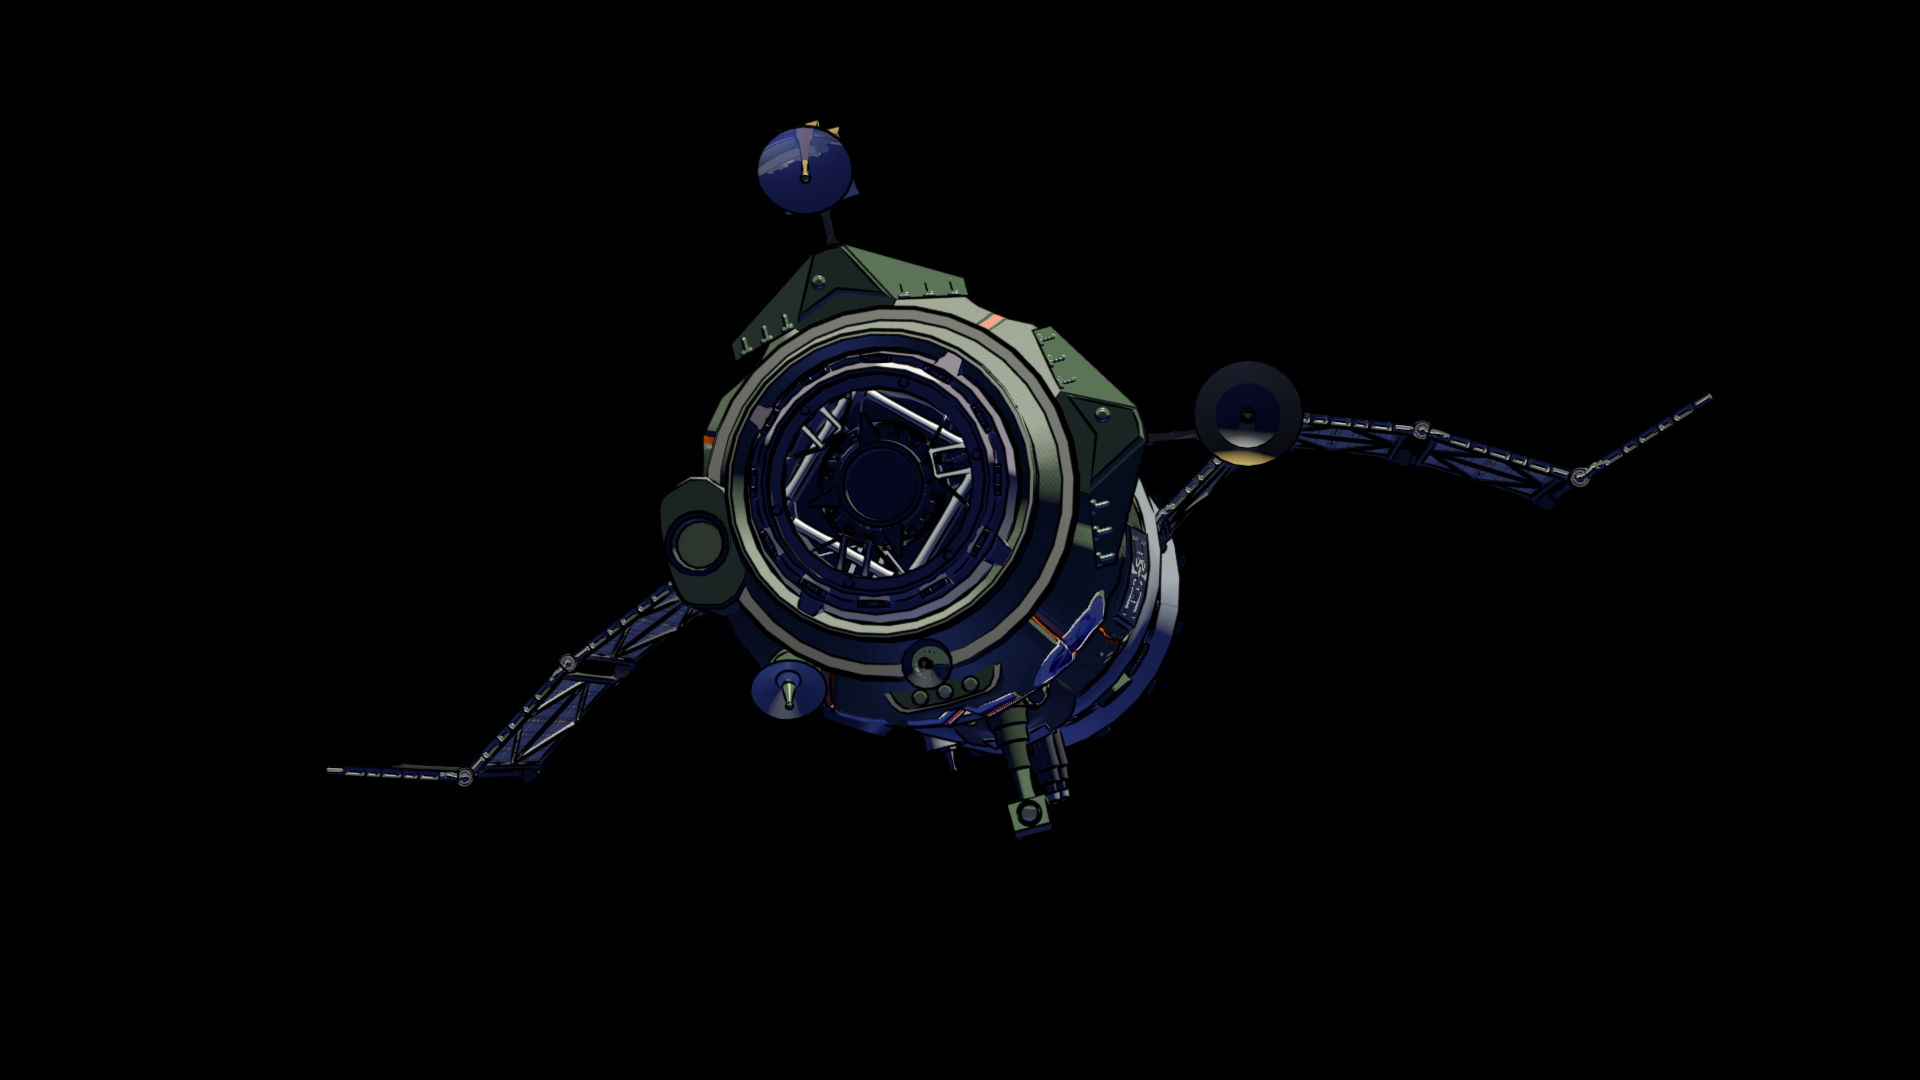
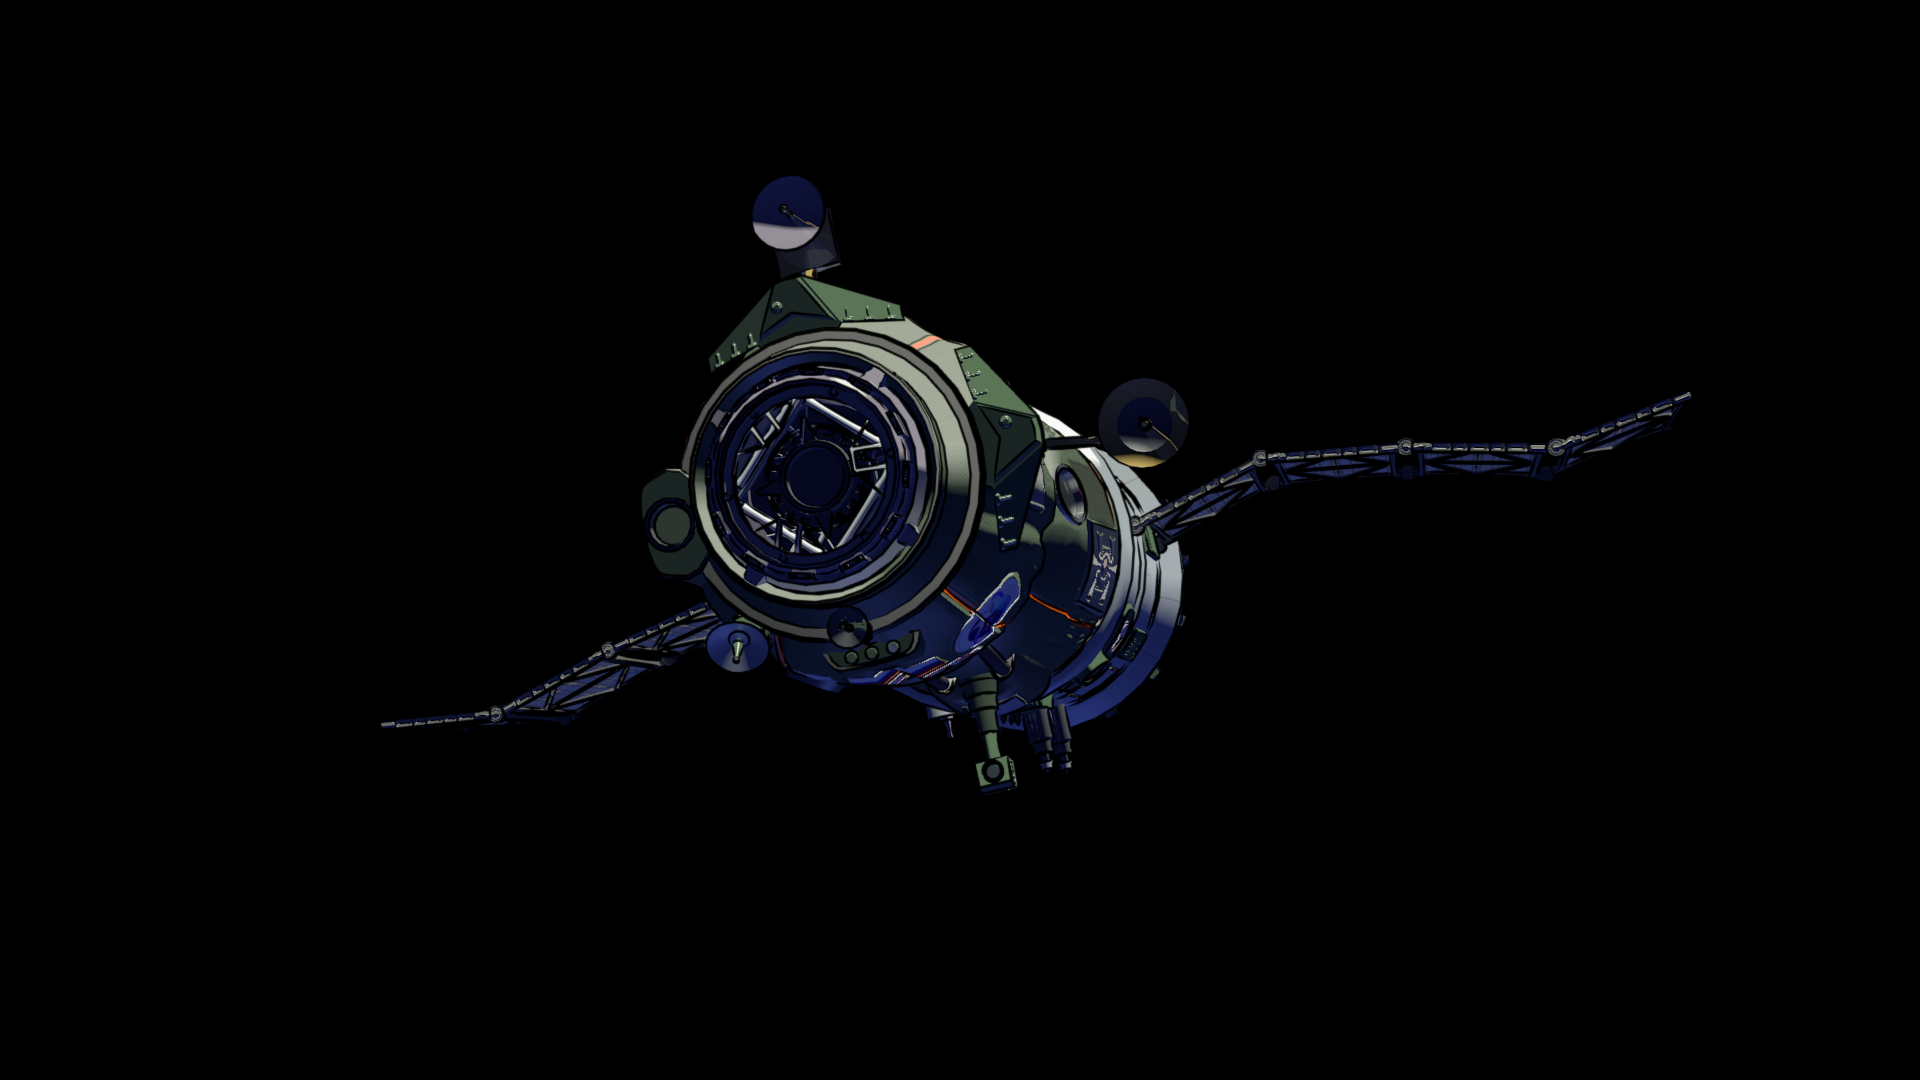
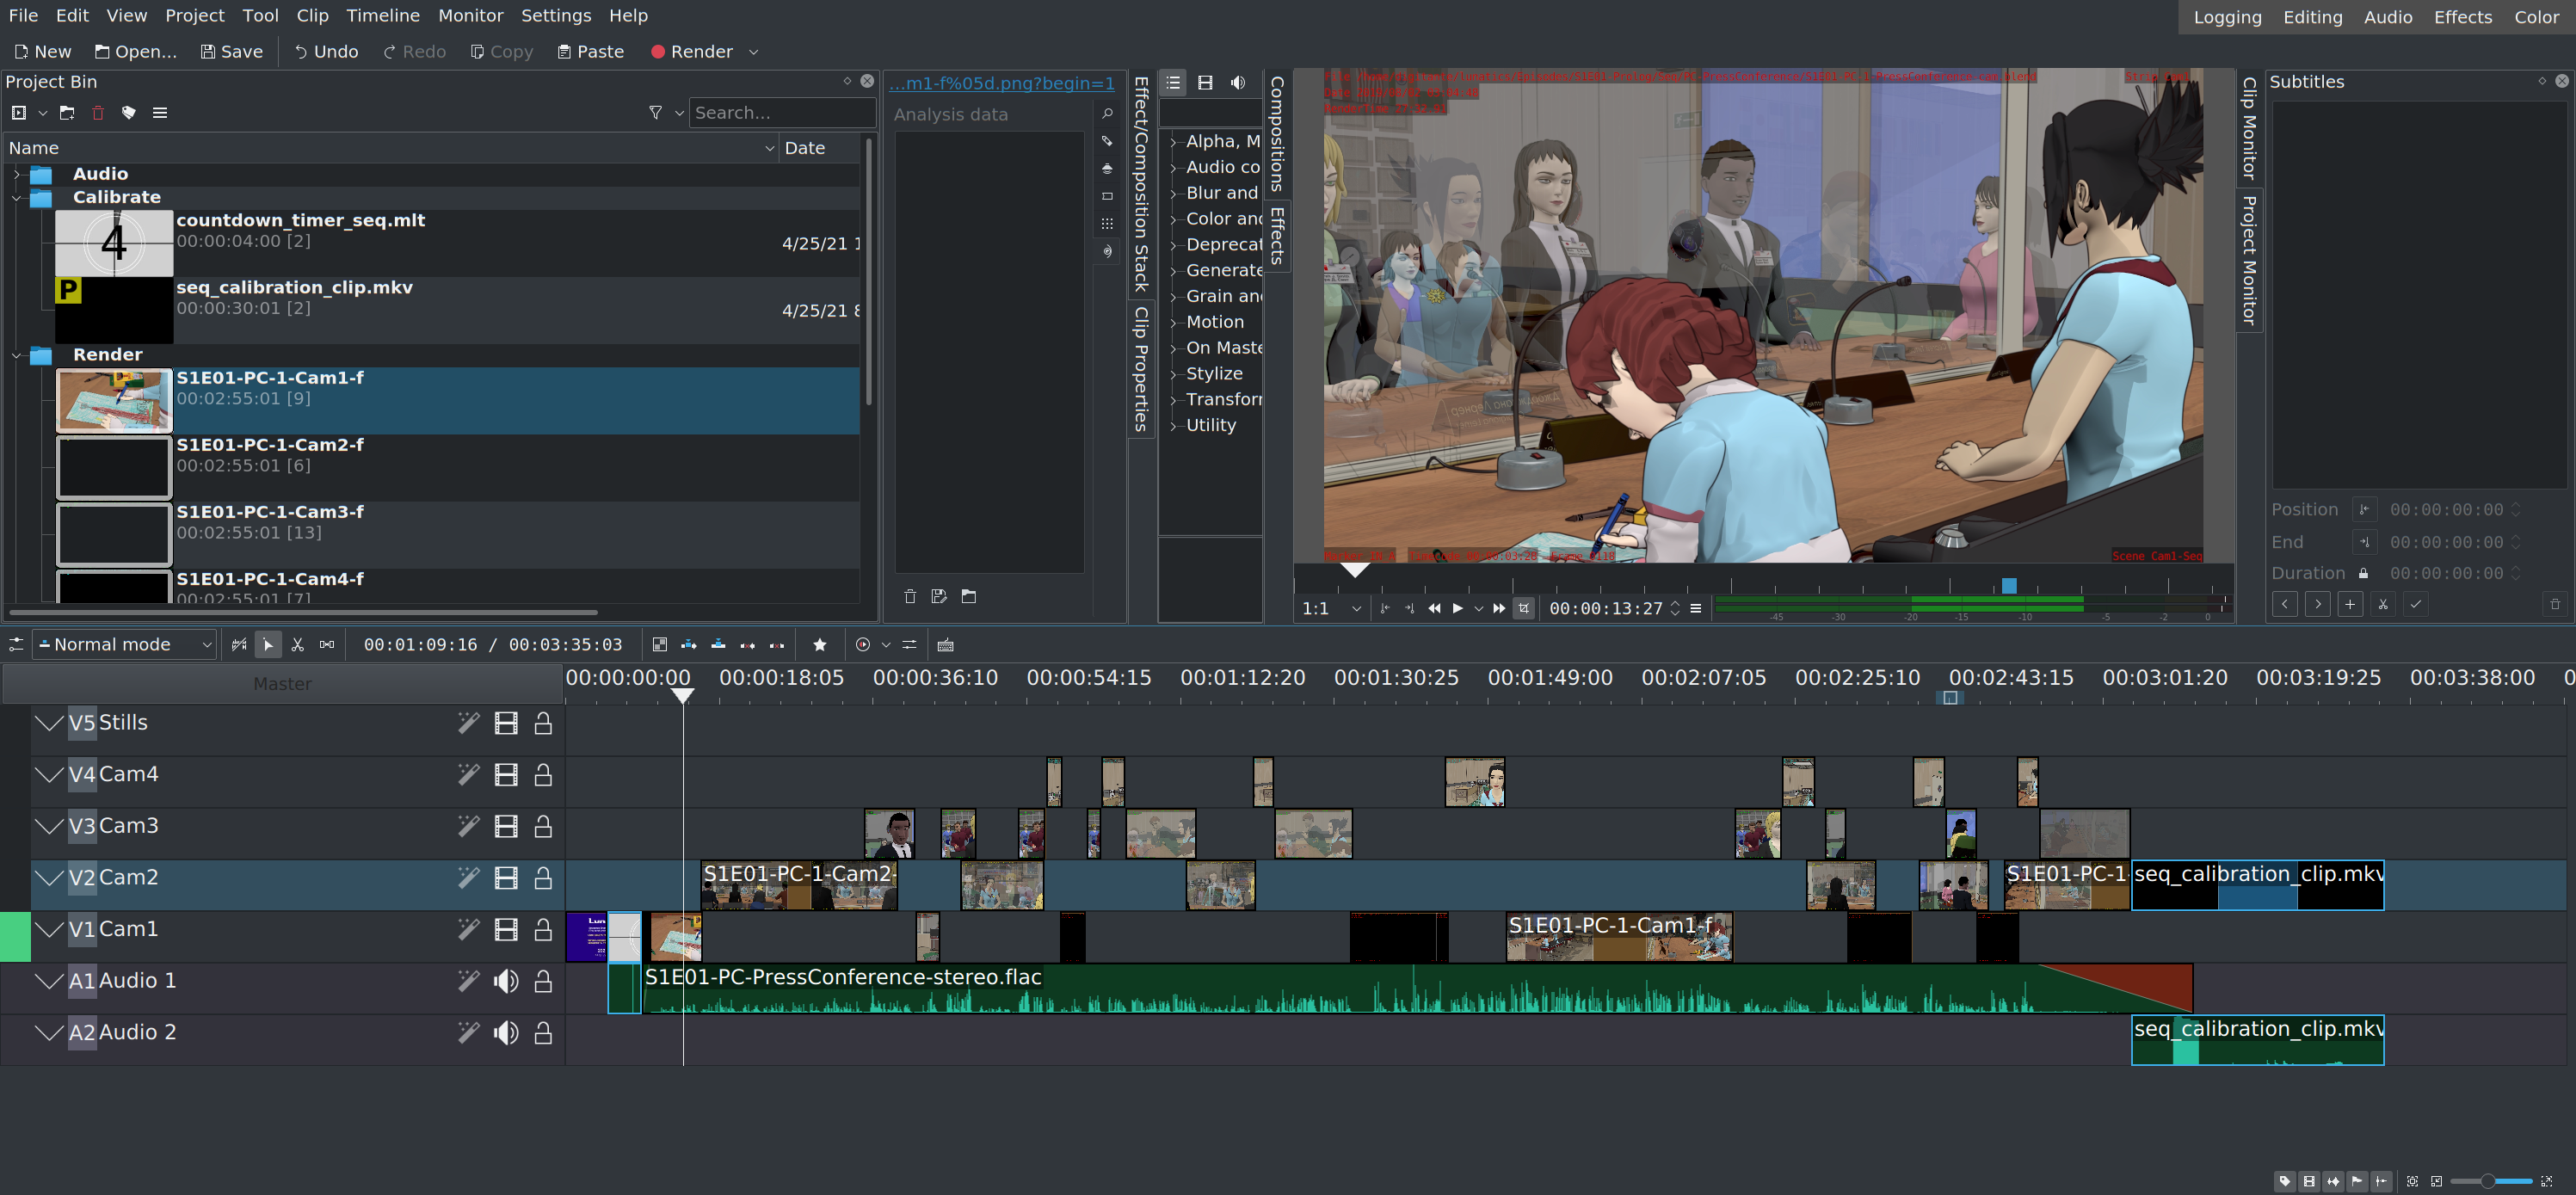
SF-1-F Check Renders (Half of Match-Move Shot)
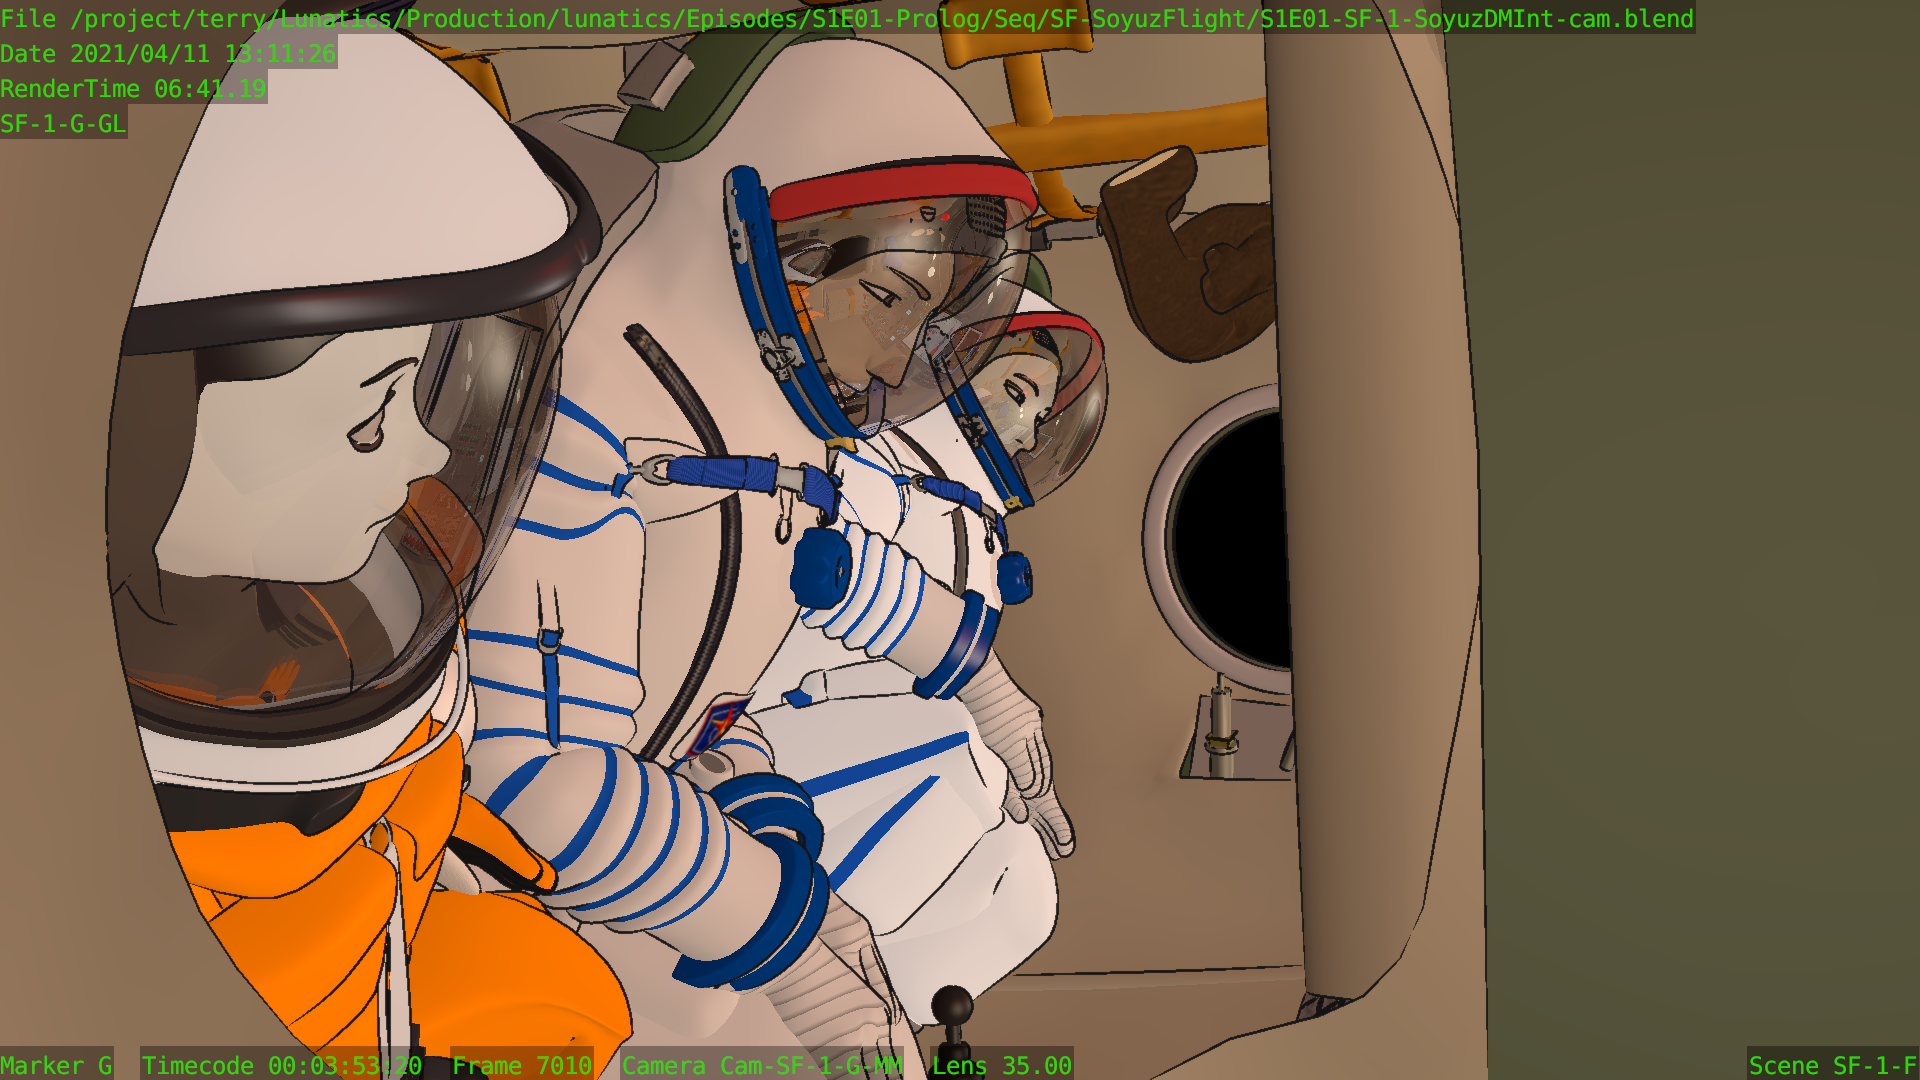
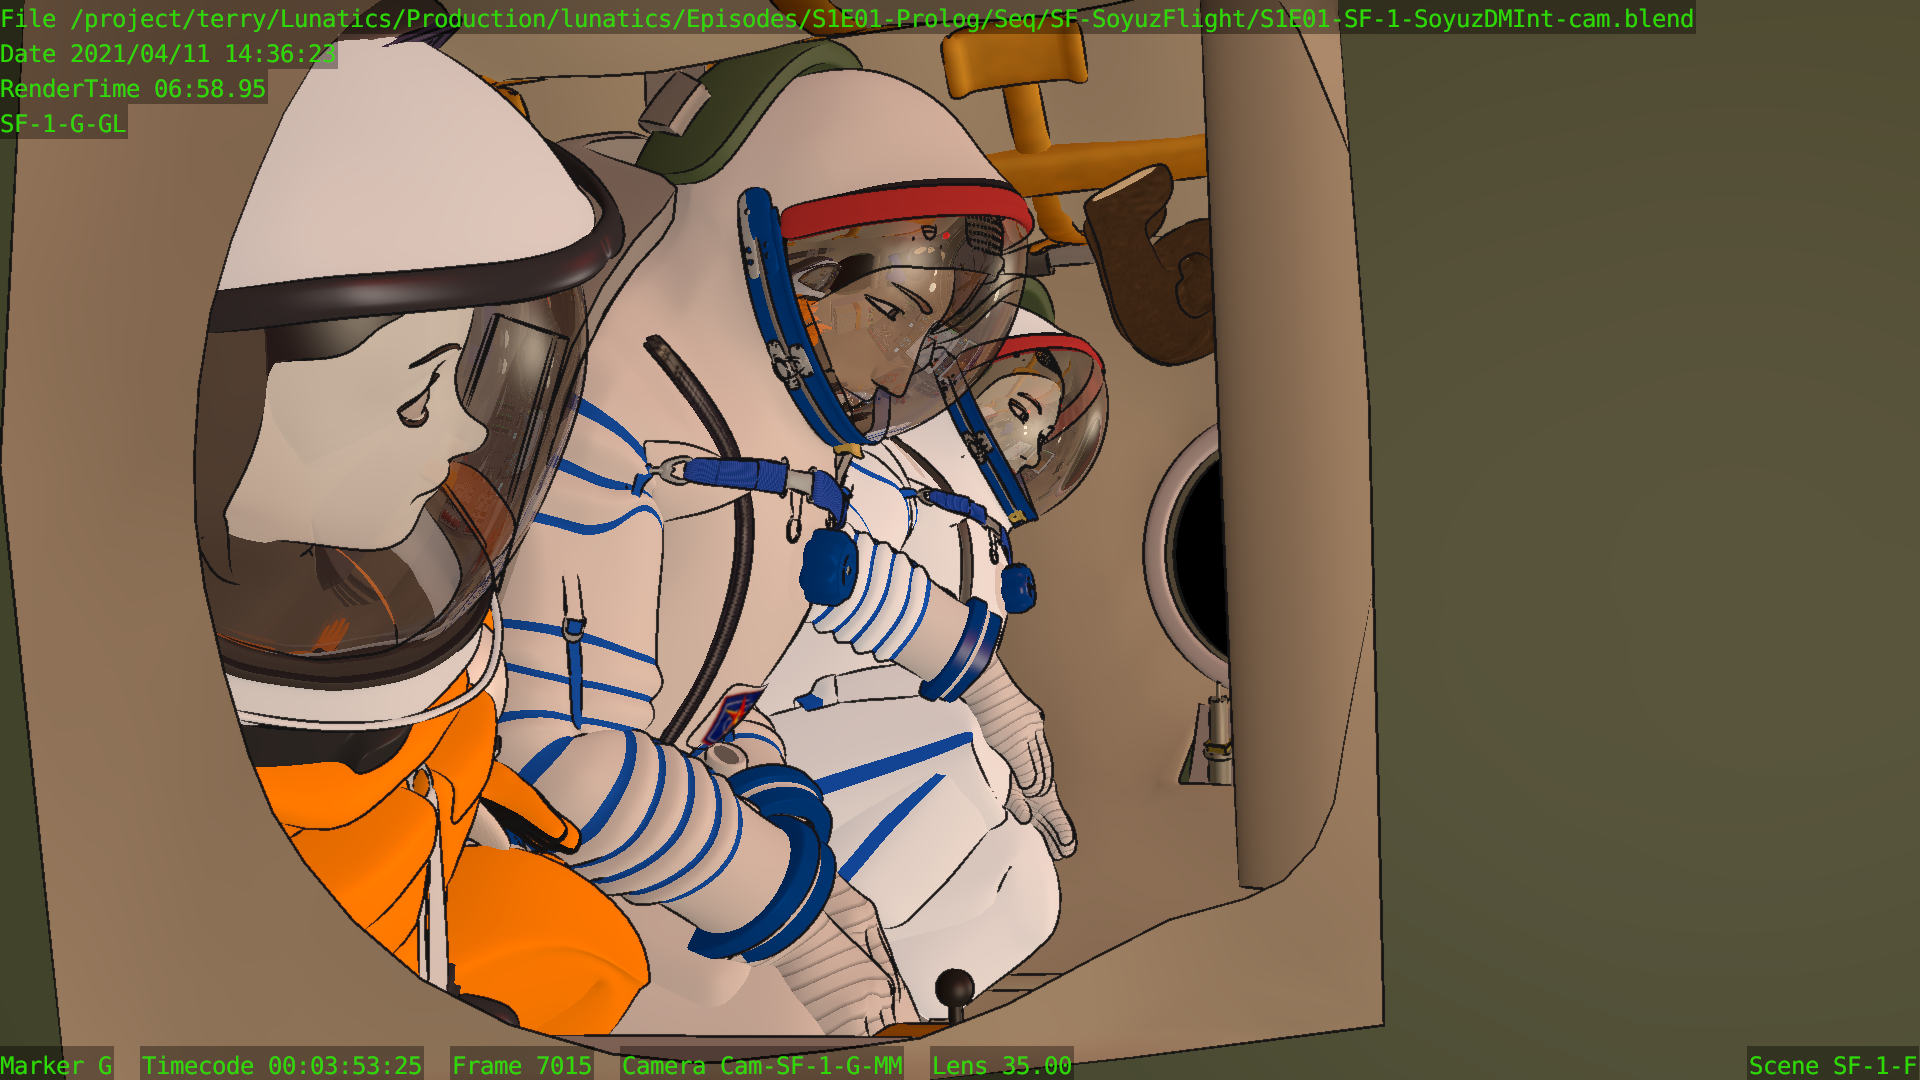


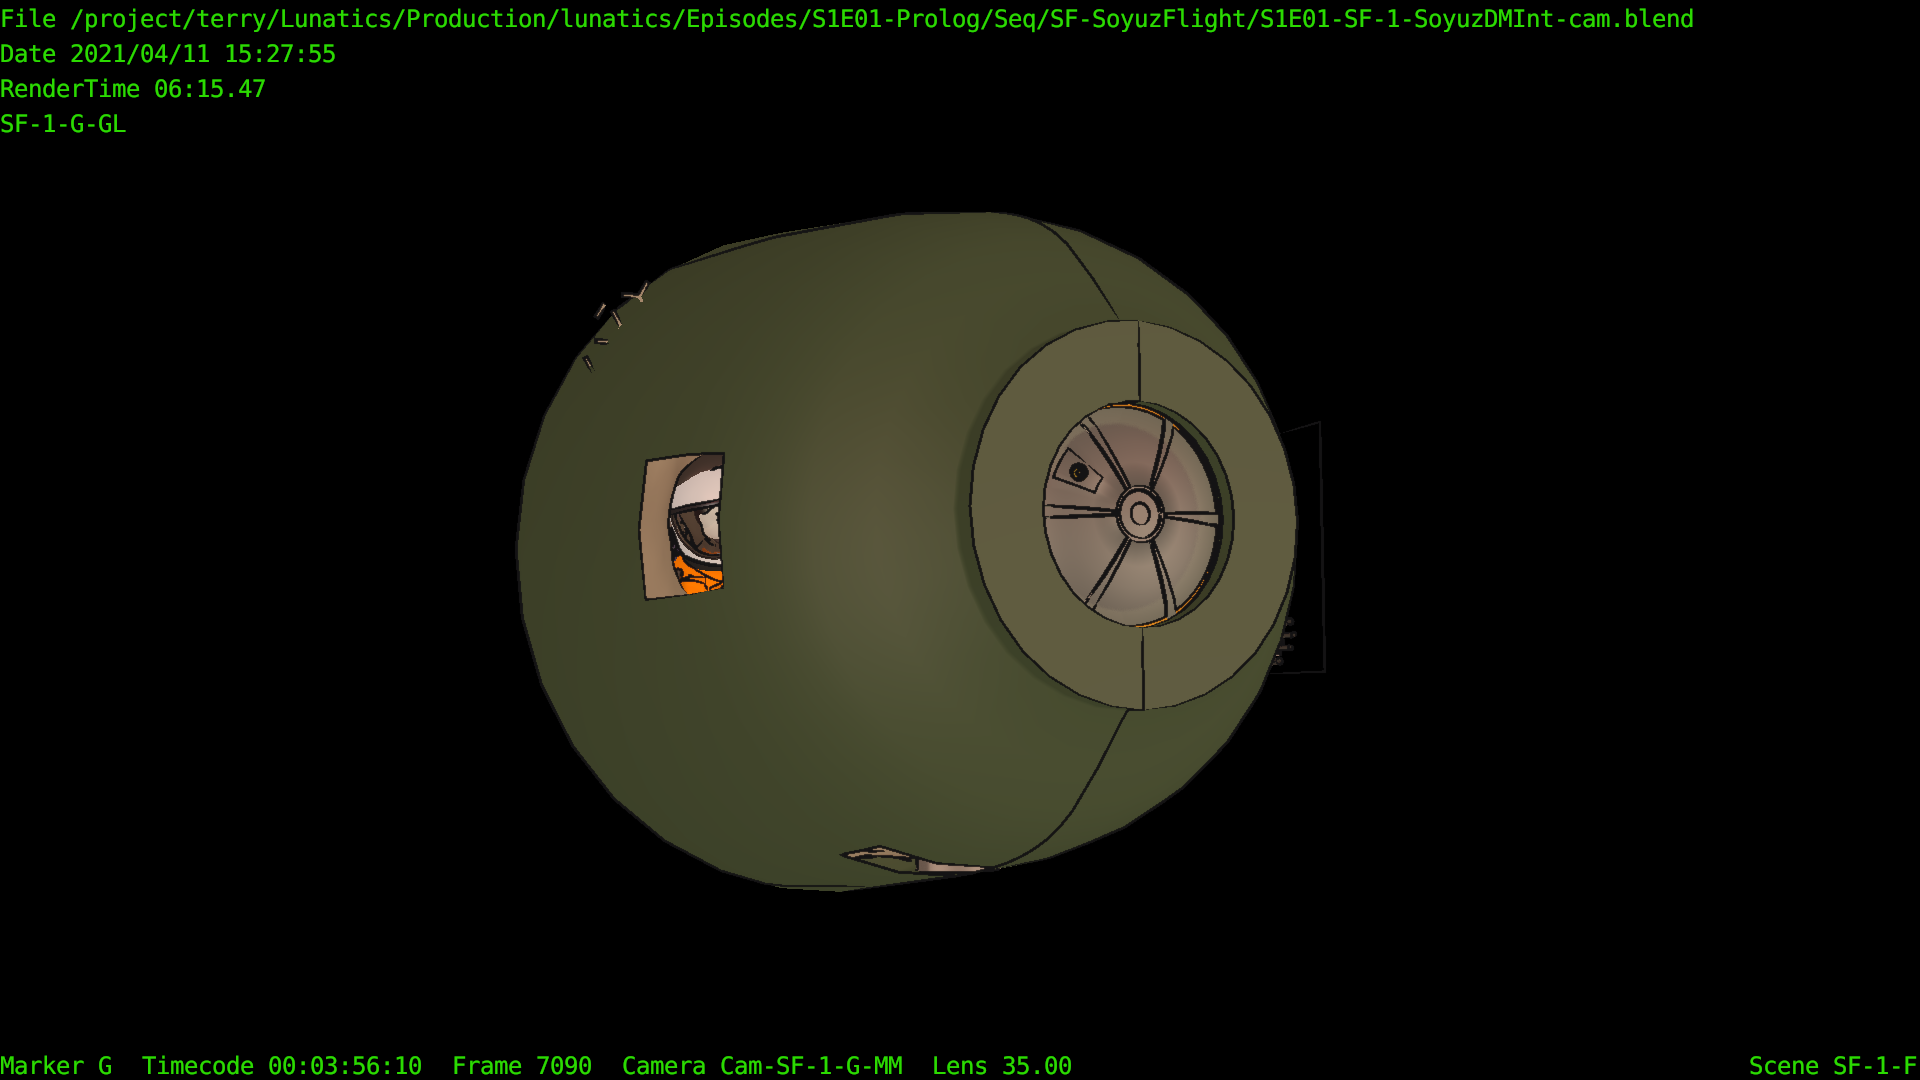
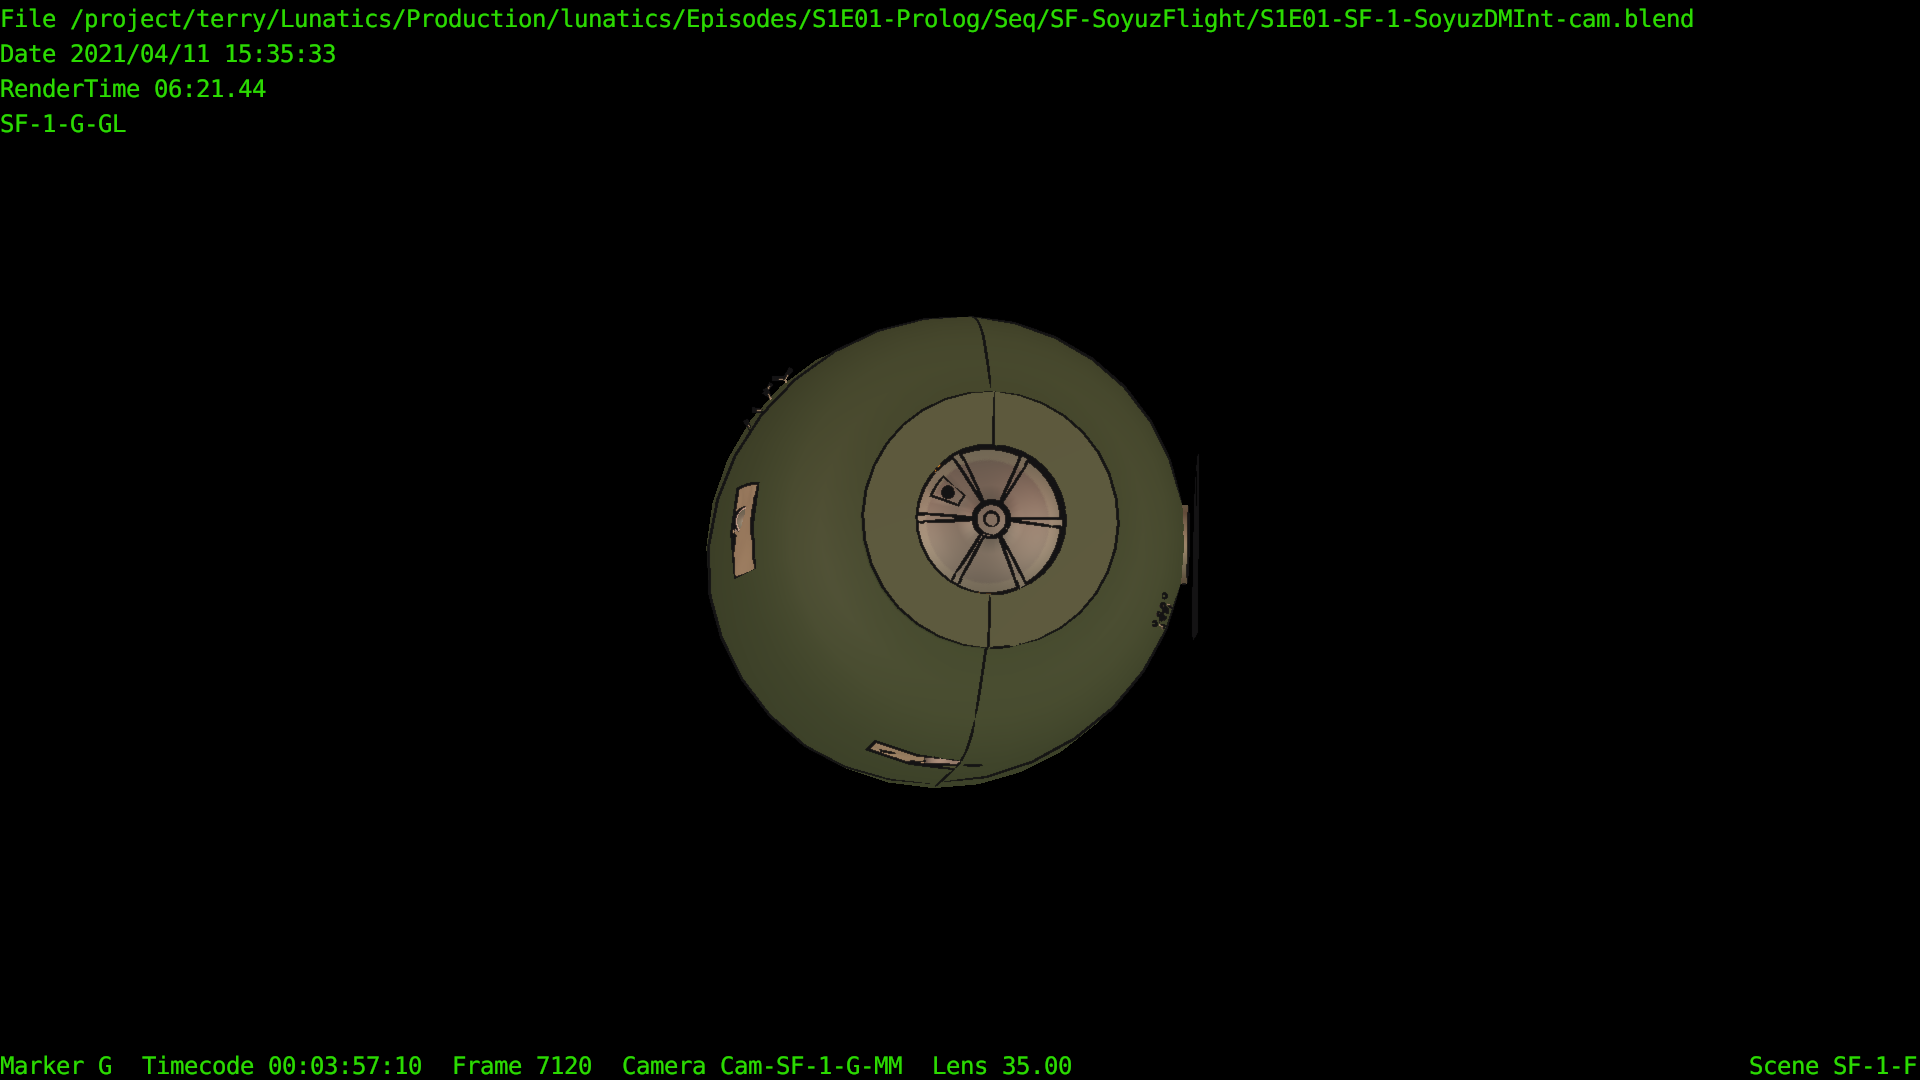
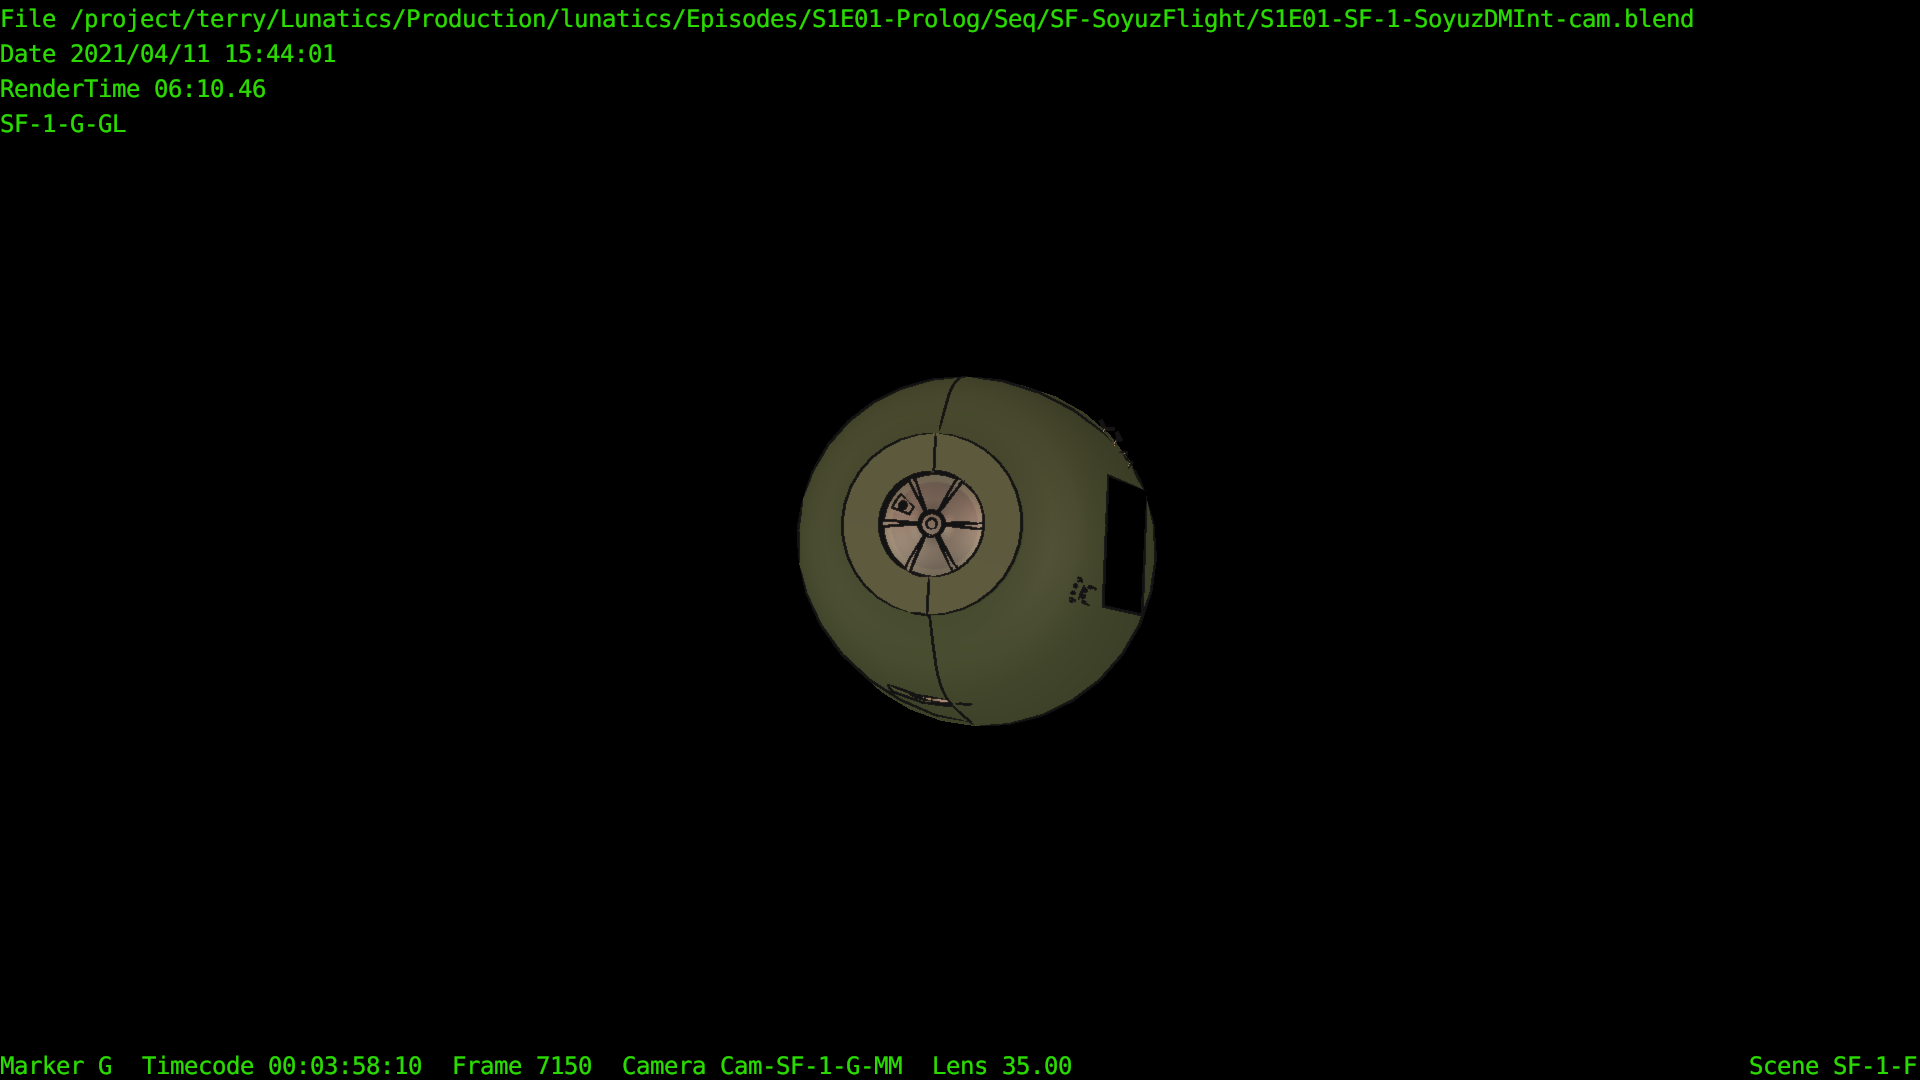
Today, I checked the status on the final match-move shot in the episode, thinking I would have to set up the camera animation, but found I had already done that. So I just rendered some check frames.
As-is, there’s no actual character animation. I didn’t think there needed to be any, but looking at this again, I think I might want to add a simple head movement to Georgiana, as she remains in shot for about 2.5 seconds.
Of course, only the part through the hole matters for the shot. Roughly, the porthole, but the rim of the port has been masked out, to avoid colliding with the porthole as modeled in the exterior element.
Apr 14, 2021 at 4:01 PM
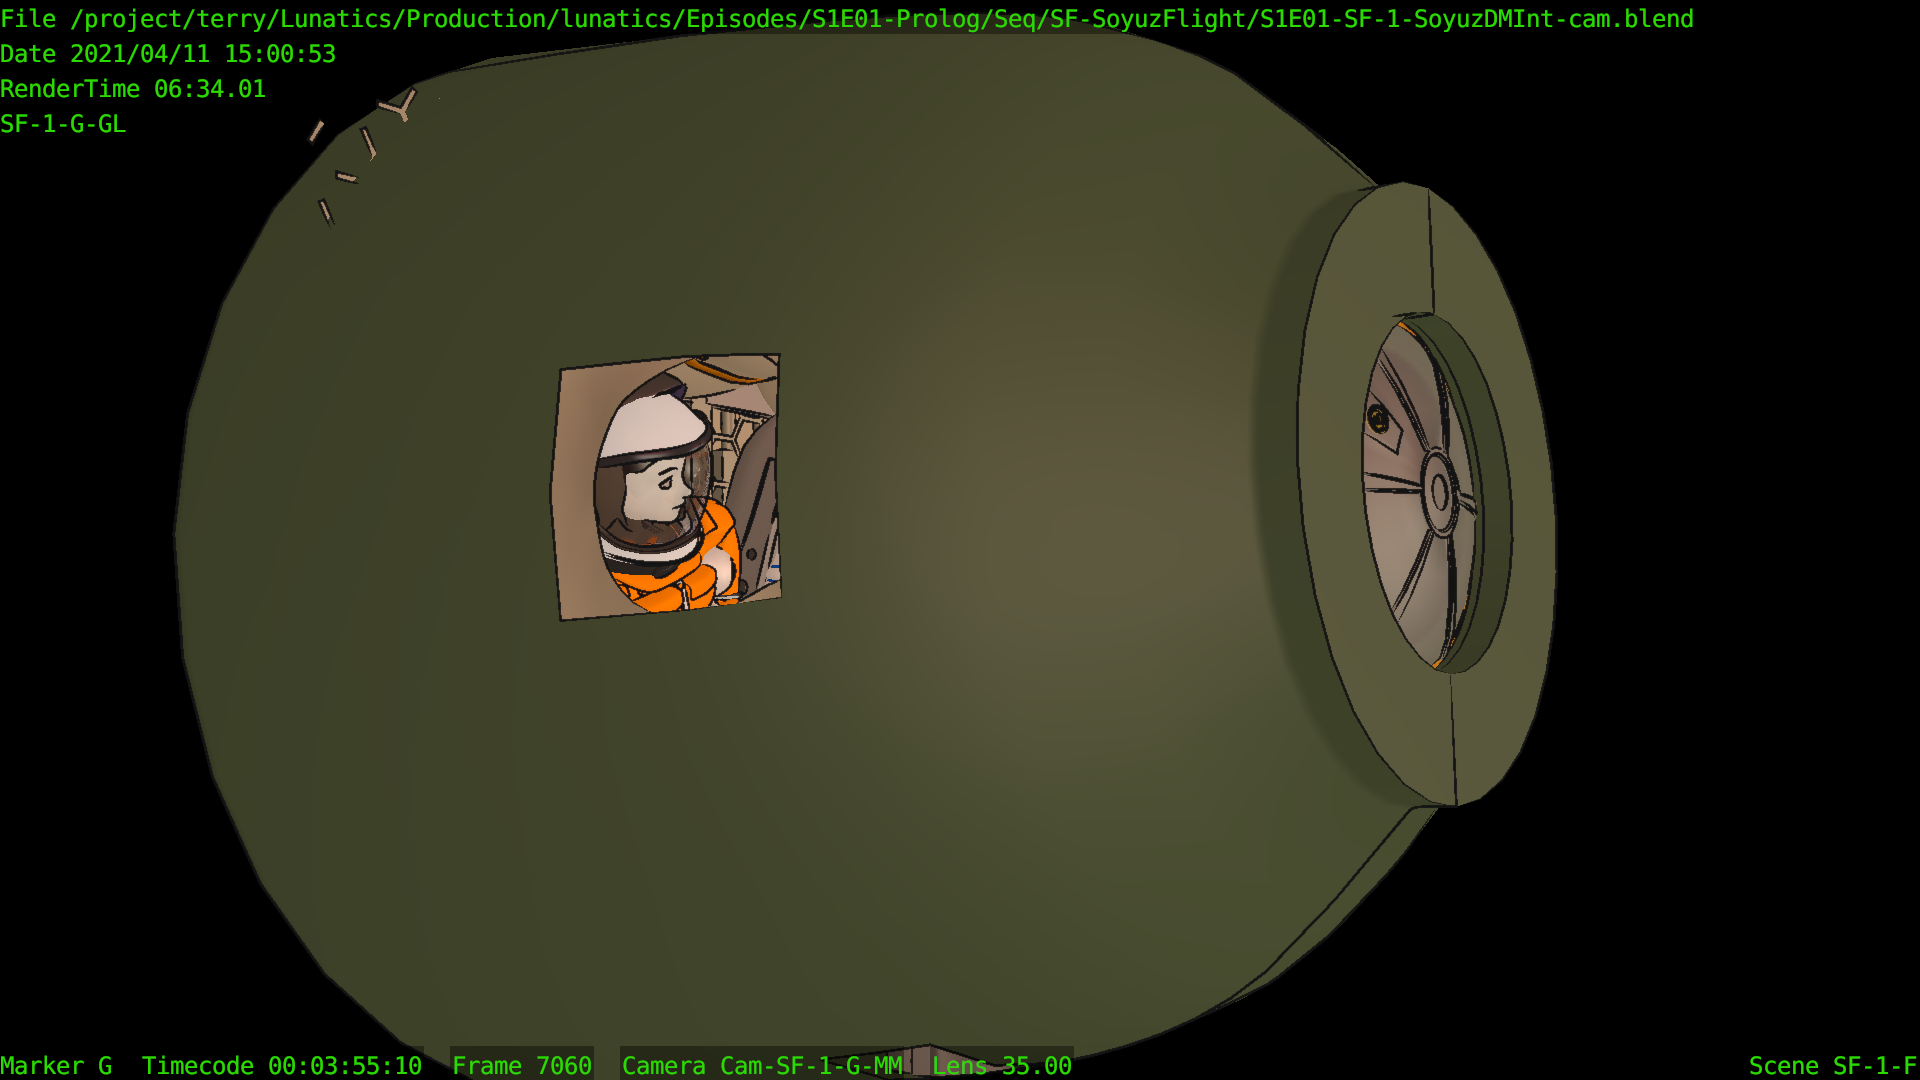
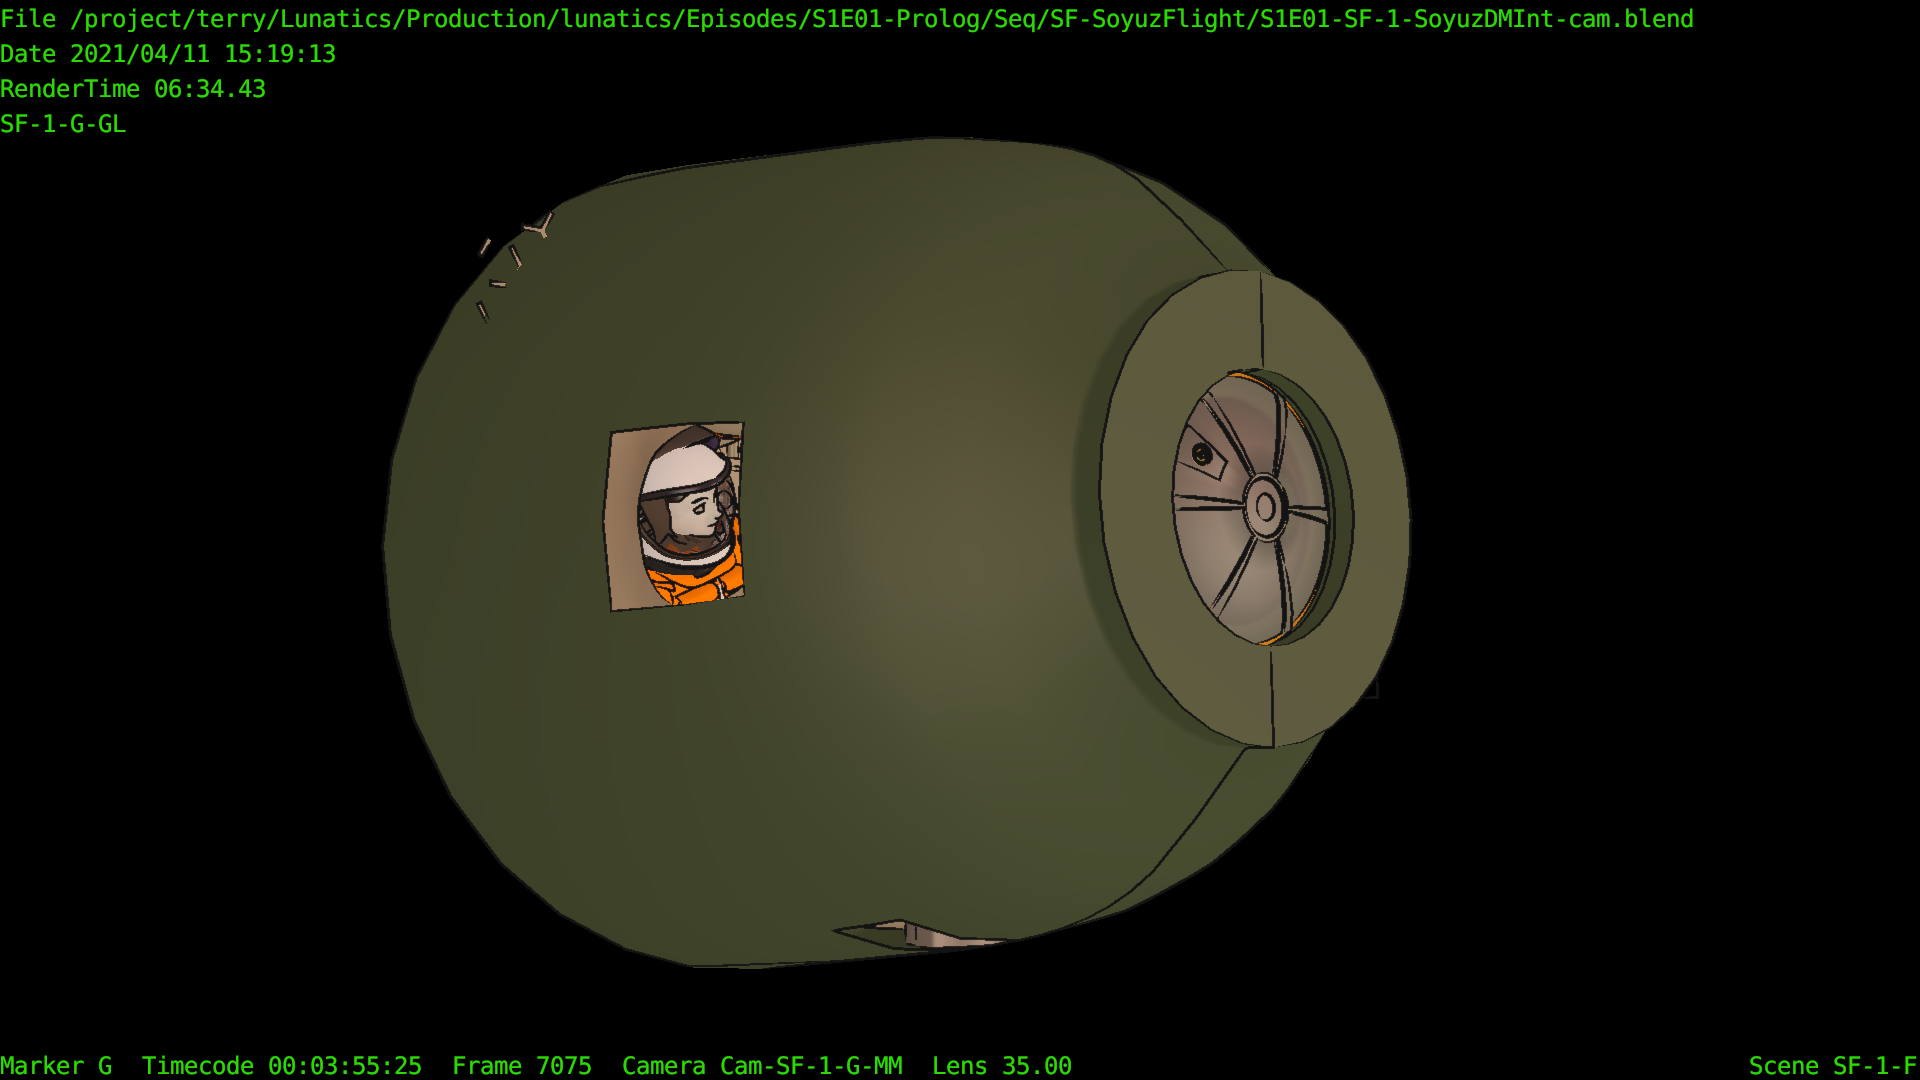
SF-5-Z Check Renders (Match Move Exterior)

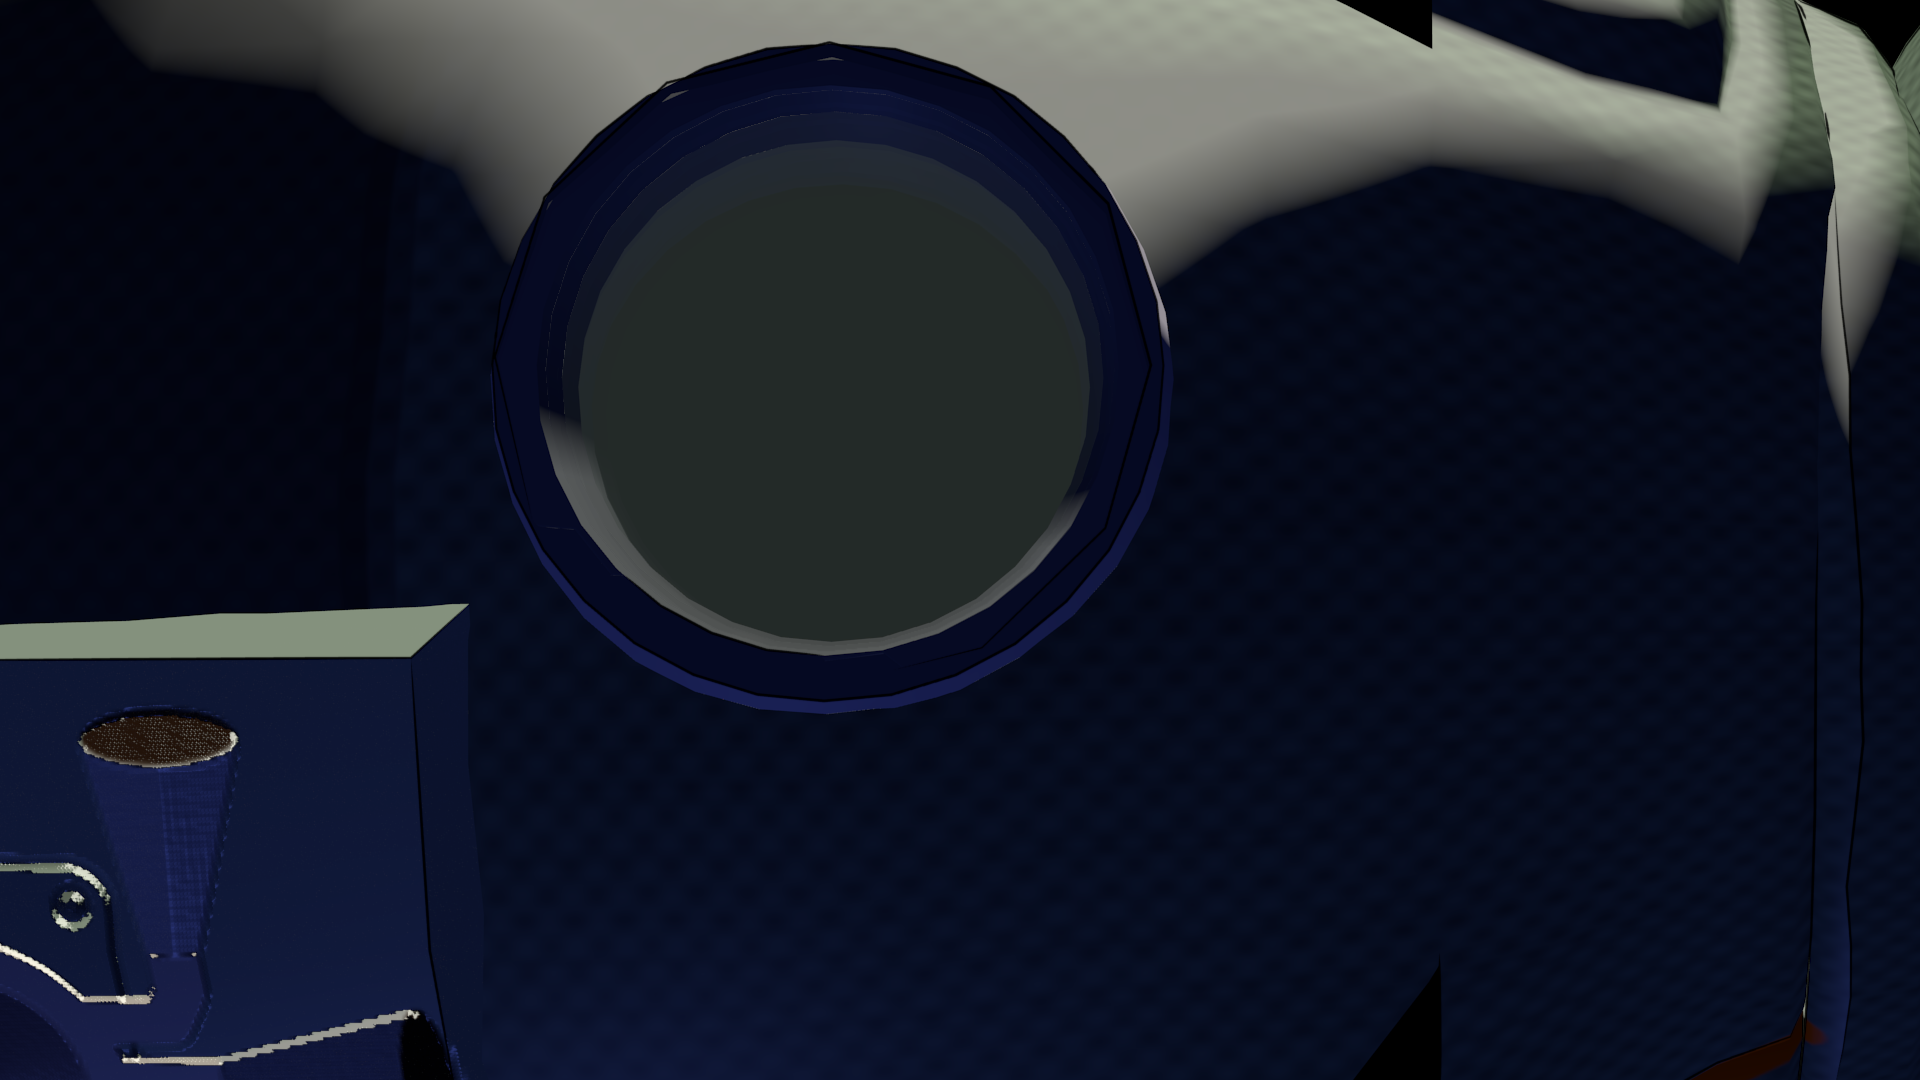
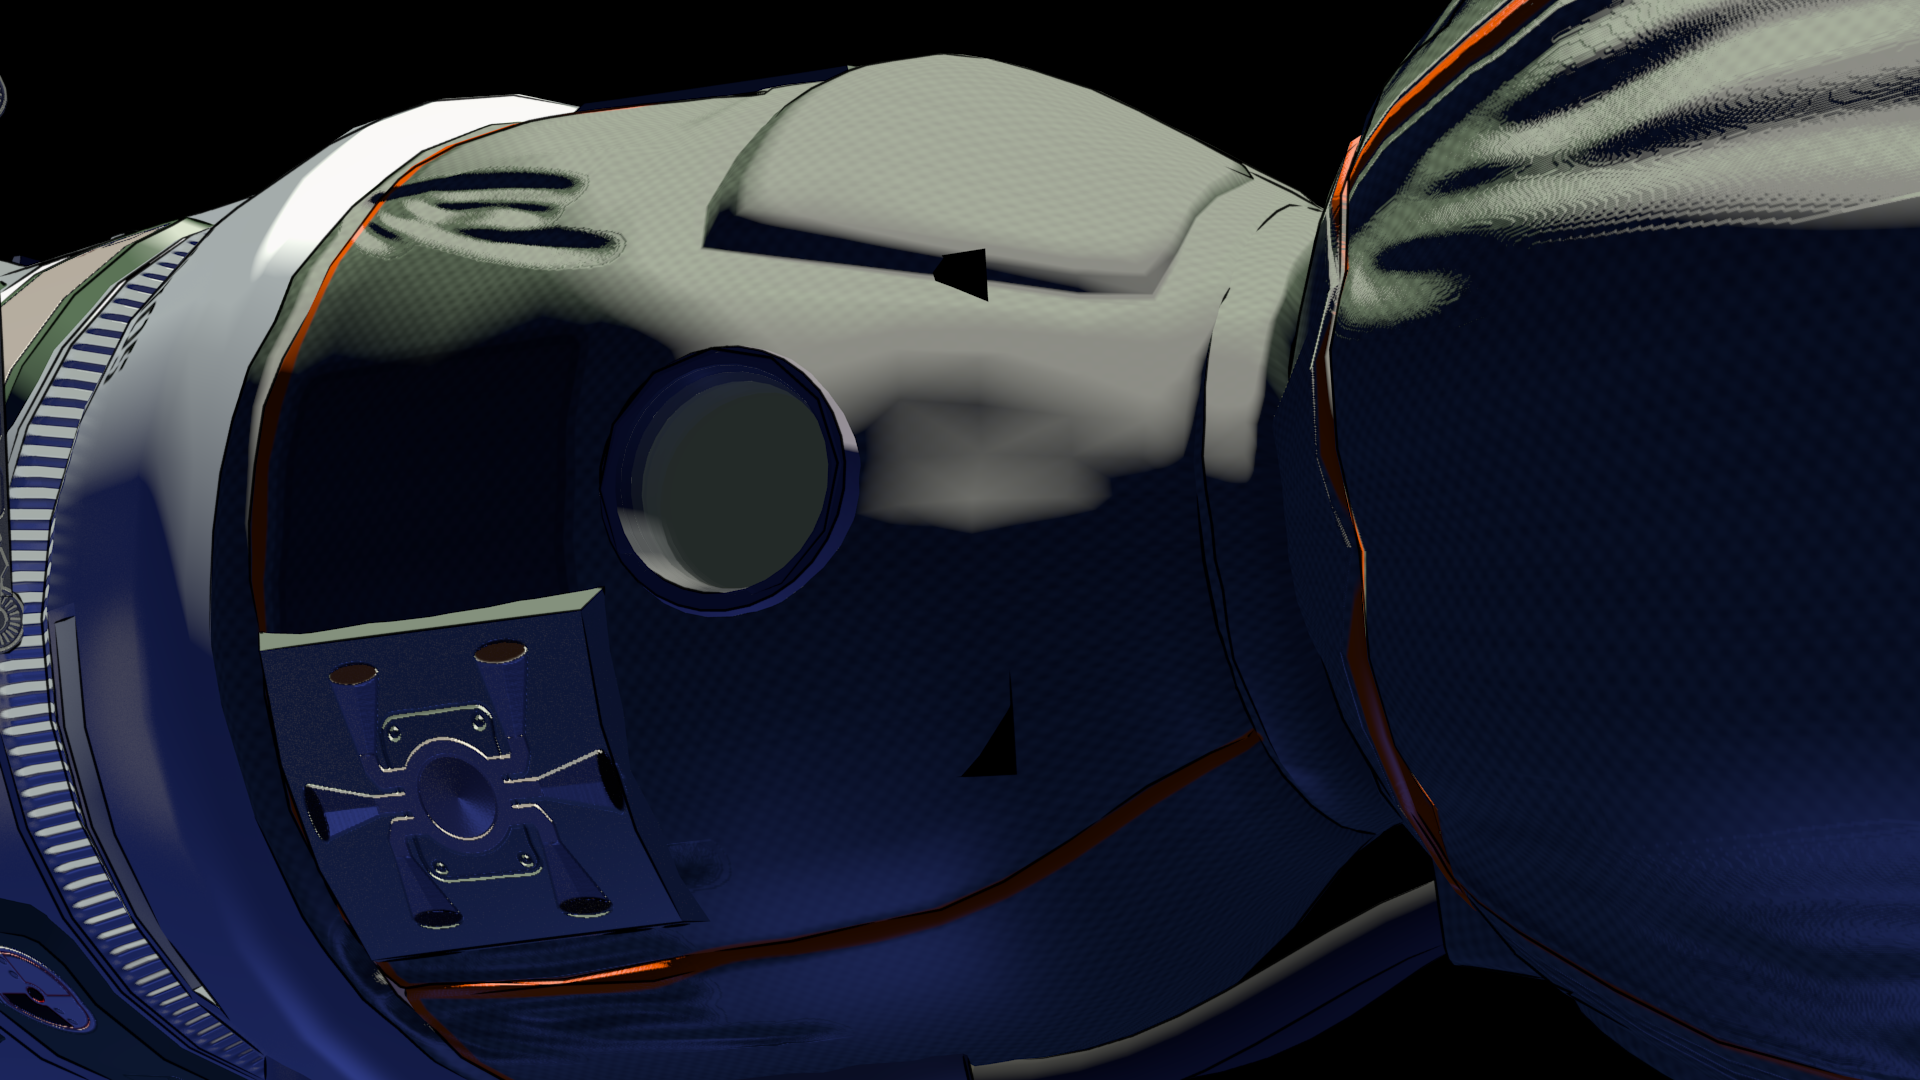
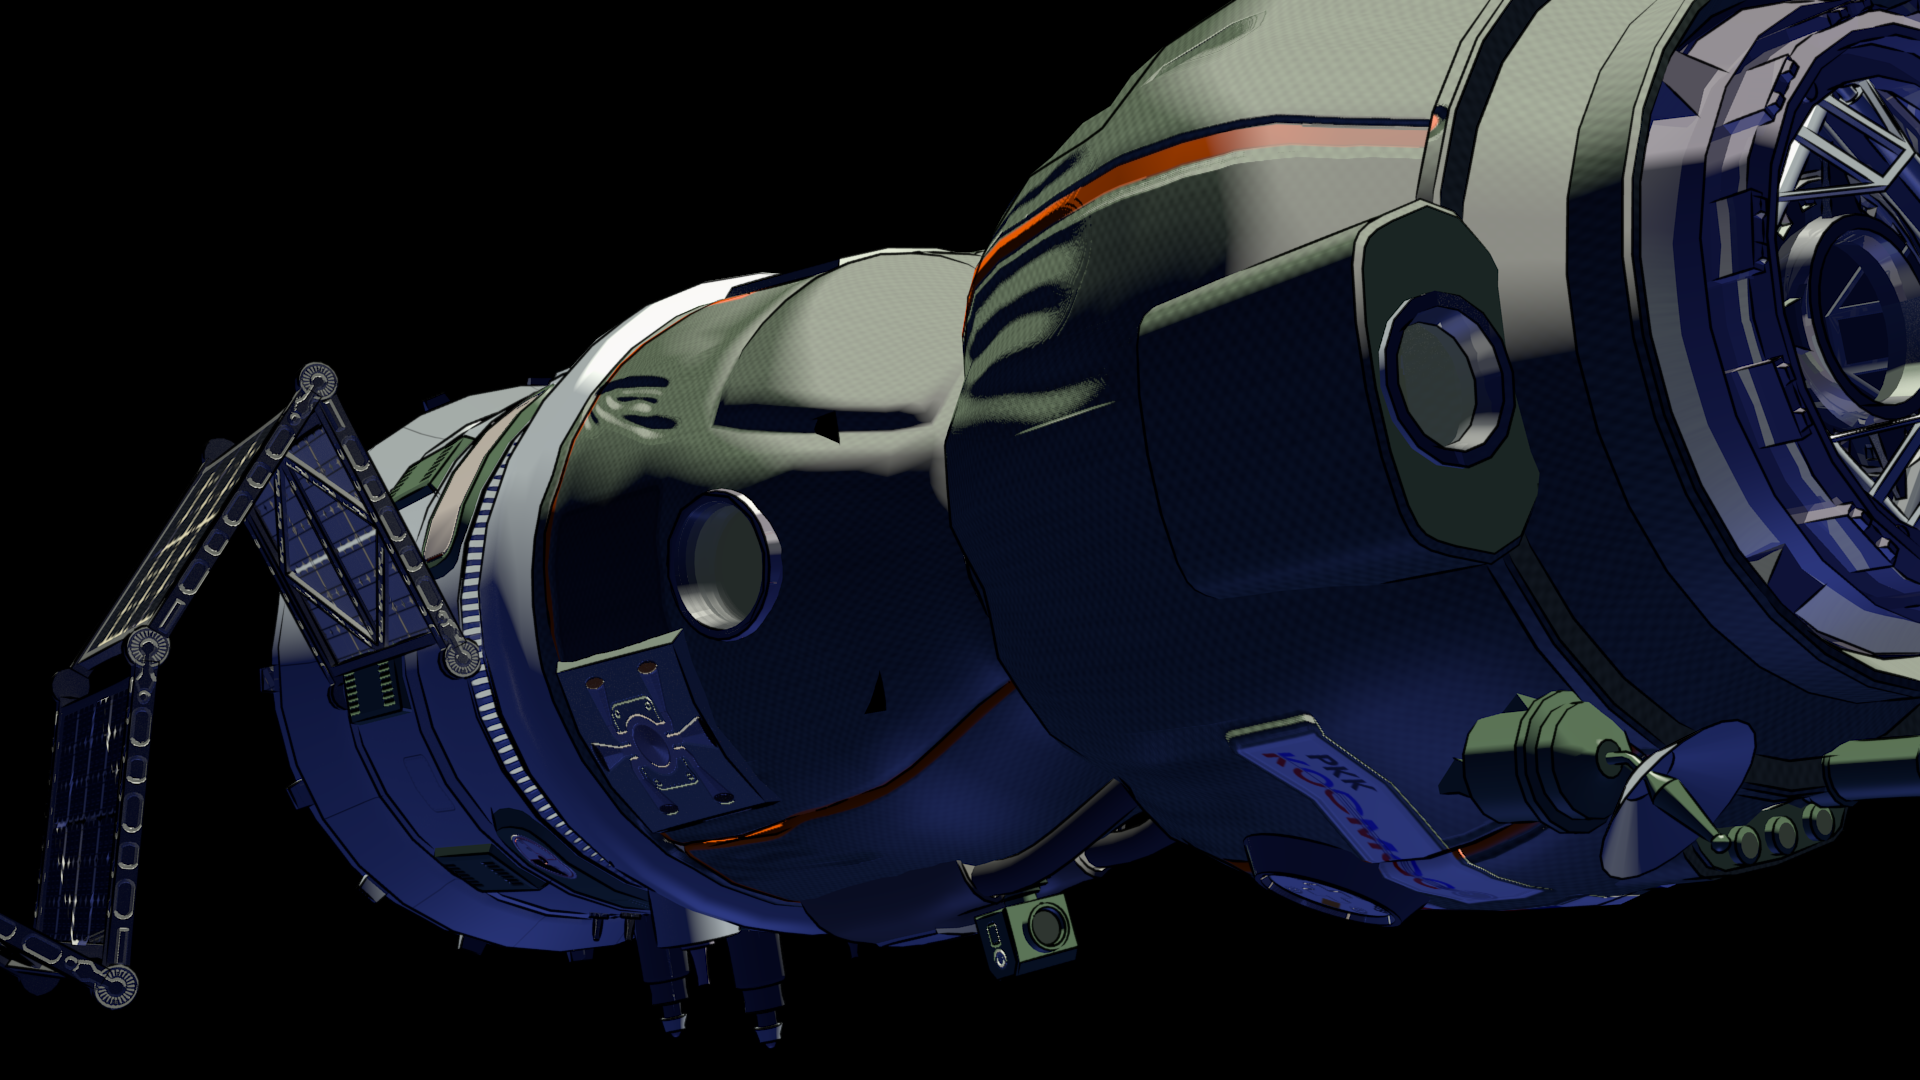

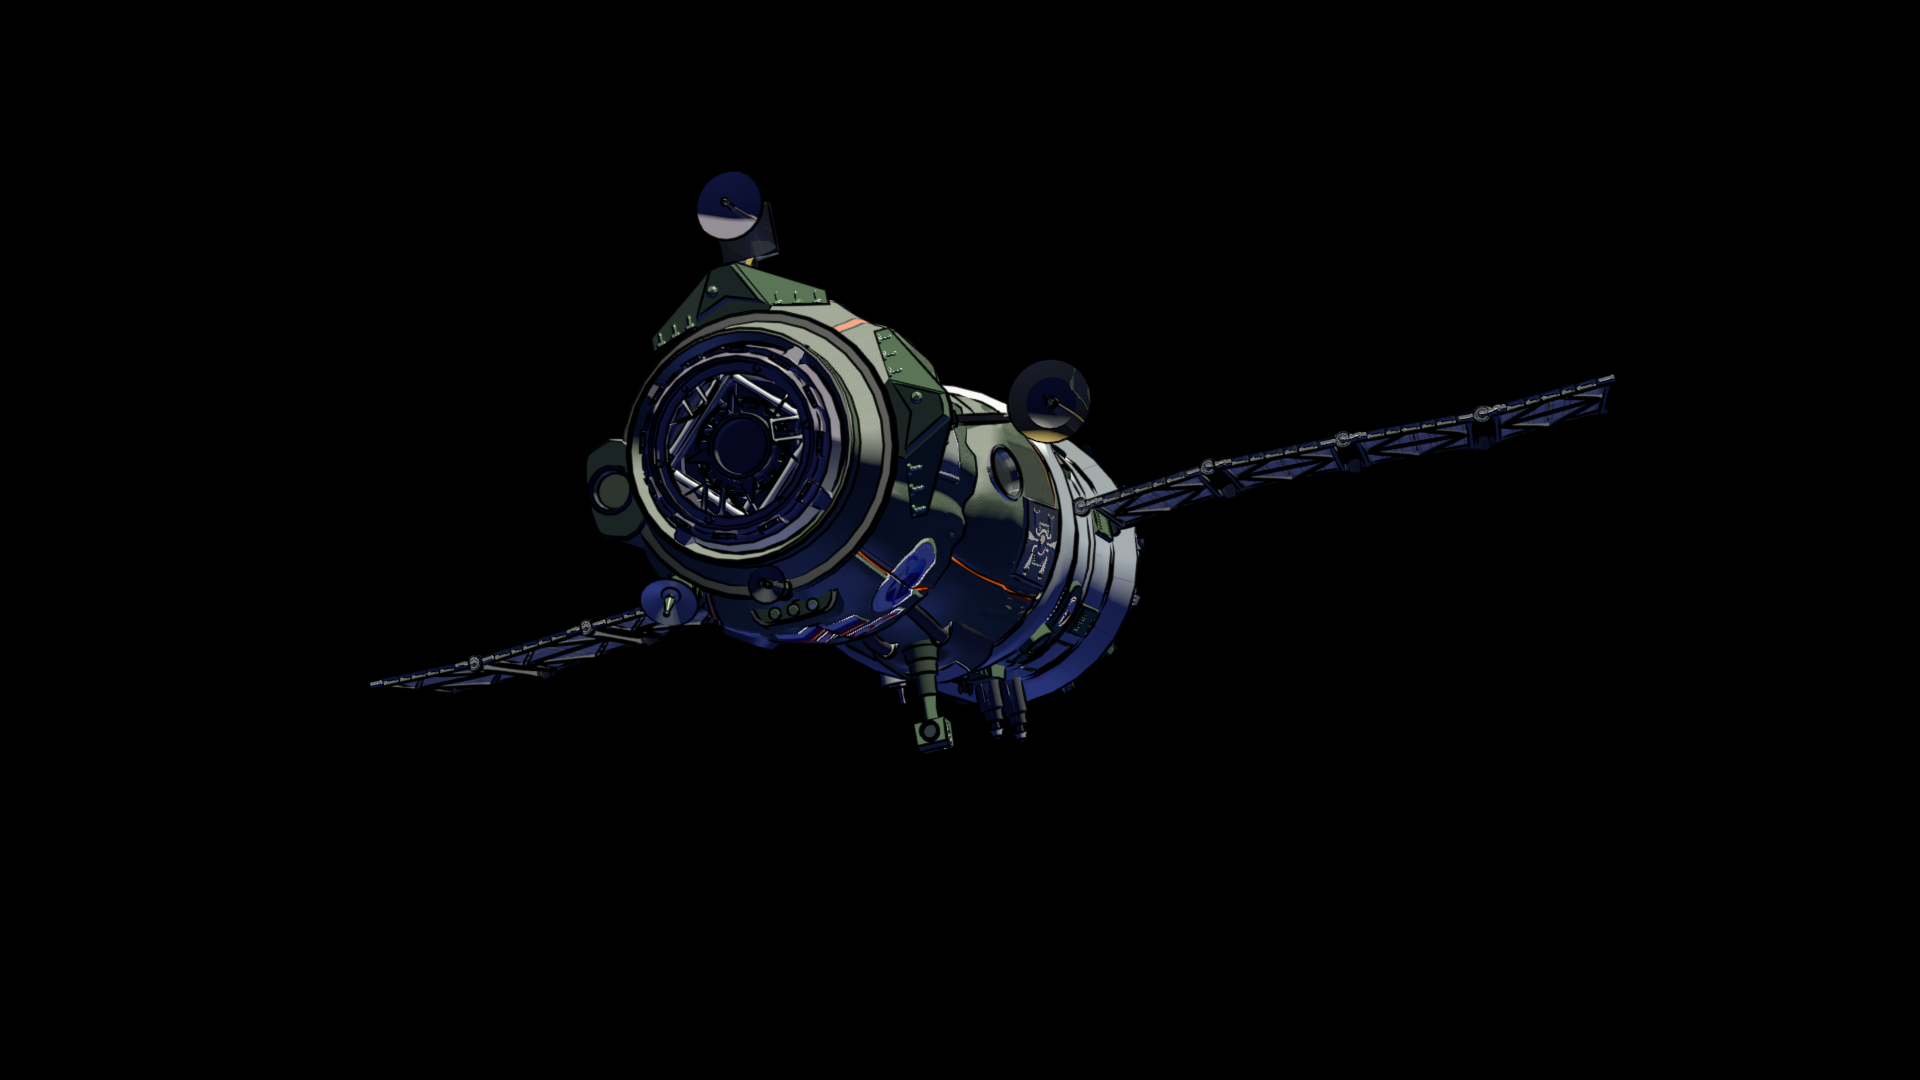

This is the exterior element for the final shot in the episode proper (leading into the main titles, which are at the end, since this was originally planned as a long teaser).
There are a number of things revealed that I need to fix here: the lighting isn’t quite right yet and the transparency masking didn’t work out as planned on this render. I have to go back for more tweaks.
But this does show the replanned shot progression as we zoom out from Georgiana’s porthole to the Soyuz disappearing out of frame at the end, mirroring the similar shot at the beginning, when the camera tracked onto Georgiana seen through the train window.
And it shows the fully-textured Soyuz orbiter exterior.
Apr 15, 2021 at 4:01 PM (Film Freedom Project)
Lib-Ray Functional Tests Converted to ‘unittest’
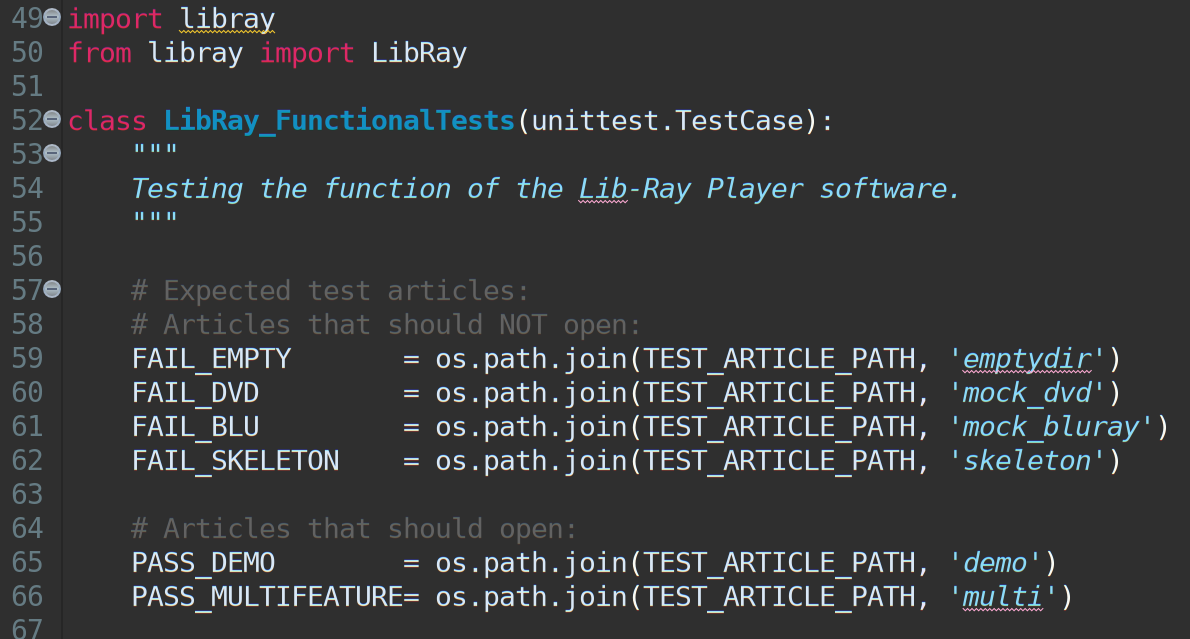
This week, I converted my “user story” “functional tests” for a Lib-Ray player to use the Python standard library “unittest” framework. This simplified a few things and made clear what “test articles” I need to provide it with.
Most importantly, though, it showed me that I need to implement visual comparison tests. Or more accurately, I need to convert my existing visual comparison tests, which I wrote during the experimental phase of development into extensions for unittest.TestCase.
I plan to add “assertVisible” to test whether a UI window or screen display has been opened, and “assertLooksLike” to do visual image comparisons between screen captures and images I’ve saved of the correct appearance.
So for example, to verify the video is playing, I can load up my demo “feature video”, with a specific segment showing this test pattern:

and then simply compare the window capture with this image from disk to verify that it is being correctly displayed (it’s a little tricky to compare images with video — I have to make sure I’m in the right point in the video and the image is stable, but the comparison will be fuzzy, so it allows an imprecise match, just like the existing “assertAlmostEqual” which can be used with floating point numbers. I can also provide a mask layer to omit parts of the image that are expected to differ.
I developed this ability before, so I know it can be done, but didn’t have any separation from the player code itself, and now I see that it more properly belongs in the test suite.
Putting together a formal test suite is an import part of rescuing my old code for the Lib-Ray Player. I need to reorganize and refactor it, and so I need a way to test it to make sure it’s working. Once I get the functional test module working, I’ll move onto to unittests replicating my earlier successes, and then of course, onto finishing integration into a working application.
My goal here is to get the codebase up to a reasonable level of organization so I can do an initial check-in onto GitHub this Summer.
Apr 17, 2021 at 5:00 PM (Film Freedom Project)
Bug Squashing in ABX
This week, I spent some time fixing some annoying long-standing bugs in the Anansi Blender Extensions — our in-studio toolbox add-on for Blender.
Fixes:
The “L. Ink Compos” operation was crashing if the file contained more than one existing Render Layer. This is was an indenting error causing a loop iteration to work incorrectly.
This also meant that the operation couldn’t be reused to reset the configuration if I had manually modified it (not without first removing renderlayers). So I altered it to simply rename the existing renderlayers and always create new ones for “Color”, “Ink, and “Ink-Thru”.
The “Ink” and “Ink-Thru” Freestyle renderlayers were actually flipped in meaning. I just confused myself about the layer mask. Trivial fix.
Tried to trace why sometimes the values for the “Lunatics Properties” get lost or changed. It seems to be a problem with how “Enums” are used in the program, as the misbehaving fields (“Seq” and “Shot”) are implemented as enums. But I still haven’t solved that problem.
I also automated the generation of the ZIP file add-on archive (and given it an actual versioning system), and started writing unit tests for a new module to extract project data from YAML or JSON files associated with the project. I had started to write this code awhile back, but there were no tests. The good news is that it wasn’t hard at all to get it to pass, so it’s pretty much working now. I haven’t yet written the tools that will use it, though.
As with Lib-Ray, I’m hoping to get this up on GitHub soon.
Apr 20, 2021 at 4:01 PM
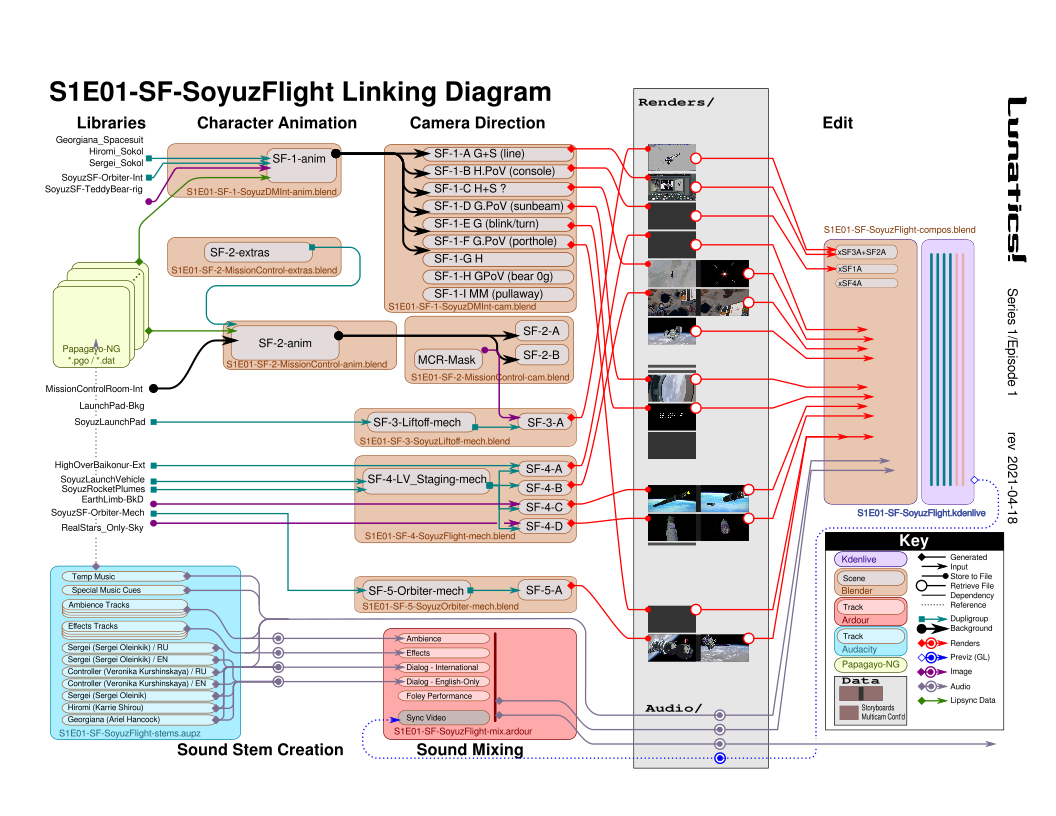
Revised Launch Sequence Plan
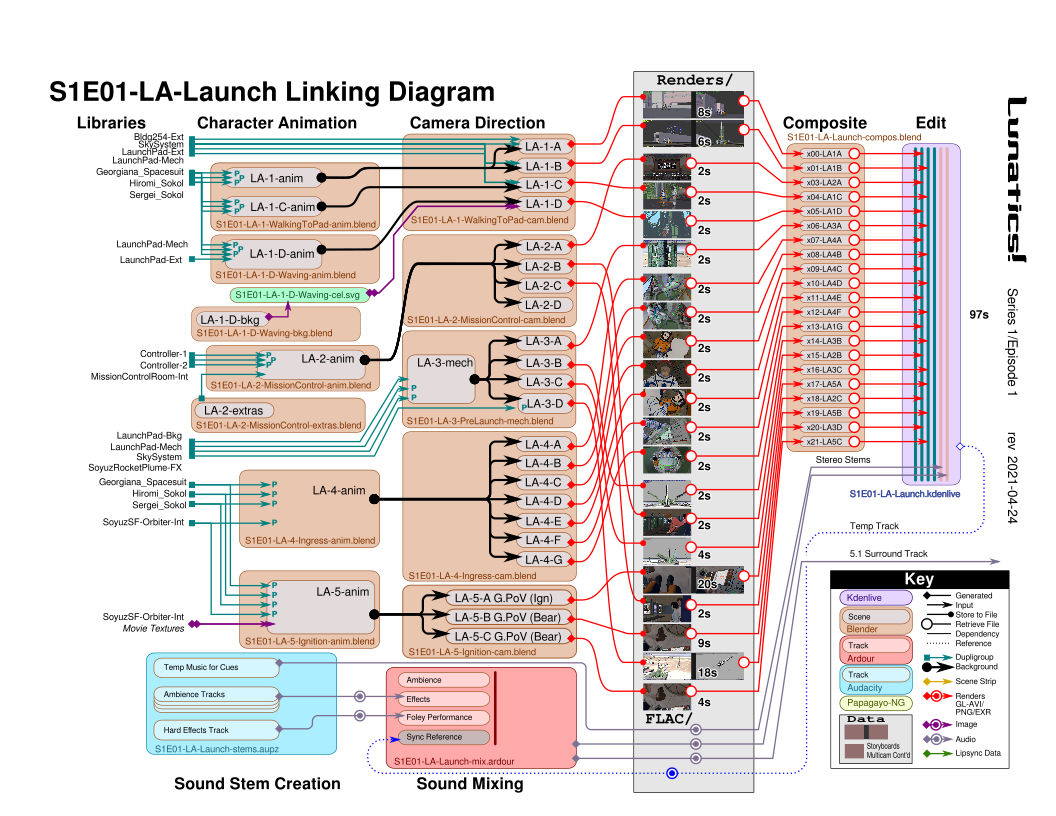
After going over the shots in this sequence again, assembling an animatic, I found a couple of gaps, and decided to update the plan. I’ve made a couple of small format changes, which I plan to propagate to the other link plans for the episode.
I decided having the dual “GL” and “PNG” renders was silly, since they just duplicated the same pattern — and now there are “EXR” renders as well. So I just eliminated this detail, and used a single red line for the renders, with the assumption that all three types can be rendered to their respective directories under the “Renders” folder.
This also left me room to add the duration for each shot, which is very handy for planning the animation. Adding these up gives a crude estimate of the sequence length — 97 seconds in this case (actual time might vary by a few seconds, depending on exactly where the shots are cut). It’s possible to work sound-first, matching the shots to the soundtrack, or visual-first, cutting sound to the action, or even to move back and forth.
And I realized the logical place to put the Blender compositor stage is on the right, right before they go into Kdenlive for editing, since they actually are drawing the data from the rendered EXR frames.
Every shot will be composited, since I have to do this anyway to put together the output from the rendering phase, even if they all just use the minimal node arrangement, like I did for the preview PNG streams. The compositor file will have a Blender scene for each (output) shot, with names starting with “x” and a sequence number, followed by the abbreviated names of the (input) rendered elements (combined with “+” if there’s more than one).
There are no combined renders in LA, but this notation allows for it if I need it (the SF sequence will have a couple). I have the option to combine rendered elements in the compositor file or leave them to be combined in Kdenlive.
I’ve started on a similar revision for the SF sequence, but there’s still work to do on it:
Will I ever automate this part of the planning?
I’m not sure. There is some degree of choice in what is shown. For example, I’ve left the library assets pretty simplistic. There’s a lot of detail there, which has to be set manually in the Blender file — exactly what groups are duplicated from the asset file, and where they are located in the animation file. They can be static or animated as objects, and with armature proxies, they can be fully-animated elements (like characters).
On the other hand, I’ve been very specific about how the shot files and scenes are interrelated. I’ve also combined this structural node information with the more conventional “storyboard” of desired (or rendered) shots. I’m not sure if it would be practical to preserve this kind of selective design in an automated system.
Most of this could probably be represented with custom Python nodes in Blender‘s node editor. But there are some limitations, and some of the visual language (such as my color-coding) would be lost.
The Tube Project (“Wires for Empathy”) implemented a node-based shot planning tool using Blender’s node editor, though I find the result harder to read than my diagrams, and less compact.
Morevna Project‘s RenderChan is capable of analyzing existing Blender files (and some other types of files) to get the sort of linking information that my diagrams are trying to represent (for the purposes of determining build dependencies).
Although my project is so linked to Blender that it doesn’t represent much of a burden to rely on it, it does also bother me a little bit to implement such a planning feature in Blender. I can easily imagine a project that doesn’t use Blender wanting a similar feature (e.g. a 2D animation project in Synfig or OpenToonz, or a live-action project that uses Kdenlive and perhaps Natron), and requiring Blender would then be a pretty heavy dependency for using only a small aspect of the program.
So, another idea I’ve considered is using a lighter independent node-editing library. I found one that seems appropriate for me using the Qt GUI and Python, called Floppy. It also allows a bit more customization in appearance than I’d get with the Blender node editor. It would be a pretty good fit if I wanted to automate this process. In fact, since it is written in Python itself, it would be possible to extend it if it did lack something I needed for the project.
I’d have to make some key decisions about what information to include and what to suppress or hide. But the advantages would be clear: it would allow me to generate the diagrams directly from the source tree for accurate and up-to-date documentation, and conversely, I could edit the node diagram and then have the software boilerplate the sequence, creating the indicated files and links, creating (or renaming) scenes within Blender files, and so on.
The downside is that specifying the project clearly enough for the computer to generate it would require a lot detail to be expressed in the diagram, and it might get out of hand. With my manually-drawn diagrams, I know there will be a certain amount of creativity involved in setting up the files, and I’ll have to fill in some information (such as what groups are included in a dupligroup, where they are relocated, and what parts of them will be proxied). There are also complications, such as how to control the number of “slots” and types of slots for dependencies (Do we need a separate port for each dupligroup we rely on? Do we have to have lots of empty ports even on scenes that don’t require them? Do have to implement a means of adding extra ports?).
I’m also not too clear on just how much effort I’d need to put into developing such a tool. It does seem like it could get pretty complicated, and I do have other development projects going.
So far, though, I think I’m content to continue manually creating this documentation in Inkscape.
Apr 23, 2021 at 5:01 PM (Film Freedom Project)
Adding features to ABX
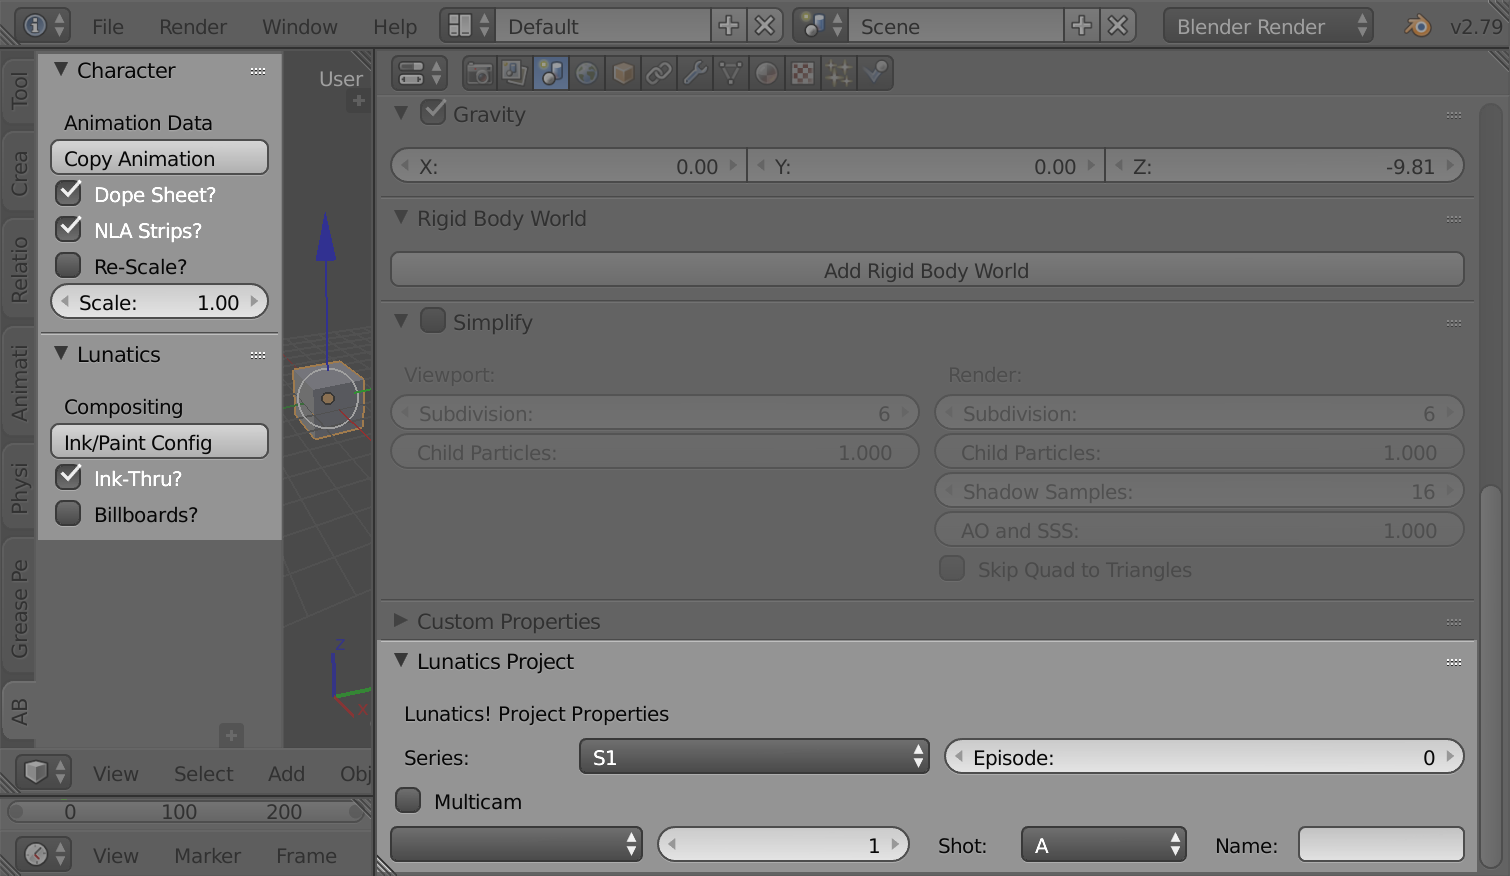
Today, I’m working on new features for Anansi Blender eXtensions (ABX), version 0.2.
The changes:
Copy Animation
Renamed from “Copy NLA”, which just copied the strips from the NLA editor from one armature to another.
The changes will make it more general, also allowing the Dope Sheet animation to be copied (this doesn’t show up on the NLA editor and was not being copied before).
And by adding a scale-factor to the copy, I can incorporate the need to copy animation from an armature that needs to be rescaled to a new armature. That is, the target armature is similar to the original, but at a different scale. I figured this was an improvement over creating a separate animation scaling operator.
This should provide a way to fix-up animation in shots that were set up to the wrong scale.
As of this writing, I’m still in the middle of implementing this new functionality.
Ink/Paint Config
Renamed from “L. Ink Compos” which seemed really cryptic. It sets up the standard camera shot-file rendering and compositing settings for the standard “look” in “Lunatics!”
The new options allow for some special cases I’ve run into a lot: I will be able to turn off support for handling ink lines seen through transparent objects (this just about cuts the render time in half for shots that don’t need it, since the transparency solution basically draws all the ink lines twice). And I have a control for turning on the materials-index pass I need for handing partially-transparent billboard objects (like billboard extras or plants) correctly.
I’ve implemented both of those changes, now, although I think the full support for billboard processing is going to require more than just the material pass. I may need to do an additional color pass to get the correct mask for the billboards.
Lunatics Scene Naming Panel
I also added a shot “Name” to the Lunatics scene properties panel. This will add a short descriptive name to the scene name when used with the Ink/Paint Config. This is something I’ve been missing — previously, I could revise the Scene name after running the script, but then if I had to run it again, I’d lose the change.
Instability
Not sure why, but I’m finding that Blender crashes after loading ABX the first time. I think there must be something I’m supposed to initialize, but don’t. However, it seems Blender catches it when it restarts, because it works fine after a restart.
It’s not really a problem for me to work around that, though it is annoying during testing and it lacks “polish” as an add-on for release to other people.
2.7 vs 2.8+
Of course, these changes are for Blender 2.7, and mainly developed around the Blender-Internal renderer. I will probably need to do a lot of rethinking when I transition to using Eevee in Blender 2.8+
Apr 24, 2021 at 4:01 PM
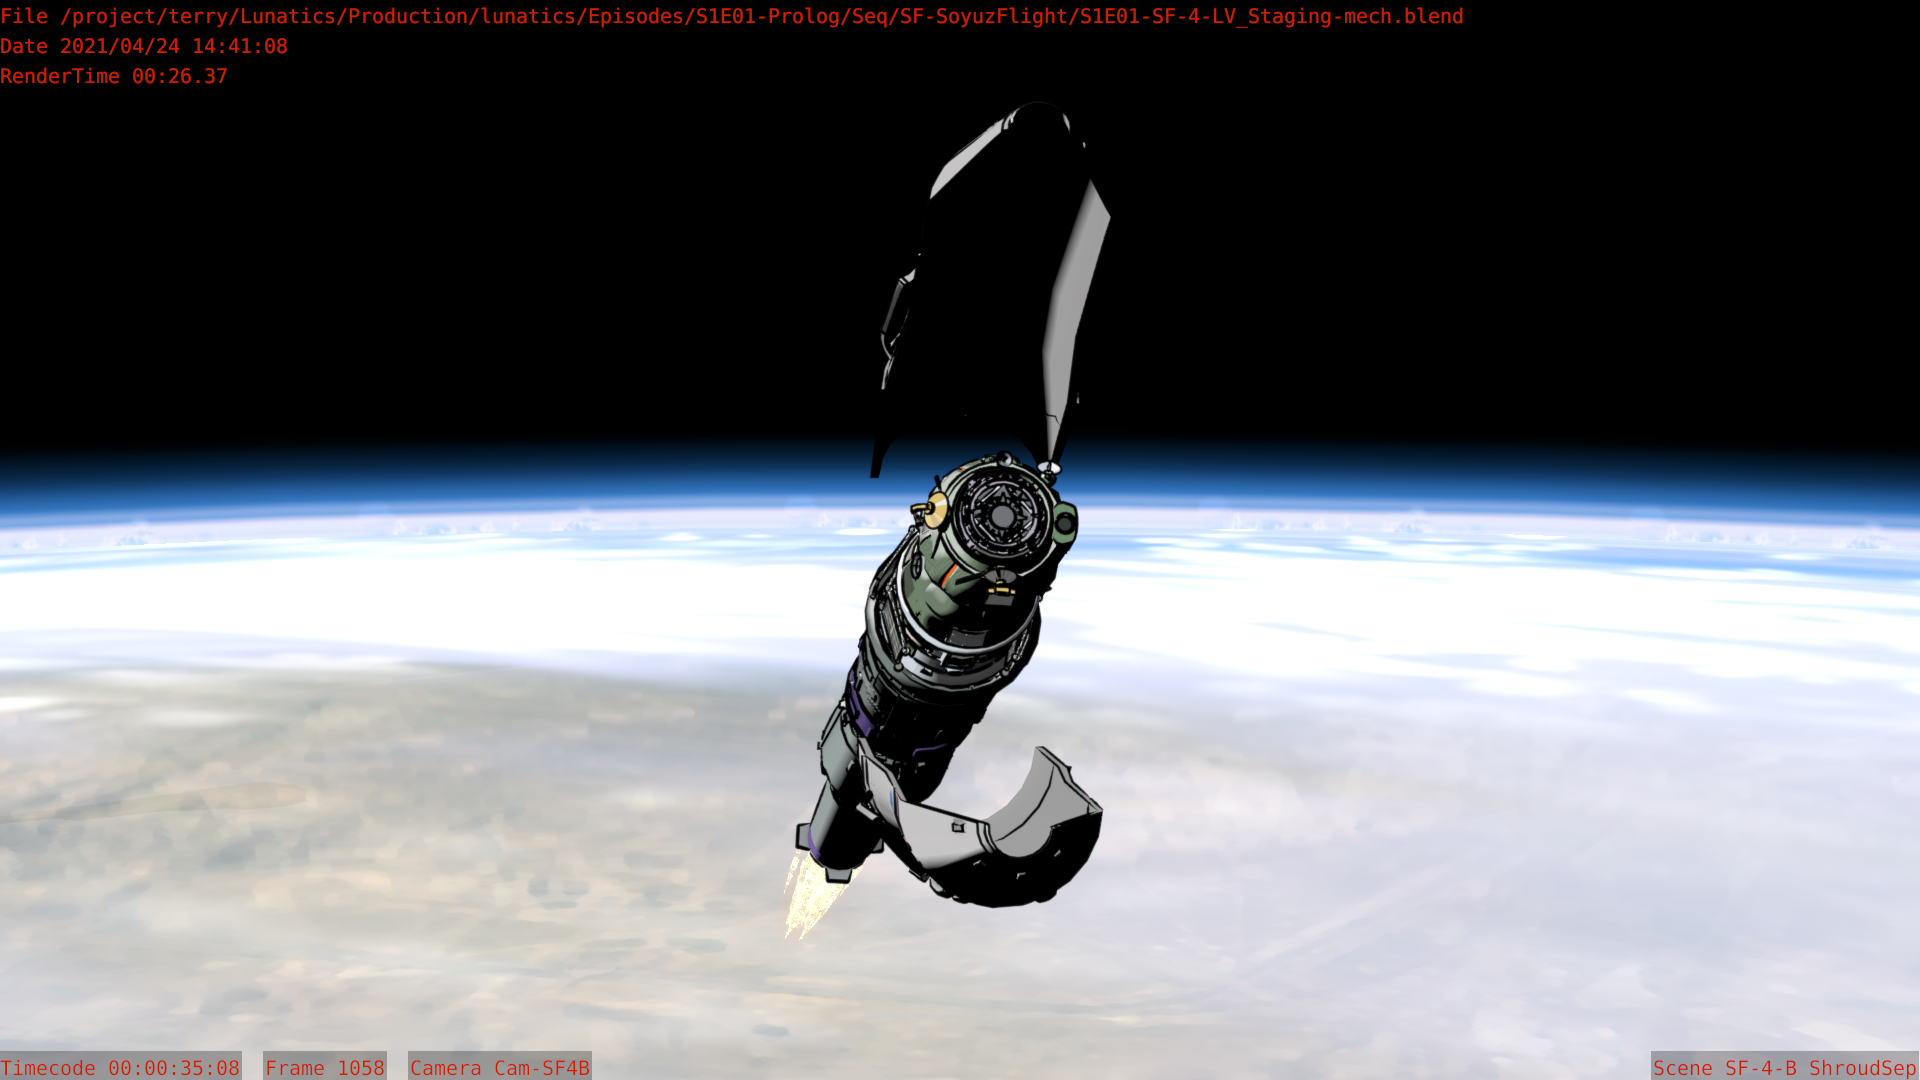
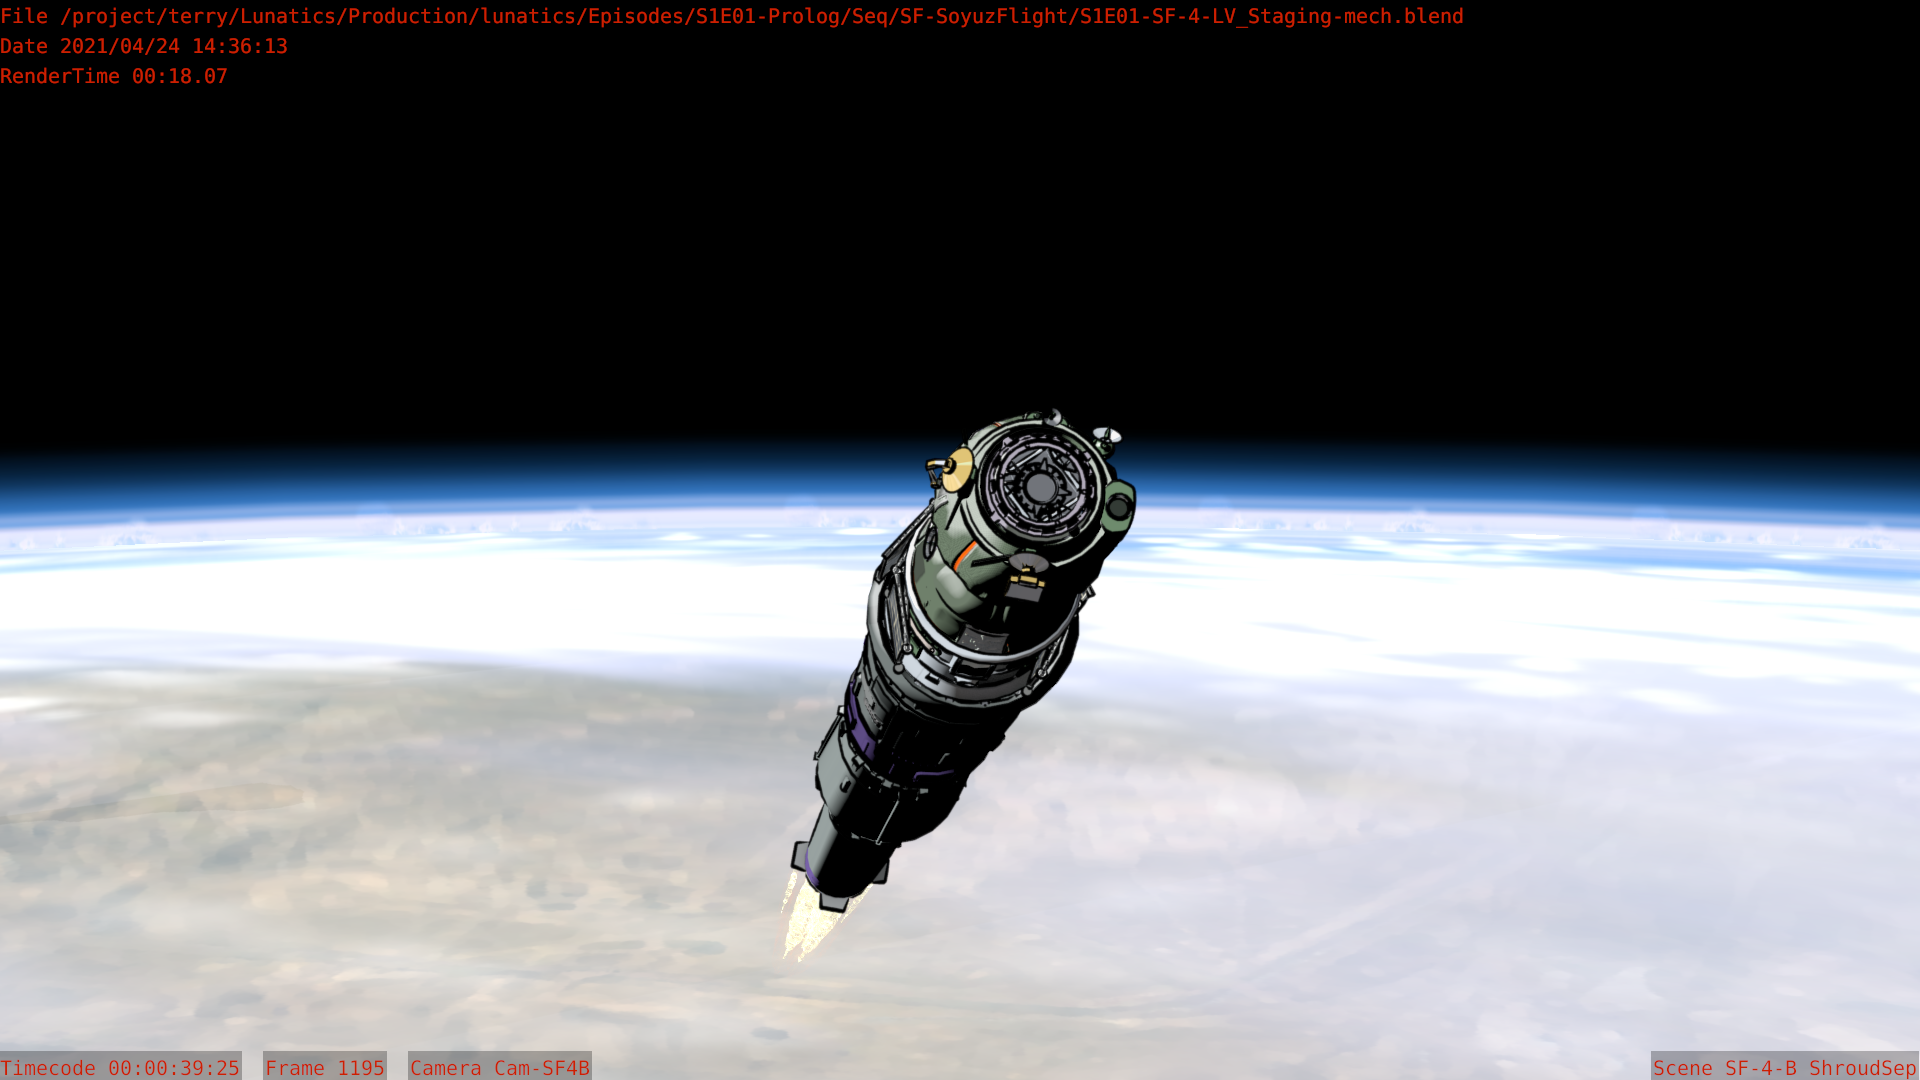
High Over Baikonur

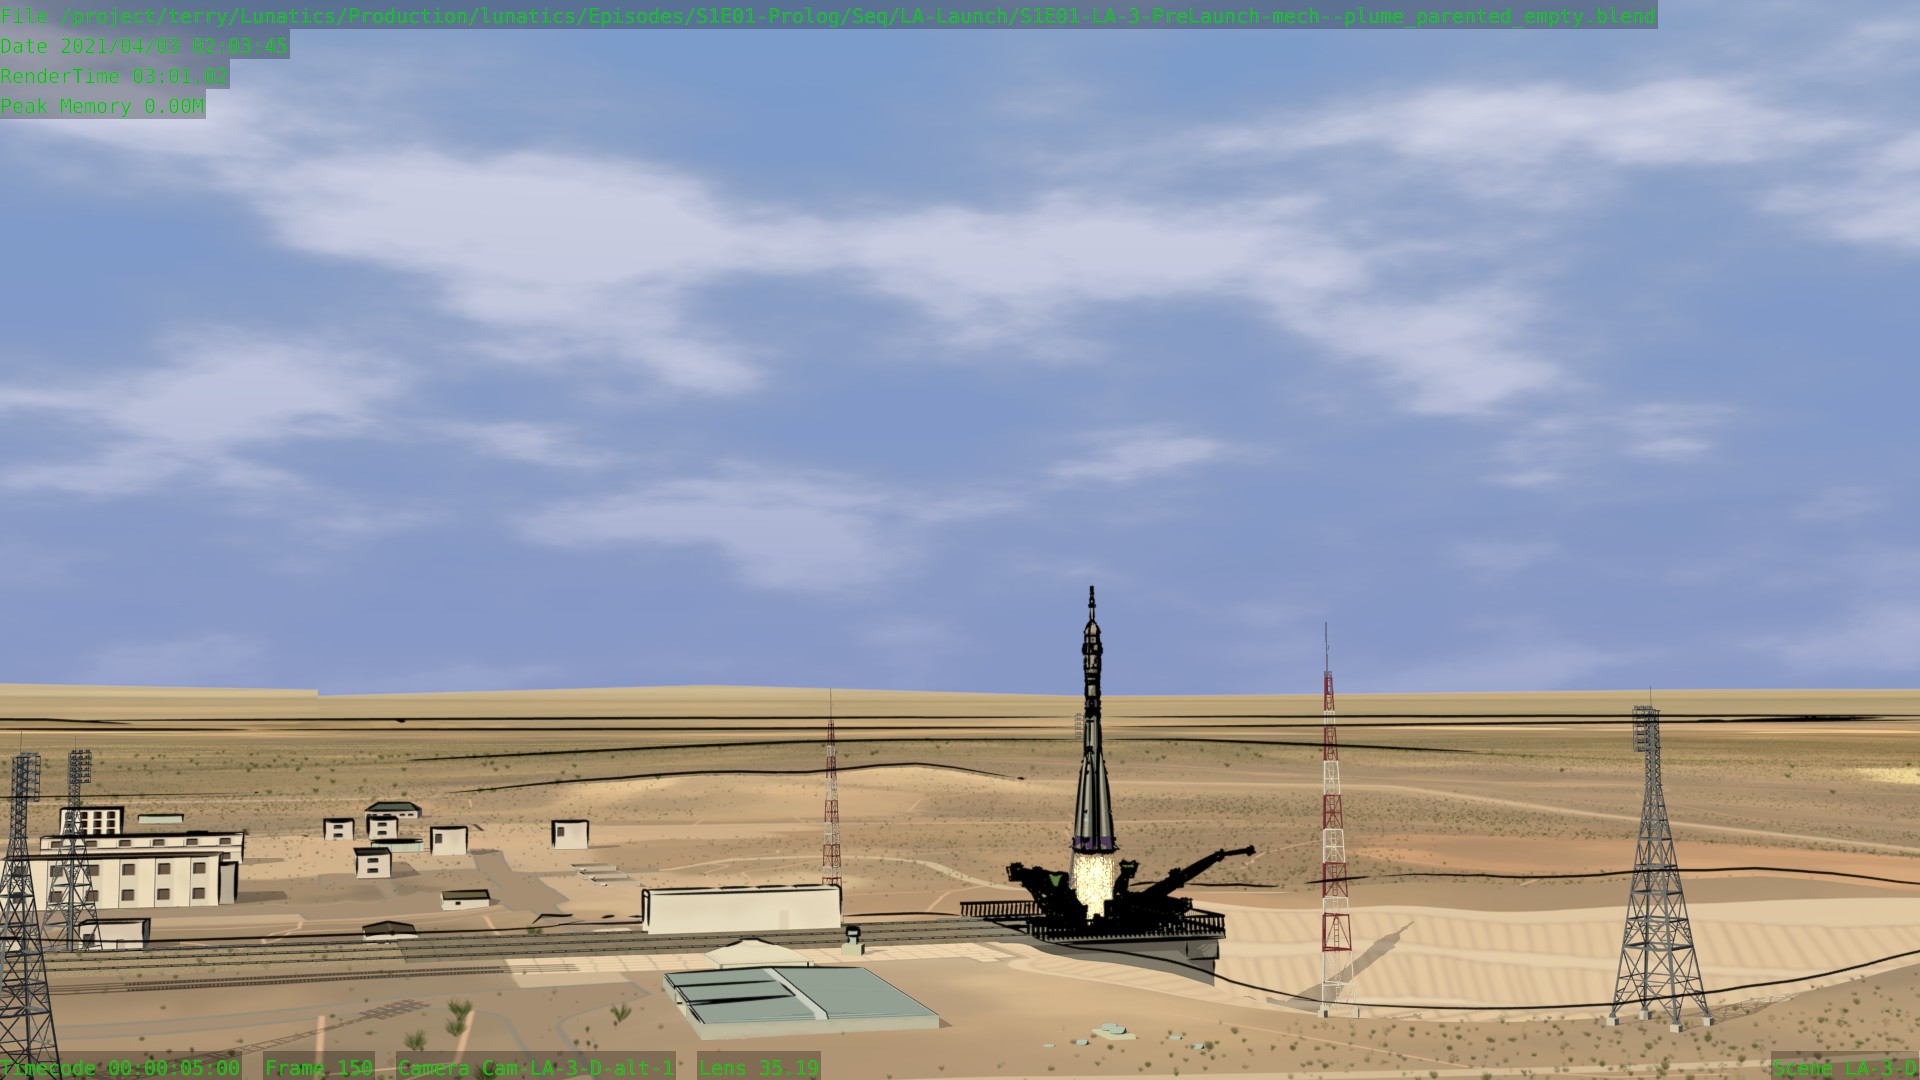
Haven’t looked at this set in quite awhile. Had to fix a broken texture link, but I’ve got it linked again. This is supposed to be about 30-40 km up over the Baikonur area, where the booster pod staging (and I may use the same set for shroud separation.
Like the ground set, it’s really a disk with a rim:
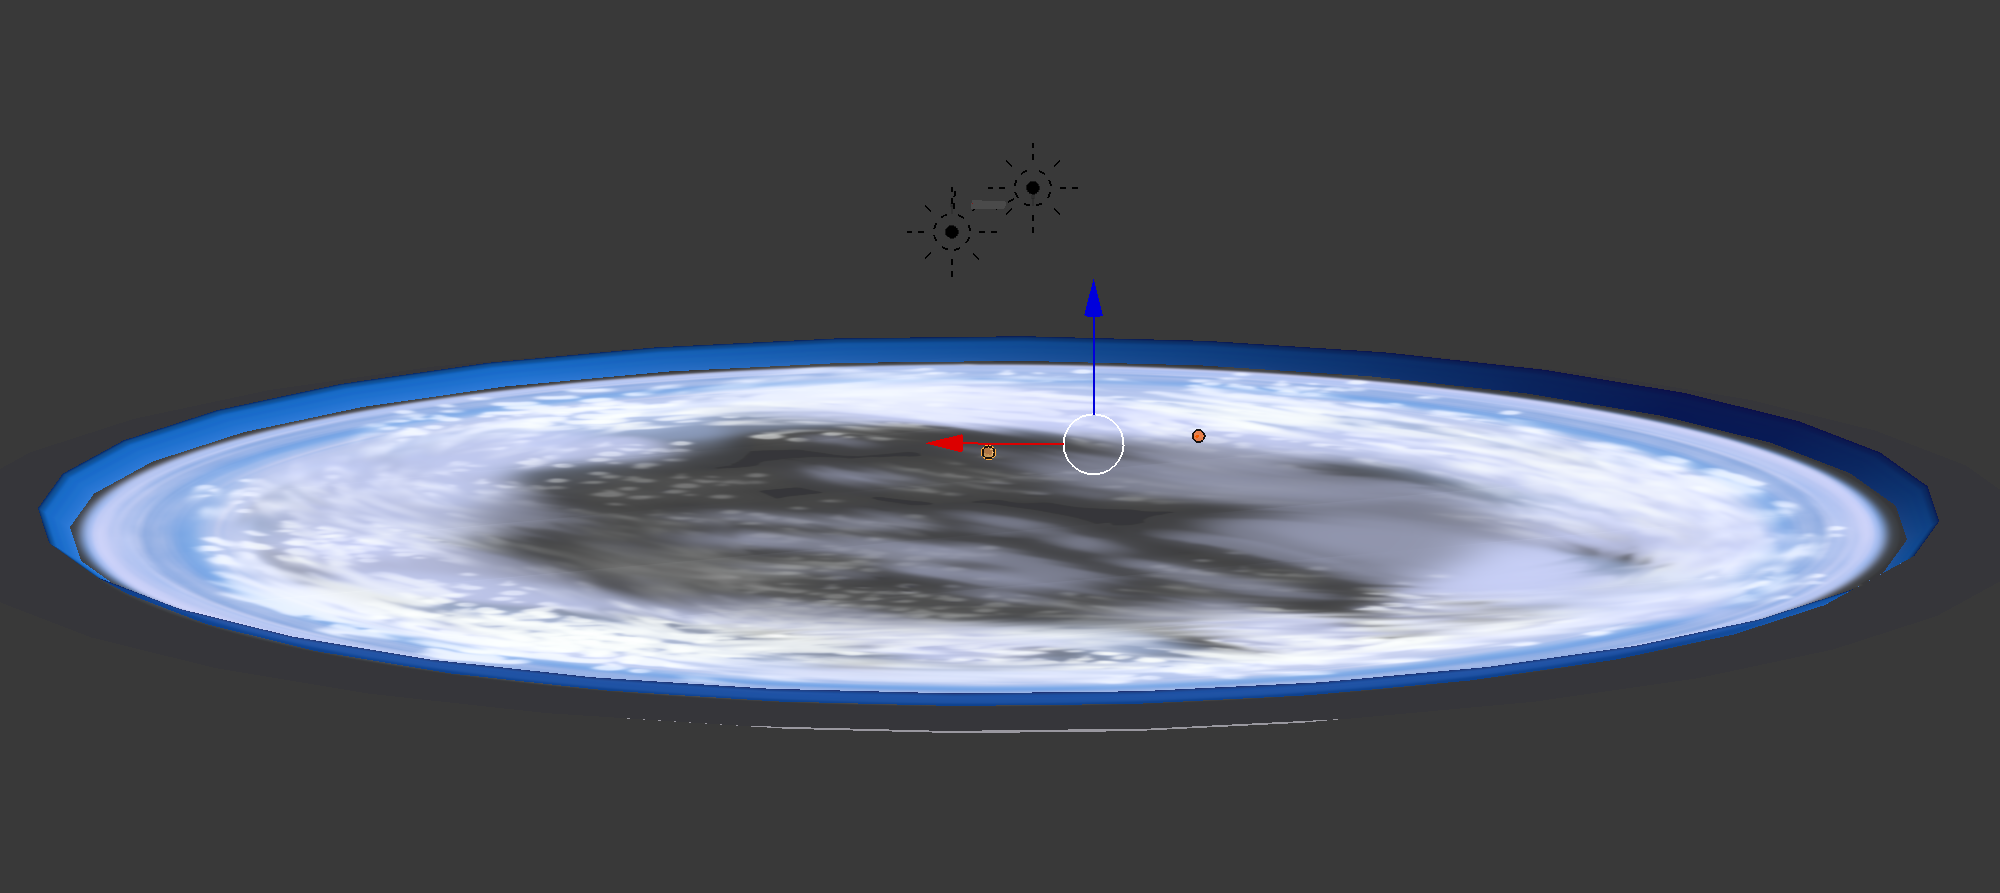
And the slight “curvature of the Earth” that you see is actually the curvature of the disk edge. But I think it works!
Now to see if my new staging rig actually works.
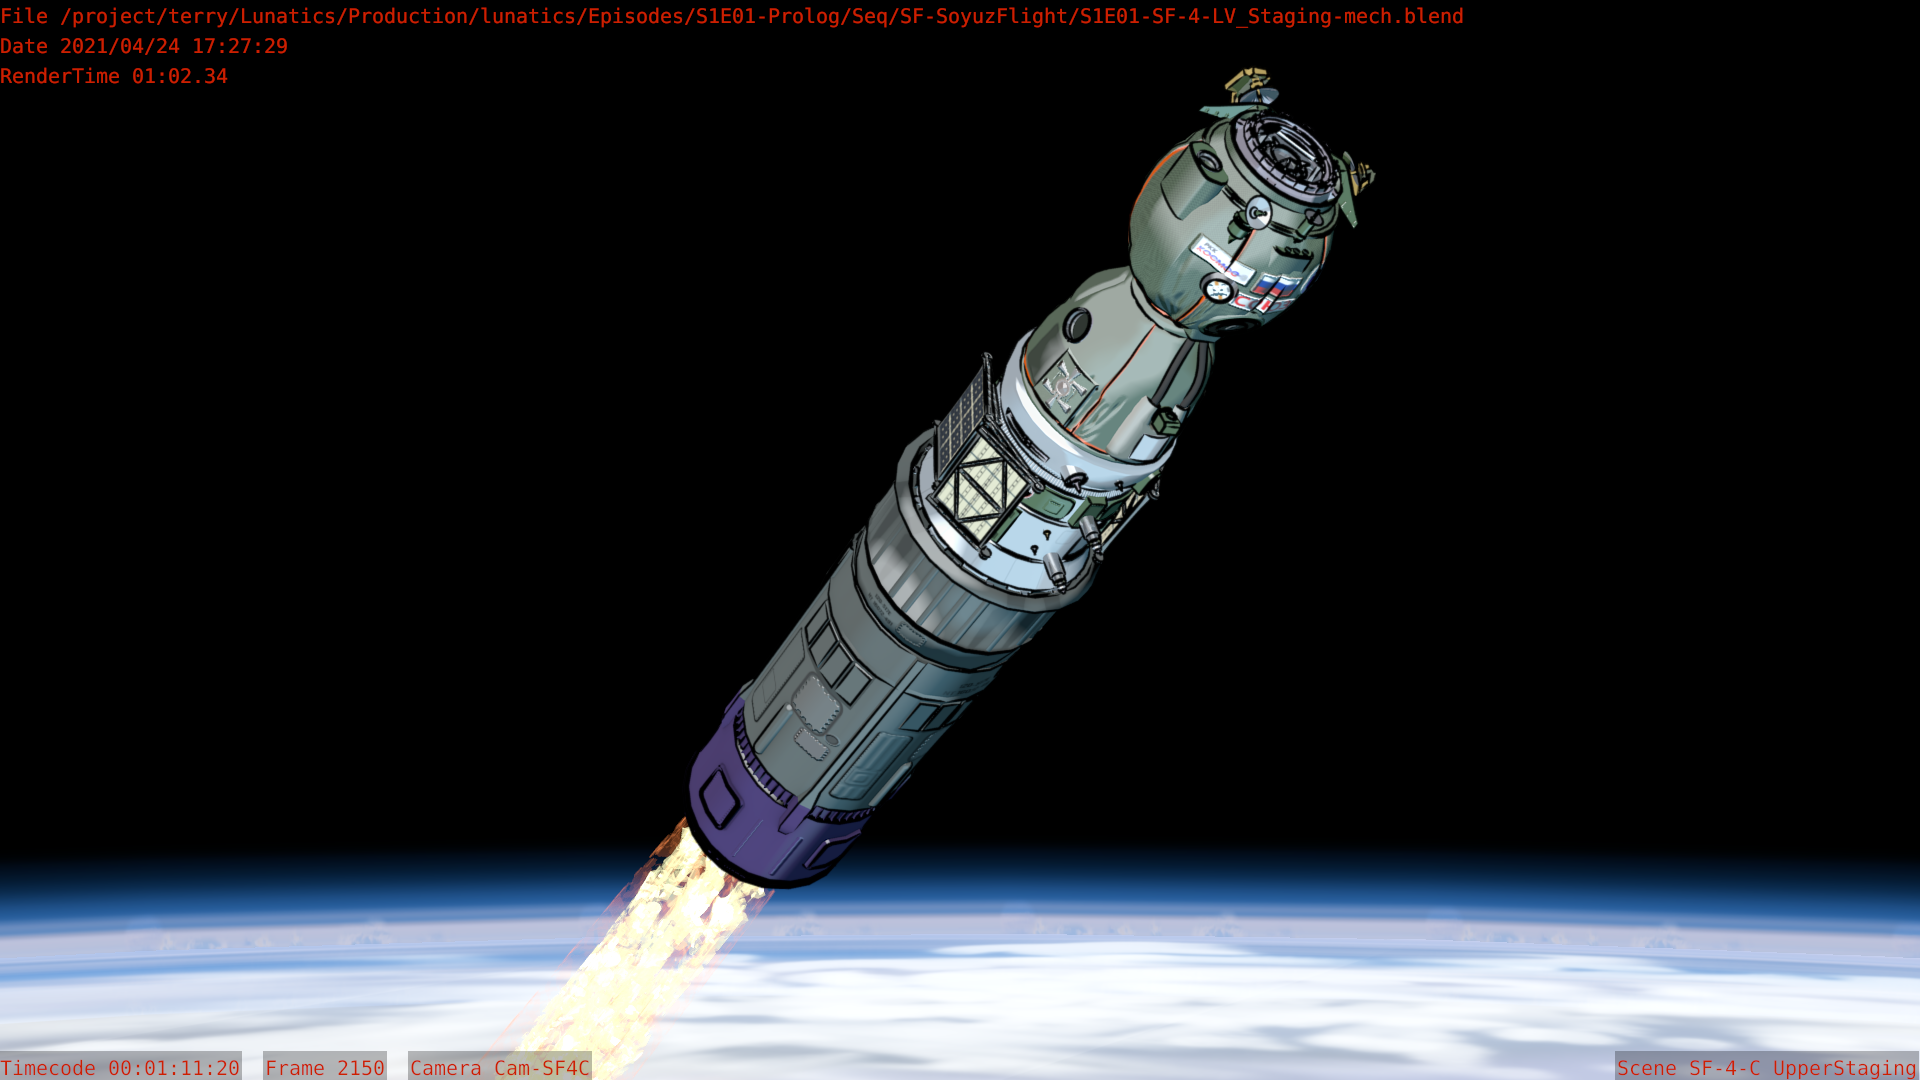
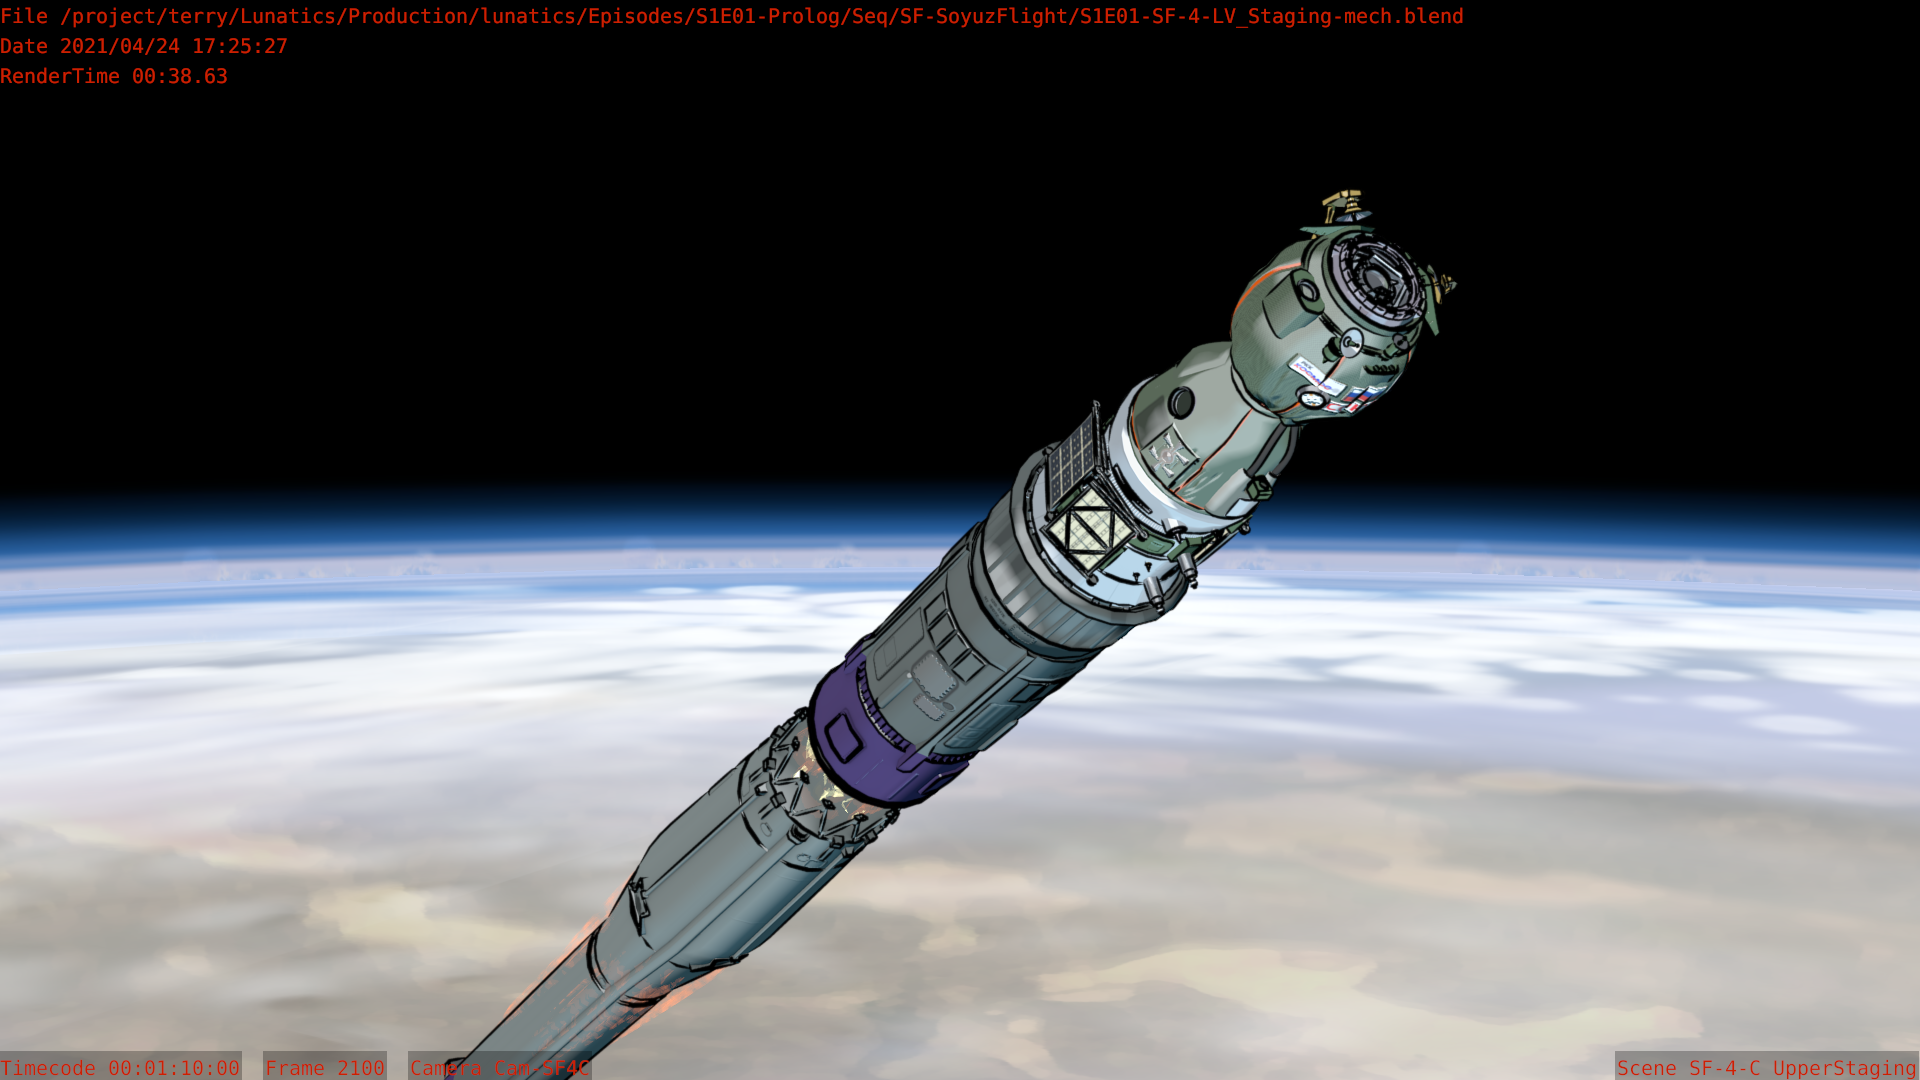
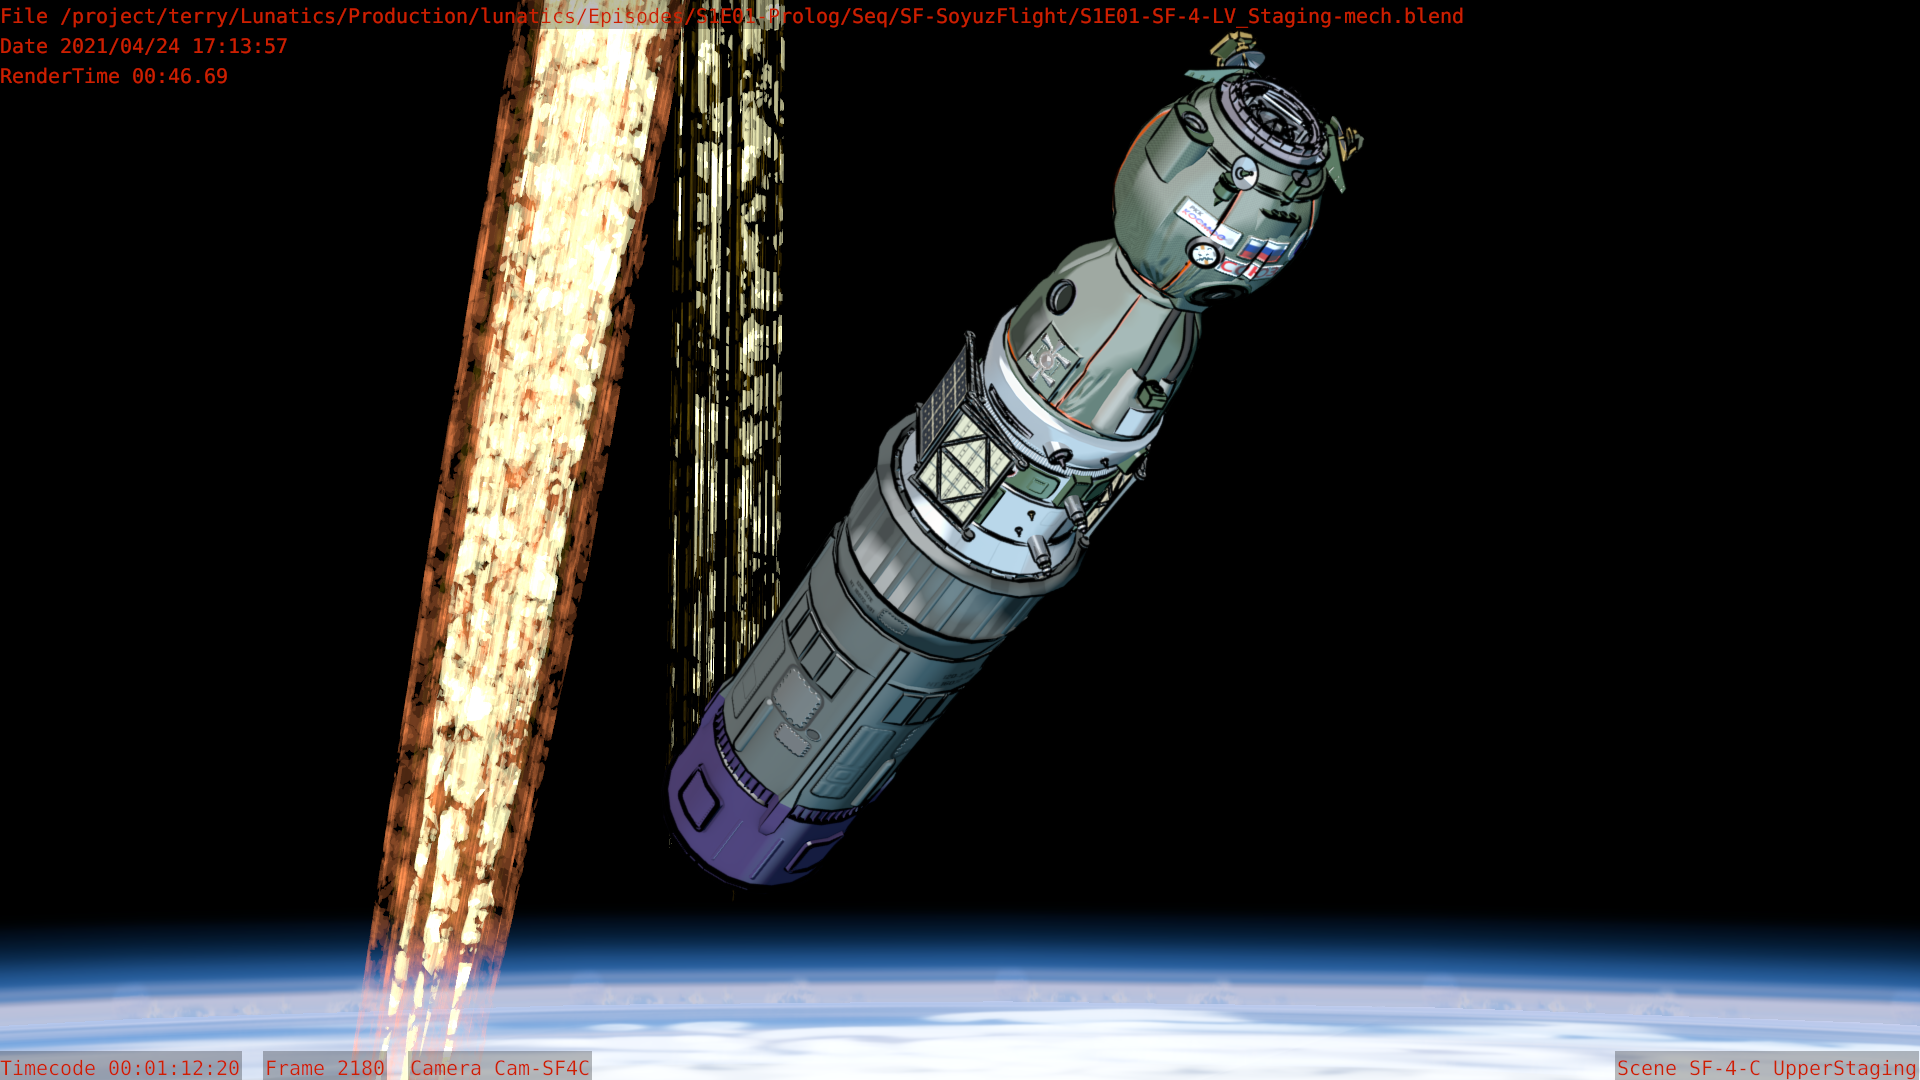
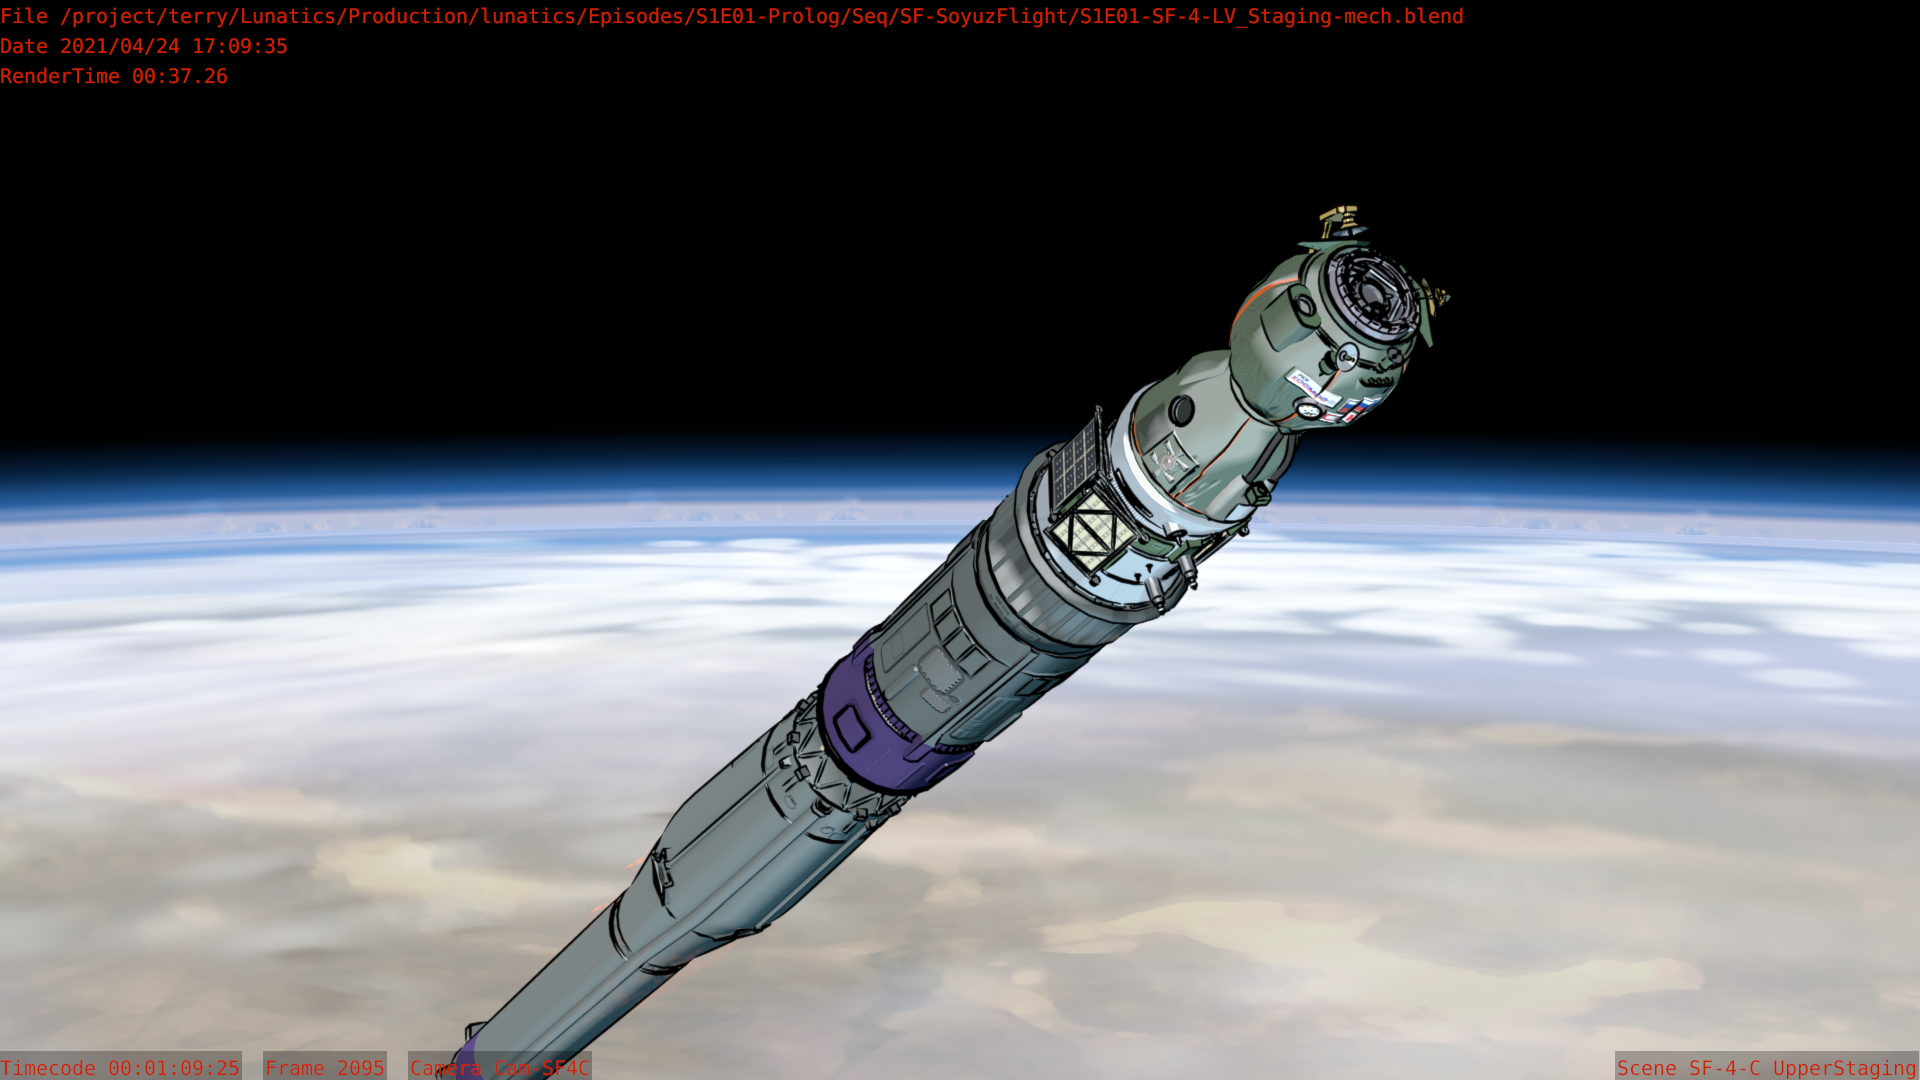
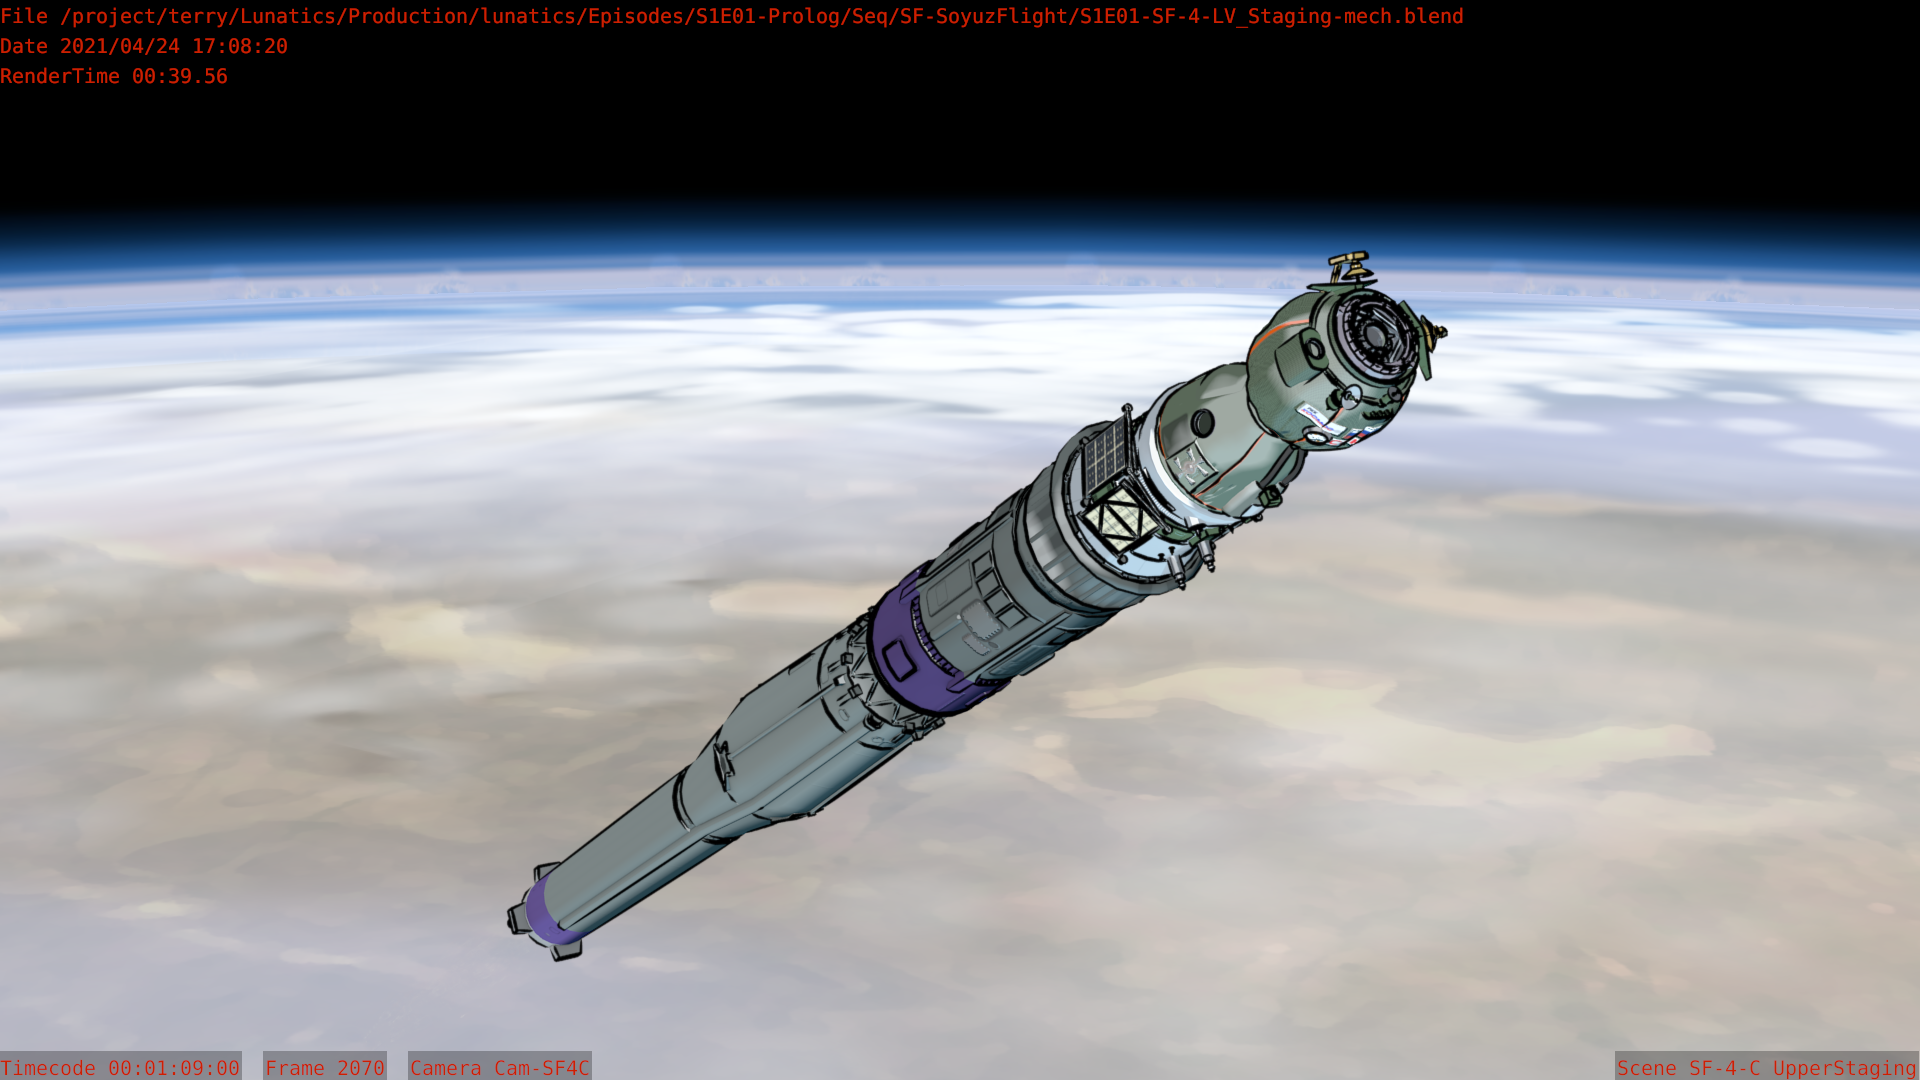
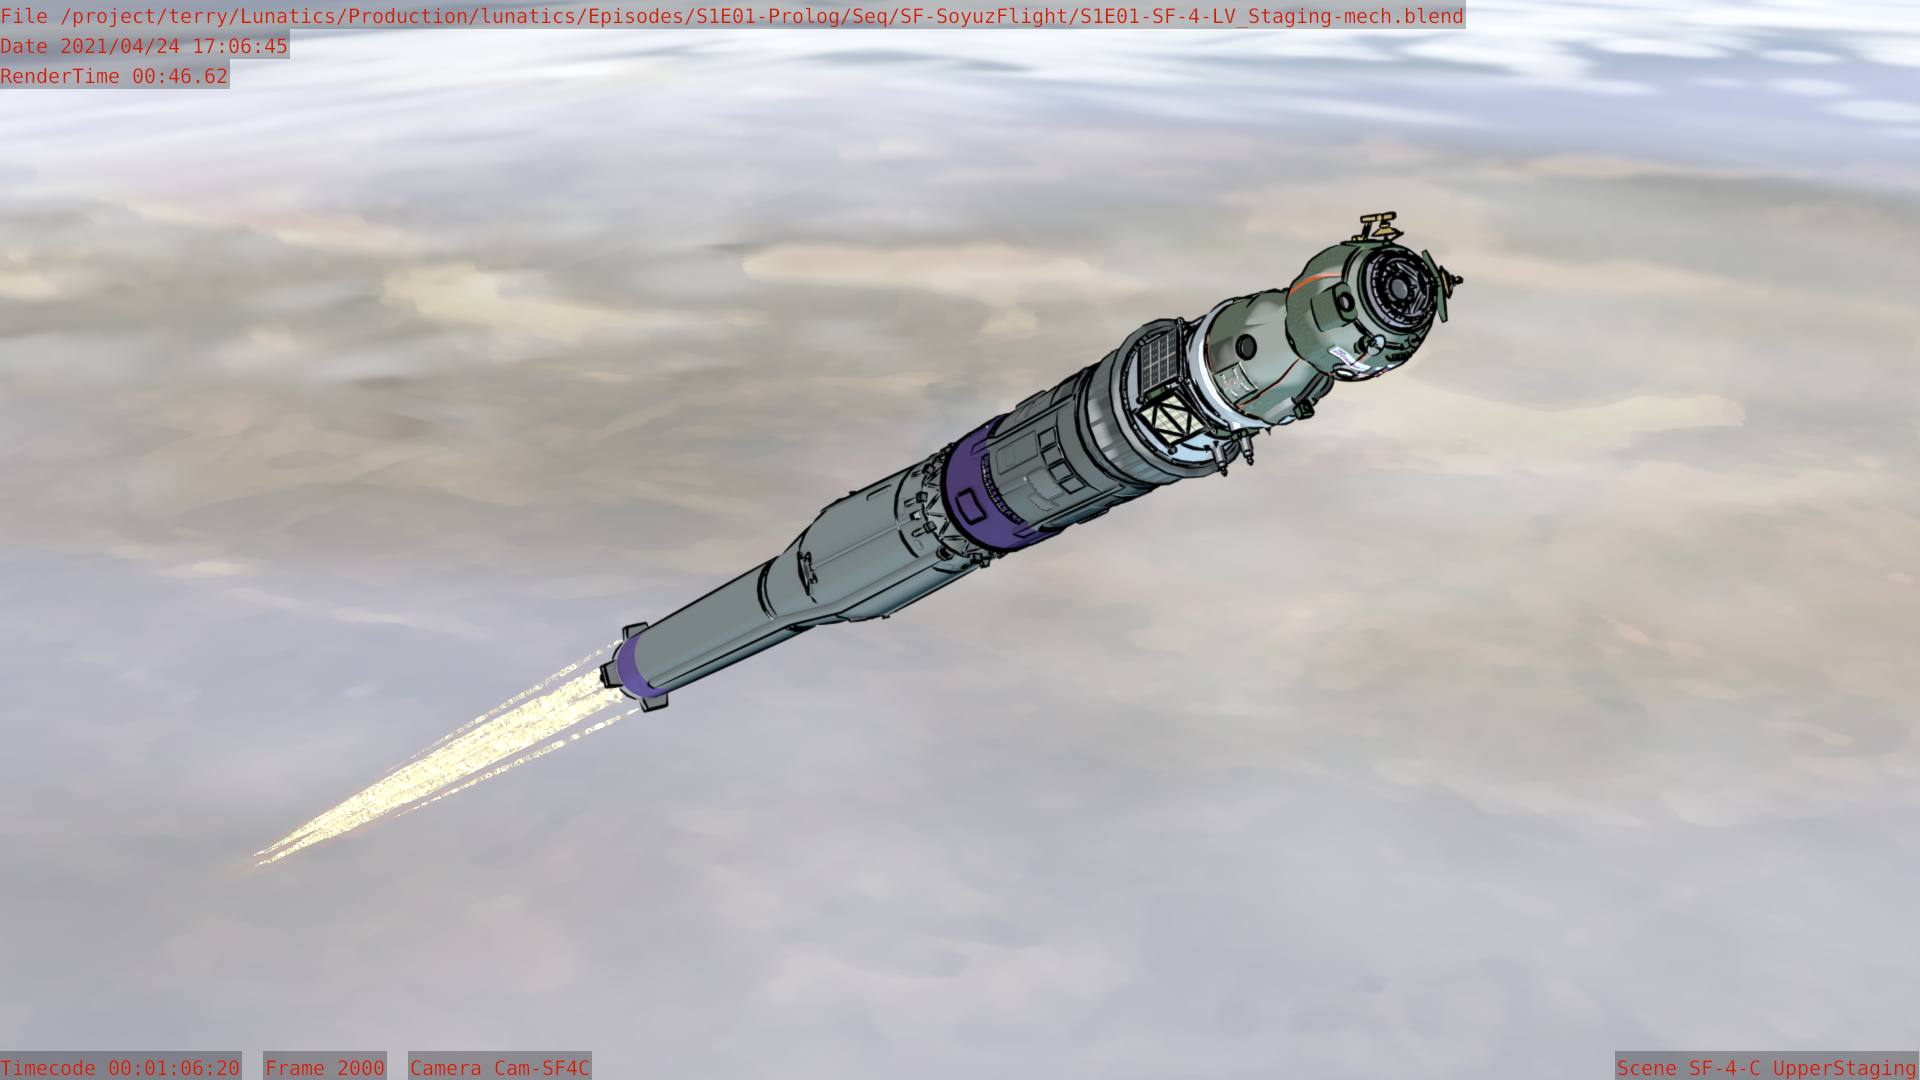
Apr 25, 2021 at 4:00 PM
Testing Soyuz Podstaging Shot Setup
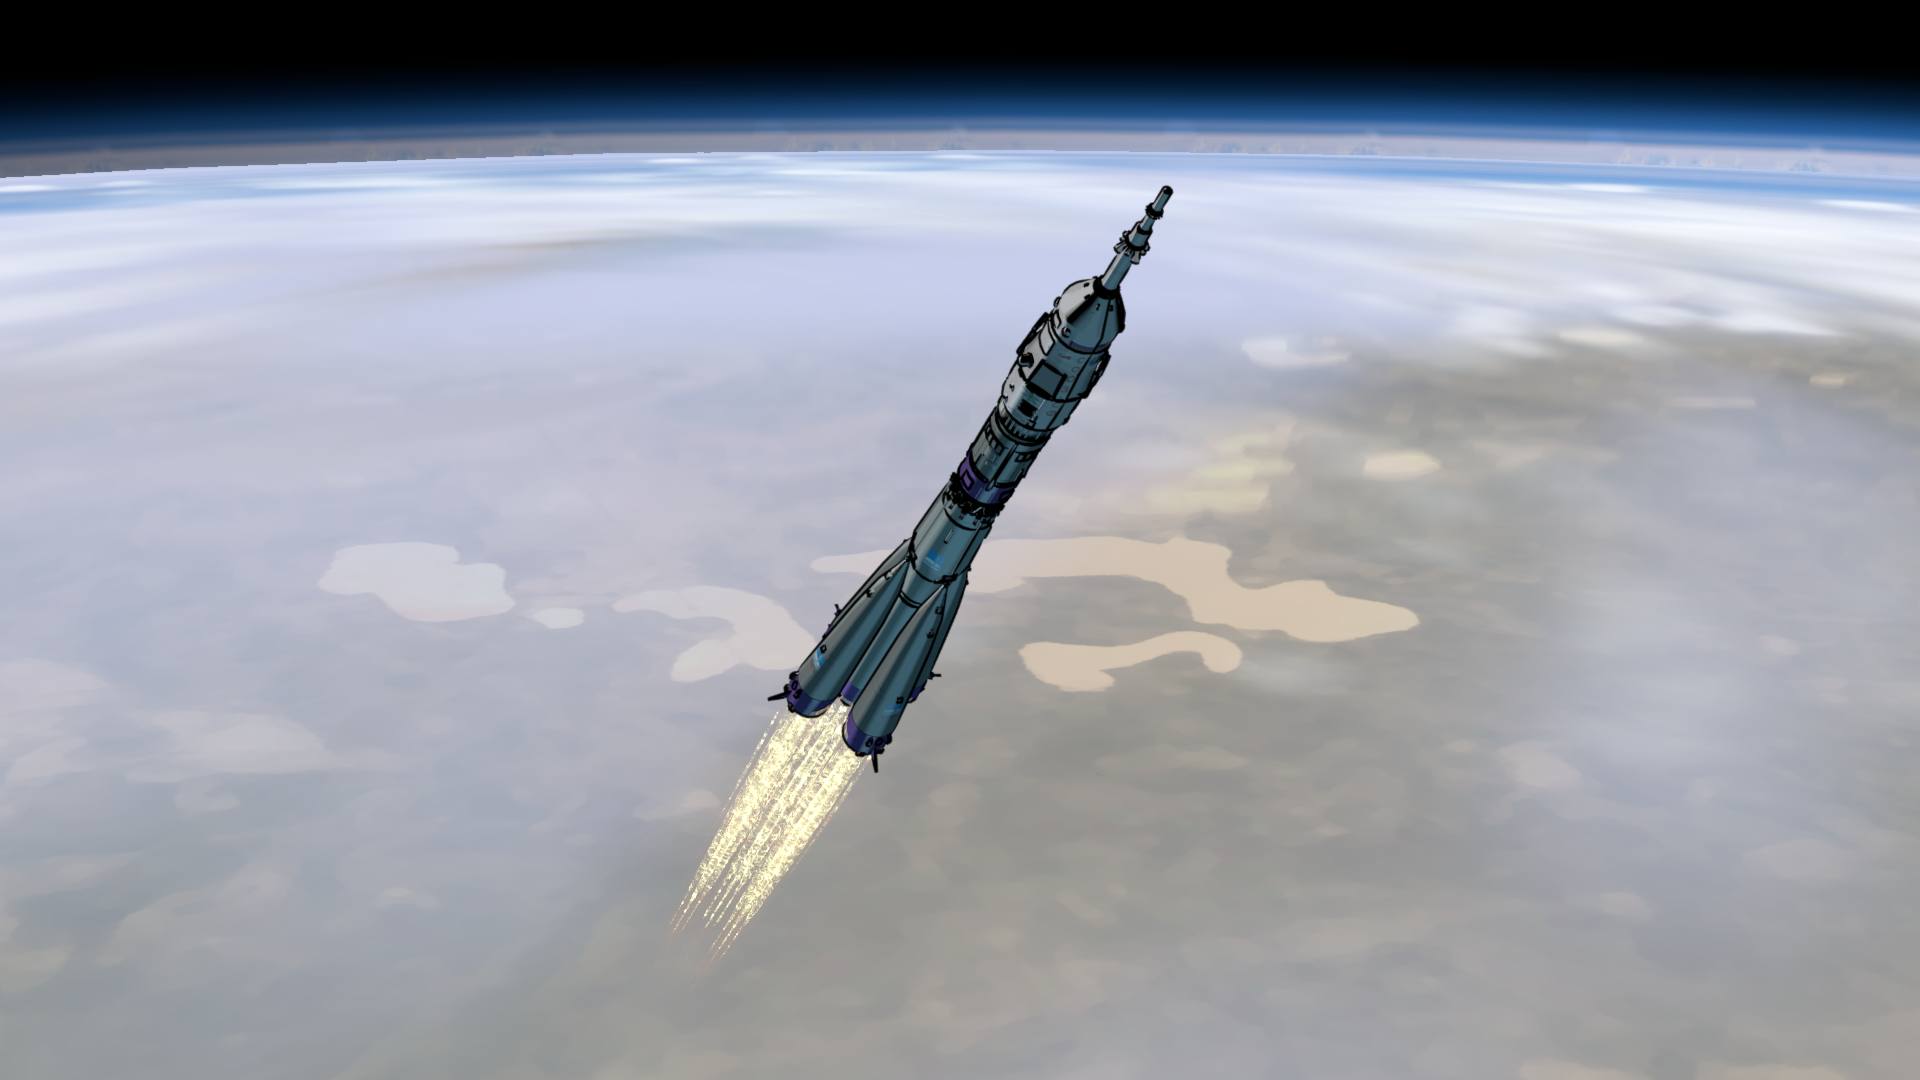
I always have some trepidation about setting up a shot with new models and rigging when I’ve basically already done it — will I be able to get it to look as good as before?
This is the re-rigged and fully up-to-date Soyuz launch vehicle model, along with the new flame plume rig, and the “High Over Baikonur” set. This is compared to the “look test” version I did in 2013:
Notably, the original look test used a “glare” filter, which I haven’t included in the update (at least, not yet). And the flame was a little redder (and a different shape). It’s a slightly different angle, but in fact, that will change throughout the shot, as before.
I did discover that I have entangled the control panel rigs for the core and pod stage rocket plumes — for this shot, they have to operate separately, so I’ll have to sort that problem out in the rocket plume effect file.
But it’s exciting to be come back around to this stuff, and doing these shots “for real”.
Apr 29, 2021 at 2:00 PM (Film Freedom Project)
Improving Workflow in Kdenlive
Recently, I discovered some features in Kdenlive that I didn’t know about, and I’ve been using them to improve my production workflow.
Recursion!
The most significant, is that it is possible to include a Kdenlive file as a clip in another Kdenlive file. I’m not sure how long that feature has been around, but I only discovered it for myself last week, when I did it by accident!
It actually makes a lot of sense, given the recursive/functional MLT-based model that Kdenlive uses for combining video. But I was still surprised!
I had been planning to render video (or perhaps PNG-streams) from my sequence videos for “Lunatics!”, and then incorporate those into the master edit for an episode, in a two-step rendering process.
But it’s much neater to simply let Kdenlive take care of that detail, by including the Kdenlive files for the sequences directly in the master episode edit.
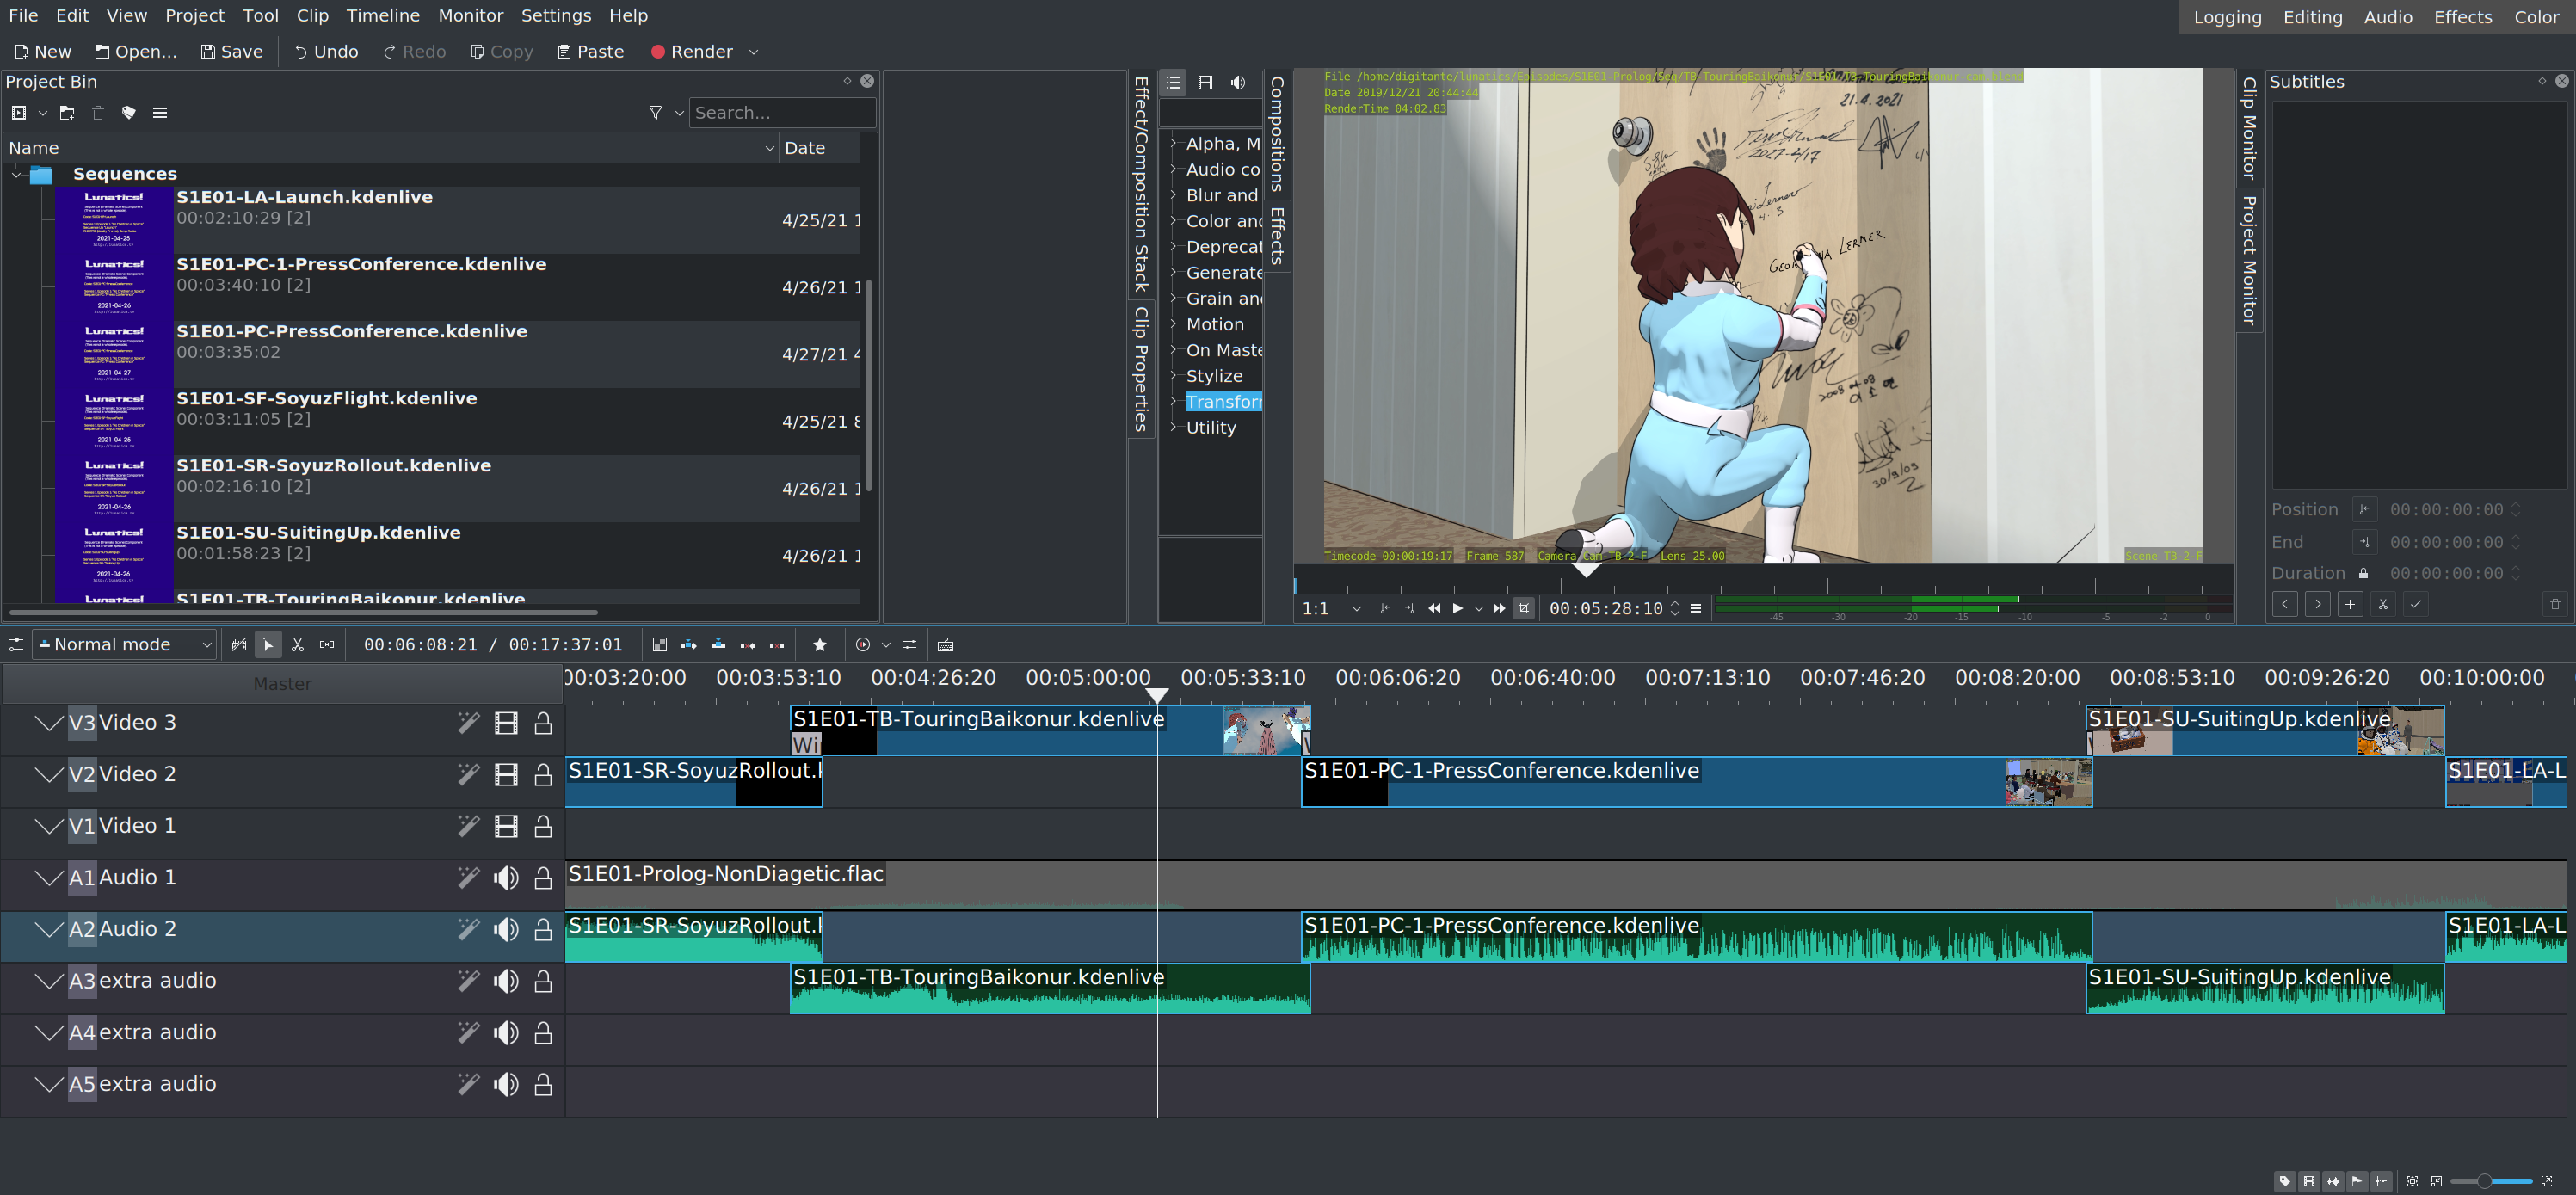
So now I have individual sequence files, like this one:
This includes the episode, with a leader and countdown timer at the beginning, and calibration video at the end, which I can use to match sound and test the video is being rendered correctly.
But then, all of these are combined into a single edit:
Now, whenever this file is rendered, it will automatically be updated by any changes I’ve made to the individual sequence edits.
Subtitle Editor
This I do know is brand new in the current 20.12 version of Kdenlive, having been added during a 2020 Google Summer of Code project, by Sashmita Raghav. It allows me to edit an SRT file for the Kdenlive edit, directly from the Kdenlive interface.
In addition to providing a quick way to prototype the actual subtitles for the episode, it’s a great way to jot down directing and animation notes while reviewing the animatic!
The subtitles are normally burned into the video, although there is a visibility button that can be clicked to disable them for rendering (but the SRT sidecar file is still there).
Color Clips for Notation
This is definitely not a new feature, but I realized that, since color clips are displayed in color on the timeline in Kdenlive, they provide an easy way to note the completion of sequences and get an overall view of the status of my project. You can see these in the picture above.
Although I had been planning to look into alternate video editors, I’m starting to feel pretty attached to Kdenlive. It has proved very versatile and very stable for the last couple of years, since I upgraded to newer versions, and this version (20.12.3) is really working out!
Apr 30, 2021 at 4:00 PM
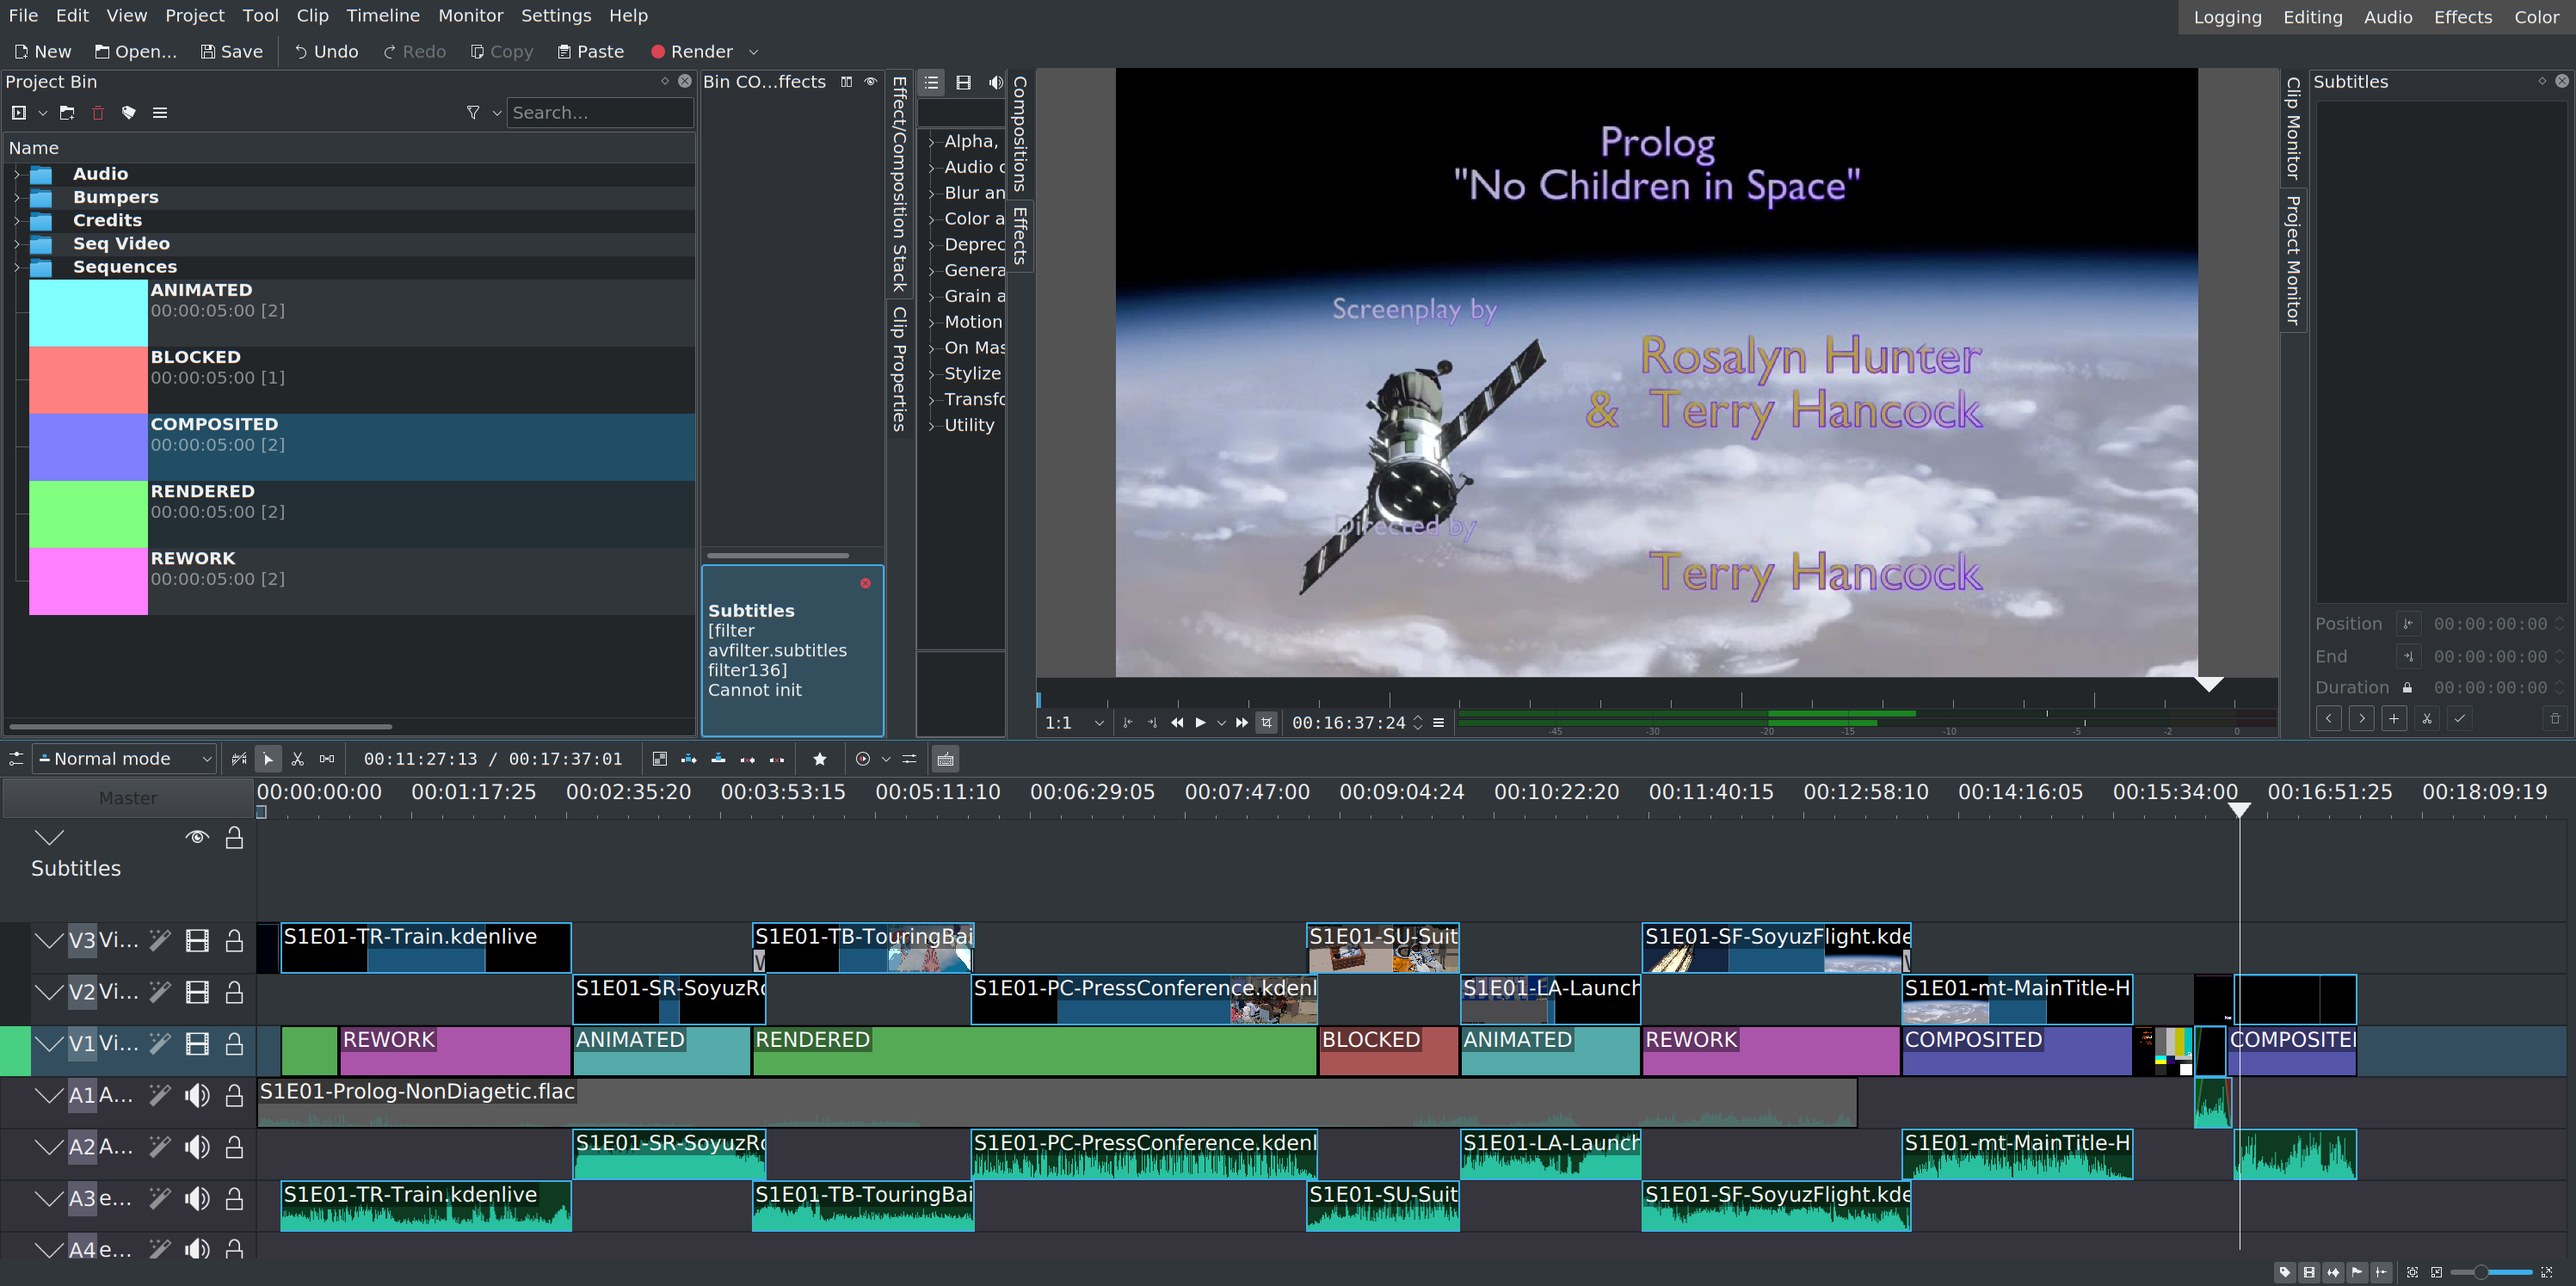
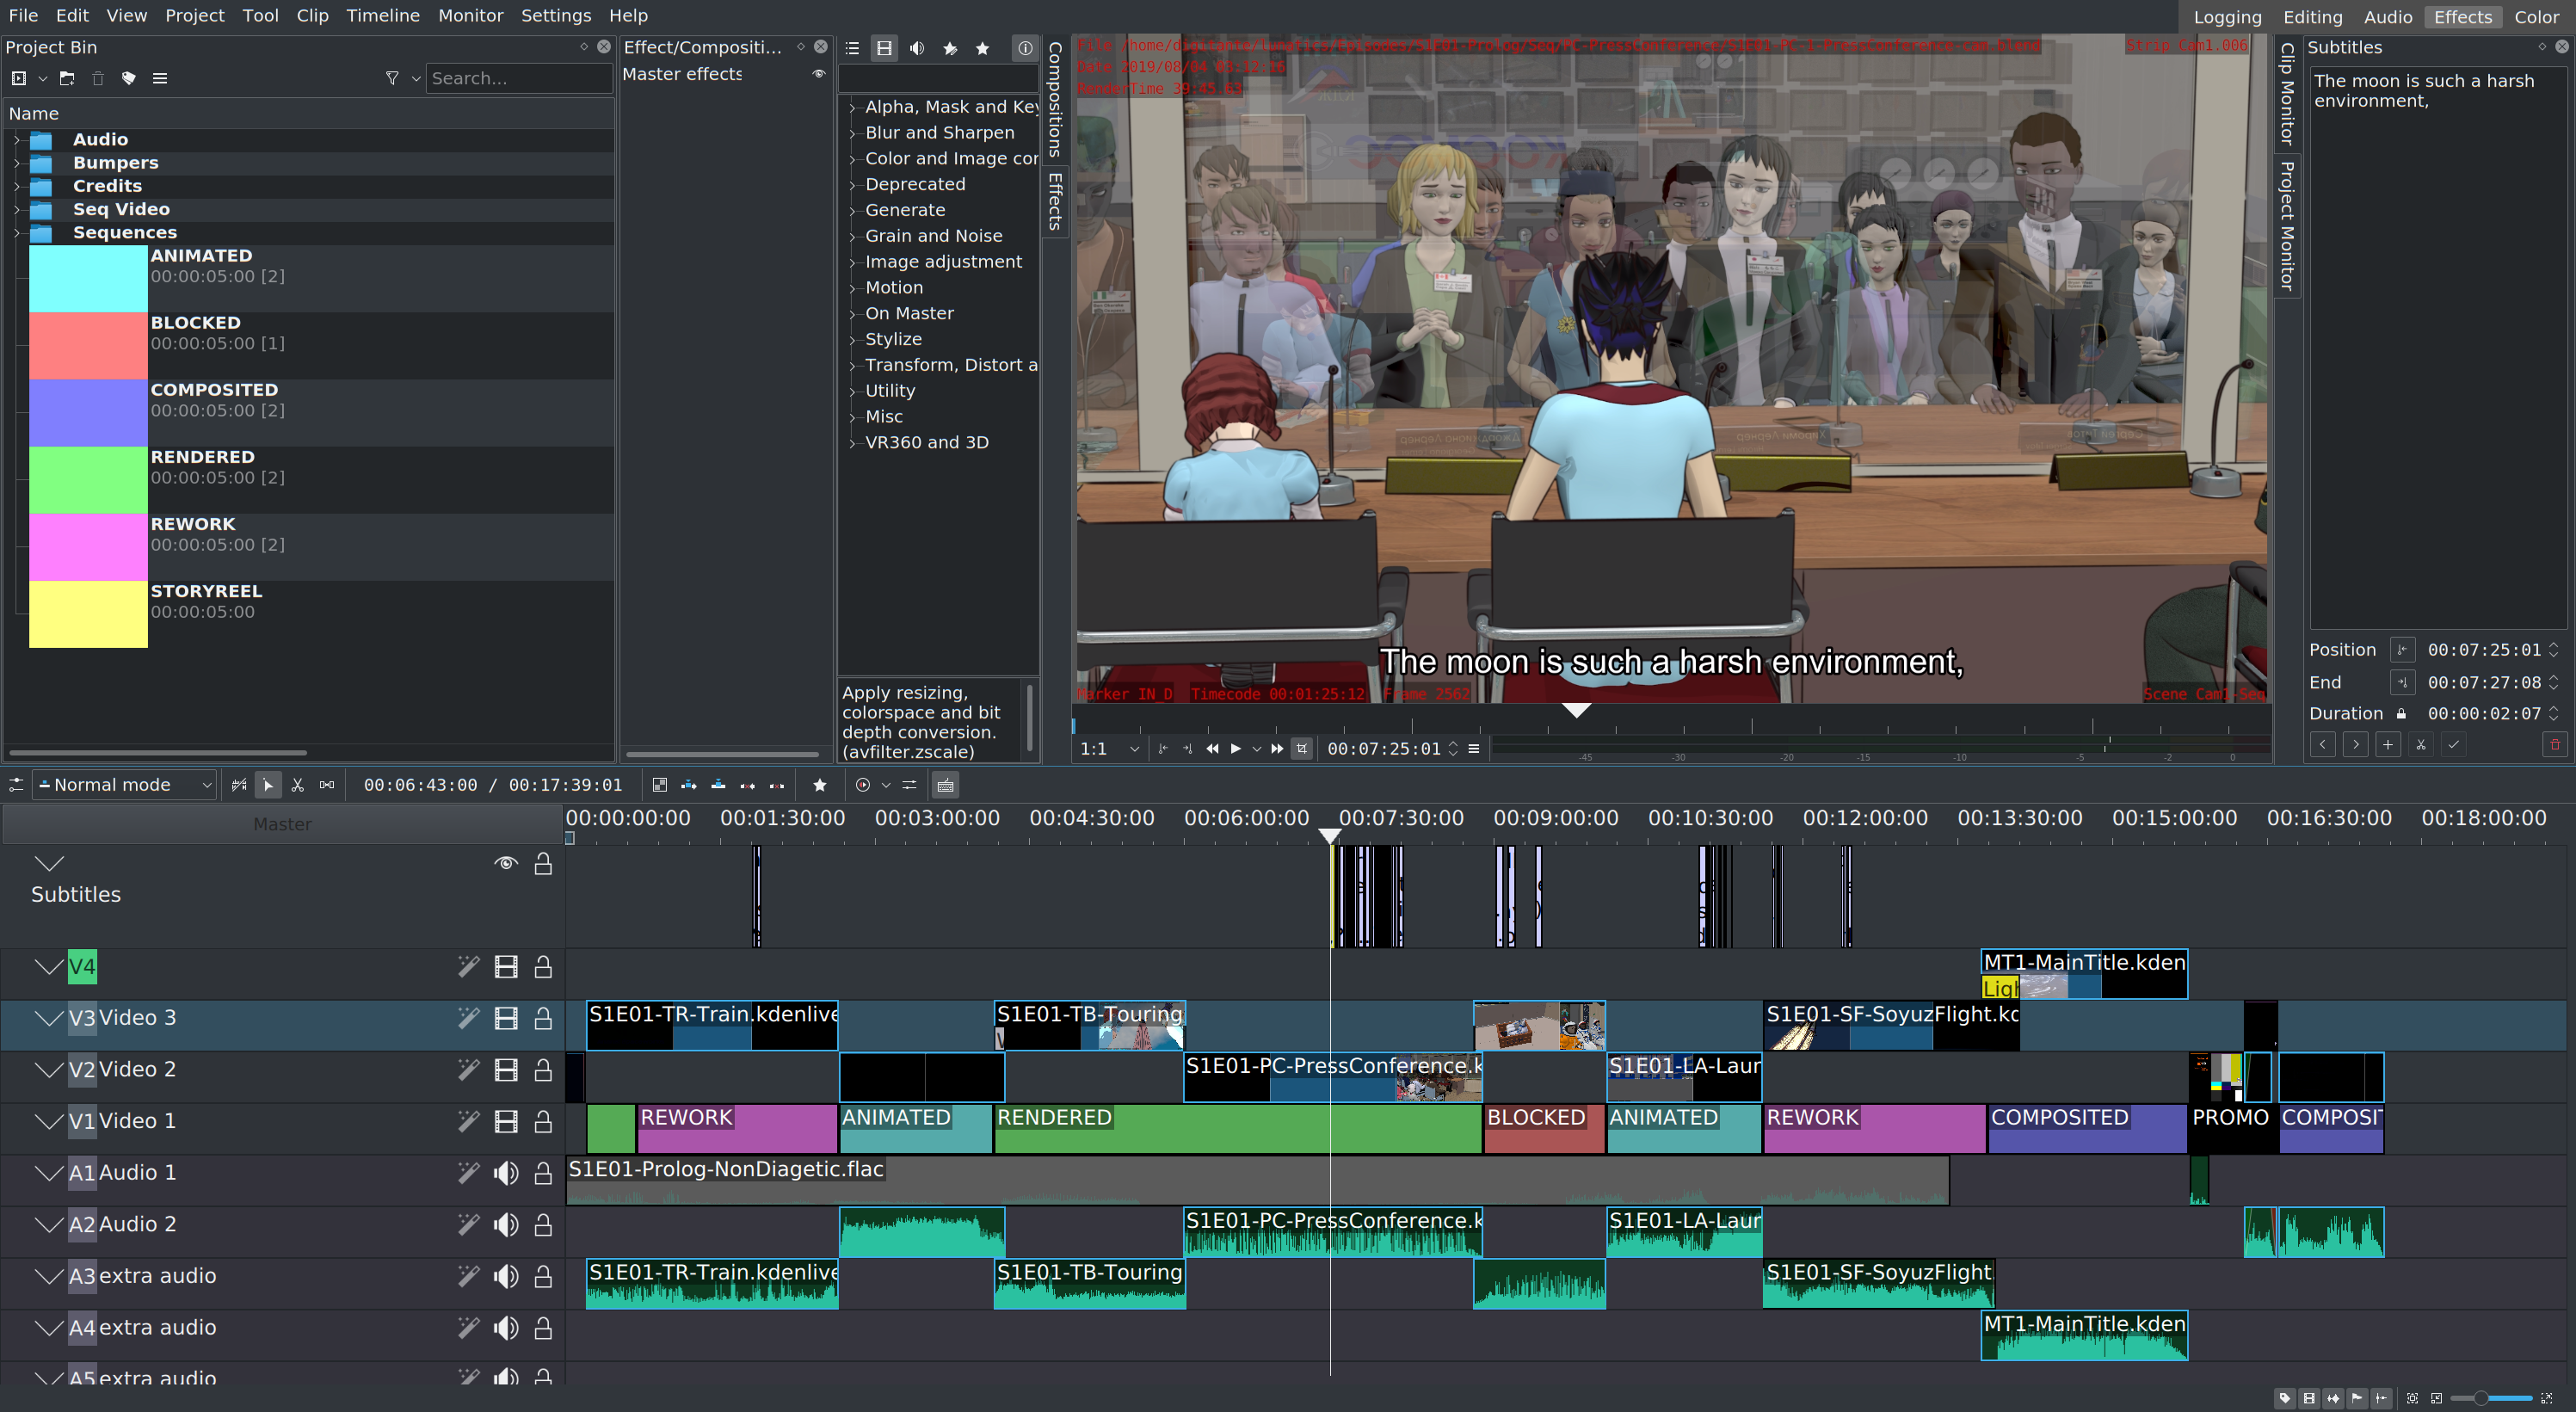
“Lunatics!” Episode 1, Work-In-Progress as of April 2021
This has been a very long road getting to this point. It took a lot longer than I initially planned on, and probably longer than expected. But I am starting to see the finish line from here.
This is my assembled master edit for the episode in Kdenlive. Here, I’m using a feature I was not previously aware of (I’m not sure how long it’s been supported, but this is Kdenlive 20.12.3): which is that you can put Kdenlive project files into a Kdenlive project as “clips”. Which means, it’s possible to build a project recursively.
This makes it easy to break down a large edit into lots of smaller ones. I’ve broken the episode into “sequences” (or in standard dramatic terms, “scenes”).
I have also used the “color clip” feature in Kdenlive to mark the stages of development each sequence has reached.
The purple strips indicate sequences that have been fully compositing, which means they’re basically “done”. Right now, that’s just the main and end titles.
The green strips indicate sequences that are rendered, which is most of the way done — the compositing step is a relatively lighter-weight process, where I can fix some errors and tweak how the renders look. But the “rendered” output is what you see in the preview window here.
The light blue strips indicate sequences that are “animated” which means the mechanical and character animation is either completed or very-nearly completed. Although some of these need tweaks and some added elements (like the “billboard extras” or modifications to the render layer nodes), what they are mainly waiting on is to be uploaded to the render server and rendered to frames.
The red strip is the least mature — that’s the “Suiting Up” sequence, and I have significant work on character animation to do in that sequence.
And then there’s the “rework” strips in pink: that’s stuff that I actually had already fully or mostly completed, but there are problems with it that mean I have to reconstruct them.
For example, a significant part of the interior character animation in the “Soyuz Flight” sequence was done for the “Teaser Trailer” back in 2012 and 2013 — BUT, the character models, set model, and rendering style have all changed substantially since then, so I need to recreate those shots with the updated assets.
You might also notice that I’m using the brand-new “Subtitle Track” feature in Kdenlive, that was added as a 2020 Google Summer of Code project by Sashmita Raghav. This works pretty smoothly! This edit uses the “international” soundtrack, which includes some Japanese and Russian dialog, and I’ve provided subtitles for those.
This is still very unfinished, but I know you’ve been waiting a really long time!
SPOILERS!
Yes, obviously if you watch this edit now, the plot of the episode will be revealed. Personally, I’m usually not bothered by that and I watch things over and over often enough, but I know some people are bothered.
If you don’t like spoilers, you probably shouldn’t watch this, because it’s NOT the finished result — there’s a lot of broken animation and rigs and a lot of it is not properly rendered. I will say that there are no more “slugs” left and very few “storyboards”. This is mostly GL animated “previz” and “preview” renders, some of it at choppy framerates or without ink lines to get quicker results.
There are also fine editing and timing issues and not all of the soundtrack is assembled correctly (e.g. music sometimes cuts out or in unexpectedly).
This cut also includes the spot for a sponsor video — in this case, it will probably be for the next upcoming “New Worlds Institute” conference, due to a prior agreement, and a stand-in for the next-episode preview (technically the shots here are for episodes 2 & 3), and of course, the episode credits. Of course, the main titles are at the end of this episode, which won’t be typical — this episode was originally conceived as the “teaser” for an hour-long show, but it was quite long, and we realized we were going to have to break down the show into smaller chunks!
But with all of those apologies made, here is the work-in-progress episode as it stands, now, on April 27, 2021:
Extra Production Images from April