
The last couple of weeks, I have been very happy to get back to some blendering! I’ve been working on the materials, lighting, rendering, and compositing setup for a set and the associated scene in the pilot episode. This is the “press conference” scene which includes most of the “true dialog” in the prolog. Since the prolog (or “No Children in Space: Part 1”, as it’s currently labeled) is mostly a visual story, most of the dialog is simply situational sound that doesn’t have to be understood to understand the plot — but the press conference provides a small dose of direct explanation of what’s going on, how it’s being received, what Hiromi thinks about it, and indirectly, how this affects Georgiana.
It’s also a room with a LOT of glass in it!

So, this is a great opportunity to talk about our shiny future and how we draw lines on it with Blender and Freestyle.
First of all, one departure from ordinary toon shading that we use extensively is ray-traced mirror reflections. This allows us to set up shots that frame both what’s seen through the glass and (through reflection) what’s on our side of it. It also creates a cool shiny effect on things, which contributes to the overall sense of brightness and polish to a lot of the scenes.
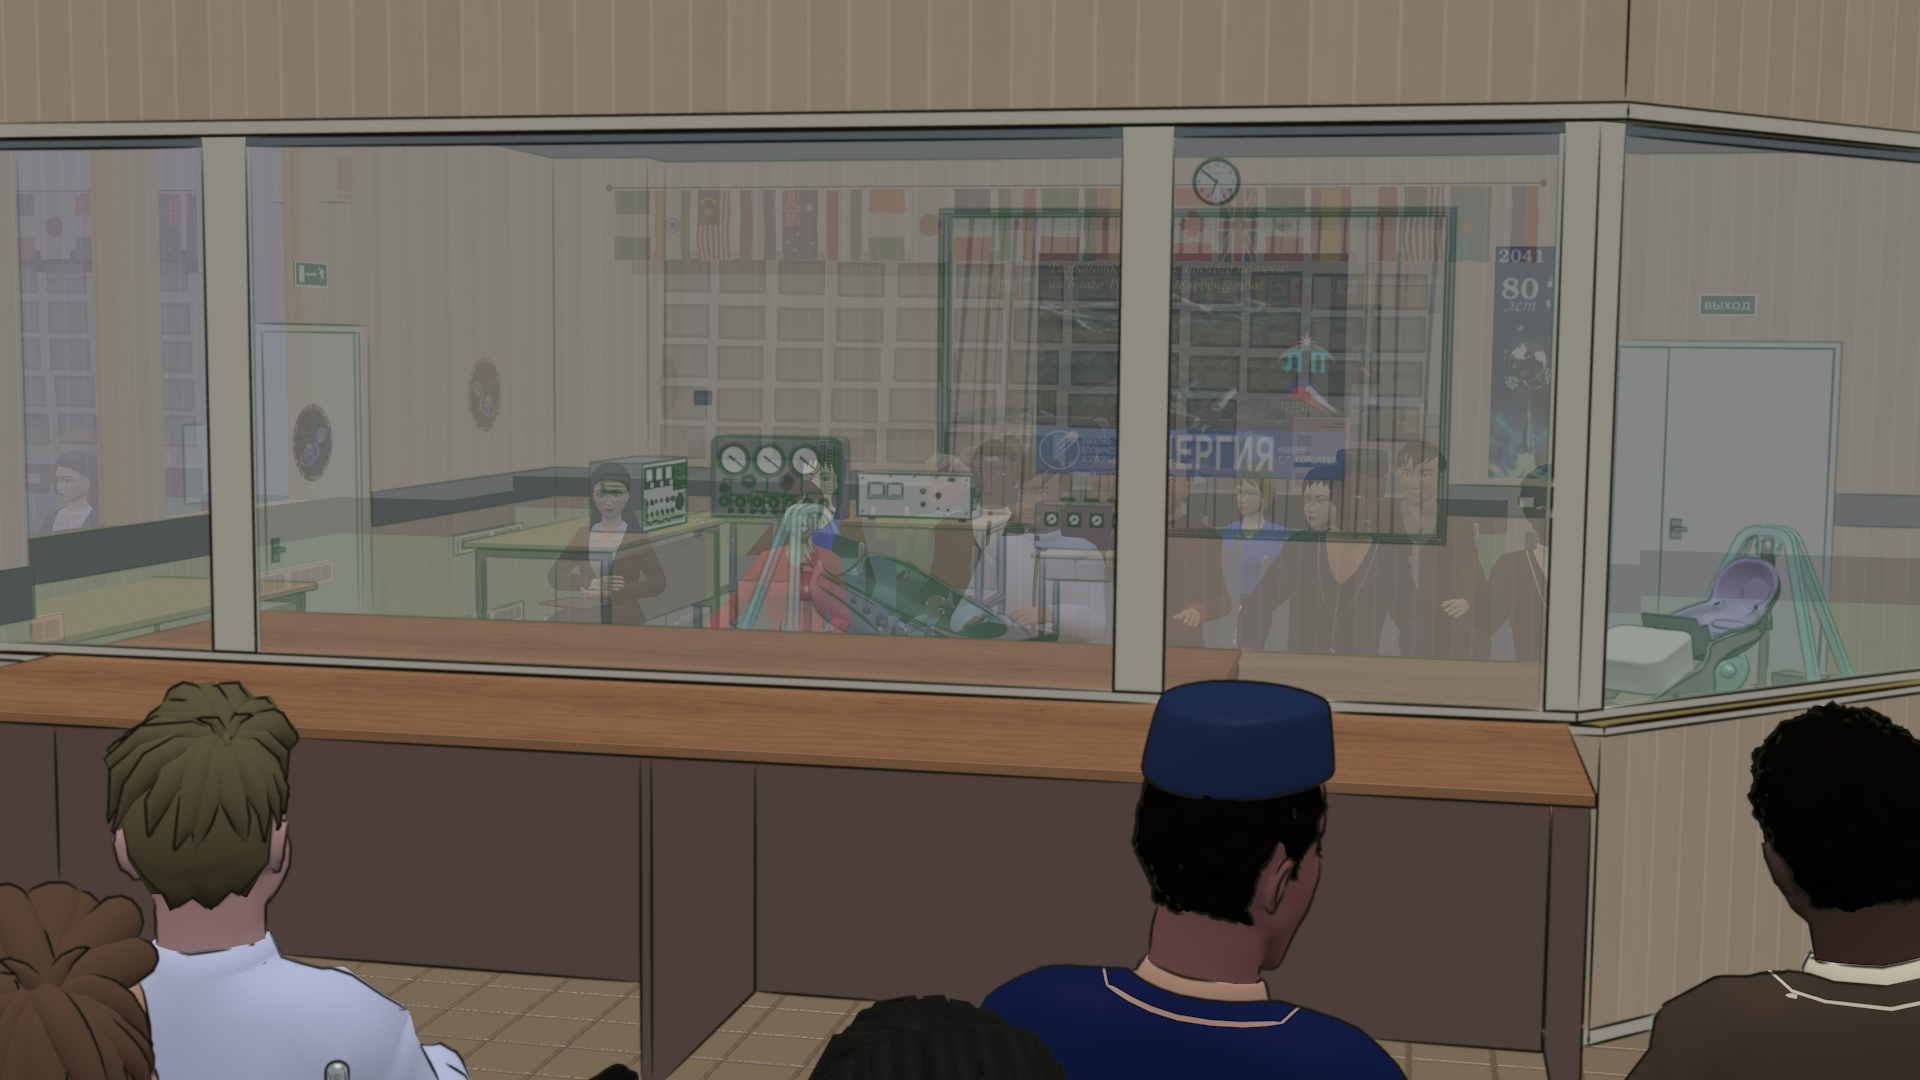
But… Freestyle it turns out, does not support either transparency or reflections. So how can we deal with that?
Most of the time, we do NOT attempt to use Freestyle for reflections: the basic reflections in Lunatics are color only, with no lines. This is generally what we want if we’re more interested in the shine and less in what is being reflected. Or we want to maintain the sense of different image qualities for reflected, transmitted, and direct objects. Most of the time that’s what we want, although the opening train sequence shows an example where we used a special setup to generate lines on the reflected image of camels to emphasize them. I will have to cover that technique in another post.
But the technique described here is what I plan to use for most shots.
The basic idea is that we maintain a separate layer for transparent objects — or more precisely, objects we want to see Freestyle inking lines through. We can put transparent objects on other layers, but if we do, we will only see the colors showing through. This may be desirable for translucent objects, where we don’t want to see the other side distinctly. In this case, though, we are talking about very clear objects like glass windows through which we want to see clearly, even if the glass affects the color.
We can then turn that layer off and on, showing the scene with and without the transparent objects. When they are present, they are opaque to Freestyle, just as they are to the GL window used in the 3D view’s “Solid” setting in Blender. We can’t see through them, and so Freestyle inks only objects on our side of the glass — “foreground” objects. When the transparent objects are gone, of course, we’ll see a completely unobstructed view, and Freestyle will normally ink everything in the frame.
At the same time, we can also introduce a useful trick for dealing with overly complex objects. These we can place on a “No Freestyle” layer or assigned to a “No Freestyle” group. Then Freestyle will ignore them — sometimes this can save a lot of time, as very complex objects can bog down the Freestyle renderer and use up lots of memory — often to produce nothing but an indistinct blob of ink after all that work. However, this can also introduce other problems, such as objects being inked even though they should be behind the object that has been omitted.
In these cases, we can compensate by creating a special “Freestyle Proxy” object, which stands in for the object during inking. If the proxy objects are included in the “No Freestyle” group, then no lines will be drawn outlining them, but they will still obscure lines behind them.
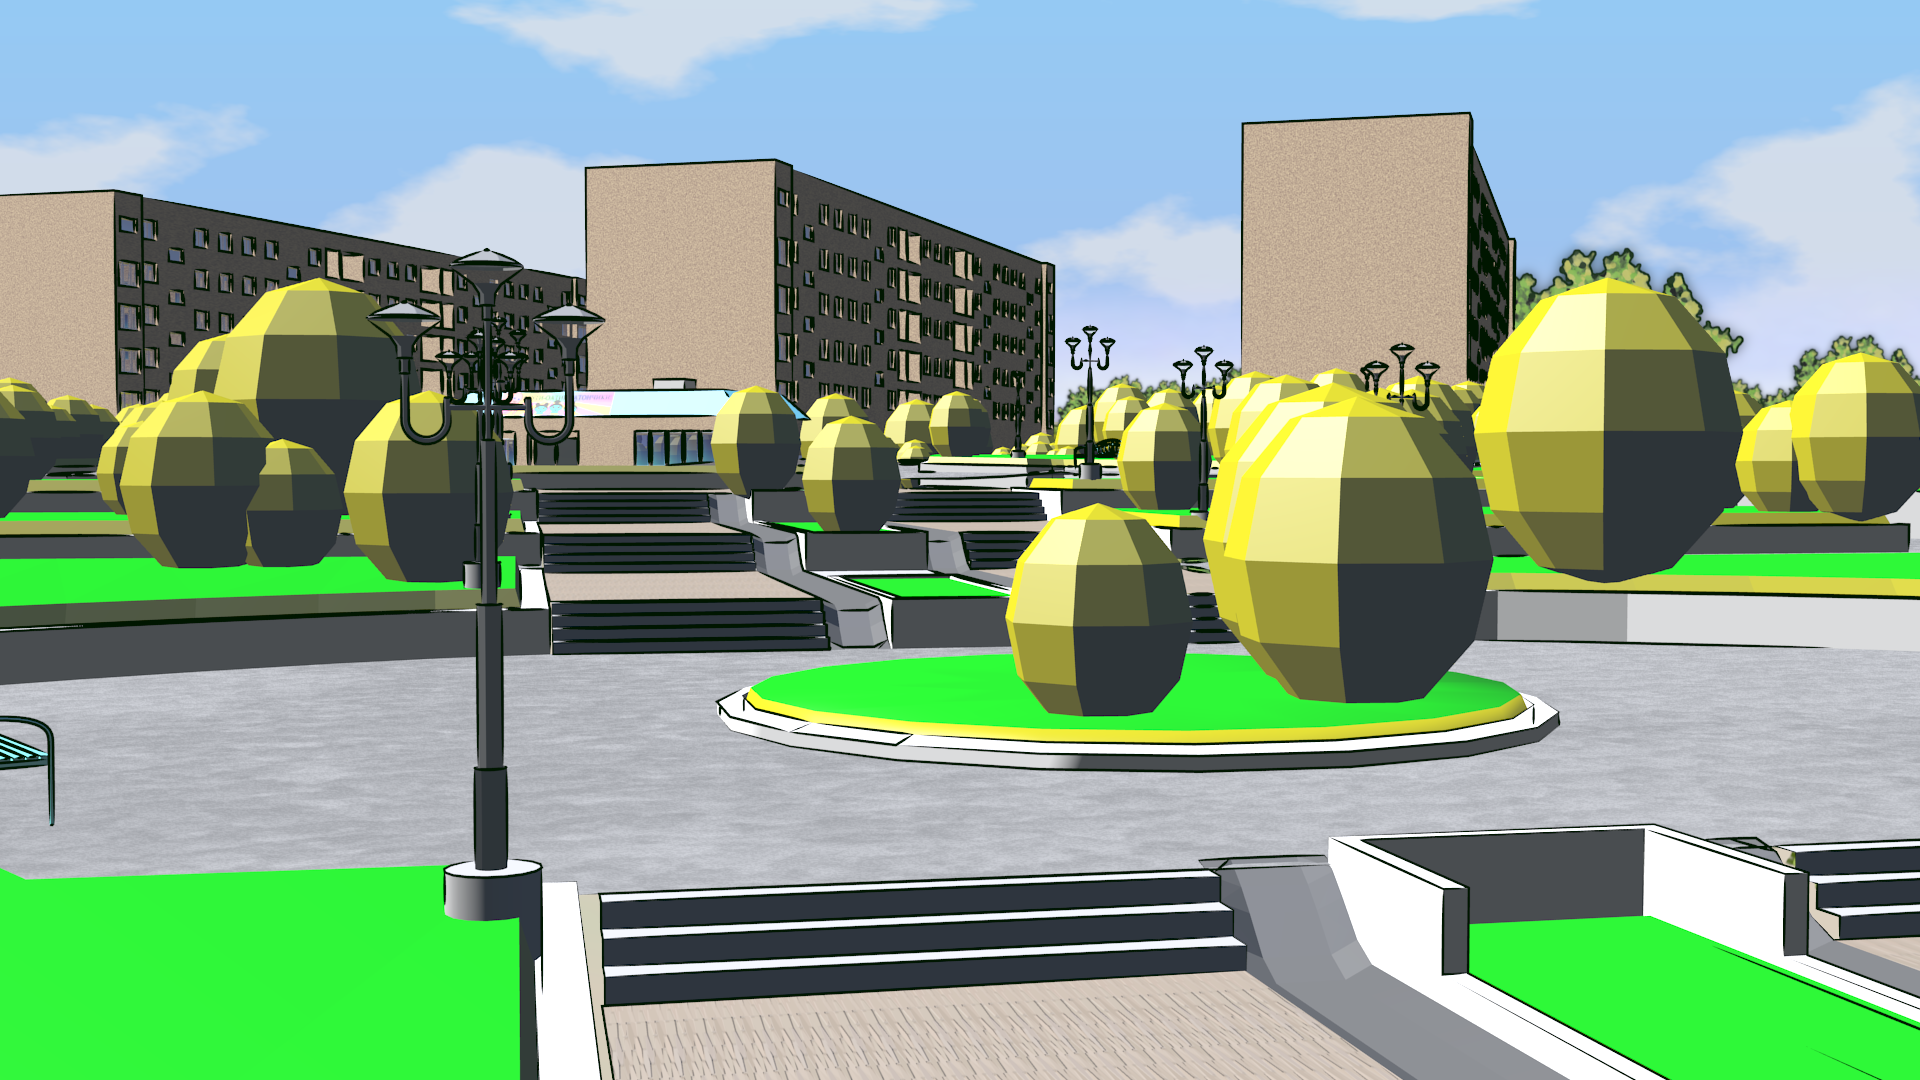
This is the technique we used to omit the trees and grass from ink rendering in the monument set below:
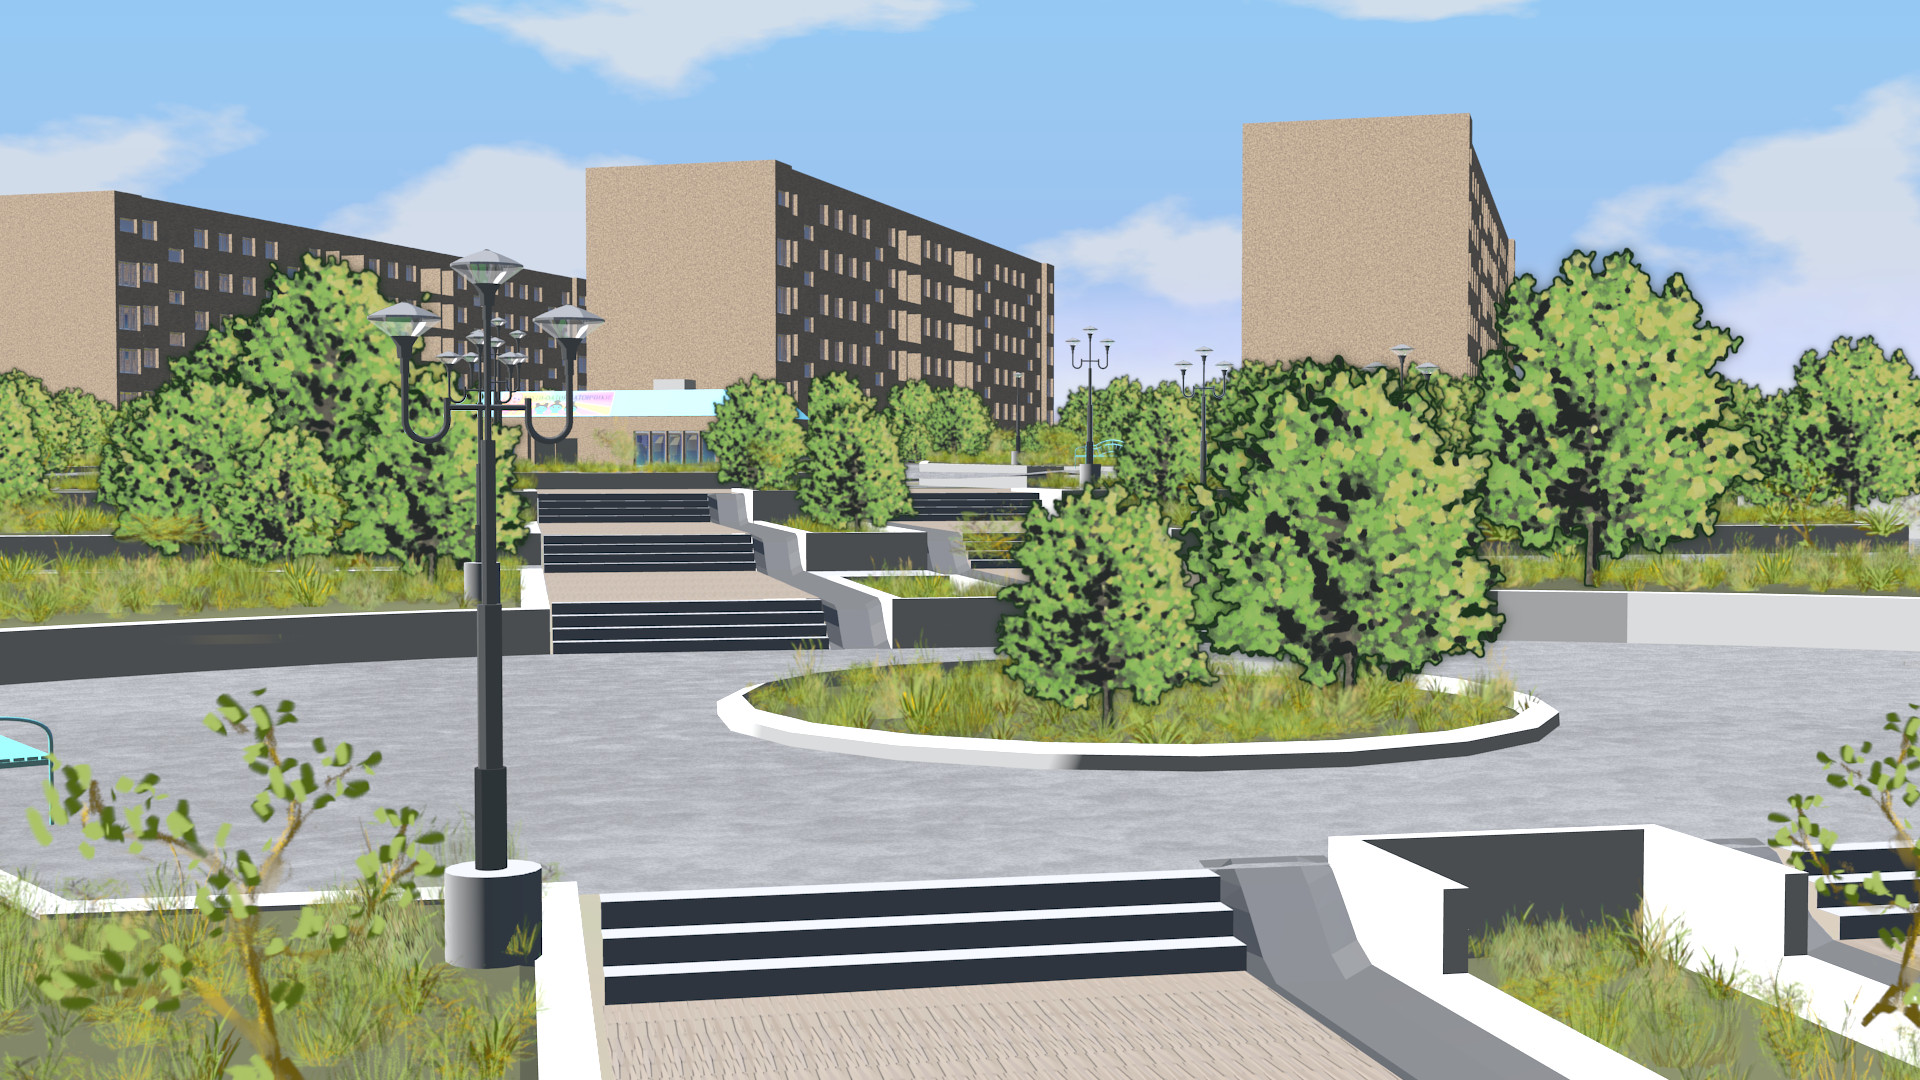
Here’s a render of the Freestyle Proxy layer used for this. Both the billboards and proxies were distributed using the same particle system with the same seed, so that they remained matched.
Sometimes, we do want the proxy object to be outlined. In this case, we just don’t assign the proxy to the “No Freestyle” group. This was the method used for the solar panel trusses in our renders of the International Space Station. The proxies were simply boxes, which caused the outside of the truss to be outlined, but did not waste the enormous amount of time and memory required fro Freestyle to ink each individual strut in the truss (which produces very little difference in the final output!):

Both techniques are combined into a single Renderlayer and Compositing Nodes setup in Blender (you’ll probably need to click through to the full-size image to read the dialogs):

This diagram shows the technique as setup in Blender: you can see the selection of scene layers for rendering at the top, the style settings for Freestyle lines on the two Freestyle renderlayers, the color layer settings, and the compositing nodes for assembling the elements. The illustrations also show more or less the result.
There are very few situations where the transparency lines would unintentionally peek out from behind the foreground lines, since they are fainter and thinner than the foreground lines. However, if this does become a problem, it is possible to turn everything off except the transparent objects and create a “mask” layer which can be used in compositing. We don’t bother with this normally, as it would introduce an extra rendering step without any noticeable effect on the output. However, just for completeness, this mask would be rendered and then used to filter the “Ink-Transparency” output before passing it to the “Alpha Over” node.
Of course, it is necessary to preserve these scene layer relationships throughout the process of rendering — the “freestyle transparency” (FT), “no freestyle” (NF), and “freestyle proxy” (FP) layer assignments have to be reserved throughout the project for this to work correctly. In this particular case of the Aquarium Room set, it means that the groups used to instance the duplicated groups in the Press Conference scene file have to be kept separate for each of these defined layers and then instanced on those layers. For convenience, I assign group names including abbreviated suffixes, such as “SET-AqRm-FT” and then instance these into the animation shot file.
